![]() WIFI® WATER LEAK AND FREEZE DETECTORCHW3610W, CHWES4, RCHW3610WF, RCHWES4Installation Guide
WIFI® WATER LEAK AND FREEZE DETECTORCHW3610W, CHWES4, RCHW3610WF, RCHWES4Installation Guide

Read and save these instructions
Need help?
- Web: www.resideo.com
- Phone: 1-800-468-1502
Download the Honeywell Home app
Search for Honeywell Home in the App Store or Google Play.After downloading, launch the app, register (if necessary), go to Menu and then go to Add New Device.

Install batteries
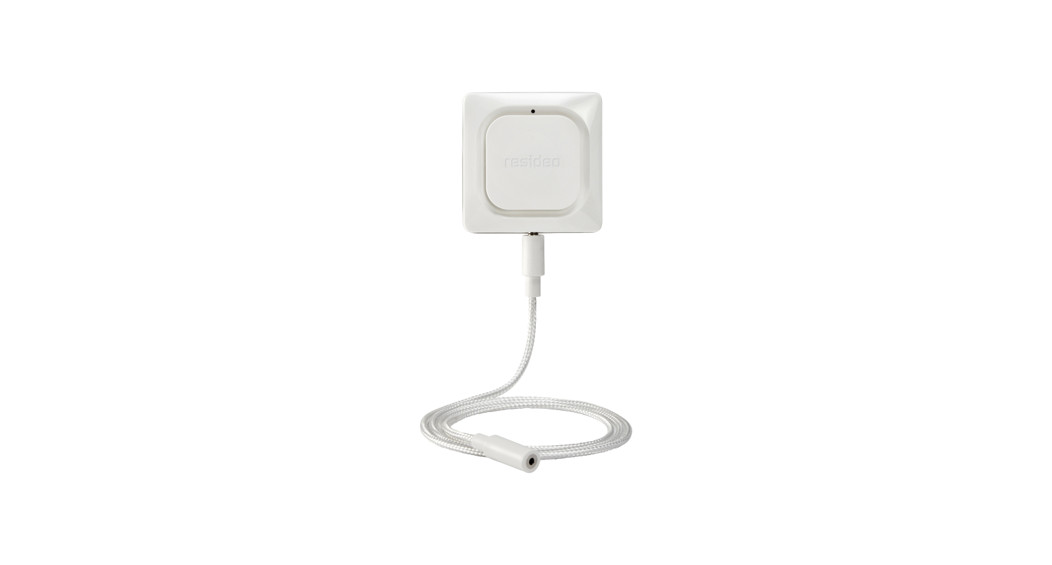
The detector is powered by 3 AA batteries (included). Open the battery cover on the detector and install the batteries.When replacing the cover, press firmly around the edges to ensure a snug fit.Note: The cable sensor jack is NOT for plugging in a power adaptor. Doing so could damage the detector.

Connect
Pair and name your detector
- Under Add New Device, select Water Leak and Freeze Detector.Note: Make sure Bluetooth is enabled on your mobile device and that the detector’s LED is blinking blue. If it is not, see the Reset section.

- Provide a location for your detector. Press NEXT.
- The detector will now pair with the app.Note: If you have more than one detector, you will need to connect each detector individually.
- An audible alert will sound and your detector’s LED will turn solid blue to indicate your detector is paired. Press NEXT.
- Create a custom name for the detector or select one from the list. Press NEXT.


Connect to WiFi
- Choose your network from the list. Press NEXT.
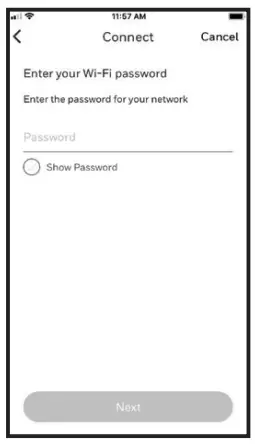
- Enter your WiFi password, if necessary. Press NEXT.
- When connected to WiFi, the LED will turn solid green for 5 minutes, then turn off to preserve battery life.Note: If you remove and replace the detector’s batteries, it will reconnect to your WiFi network automatically.
Configure
Continue to follow instructions in the app to configure your detector.Select the alert levels you want for high and low humidity and temperature warnings, or keep the preset levels. Identify the people you want to be notified in case of an alarm. These settings can be updated at any time using the app.

Placement
Place the bottom of your detector flat on the floor or a surface.For wall mounting, use the included screw and hang the detector on the bottom cover’s mounting keyhole.
Optional cable sensor
To install the optional cable sensor, remove the sensor jack plug and insert the cable sensor. Insert the sensor jack plug at the end of the cable sensor.Accessory cable sensors (sold separately) can be connected to extend the cable and increase the water sensing area.

The entire length of the cable is an extended sensor. You can hang the detector from the wall or place both the detector and cable sensor on the floor.Note: The cable sensor jack is NOT for plugging in a power adaptor. Doing so could damage the detector.
Common uses

Operation
Honeywell Home app experienceBelow are a few examples of the Honeywell Home app screens you will see as you use the Water Leak and Freeze Detector.

ResetUse one end of a paperclip to press and hold into the reset hole for 5 seconds to reset WiFi, detector settings, and to re-start Bluetoothpairing. The LED will blink blue.Press and hold the paperclip into the reset hole for 15 seconds to restore factory defaults. The LED will blink blue.
Status LEDThe detector has an LED that gives device status.
| LED | Detector state |
| During installation | |
| Blinking Blue | Powering up and connecting to Bluetooth. |
| Solid Blue | Paired with Bluetooth. |
| Blinking Green | Connecting to WiFi network. |
| Solid Green | Has power, WiFi connection, and is operating normally.Note: LED turns off after 5 minutes to preserve battery life. |
| Solid Red | Failed to connect to WiFi. |
| During operation | |
| Blinking Red | Detected a leak. |
In case of an alertTo preserve battery life, it can take up to 1 minute for the detector to sense a leak.You can mute the detector by pressing the Mute button in the app or removing the batteries or cable sensor from the detector. The mutecommand may take up to 1 minute to reach the detector.After you’ve addressed the cause of the alert, wipe dry the detector and cable sensor and put them back in place. Replace batteries if they were removed.
FCC Regulations
§ 15.19 (a)(3)This device complies with part 15 of the FCC Rules. Operation is subject to the following two conditions: (1) This device may not cause harmful interference, and (2) this device must accept any interference received, including interference that may cause undesired operation.§ 15.21Changes or modifications not expressly approved by the party responsible for compliance could void the user‘s authority to operate the equipment.FCC Radiation Exposure Statement:This equipment complies with FCC radiation exposure limits set forth for an uncontrolled environment. This equipment should be installed and operated with a minimum distance of 20cm between the radiator & your body.IC RegulationsThis device contains license-exempt transmitter(s)/receiver(s) that comply with Innovation, Science, and Economic Development Canada’s license-exempt RSS(s). Operation is subject to the following two conditions:
- This device may not cause interference, and
- This device must accept any interference, including interference that may cause undesired operation of the device.
IC Radiation Exposure Statement:This equipment complies with IC RSS-102 radiation exposure limits set forth for an uncontrolled environment.This equipment should be installed and operated with a minimum distance 20cm between the radiator & your body.The operation of this equipment is subject to the following two conditions: (1) this equipment or device may not cause harmful interference, and (2) this equipment or device must accept any interference, including
![]()
Resideo Technologies, Inc.1985 Douglas Drive North, Golden Valley, MN 554221-800-468-150233-00381EFS—01 M.S. 11-20 | Printed in the United States
© 2020 Resideo Technologies, Inc. All rights reserved.The Honeywell Home trademark is used under license from Honeywell International, Inc.This product is manufactured by Resideo Technologies, Inc. and its affiliates.

[xyz-ips snippet=”download-snippet”]