
ResMed AirCurve 10 Bilevel Device User Guide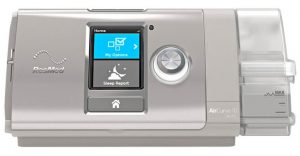
Product Overview
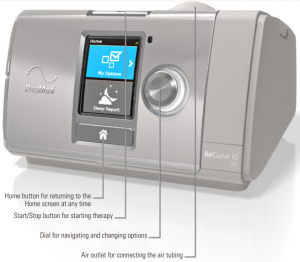
Read your entire AirCurve™ 10 User Guide before use.
Setup
Place the device on a stable level surface. Plug the power connector into the rear of the device. Connect one end of the power cord into the power supply unit and the other end into the power outlet.
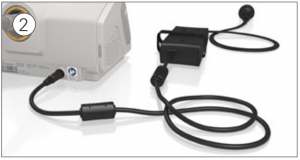 Connect the air tubing firmly to the air outlet located on the rear of the device.
 Connect the free end of the air tubing firmly onto the assembled mask. Press Start/Stop to begin therapy.
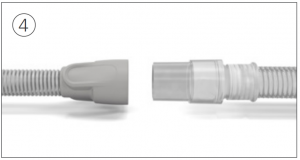
AirCurve 10 with HumidAir
If you have an AirCurve 10 device with HumidAir™, fill the humidifier as follows: Open the humidifier and fill with water up to the maximum water level mark.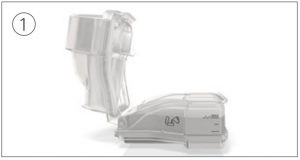 Close the humidifier and insert it into the side of the device.
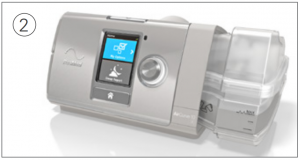
Heated humidification offers relief from dryness and congestion and is designed to make therapy more comfortable. If you do not have an AirCurve 10 device with HumidAir, consider purchasing HumidAir and ClimateLineAir™ heated air tubing.
Adjusting to therapy
If you are a first time user, you might need some time to get used to therapy. This is not unusual as it takes most patients between one and two weeks to adjust to the air pressure.
Overcoming symptoms by changing comfort settingsIf you are having difficulties getting used to therapy, use the AirCurve 10 comfort features to help you on your journey to better sleep.
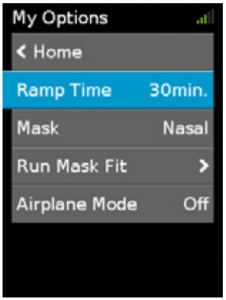
- Trouble falling asleep—If you are having trouble falling asleep with high pressure, turn on Ramp or increase Ramp Time.
- Bloated feeling—If you are experiencing a slightly bloated feeling from swallowing air, turn on Ramp or increase Ramp Time.
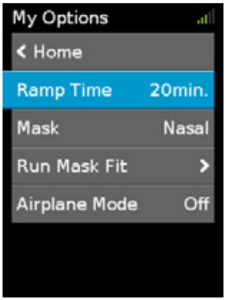
- Feeling of not getting enough air—If you feel like you are not getting enough air, turn Ramp Time to Off.To change the Ramp Time
- Press the dial to enter My Options.

- Turn the dial to highlight Ramp Time and then press to select it.
- Turn the dial to adjust to your preferred setting.
- Press the dial to save the change. If you have an AirCurve 10 device with HumidAir, you have more comfort features available which help make your therapy more comfortable.
- Press the dial to enter My Options.
- Dry or runny nose—If you are getting a dry or runny nose, adjust the Humidity Level by turning it up.
- Droplets of water (condensation)—If you are getting droplets of water on your nose, mask or air tubing, adjust the Humidity Level by turning it down


Cleaning
- Wash the air tubing in warm water using mild detergent.Do not wash in a dishwasher or washing machine.
- Rinse the air tubing thoroughly and allow to dry out of direct sunlight and/or heat.
- Wipe the exterior of the device with a dry cloth.
If you have an AirCurve 10 device with HumidAir, clean the humidifier as per steps 1 and 2. Refer to your mask User Guide for detailed instructions on cleaning your mask.
Checking and replacing your parts regularlyIt is important for your comfort and health that you check and replace your parts and supplies regularly. Replacing your parts and supplies on a regular basis helps ensure you are receiving optimal therapy and continued comfort.Refer to your AirCurve 10 User Guide for detailed instructions on checking your device. Contact your care provider for information on your replacement schedule
| Serial number:_____________ | Device number:___________ |
| Mask type and size:__________ | Date of setup:____________ |
| Notes: |
ResMed Pty Ltd1 Elizabeth Macarthur DriveBella Vista NSW 2153 AustraliaSee ResMed.com for other ResMed locations worldwide. AirCurve, ClimateLine and HumidAir are trademarks and/or registered trademarks of the ResMed family of companies. For patent and other intellectual property information, see www.resmed.com/ip. © 2021 ResMed. 378906/2 2021-06ResMed.com
References
[xyz-ips snippet=”download-snippet”]