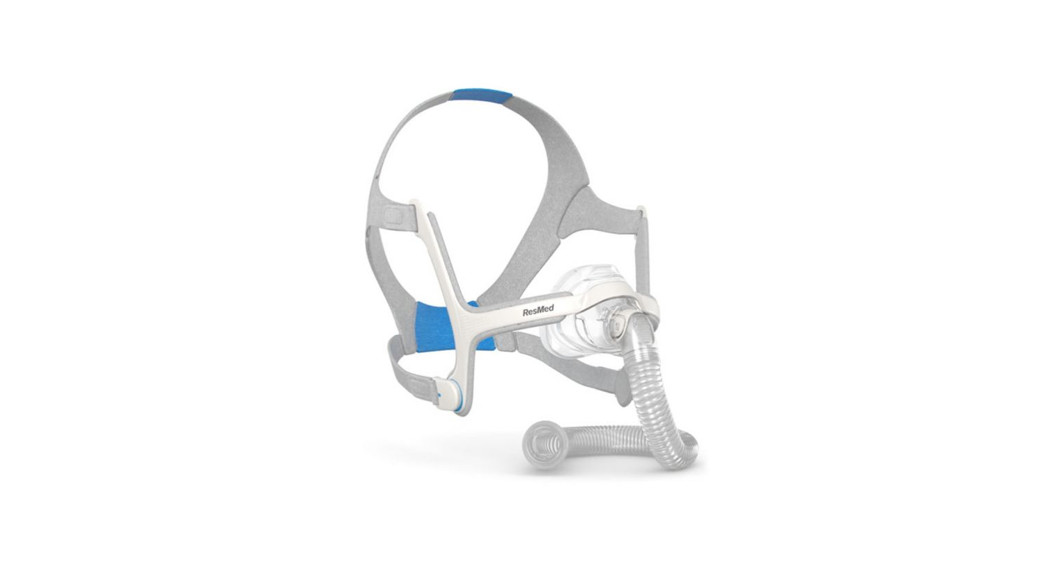
![]() My sleep therapy:ResMedequipment start guideAirSense™ 10 AutoSet™ machineAirFit™ N20 mask
My sleep therapy:ResMedequipment start guideAirSense™ 10 AutoSet™ machineAirFit™ N20 mask
Getting started with your new equipment

Watch the videoFor an overview on how to set upyour ResMed equipment, visitResMed.com/RemoteSetUpTreating your sleep apnoea plays such an important role in improving your energy and health, you’re in good hands with your ResMed AirSense 10 machine and AirFit N20 mask.This setup guide will walk you through how to use your new equipment.Please read the user guide included in your package carefully and refer to it for detailed information about product use and related precautions.
What’s inside
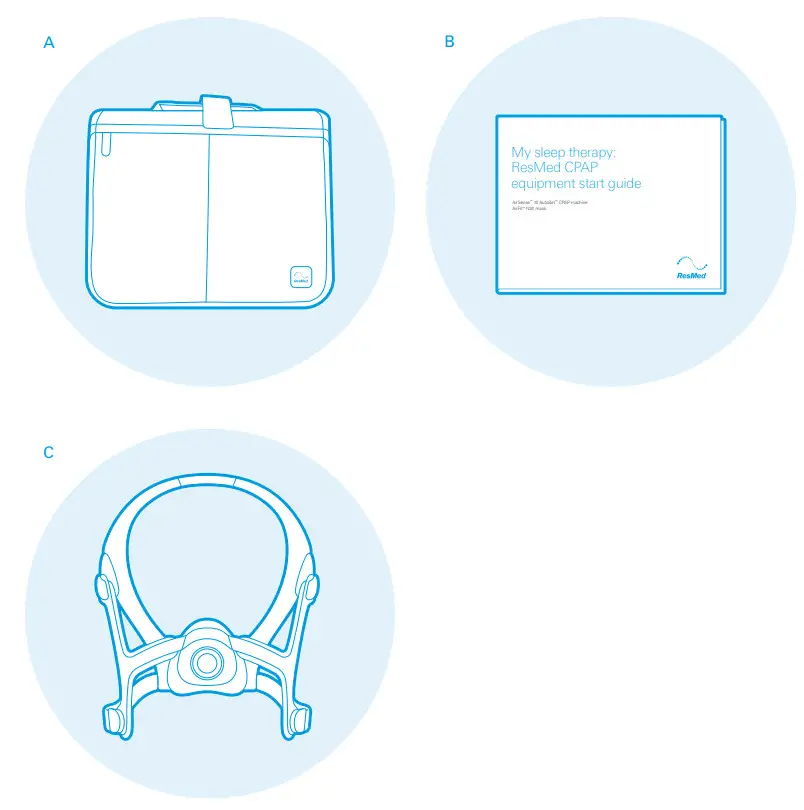
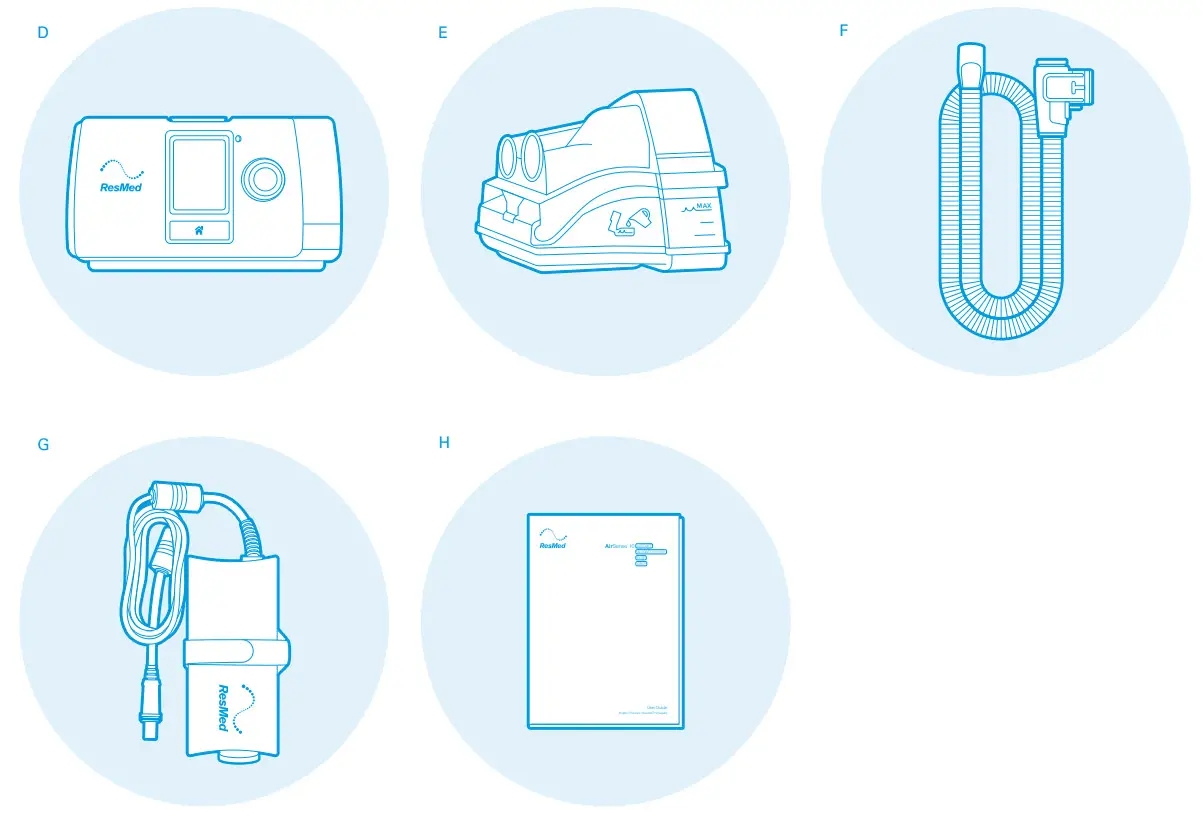
Shipping boxA Device travel bagB Start guideC AirFit N20 nasal maskDevice travel bagD AirSense 10 machineE HumidAir™ humidifier tub*F Air tubingG Power transformer and power cordH User guide*only if you have been prescribed a humidifier with your machine.
Setting up your AirSense 10 machine
Let’s begin by setting up your AirSense 10 machine.A Insert the power cord into the back of your machine using the round plug.B Connect the power cord to the power supply and plug the other end into an electrical outlet.C Your machine will power on and display the Home screen.
Attaching your air tubing
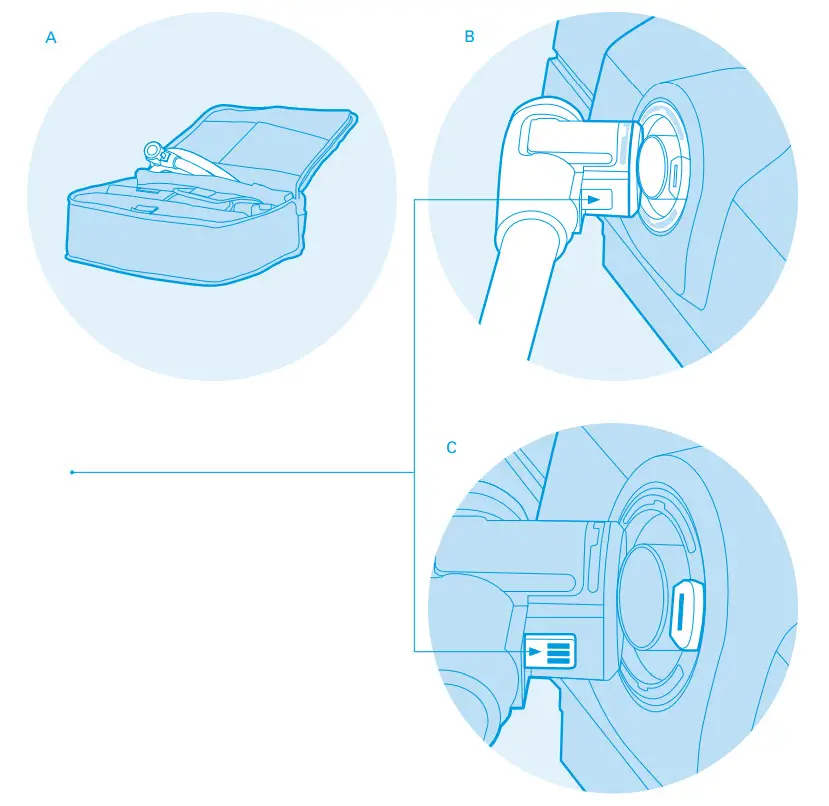
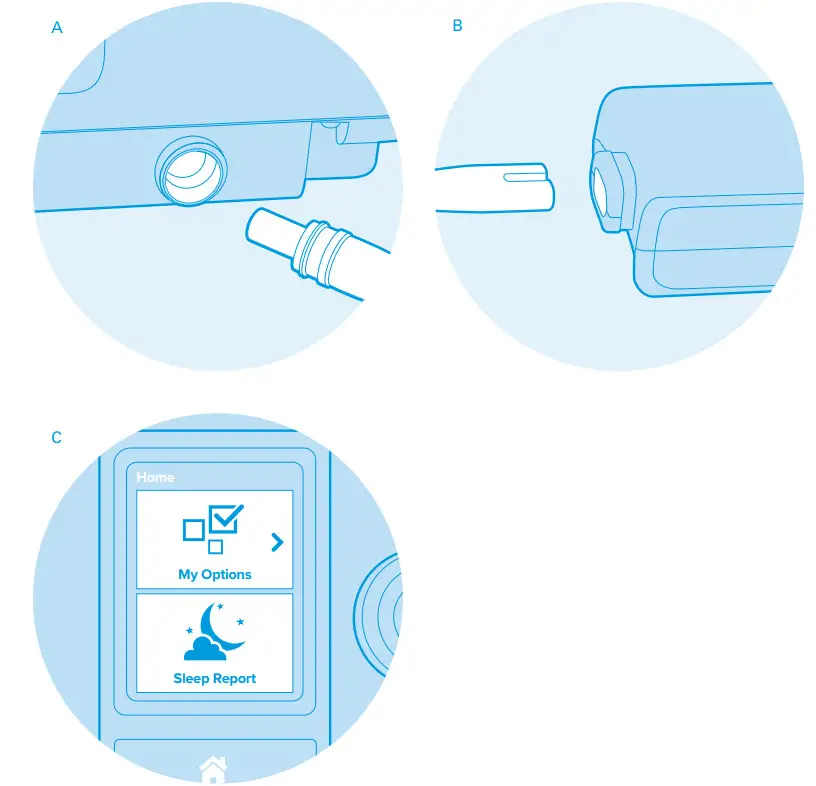
A You can find your air tubing in the zippered pocket of your AirSense 10 travel bag.B Connect your air tubing by holding the cuff and lining it up with the connector port on the back of the machine.C Be sure to line up the connector pin on the tubing cuff to the corresponding slot on the connector port.D Push until it clicks into place.
Note: The air tubing included with your machine may not include the connector port shown in images B and C.If that’s the case, simply connect the air tubing firmly to the air outlet located on the back of the machine.
Preparing your MAX HumidAir humidifier tub*
A Snap open the lid of the water tub.B Fill with water to the maximum watermark on the tub.C Close the lid until it snaps shut. Gently push the water tube into the side of the machine until you feel it lock into place.
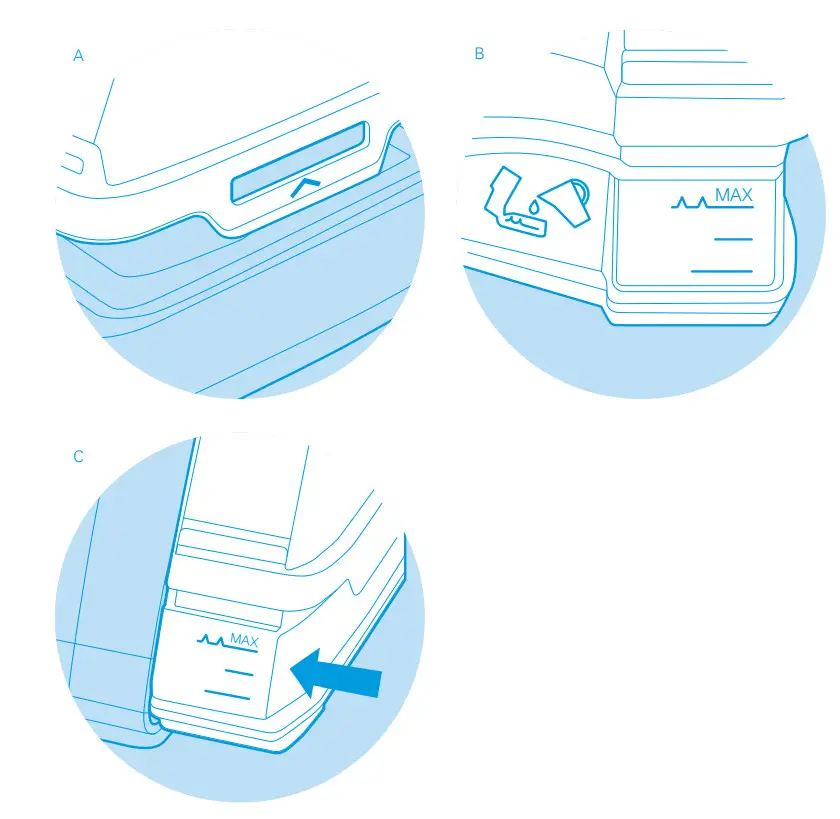
*If your machine does not have a humidifier, please do not put water into the machine. Water should not go inside the black outer housing.
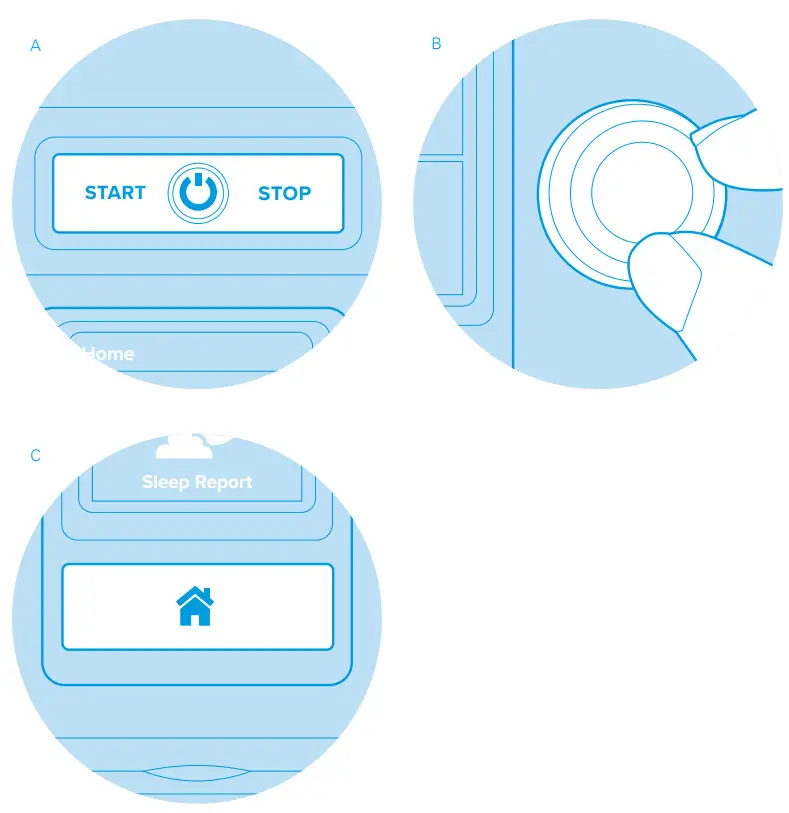
A The START/STOP button located on the top of your machine is used to begin and end therapy.B The dial on the front is used to adjust comfort settings and access your sleep therapy data. Turn it to navigate the menu, and press it to confirm your choice.C The HOME button sends you back to the Home screen, regardless of where you are in the menus.Note: All of your other machine settings are pre-set to your personal therapy needs per your healthcare provider. You will not need to make any additional setting adjustments.
Unboxing and assembling your mask
A Mask systemB ElbowC Fitting templateD Additional cushions* If provided by your healthcare provider. Additional cushions are not for resale.
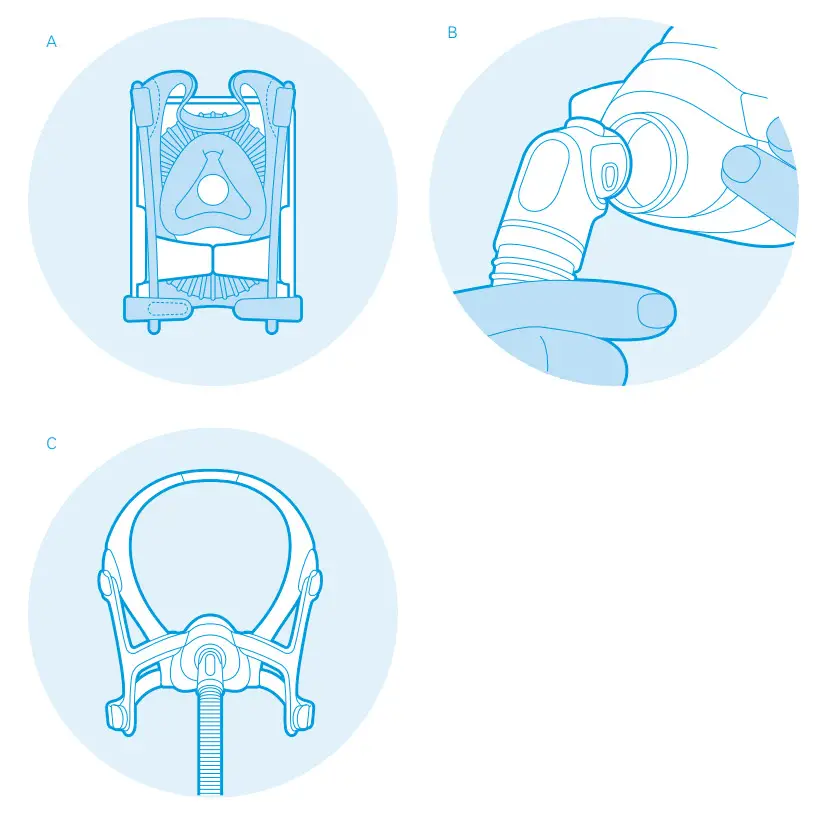
A Remove your mask from its packaging. Remove the packaging support material from your mask.B Complete assembly of your mask by connecting the elbow to the front of your mask.C This is what it looks like assembled.Note: Please begin with the cushion that is already connected to your mask. If you find the cushion is too small or large, try one of the additional cushions.* Contact your healthcare provider if you require a different cushion size than what is included with your equipment.
How to fit your mask
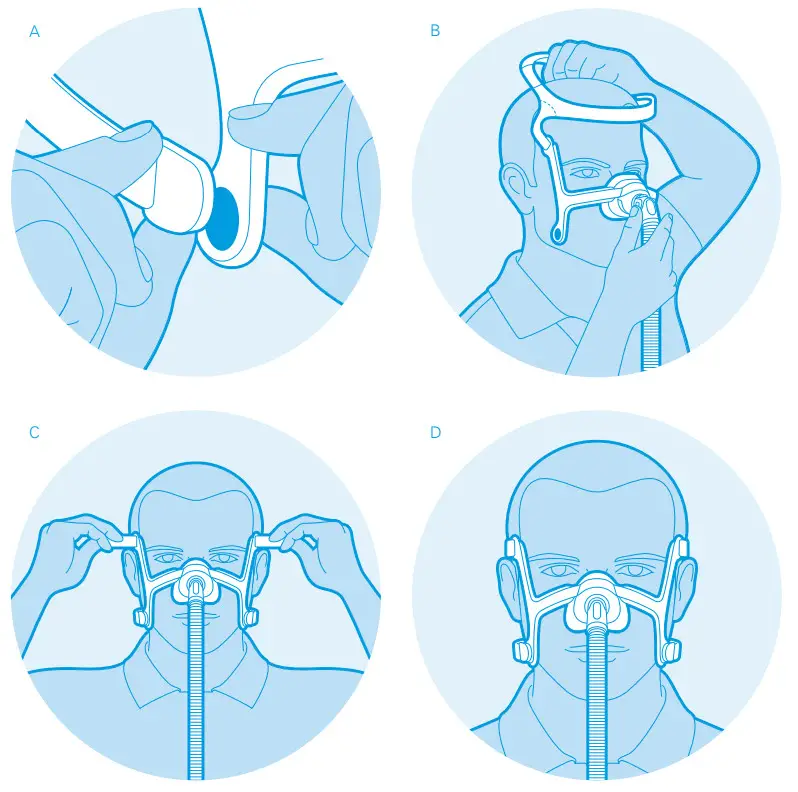
A Disconnect the magnetic*headgear clips on your mask.B Place the mask cushion on your face and slip the headgear over the top of your head. Re-attach the magnetic headgear clips to your mask.C Make any necessary adjustments to the two top straps and bottom straps to get a snug, but not tight, fit.D This is how the mask should look when it’s properly fitted.*Use of masks with magnetic components is contraindicated in patients with the following pre-existing conditions:– a metallic hemostatic clip implanted in your head to repair an aneurysm– metallic splinters in one or both eyes following a penetrating eye injury
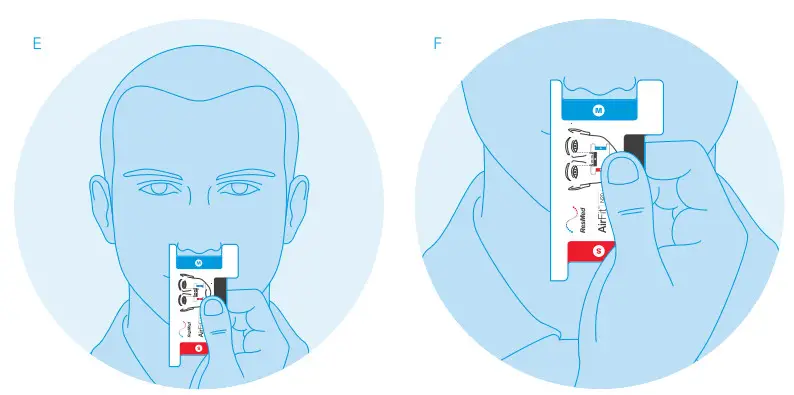
If you find your mask feels too large or too small, you can use the provided fitting template to confirm your size:E Face the mirror and hold the mask fitting template up to your face.F For a nasal mask, the template will align with the bottom of your nose. Determine which size is best for you based on your nose width.Note: If you fall between two sizing options, we recommend going with the larger size for greater comfort.* Contact your healthcare provider if you require a different cushion size than what is included with your equipment.
Connecting your mask to your machine
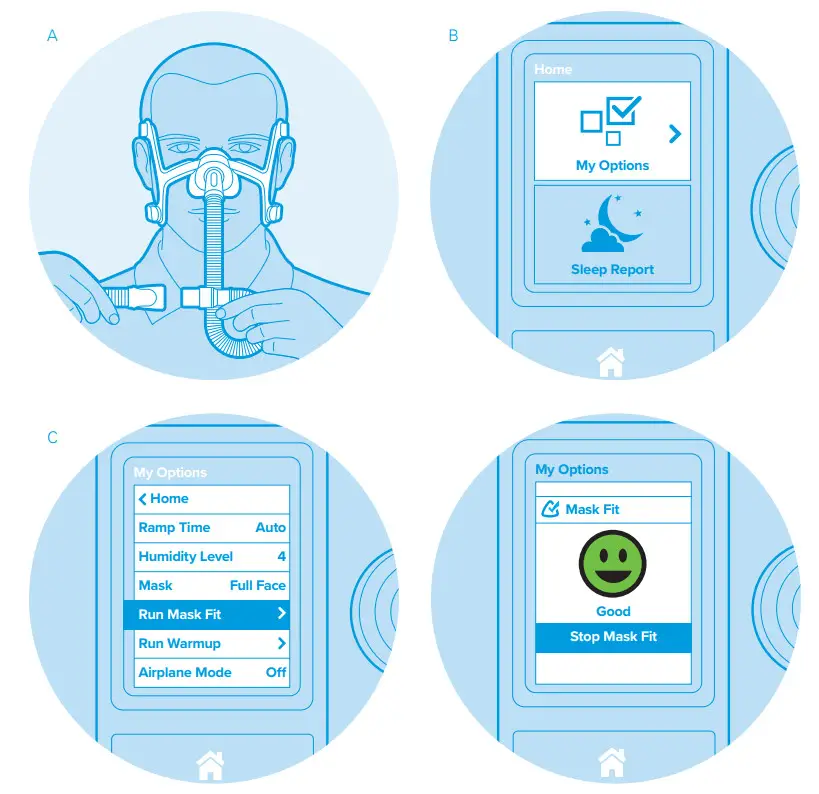
A With the mask on your face, connect the tube from your machine to the mask.B On the Home screen, turn the dial to My Options and press the dial to confirm your choice.C Scroll down to the Run Mask Fit option and press the dial. The machine will start blowing air, and a green happy face will automatically appear on the screen. Wait at least 10 seconds to ensure the screen does not change; a happy face indicates that your mask is fitted properly.
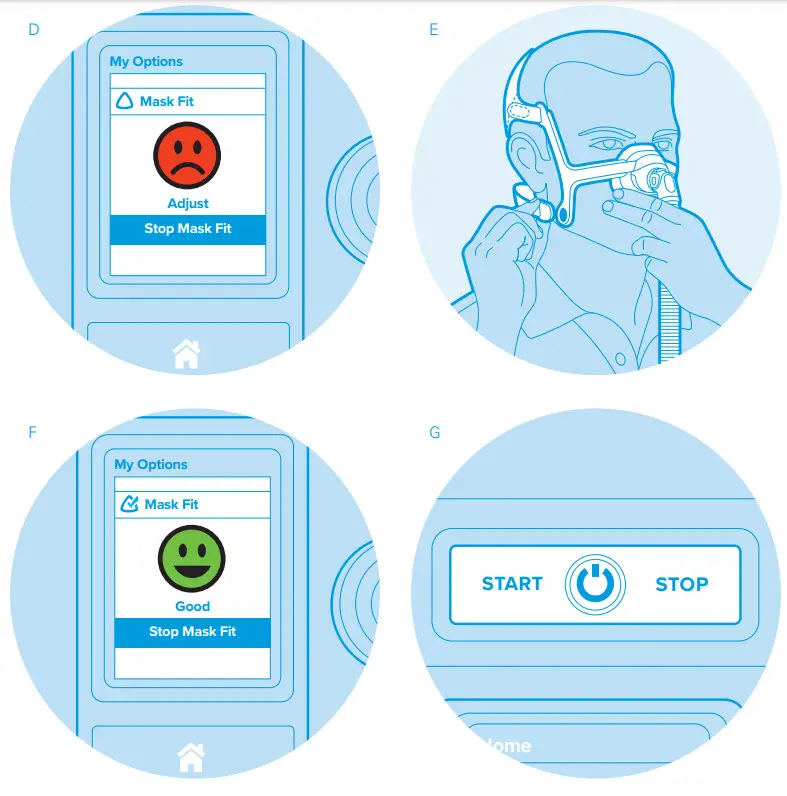
D If the happy face screen changes to a red sad face, this indicates your mask may be leaking. You may need to make small adjustments.E Readjust the top and bottom headgear straps so that your mask has a snug, but not too tight, fit. You can also pull the mask away from your face and gently let it fall back against your skin.F When your mask is properly fitted, you’ll see the happy face appear back on the screen.G When you’re ready to start therapy, press the START/STOP button.
Getting used to therapy
Breathe normally
When you use your machine for the first time, remember to breathe normally. Focus on breathing in and out through your nose only.
Pressure may feel strange at first
It may feel easier than normal to inhale, but harder than normal to exhale. Take your time – even a few minutes of breathing normally with your machine will help you relax and get used to your therapy.If you find yourself struggling and thinking about breathing, consider deep meditation breathing as this helps to increase relaxation. Remember, you can stop and start therapy at any time by using the START/STOP button on the top of your machine.
Check for leaks
Check for leaks and make any necessary mask adjustments before falling asleep. Adapting to therapy takes time, so be patient with yourself. The best way to adjust to therapy isto use your machine nightly.
Register for myAir
ResMed myAir™ is a free, easy-to-use application that lets you know how you slept the night before and helps you stay on track throughout your sleep apnoea treatment journey.Sign up at myAir.resmed.eu
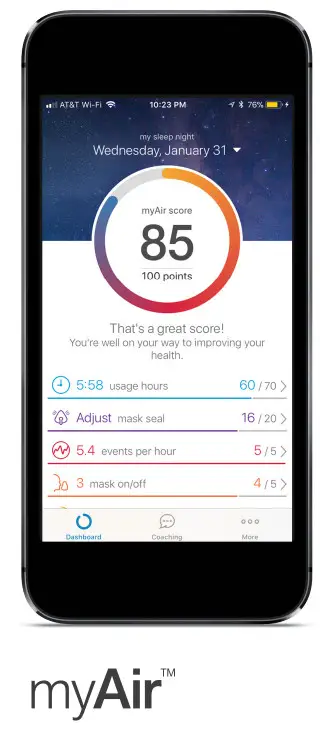
 myAir scoreA daily snapshot of how well you slept
 BadgesCelebrate reaching milestones in your treatment
 Tips Receive emails that give you tips about improving your comfort and sleep
 AlertsKnow if something is wrong with your mask or machine, and how to fix it
Personalized sleep toolsHow-to instructions, videos, and personalized information
Benefits of sleep apnoea treatment
When left untreated, sleep apnoea can negatively affect your energy levels, productivity and mental well-being.¹ It can also have long-term, adverse effects on your heart,¹ metabolism, and health. Sleep apnoea can affect anyone – fit or overweight, old or young, male or female. A few of the common symptoms are:
- Loud snoring¹
- Lack of energy¹
- Daytime sleepiness¹
- Morning headaches¹
- A partner or family member notices that you stop breathing during sleep¹
Effective treatment of sleep apnoea has been shown to help alleviate these symptoms, which can lead directly to a healthier mental outlook and improved well-being.²³For more ResMed equipment information,visit ResMed.com/RemoteSetUpFor specific questions about your equipment,contact your equipment provider orResMed customer support: 0800 917 7071
![]()
 report this ad
References:
- Memon J, Manganaro SN. Obstructive Sleep-disordered Breathing (SDB). In: StatPearls. Treasure Island (FL): StatPearls Publishing; 20202 American Academy of Sleep Medicine (AASM). “CPAP – Benefits.” Sleep Education. 2018.
- Schwartz DJ & al. For individuals with obstructive sleep apnea, the institution of CPAP therapy is associated with an amelioration of symptoms of depression which is sustained long term. J Clin Sleep Med. 2007;3(6):631-635.
- Farrell PC, Richards G. Recognition and treatment of sleep-disordered breathing: an important component of chronic disease management. J Transl Med. 2017;15(1):114. Published 2017 May 25. doi:10.1186/s12967-017-1211-y
See ResMed.com for other ResMed locations worldwide. Air10, AirFit, AirSense, HumidAir, and myAir are trademarks and/or registered trademarks of the ResMed family of companies. Specifications may change without notice. For patent and other intellectual property information, see ResMed.com/ip.© 2020 ResMed. 10112064/1 2020-07
References
[xyz-ips snippet=”download-snippet”]