
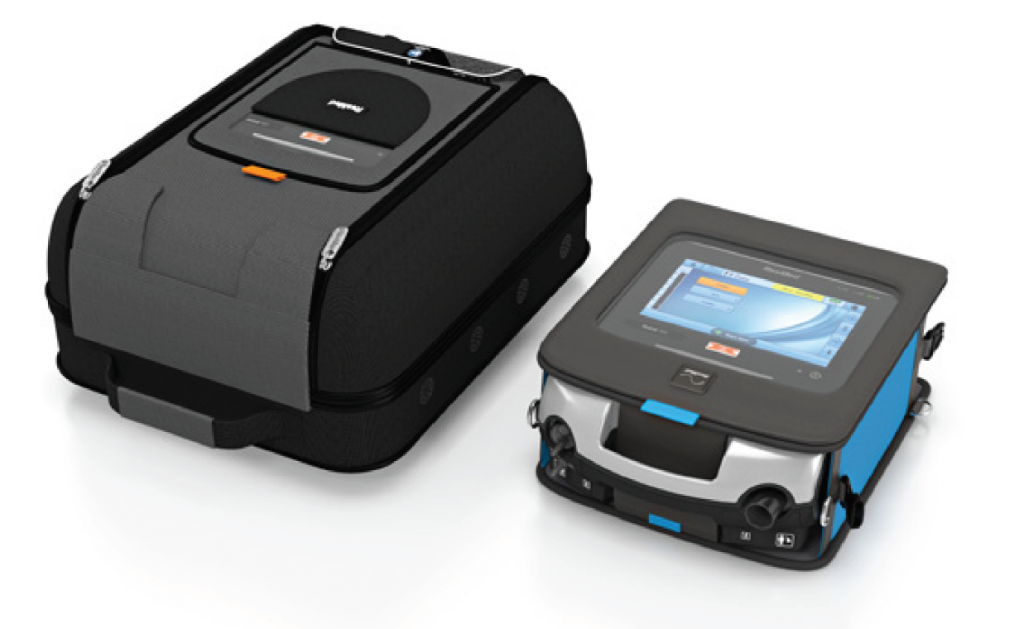
ResMed SlimFit mobility bag
Thank you for choosing the Astral mobility bag. This user guide provides instruction for the use of the Astral mobility bag and the Astral SlimFit mobility bag referred to collectively as ‘mobility bag’ throughout this manual unless otherwise stated.
Intended Use
Mobility bag and SlimFit mobility bagThe mobility bag has been designed to allow mobile use of the Astral ventilator.
General warnings and cautionsThe following are general warnings and cautions. Further specific warnings, cautions and notes appear next to the relevant instruction in the user guide.A warning alerts you to possible injury.
WARNING
- Read the entire guide before using your mobility bag.
- To prevent overheating, remove the Astral power supply unit from the mobility bag or the Battery/PSU pouch of the Slimfit mobility bag when running Astral from an external power source.
- Ensure all alarm settings have been reviewed and adjusted accordingly for use in a mobile environment.
- Ensure the air inlets and vents of the mobility bag and the device are kept clear. Blocking the air inlets and / or vents could lead to overheating of the device.
- When used with oxygen, keep sources of ignition away from the mobility bag.
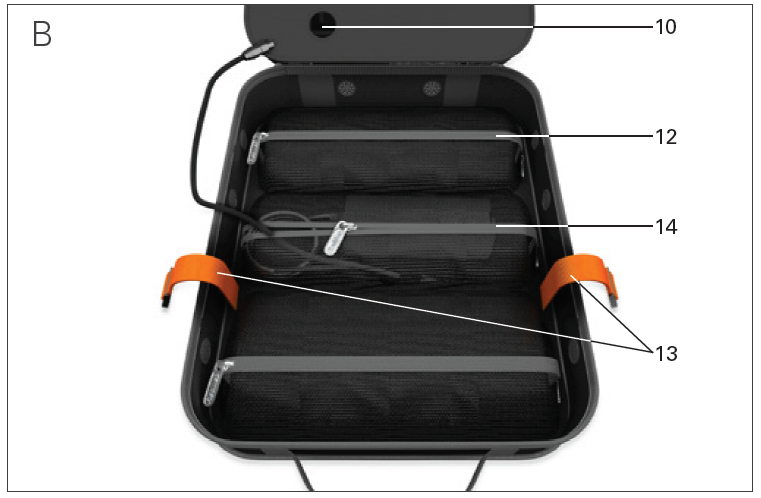
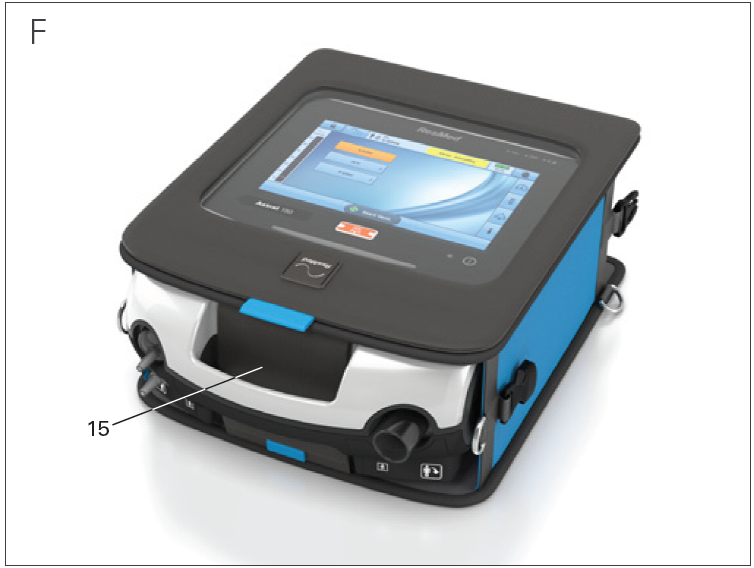
A caution explains special measures for the safe and effective use of the device.CAUTIONResMed recommends adjusting the alarm volume to the highest level before using the Astral device inside your mobility bag.Note: For any serious incidents that occur in relation to this product, these should be reported to ResMed and the competent authority in your country.Mobility bag and SlimFit mobility bag at a glance Refer to illustrations A, B, C, D, E & F
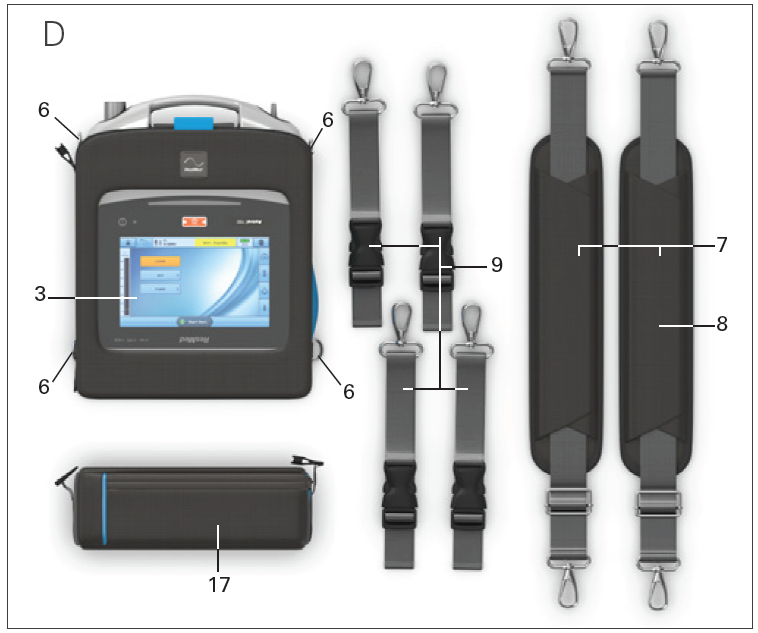


- Carry handle
- Circuit flaps
- Protective cover
- Access panel to Astral connections
- Air inlet
- Attachment points
- Backpack strap (x2)
- Shoulder strap
- Wheelchair strap (x4)
- Cable port
- Vents
- External battery pocket
- Retention straps
- Power supply pocket
- Device securing strap
- Detachable Battery / PSU pouch
- SlimBag Bed Support (optional accessory) – not illustrated
Setting up the mobility bag
WARNINGDo not place the mobility bag upright on the ground as this will block the air inlet of the mobility bag.Connecting the power supply unit and battery
- Place bag on a flat surface and unzip the accessories compartment.
- Unclip the retention straps.
- Place the Astral power supply unit into the centre pocket. Position the cables towards the side so that they exit the pocket as shown.
- If connecting to an external battery:• Connect the power supply DC cable to the external battery.• Place the external battery in the bottom pocket. Ensure the DC cable exits the pocket.• Connect the external battery cable through the bottom part of the device compartment.
- Push the DC cable through the cable port into the bottom of the device compartment.
- Clip the retention straps and adjust the length if required.
- Close the accessories compartment. Ensure all zippered compartments are closed.
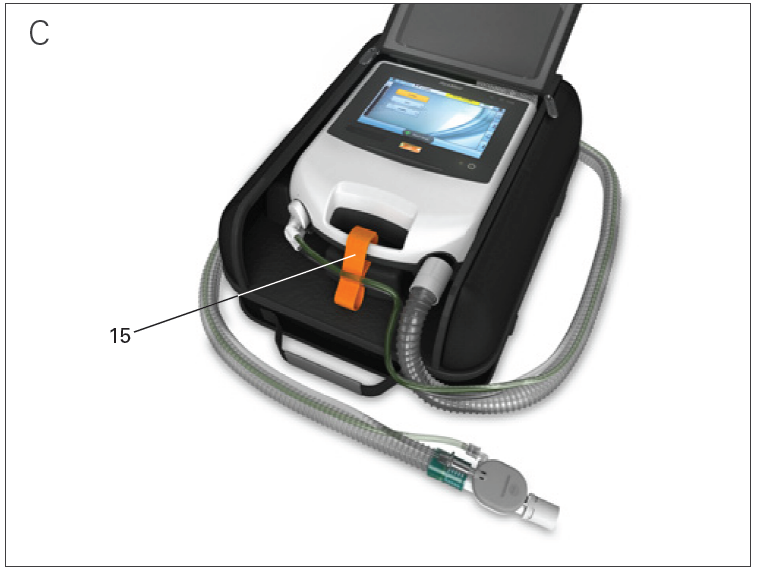
Connecting the deviceThe mobility bags have been designed to allow transfer of the device into the bag while ventilating. When using oxygen, the oxygen inlet must be disconnected and reconnected.
Refer to illustration C
- Unzip the device compartment and unfasten the device retention strap.
- Place the device into the mobility bag and secure into position using the device retention strap. Ensure that the device retention strap does not compress the tubing.
- Connect the DC plug of the power supply unit or battery to the rear of the Astral device.
- If not already completed, attach the patient circuit and the antibacterial filter (if applicable) to the air outlet of the device.
- Close the device compartment. Ensure all zippered compartments are closed.
Notes:
- Always close the zippers and the flaps to protect the device from moisture.
- Ensure the protective cover is closed to avoid damaging the Astral screen.
- For more information on connecting patient circuit, see the Astral User Guide.
Setting up the SlimFit mobility bag
- Place bag on a flat surface and slide the Astral device into the Slimfit mobility bag ensuring the handle is accessible.
- Once in place, fasten the flaps under the handle of the Astral device and secure in place using the VELCRO® strip.
- Attach required straps to use as a backpack, carry bag or wheelchair attachment.
Connecting oxygen and other accessories
When using supplemental oxygen inside the mobility bag, the maximum permitted flow rate is 6 L/min. Oxygen can be used with a double limb circuit in a SlimFit mobility bag.
Oxygen and other accessories can be connected to the Astral device through the cable ports on the rear access panel of the mobility bag.
- Connect oxygen to the low flow oxygen inlet at the rear of the device. For full instructions on using oxygen with the Astral device, refer to the Astral Clinical Guide.
- When using a pulse oximeter with the device, ResMed recommends placing the cables around the side of the device through the circuit flaps on the front panel.
For a full list of accessories, see the Ventilation accessories guide on www.resmed.com. If you do not have internet access, please contact your ResMed representative.
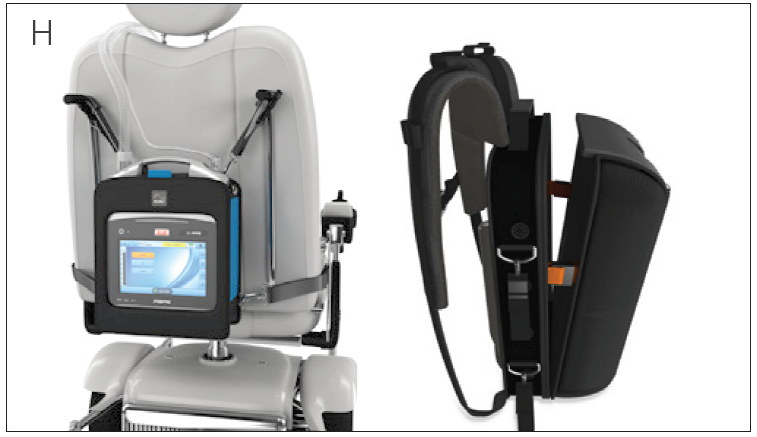
For use with a wheelchair
- Attach the four wheelchair straps to the attachment points on the sides of the mobility bag.
- Attach each of the four straps around a secure part of the wheelchair, tighten or loosen as required.
Note: Alternatively, secure the bag using the backpack or shoulder straps.
For use as a backpackAttach the backpack straps using the VELCRO® strips and secure to the attachment points at the top and bottom of the mobility bag.
For use over the shoulderFor the mobility bag, secure the shoulder strap to the top two attachment points of the mobility bag.For the SlimFit mobility bag, adjust the length of one backpack strap to use as a shoulder strap.
For use with mains power
- Ensure that the power cord does not pose a tripping or choking hazard.
- When the Astral device is used in the mobility bag, the internal battery may stop charging in high ambient temperature conditions. If the internal battery is not charging, remove the Astral device and the power supply unit from the mobility bag to continue charging.
- Connect the DC plug of the Astral external power supply unit to the rear of the Astral device.
- Before connecting the power cord to the ResMed power supply unit, ensure the end of the connector of the power cord is correctly aligned with the input socket on the power supply unit.
- Plug the other end of the power cord into the power socket.
Cleaning and maintenanceWipe your mobility bag with a damp cloth and mild detergent. Allow to air dry.
Disposal
The Mobility bag and packaging does not contain any hazardous substances and may be disposed of with your normal household refuse.
Limited warranty
ResMed Pty Ltd (hereafter ‘ResMed’) warrants that your ResMed product shall be free from defects in material and workmanship for a period of 12 months from the date of purchase by the initial consumer. This warranty is not transferable.If the product fails under conditions of normal use, ResMed will repair or replace, at its option, the defective product or any of its components.This limited warranty does not cover: a) any damage caused as a result of improper use, abuse, modification or alteration of the product; b) repairs carried out by any service organisation that has not been expressly authorised by ResMed to perform such repairs; c) any damage or contamination due to cigarette, pipe, cigar or other smoke; d) any damage caused by water being spilled on or into the product.Warranty is void on product sold, or resold, outside the region of original purchase.Warranty claims on defective product must be made by the initial consumer at the point of purchase.This warranty is in lieu of all other express or implied warranties, including any implied warranty of merchantability or fitness for a particular purpose. Some regions or states do not allow limitations on how long an implied warranty lasts, so the above limitation may not apply to you.ResMed shall not be responsible for any incidental or consequential damages claimed to have occurred as a result of the sale, installation or use of any ResMed product. Some regions or states do not allow the exclusion or limitation of incidental or consequential damages, so the above limitation may not apply to you.This warranty gives you specific legal rights, and you may also have other rights which vary from region to region. For further information on your warranty rights, contact your local ResMed dealer or ResMed office.
Warranty information for Australian consumersOur goods come with guarantees that cannot be excluded under the Australian Consumer Law. You are entitled to a replacement or refund for a major failure and for compensation for any other reasonably foreseeable loss or damage. You are also entitled to have the goods repaired or replaced if the goods fail to be of acceptable quality and the failure does not amount to a major failure.In addition to your rights and remedies under Australian Consumer Law (and any other applicable law), ResMed Pty Ltd ABN 30 003 765 142 of 1 Elizabeth Macarthur Drive, Bella Vista NSW 2153, (ResMed) warrants that your ResMed product will be free from defects in material and workmanship from the date of purchase for the period specified below:
To make a claim under this warranty you should contact the ResMed accredited outlet from which you purchased your ResMed product or send your claim to ResMed at 1 Elizabeth Macarthur Drive, Bella Vista NSW 2153 (phone number (02) 8884 1000) (email: [email protected]). All claims under this warranty must be accompanied by your original receipt.
You will then need to deliver the ResMed product you claim is defective to the ResMed accredited outlet from which you purchased your ResMed product or your closest ResMed accredited outlet at your expense. A similar product will normally be lent to you by your ResMed accredited outlet while your product is assessed.
The product you claim as defective must be delivered from the ResMed accredited outlet to the ResMed Service Centre within the relevant warranty period referred to above. ResMed will not be responsible for the cost of the transport of your ResMed product to the ResMed Service Centre. You must pay any necessary costs to the ResMed accredited outlet. If ResMed determines that your warranty claim is valid, we will return the repaired product, or a replacement product, to your ResMed accredited outlet at ResMed’s expense.
If ResMed determines that your warranty claim is valid you may claim any reasonable expenses you have incurred in making the claim by posting to us at 1 Elizabeth Macarthur Drive, Bella Vista NSW 2153 a claim in writing attaching original receipts for the expenses claimed. If ResMed determines that your warranty claim is not valid, we will notify your ResMed accredited outlet by providing a quotation of the cost of repair. Your ResMed accredited outlet will then contact you and you will have the option of taking up the quotation offer, valid for 30 days, or have your product returned unrepaired to your ResMed accredited outlet at ResMed’s expense.
This manufacturer’s warranty is void on product sold, or resold, outside the region of original purchase. Manufacturer’s warranty claims on defective product must be made by the initial consumer at the point of purchase or to us directly as specified above.
This warranty gives you specific legal rights. For further information on your warranty rights, contact your local ResMed dealer or ResMed office.If you are provided with a replacement or repaired product, the warranty continues to apply to the replacement or repaired device but does not continue beyond the original warranty period referred to above.If you have any questions or would like the address of your nearest ResMed accredited outlet, please contact our friendly customer service consultants.
![]()
References
[xyz-ips snippet=”download-snippet”]