retrotec 5000 High Flow Blower Door System
Download the “Blower Door Operation Manual” and the “Residential Pressure & Air Leakage Testing Manual” from www.retrotec.com Read warnings.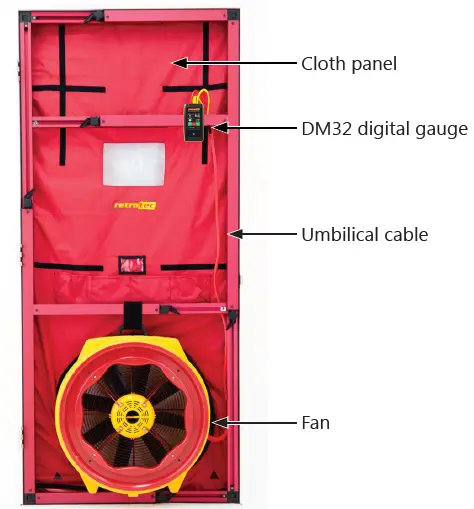
INSTALLATION
Step 1: Prepare the building
Refer to the Gauge QuickGuide and become completely familiar with its operation before performing a test.
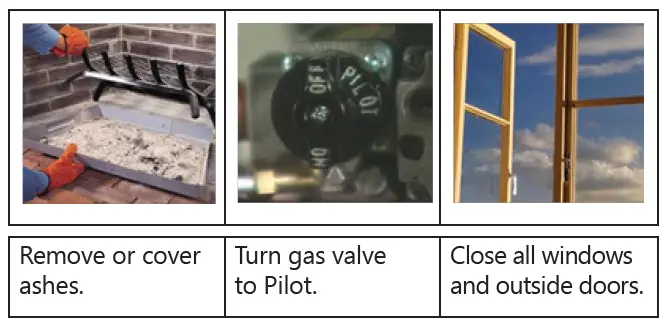
- Fireplaces and stoves must be cold with doors closed (cover ashes).
- Close and lock outside doors and windows so they don’t open during the test.
- Open all interior doors leading to conditioned spaces.
- Shut off HVAC, combustion appliances, exhaust fans, dryers, A/C and furnaces. Ensure they will not come on
- Turn gas hot water to Pilot.

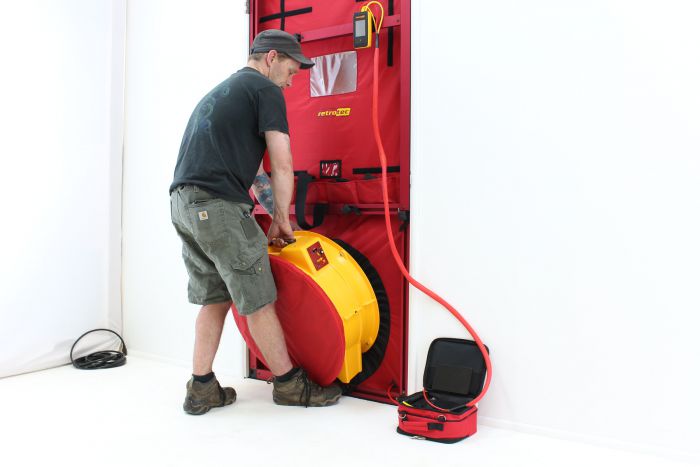
Step 2: Install the system
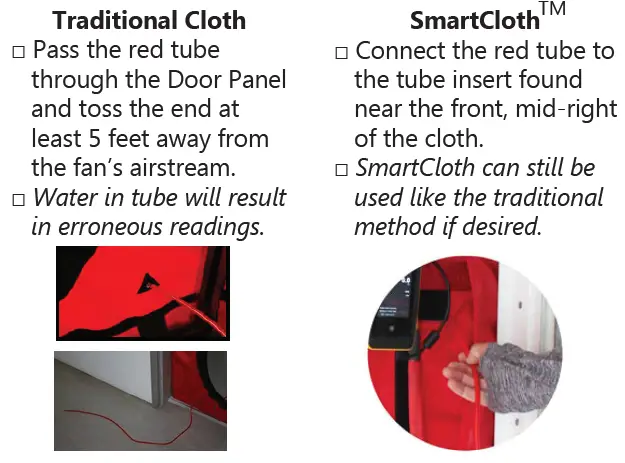
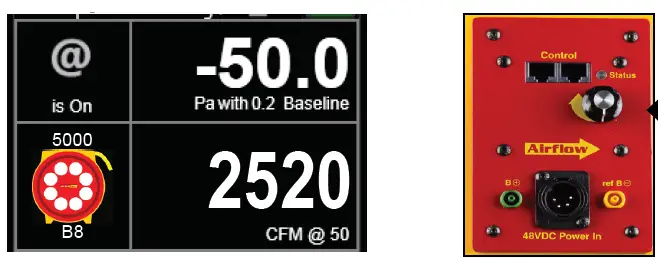
- Set up the Door Panel.Refer to your “Door Panel QuickGuide”
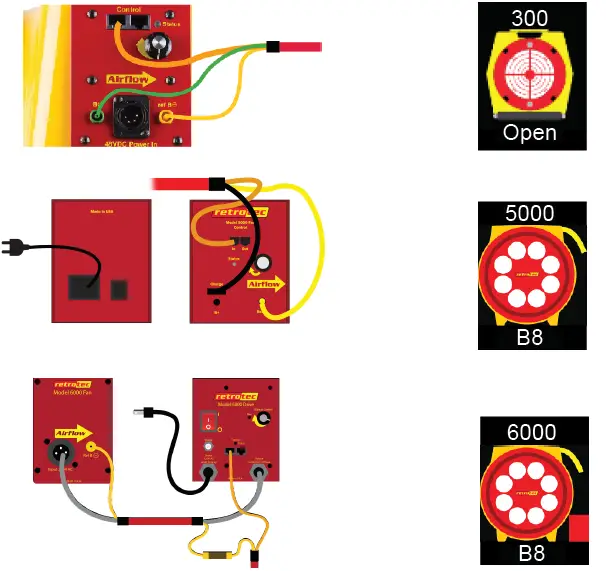
- Connect the Ethernet style Speed Control Cable to the fan and gauge.
- Connect the yellow tube between yellow ports marked “Ref B” on fan and gauge. If the fan has a green port (“Input B”), connect the green tube.
- Connect the short red tube to the red gauge port.
- Install the fan blowing outdoors. Cover the fan. Refer to “Range Configurations” QuickGuide for assistance on selecting proper fan coverage.
- Connect power cord between fan & a wall outlet. Power light must be on.
- Place gauge near fan, or attach gauge to Door Panel.
Step 3: Conduct depressurization test, ()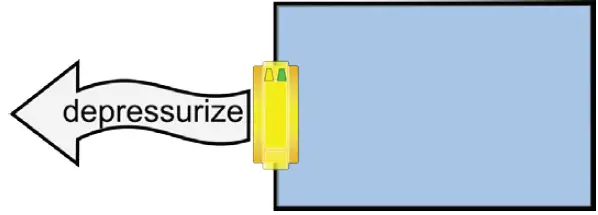
- Gauge [On], tap [Settings] then [Baseline].
- Tap [Capture Baseline]. After 20 seconds on a calm day or 60 seconds on a windy day, tap [End Capture] then [On] to return to the Home screen.
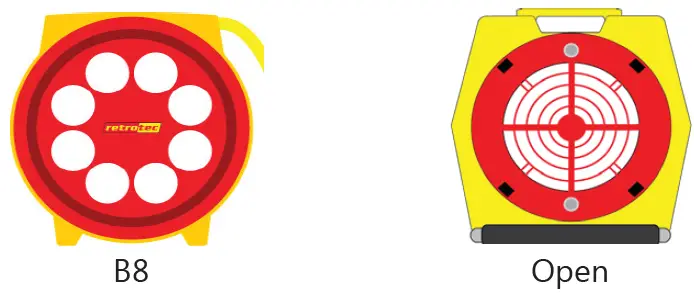
- Uncover fan. Install Range Plate B8 (Open for 300 fan).
- Ensure gauge shows correct Range on Home screen.
- Disconnect Speed Control Cable, turn knob to zero then adjust until pressure is about 50 Pa.
- Tap [Set Pressure] [50] [Set] [@] to calculate what flow would be at exactly 50 Pa.
Step 4: Desired results not achieved?
Cannot achieve test pressure at full speed?If fan reached 100% speed but could not achieve 50 Pa:
- Ensure that all doors and windows are closed.
- If possible, use Range with larger opening to get more flow and try again.
- Change [Range] on the gauge to match.
- Re-adjust fan speed.
Flow reads “–” at test pressure?
If the test pressure has been reached, but “–” appears, the fan is running too slowly to accurately measure flow.
- Add the next lower Range
- Change [Range] to match
Gauge set up
Make sure the device shown on the Home screen matches your fan. To change device, tap the fan picture, then the [Change Device] key.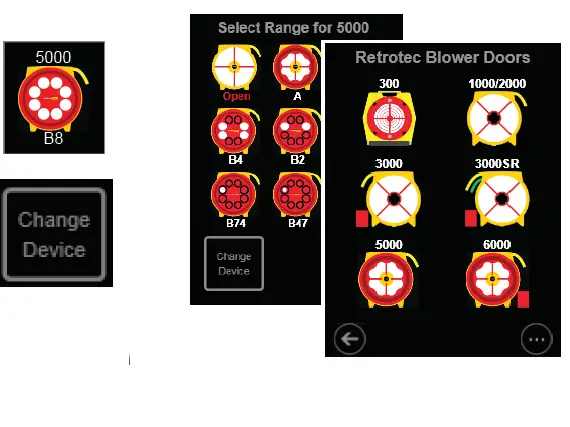
- Select your device from the graphics under “Retrotec Blower Door” then select Range. Use Range Plate B8 for most houses, try Range B4 for tighter new houses, and Range Ring A for leakier older houses. For 300 fans, start with Open Range. Tap on [Channel B] to change the type of result or units. Refer to gauge and “Residential Pressure & Air Leakage Testing, Appendix A” manuals for guidance.
- Tap [Settings] then [Time averaging] to adjust the time averaging. 5 seconds is OK for a calm day. 10 or 30 seconds can be used on windy days.
- Make sure the [Default @ Pressure] is set to 50 Pa.
- Tap to return to the Home screen.
Show leakage area Result
Equivalent Leakage Area (EqLA) describes the leakage area in terms of one large hole in a flat surface. Tap the [Channel B] key, then , and select “EqLA: sq in”[Channel A] shows the building pressure and[Channel B] “EqLA” shows the combined size of all holes in the building.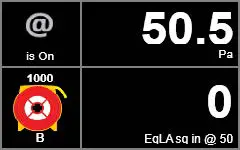
Leakage area is not a required result, but is a nice way to visualize the size of the hole in the ducts.
Pressurization test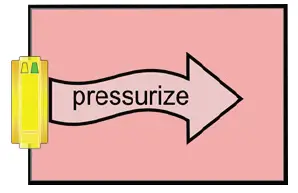
Turn the fan around to blow air into the house. Tube configuration is the same as the depressurization test.
Adjust fan with gauge
Connect Speed Control Cable to the fan. Solid green Status light indicates gauge is connected. Tap [Set Pressure] [50] [Set] to get gauge to control to a pressure of 50 Pa.CAUTION: Doors opening during the test will cause fan speed to increase which will create a pressure pulse when that door is re-closed, disturbing dust, soot, and particulates, causing damage. STOP the Fan if a door opens.Tap [Set Speed] [50] [Set] to set speed to 50%. When [Set Speed] or [Set Pressure] is used, the Jog keys become active on the Home screen. Use the [JogUp] [JogDown] arrow keys to increase or decrease the target by 5 Pa or 1%. Tap [Stop] to turn the fan off.
Adjust fan speed remotely
Use optional WiFi to control the fan remotely. Refer to “GaugeRemote QuickGuide”. 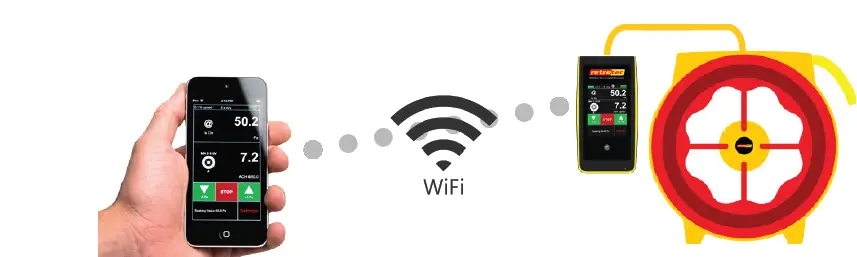
Control fan speed with software
Speed control is handled automatically with FanTestic software, for complete automation. 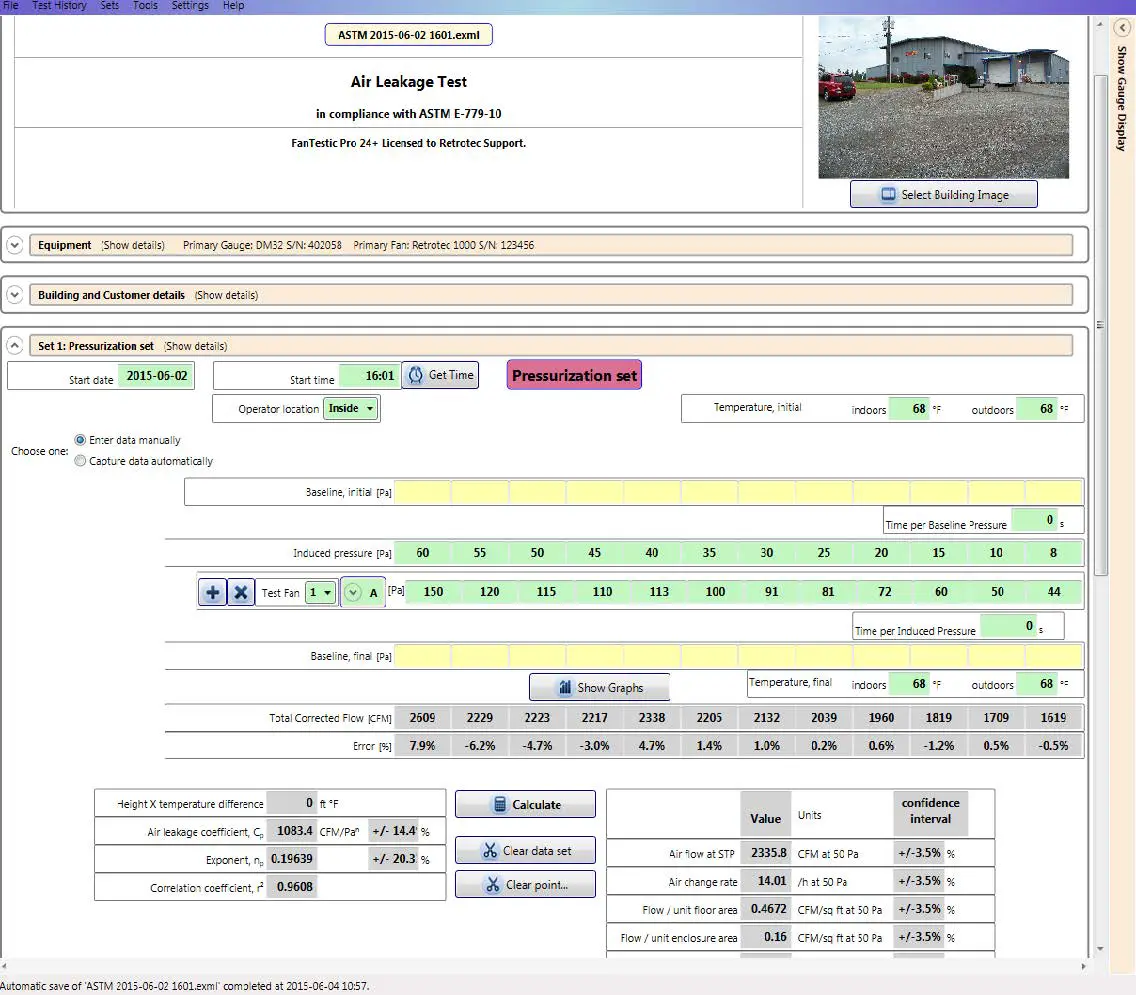
Field check gauge weeklyCheck for gauge accuracy, blocked, leaking, or pinched tubes weekly, and anytime results are in question. 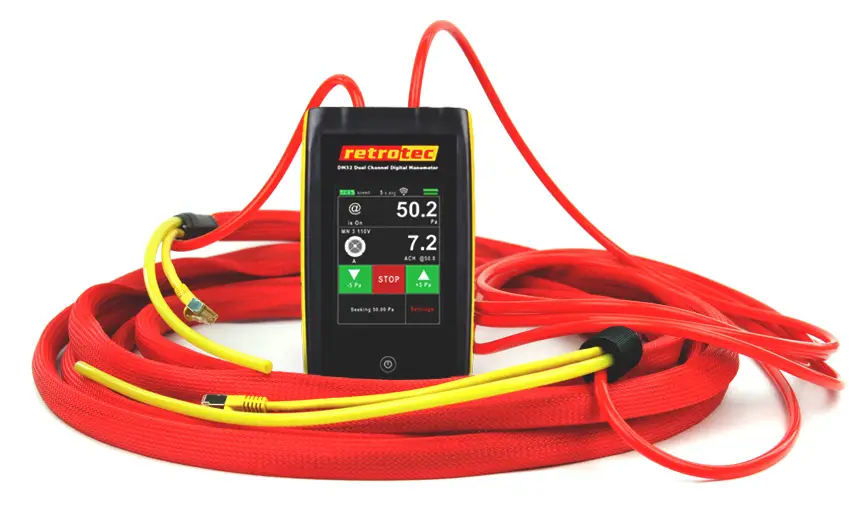
Check the gauge with the tubes in the Umbilical.
- Set [Time Average] to 5 seconds in [Settings].
- Tap [Channel B] and select“Pressure: Pa”.
- Connect the red tube between the red and yellow ports.If readings on Channel A and Channel B are within2% and don’t drop noticeably in 5 seconds, thegauge is functioning correctly.
- Remove red tubes and repeat with the yellow tube between the blue and green ports.Check gauge and tubes regularly to eliminate the most common source of errors.
 report this ad
Field check system monthly
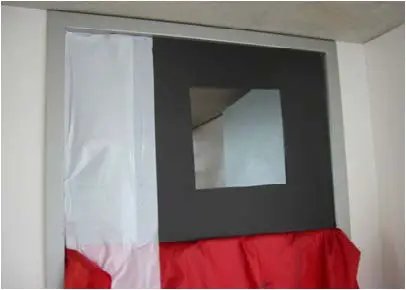
- Perform a Blower Door test on a room and record the EqLA at 50 Pa.
- Install cardboard in upper part of doorway with a20 x 20 inch hole cut in it.
- Perform a second Blower Door test on thebuilding, record the EqLA at 50 Pa.
- Subtract the first result from the second resultand the value should be 400 sq. in. (+/-10%).
References
[xyz-ips snippet=”download-snippet”]