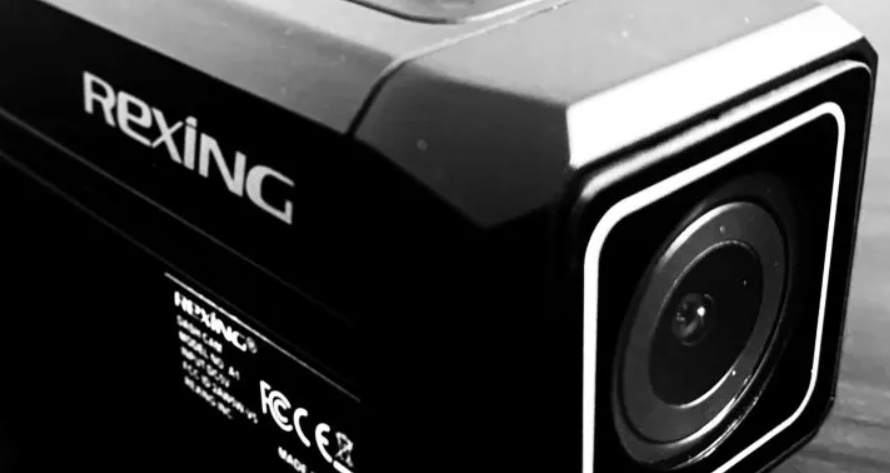
REXING BBYA1CAM A1 Action Camera
![]()
What’s in the Box
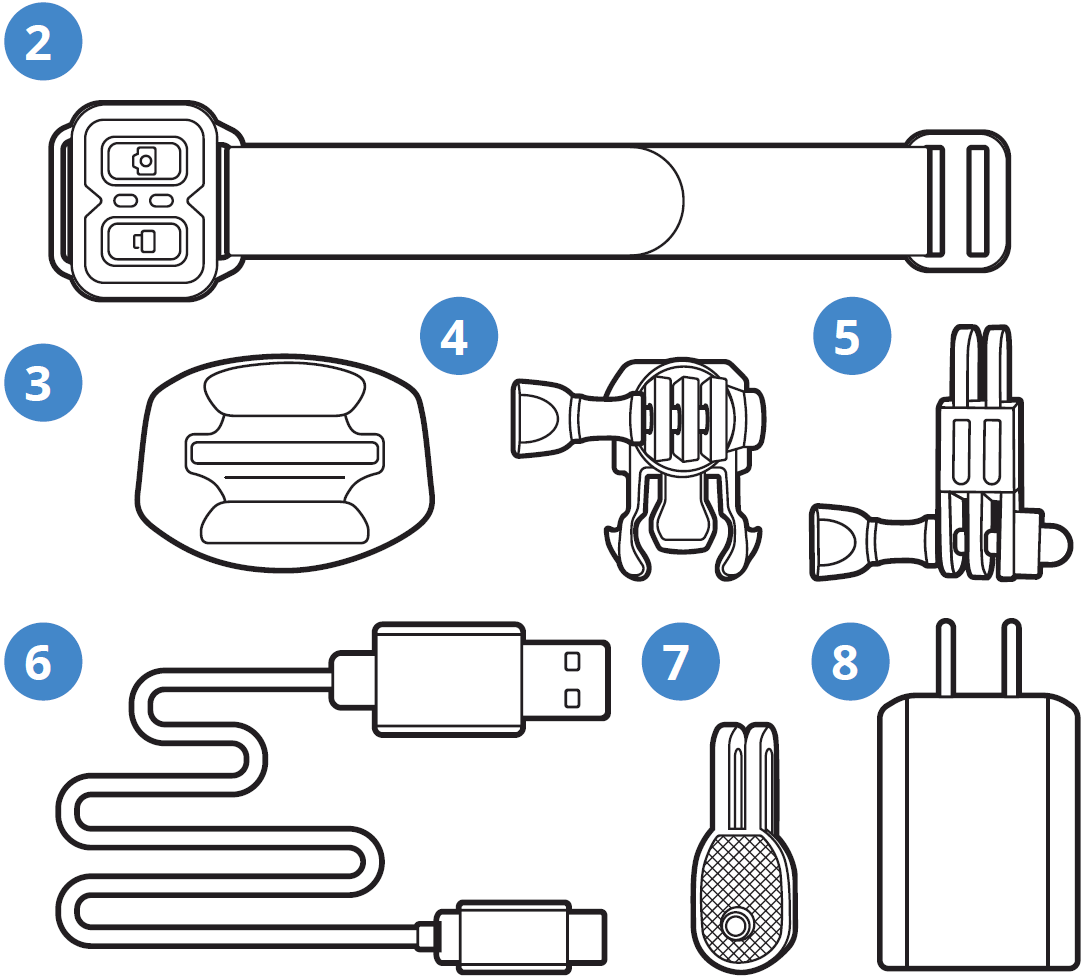
- A1 Action Camera
- Remote Control
- Adhesive Mount
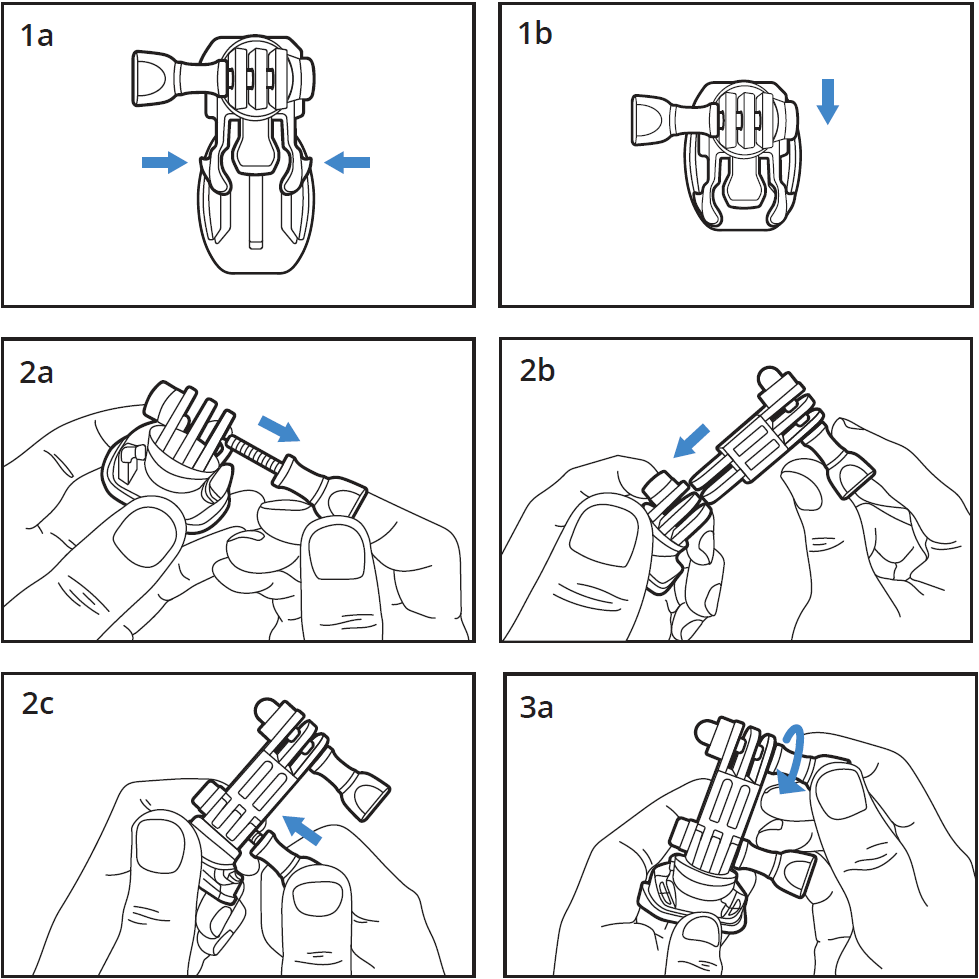
- Mounting Buckle with Thumb Screw
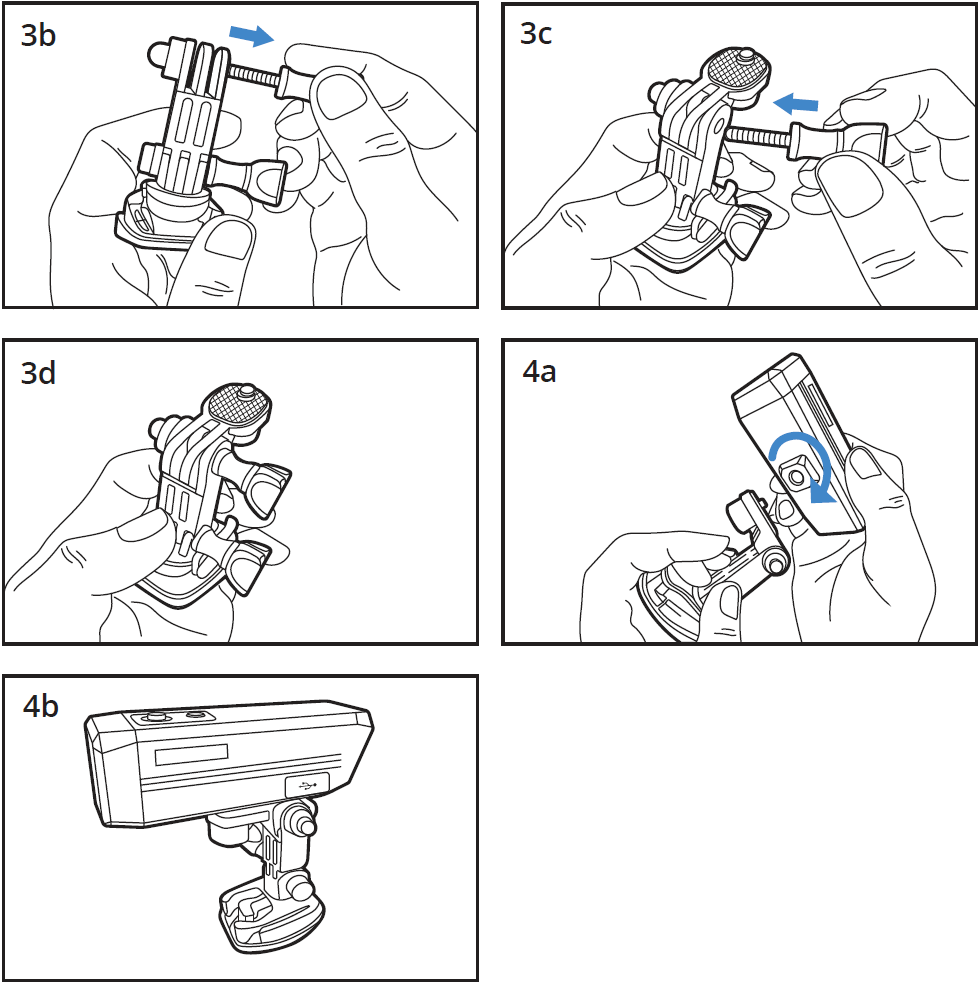
- Pivot Arm with Thumb Screw
- USB to Micro USB Cable
- Quick Release Plate
- Charger
- User Manual
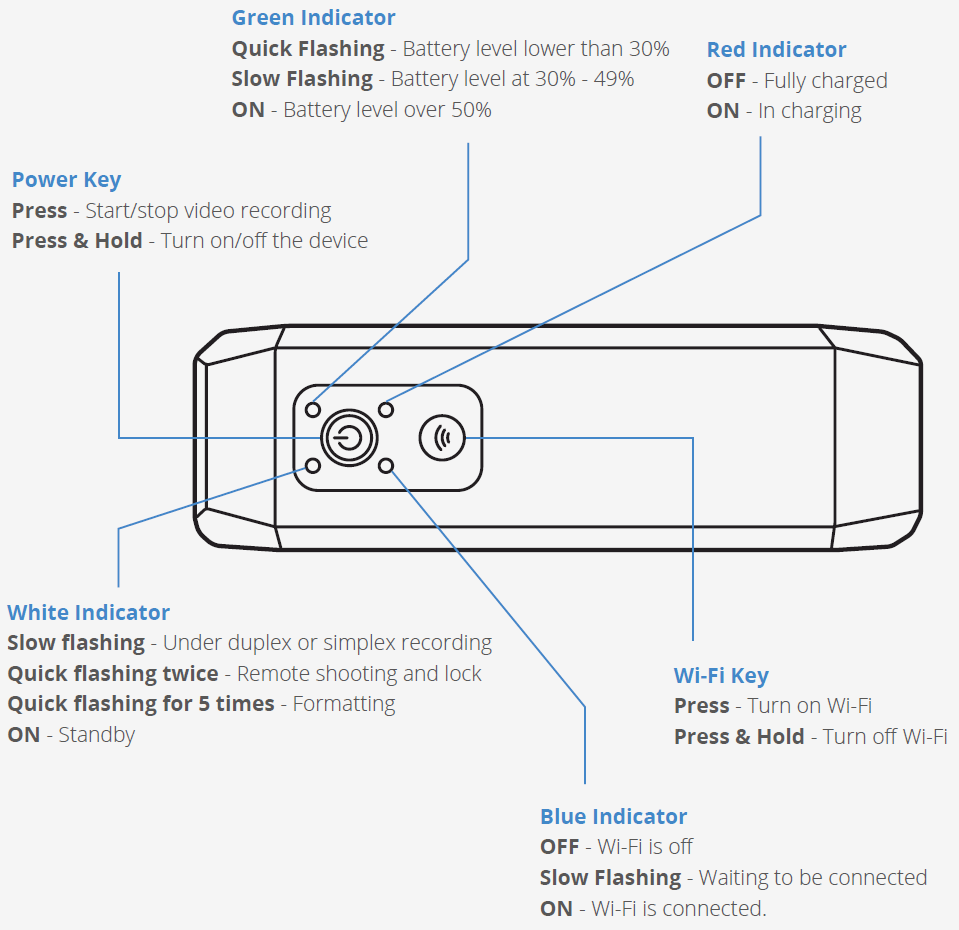
Definition of Indicator Lights, Keys and Camera Vibration

Camera Vibration
- Vibrating once
- The device turns on. To turn on the action camera, release the key once it vibrates.
- The valid operation: starting/stopping video recording, Wi-Fi, etc. (excluded shut-down and formatting)
- Remote operation
- Vibrating for 5 times
- Memory card formatted.
- Device error.
- Long vibration for 2 times
- Power off (including manual, automatic, and low battery shutdown)
Specification
- MODEL – A1
- RESOLUTION – Simplex 2560*1440 30fps, Duplex 1920*1080 30fps
- BODY DIMENSION – 4″ x 1.2″ x 1.2″
- WEIGHT – 3.5 oz
- VIDEO FORMAT – .mp4
- MEMORY – Micro SD, up to 256G, Class 10
- AUDIO INPUT – Built-in microphone
- IMAGE SENSOR – SONY IMX307 x 2
Installation
Get Started
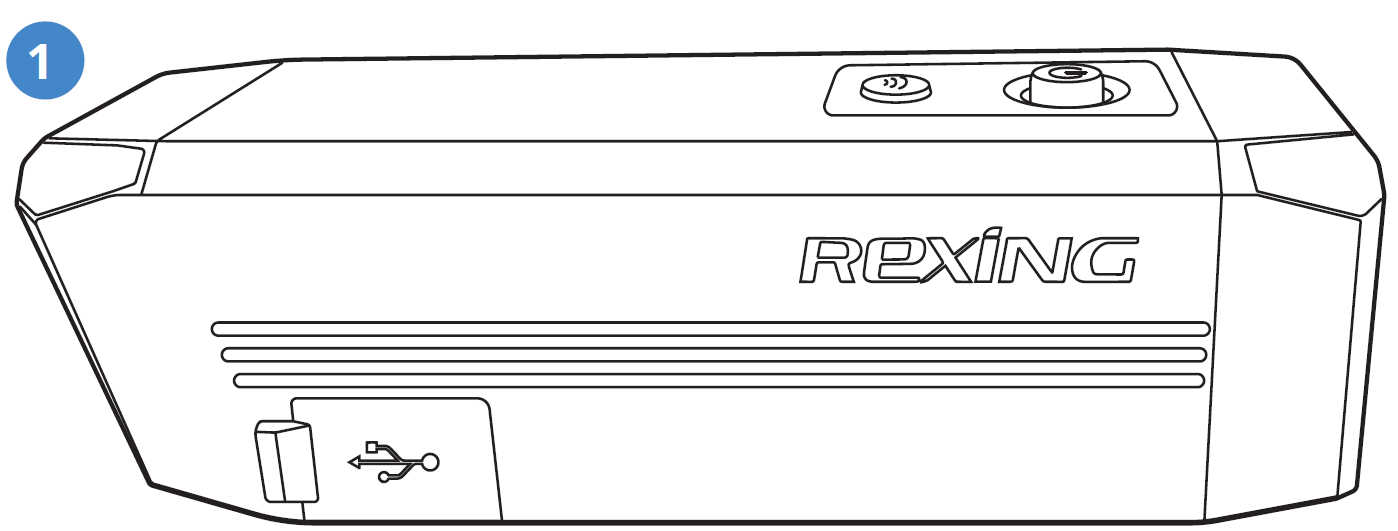
- Take out the device and Micro USB cable.
- Connect the charger and computer with USB cable to charge the recorder.
- The Red Indicator will be ON while charging and OFF after charging is complete.
- If the battery runs out of power during use, the device turns off automatically.
Micro SD Card Instructions
- Open the waterproof cover cap from the Micro SD card slot.
- Insert a high speed Micro SD card (Class 10 or above) according to the direction indicated on the slot.
- Close the card slot cover cap.
- DO NOT insert or remove the Micro SD card when device is turned on.
Installation
Basic Operations
Operation
- Press the Power Key to turn on the device (the device vibrates once).
- Once ON, the recorder automatically enters video mode and starts recording (white indicator flashed). Press the Power Key to stop recording (the camera vibrates once).
- After the recorder is turned on, Wi-Fi will be activated automatically and the blue indicator flashes at the same time. If connection is not established with any cellphone within 1 minute, Wi-Fi will turn off. Upon successful connection with a cellphone, the blue Wi-Fi indicator light turns on (Note: After the Wi-Fi Key is held down for 5 seconds, Wi-Fi will not be turned on automatically at next booting.)
- Press Power Key again the power key to turn the device off (the camera vibrates twice).
- Press the Power Key continuously for 5 times, and the card will be formatted. The white indicator will flash 3 times and the camera vibrates 5 times.
- Power Saving Mode: Even if the camera is ON/recording, it will turn itself off if there is no motion detected for 5 minutes.
Basic Operations
Using the Remote Control
- The action camera automatically pairs with its remote control after starting.
- Pressing the Lock Button of the remote control, its red indicator light will flash once and the device’s white indicator will flash twice and the video file under recording will be locked and saved.

- Pressing the Camera Key of the remote control, its green light flashes once and the white indicator of the device will flash twice and a picture will be taken.
- The remote control uses ONE CR2032 battery.

APP Operation
- Download the RexingConnect APP via the Appstore/Playstore to your cell phone.
- Search for REXING_xxxxxxxxxxxx with your phone. Wi-Fi password: 12345678
- After successful connection, it re-turns to the APP homepage and you are allowed to preview the videos & images in real time.
- The mode can be changed via the keys: Playback, Record, Camera, and Change View.
- Click the lower right settings icon to set up the action camera: Wi-Fi Password, Audio Recording, Date Stamp, Loop Recording, G-sensor sensitivity, Video Resolution, Formatting the Memory Card and Reset Default Settings.
![]()
References
[xyz-ips snippet=”download-snippet”]