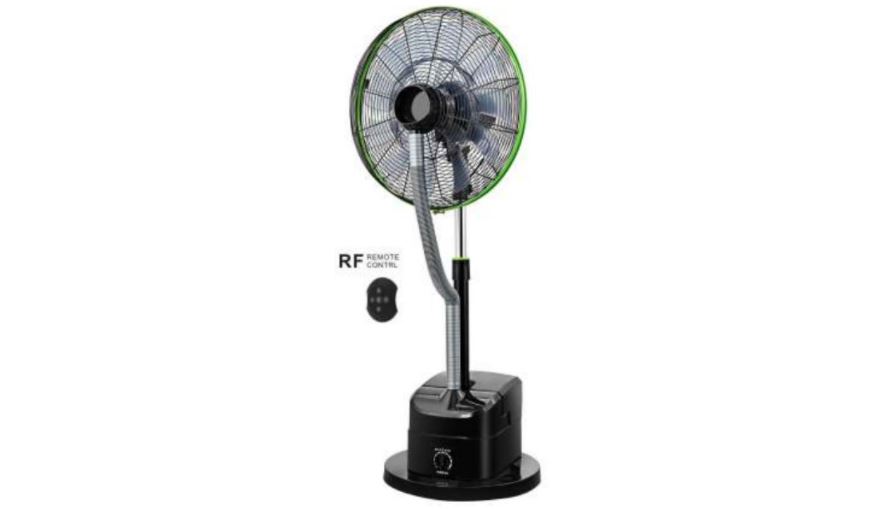
RF Electric Fans Instruction Manual
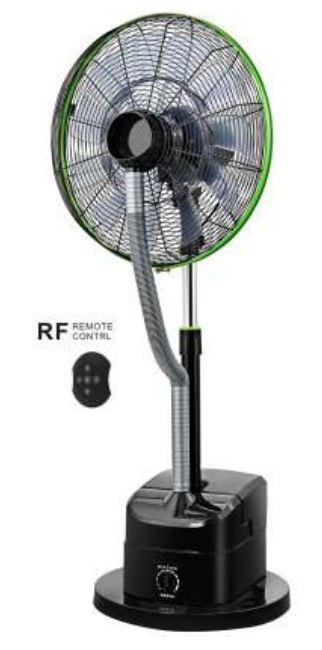

Electric Fans model: FM45-DC17ARLThank you for choosing our innovative product. Please carefully read and keep the instruction manual for future reference.
Method of Installation
- Assembly of Base, Motor and Fan Pole.
- a Remove the Base, Motor and Fan Pole from its packaging.
- b
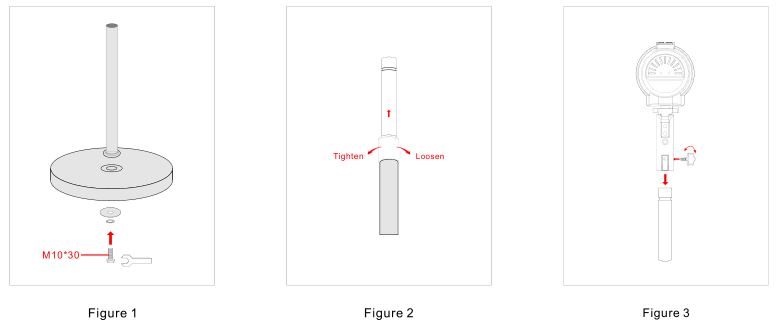
- Remove the M10*30 screw with round stopper from the bottom of the Fan Pole.
- Insert the bottom of Fan Pole into the top hole of the base (figure 1). 3.Tighten the M10*30 screw.
- c
- Loosen the Height Adjustment Knob on the top half of the Fan Pole.
- Pull out the inner pipe to the desired height and tighten the Height Adjustment Knob (figure 2).
- d Loosen the screw of the Motor Connector and insert the inner pipe into the Motor Connector, then tighten the screw to secure the Motor Connector (figure 3).
- Assembly of Net Cover and Fan Blade.
- a. Assembly of rear net cover:
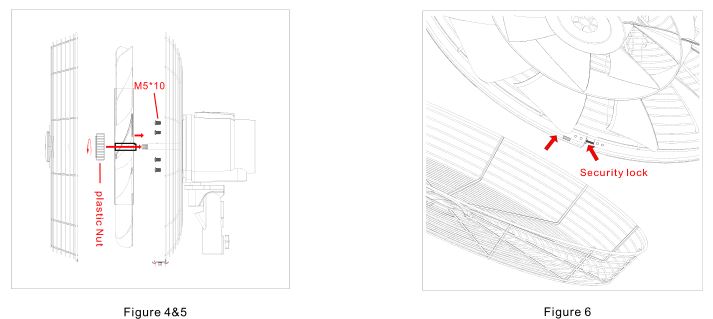
- Remove the nut of the blade and four M5*10 screws from the front of motor.
- Align the four small holes of the rear net cover to the four screw holes of the motor.
- Use the four M5*10 screws to secure the rear cover to the motor (figure 4).
- b. Assembly of blade:
- Remove the protective sleeve on the motor shaft.
- Insert the centre of the blade into the motor shaft and take the plastic Nut and tighten on an anticlockwise direction (figure 5) .
- c. Assembly of front cover:
- Loosen the screw at the bottom of the net cover.
- Place the security lock downwards, then insert the front cover into corresponding position of the net frame.
- Adjust the alignment of the front and rear net cover carefully.
- Then tighten the screw of the security lock. (figure 6)

- a. Assembly of rear net cover:
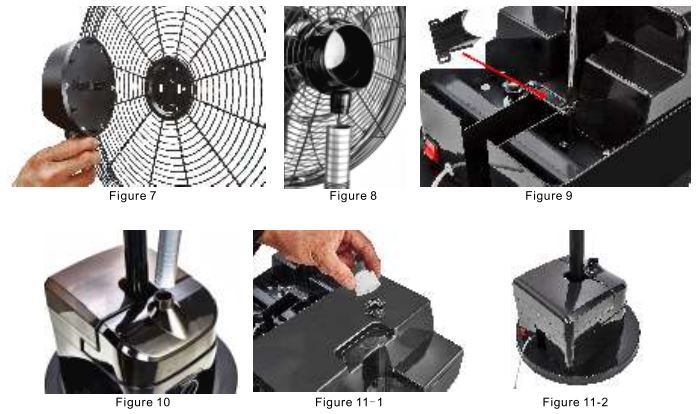
- Place the spray outlet and the connector directly at the front two holes of the front grill net cover, and securely install. Then insert the shorter end of the spray catheter into the spray outlet. (Figure7 & 8)
- Installation method of spray system
- a. Take out the spray generator, remove the water tank. Then put the spray generator on the round base, and make sure that the spray generator is close to the column. (Figure 9)
- b. Lock the spray generator with two screws and fixer. (Figure 9)
- c. Insert the other end of the spray catheter (the longer end) into the spray generator. (Figure 10)
- Unscrew and open the lid of the water tank, pour water to the max level indicator, then close the lid and install the water tank on the top of the spray generator. (Figure 11-1&11-2)
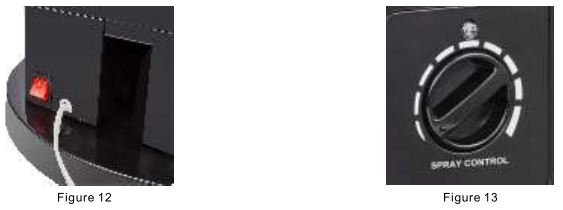
Spray System function: (note that the spray system and fan function are two separate independent control systems).
- The switch of the spray system is shown in (Figure 12).
- The spray volume control of the spray system is shown in (Figure 13).
- The LED indicator light is over the volume control knob( when it is blue color, that means water tank has water, and when it’s red color, that means no water in the tank. )
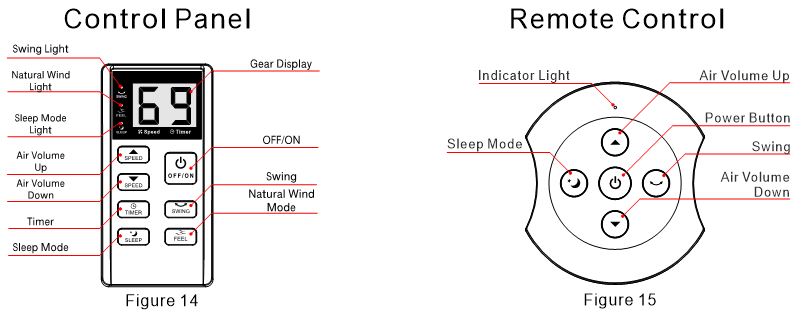
Function Control Panel Display: Figure 14
- ON/OFF: In standby mode, press this button to start the fan with normal wind default at third level, the indicator light of the digital screen will display the number 3, other lights are off.
- SPEED: Air Volume UP/Down (6 levels), note: the indicator light of the digital screen displays the numbers 1 to 6
- TIMER: Press the Timer button, the indicator light of the digital screen is on, press Air Volume UP/Down to adjust the timer (timing range is 1 to 9 hours) the indicator light of the digital screen will light up when timing time starts. The flashing number indicates the remaining time left. A quick press of the timer button can be start the timer mode again, longer press can cancel the timer mode.
- SWING: Press the Swing button to activate swing mode, the indicator light of the digital screen will light up. To Stop press swing button again
- FEEL: Press the Feel button to activate natural wind mode, the indicator light of the digital screen will light up. To Stop, press Feel button again.
- SLEEP: Press the Sleep button to activate sleep mode, the indicator light of the digital screen will light up. When the digital screen is showing number zero, the RPM is at its lowest.
- REST Mode Display: When the control panel has been idle for 2 minutes, all lights will turn off and automatically enter rest mode, press any key to display the current mode of the fan. This does not turn off or cancel the current fan mode.
Function Remote Control : Figure 15
- There is a “beep” sound on the control panel every time the remote control key is used.
- The function of all keys on the Remote Control are the same as that of the corresponding keys on the control panel.
Fan Height AdjustmentTurn anit-clockwise to loosen the Height Adjustment Knob .Slowly adjust the motor to the appropriate height and tighten the knob.
Elevation Angle AdjustmentGently press the motor and net part lightly up or down to adjust desirable height.
Remote Control StorageInstall the remote control holder on the wall and then place the remote control on the remote control holder.
WARNINGS:
- Before use, please check whether the voltage used is the same as the voltage marked by this product.
- Do not connect to power when the fan is not fully assembled. Ensure all power is off and power cable and plug are unplugged from the power socket.
- Do not use wet hands to pull the power plug to avoid the risk of electric shock.
- Do not place the fan on a sloping floor.
- Please avoid high temperature, high humidity and items that can be easily absorb by the (eg. Acid, alkali, oil, fluids, curtains etc)
- Infants and elderly persons should not use strong wind for a long period.
- Do not insert your fingers or sharp objects into the net when the fan is on.
- Children should use the product under adult supervision to prevent any accidents.
- Before using the fan, inspect the power cord and power plug are not damaged, please immediately contact the supplier for a replacement.
- If the fan is not being used for a long period of time, please remove the battery of the remote control and keep it away from moisture.
Maintenance:
- Turn off the power before cleaning the product.
- Do not use any grinding tools and solvents that can damage the surface.
- To clean parts of the fan (excluding the motor), wash it with detergent and then wipe with a dry cloth and allow some time to ensure all parts are fully dry before reassembling the fan.
- It is recommended that the product be inspected and cleaned annually to extend the service life of the product.
Disclaimer:
- The instruction manual has been carefully reviewed and the manufacturer reserves the right of explanation.
- It is not required to inform or notify any persons, If the product is subject to technical improvements in the future.
[xyz-ips snippet=”download-snippet”]