RHM professional subwoofer karaoke system speaker User Manual

All-In-One Bluetooth Sound System

Quick Start Guide & User’s Manual
Safety Precautions & Warnings
- Do not disassemble any part of the device.
- Do not exposure the device to any amount of water or rain.
- Do not operate in high temperature environments.
- Do not operate the unit around machines or appliances.
- When not charging or using the device, turn off and unplug the unit.
- Use only the included accessories with the device.
What’s In The Box
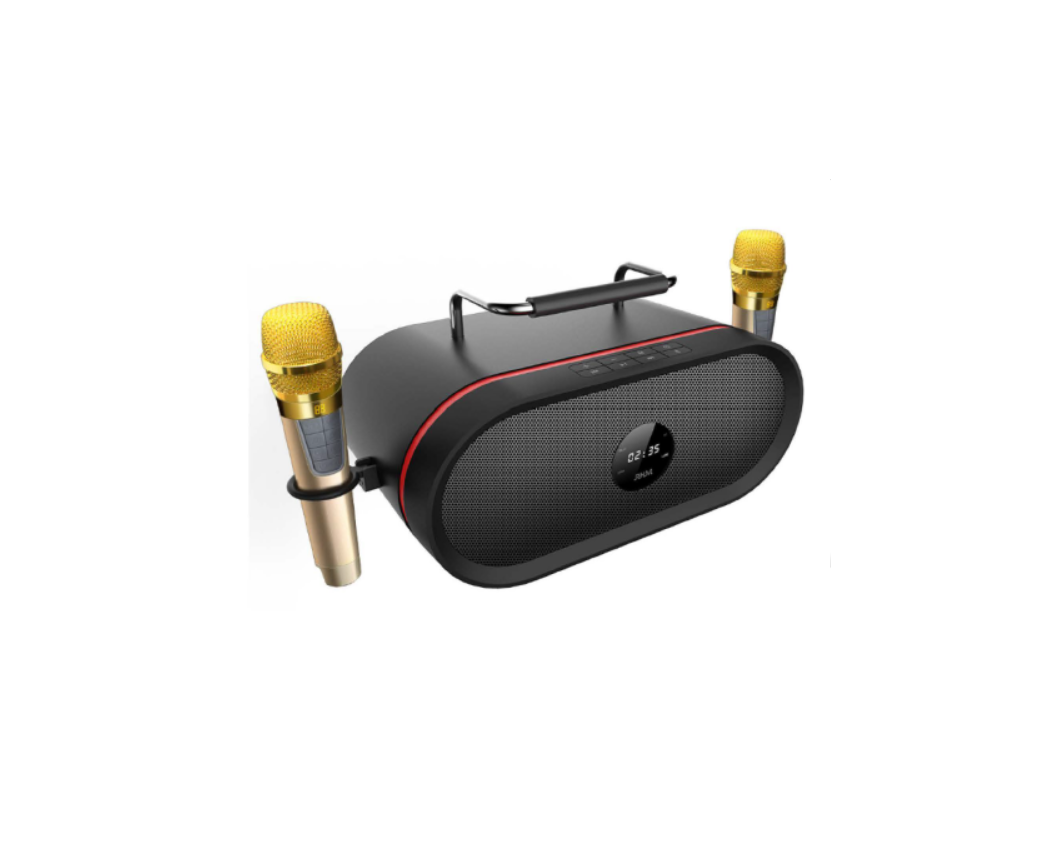
 2 Wireless Microphones
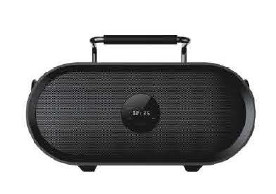 Speaker

3.5mm Aux Audio Cable Power Adapter
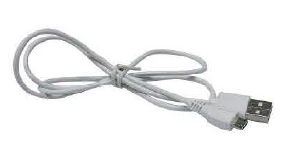 USB Data Cable & Charging Cable
Battery charge and discharge management
- The battery should be kept in a dry place at room temperature
- Recommended to shutdown the device when charging.
- To charge the speaker battery: Use the 15V 4A power adapter, the red light indicator will be turned off after fully charged. The indicator light will flash when the device is at low battery.
- The device battery takes about 3-4 hours to be fully charged. Play time is around 5 hours.
- To charge the wireless microphones: the microphones have charging ports located underneath. Use the USB charging cable to connect the microphone to any USB Adapter. The light will flash and show the power when the device is charging. The device battery takes about 1.5 hour to be fully charged. Play time is around 6hours.
Product Uses & Features
✓ All-In-One, Versatile Sound System With Multiple Uses✓ Use It As A Bluetooth Music Speaker, Karaoke System, or Portable PA System✓ 2 Wireless Microphones With Remote Volume Control & Optional Reverb✓ Listen To Music By Bluetooth, 3.5mm Aux In, USB Drive, or MicroSD Card✓ Built-In Rechargeable Batteries Inside Speaker & Microphones✓ Convenient Carrying Handle Doubles As A Phone Holder✓ Powerful, Crisp Audio From 2 Speakers+ 1 Dedicated Bass Speaker Inside
Quick Start Guide
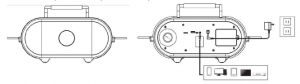
- To charge the unit before use, plug the power cable into the back of the unit. Plug the other end of the power adapter into a power outlet.
- Press the power button located on the top of the unit.
- When the device starts up, it will automatically be in “Bluetooth”mode. If it’s your first time connecting a device, the small Bluetooth icon on the screen will flash until you’ve connected a device. On your phone or other Bluetooth device, scan for Bluetooth devices and connect to the “K666” device. Once connected, just start playing music! Skip to step B to learn how rouse the included wirefess microphones.
Quick Start Guide (continued)
- Alternatively, to listen to music using an aux-in (3.mm audio) cable: Connect your aux-in cable to your audio source (such as an MP3 player, smartphone, tablet, orcomputer) with the included 3.5mm audio cable. Connect the other end to the back of the K666 speaker. Press the”M” (Mode) button on the top of the K666 until “LINE” appears on the screen, as shown below.Then, simply start playing music from your audio source.
- Alternatively, to listen to music using a USB flash drive: Make sure your music is in MP3 format and saved on your USB flash drive. Then, plug the USB flash drive into the slot marked “USB” on the back of the K666. If your music does not automatically start playing, press the “M” (Mode) button on the top of the K666 until “USB” appears on the screen, as shown below.To skip between audio tracks, simply press the>> and<< buttons on the top of the K666.
- Alternatively, to listen to music using a MicroSD (TF) memory card: Make sure your music is in MP3 format and saved on your MicroSD card. Then, plug in the Micro SD card into the slot marked “TF” on the back of the K666. If your music does not automatically start playing, press the”M” (Mode) button on the top ofthe K666 until “Sd” appears on the screen, as shown below.To skip between audio tracks, simply press the>> and<< buttons on the top of the K666.
- Alternatively, to listen to music from your computer by connecting the K666 as an external speaker: Plug the large end of the included USB cable into your computer. Plug the small end into the port marked “PC” on the back of the K666. Press the”M” (Mode) button on the top of the K666 until “PC” appears on the screen, as shown below.The K666 will then be automatically installed on your computer as a speaker.NOTE: You will need to adjust your computer’s sound settings to set the”USB Audio Device” as the default playback device. Then simply start playing music on your computer.
- To use the wireless microphones, simply hold down the 6/Fn buttons on the microphones. The microphones will tum on and automatically connect to the K666 speaker.(1) Adjusts the reverb level (2) Adds digital enhancement to’beautify” your singing (3)Decreases the music volume level (4)Increases the music volume level (5) Decreases the microphone volume level (6) Increases the microphone volume level (7) Long press: powers on and off the micrphone Short press: displays the microphone’s battery levelTO CHARGE YOUR WIRELESS MICROPHONES: the microphones have charging ports underneath them.Use the USB charging cable (included) to connect the microphone to any USB charger (not included).
 Then, simply start playing music from your audio source.
 To skip between audio tracks, simply press the>> and<< buttons on the top of the K666.
 To skip between audio tracks, simply press the>> and<< buttons on the top of the K666.
 The K666 will then be automatically installed on your computer as a speaker.NOTE: You will need to adjust your computer’s sound settings to set the”USB Audio Device” as the default playback device. Then simply start playing music on your computer.
 TO CHARGE YOUR WIRELESS MICROPHONES: the microphones have charging ports underneath them.Use the USB charging cable (included) to connect the microphone to any USB charger (not included).
Technical Specifications
- Main Speaker Unit– Bluetooth range: up to 1 0 Meters– Bluetooth version 4.0 with A2DP support-Automatically connects with last connected Bluetooth device– Built-in two 3-inch treble speakers+ one 4-inch bass speaker-Speaker impedance: 4n– Speaker output power: treble 15Wx2 + bass 25W– Audio frequency response: 35Hz ~ 20KHz– Power supply: 15V, 4A DC power adapter (110 – 240V, 50Hz/ 60Hz)– Built-in lithium battery: 2200mAhx6
- Wireless Microphones– 2.4GHz Wireless Band– Range: up to 10 Meters– Digital reverb processing+ dig ital audio enhancement-44.1 K 16bits high quality sampling (CD quality)– Audio frequency response: 20Hz – l 6KHz– Built-in lithium battery: 400mAh– Automatic shut off after periods of non-use
Read More About This Manual & Download PDF:
[xyz-ips snippet=”download-snippet”]