ROCHOBBY Katana Instruction Manual

Function

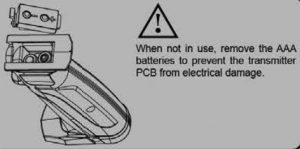
Install the Batteries
- Remove the battery compartment cover.
- Replace the used batteries with new AAA size batteries.
Please replace batteries when the power indicator blinks or the buzzer beeps.
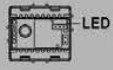
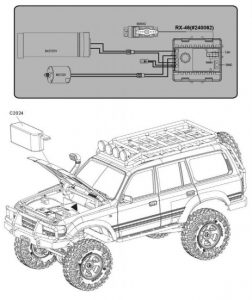
- Connect the receiver to the battery. Place bind plug into port labeled “BIND”. The LED will now flash rapidly.

- Turn on the transmitter.
- The LED on the receiver should now turn on and remain solid, indicating that the binding process is complete.


Channel Reverse:
- Steering: Turn the steering to its maximum deflection in either direction and hold; simultaneously press and hold the steering REV button and the steering channel will be reversed.
- Throttle: With the car inverted (Wheels not touching the ground), press the throttle trigger down to its maximum position and hold; simultaneously press and hold the throttle REV button and the steering channel will be reversed.
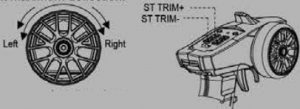
Control Rate:
- Steering: Turn the steering to its maximum deflection in either direction and hold; press the ST trim + or – buttons to increase or decrease the steering rate. If the steering is unresponsive, keep pressing the steering trim + button while holding the steering wheel at maximum deflection.Turn the steering to its maximum deflection in either direction and hold.
- Throttle: With the car inverted (wheels not touching the ground), press the throttle trigger down to its maximum position and hold; press the TH trim + or – buttons to increase or decrease the throttle rate. If the throttle is unresponsive, keep pressing the throttle trim + buttons while holding the throttle down at its maximum point.
 Turn the steering to its maximum deflection in either direction and hold.
 Press the throttle trigger down to its maximum position and holdNote: If your vehicle has steering but no throttle or vice versa, this setting is the likely culprit. The following instruction should allow the vehicle to function normally again.
- Throttle Trigger
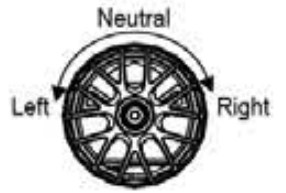
- Steering Wheel
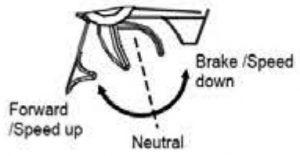
- Push the trigger forward to slow down or brake.
- Full the trigger backward to accelerate.
 Keep the transmitter and receiver 40cm apart when operating.
Throttle trim: If the vehicle inches forward or backwards without throttle input, adjust the trim to set the neutral throttle position.
Steering trim: If the vehicle veers left or right without any steering input, use the steering trim to adjust the steering servo until the vehicle tracks straight.
Operating Producer
Always turn the transmitter on before turning on the vehicle.Always disconnect the vehicle before turning off the transmitter.
![]() Caution:This product is intended for ages 14 + users under 18 years of age require parental supervision.
Caution:This product is intended for ages 14 + users under 18 years of age require parental supervision.
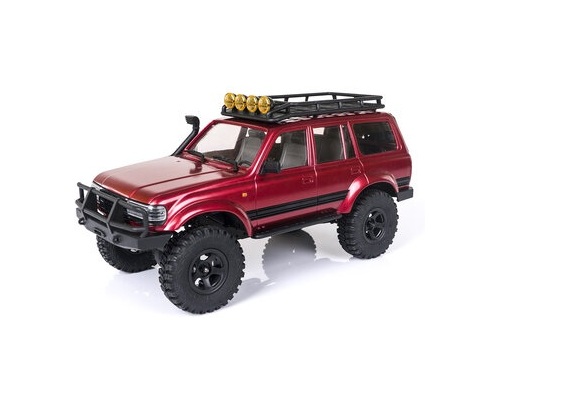
Introduction
Thank you for purchasing the ROC Hobby 1/18th Katana Engineered to be one of the most realistic, capable and dependable trucks in its class, the ROC Hobby 1/18th series is ready to tackle any terrain right out of the box.
This manual is written to assist you in properly operating, maintaining and repairing the vehicle. As many of the components used are unique to this truck, please retain this manual as a future reference.
Composed of precision-made components, the ROC Hobby 1/18th Katana is not a toy, thus it is not suited far children under 14 years of age. Minors should be accompanied by an adult when operating.
It is the owner’s responsibility to operate this product in a safe manner. ROC Hobby and its distributors are not responsible in any way for any and all bodily harm and/ or property damage that may result from the use of this product.
Warnings
- This vehicle is nat intended for those under 14 years of age without proper adult supervision. It is not a toy! Failure to operate or maintain this vehicle in a safe manner can result in bodily harm.
- Replace damaged components with original factory-parts. Pay special attention to the polarity of all vehicle wiring.
- Only use approved 2 cell lithium polymer Do not over-charge or over dis-charge the battery as doing so may cause the battery to become a fire hazard. If the battery should become hot during charging, discontinue charging immediately and disconnect the battery from the charger. Never leave the battery unattended while charging. If you are unsure of how to charge this battery, please seek the advice of experienced RC users. Never let children charge the battery without adult supervision.
- The motor will become hot during Allow 10-15 minutes between runs for the vehicle to cool dawn. Doing so will prolong the life of your vehicle.
- Use common sense when selecting the environment to operate your vehicle. Do not operate near power cables, cellular/radio towers, deep water or unstable terrain. The operator is solely responsible for their actions.
- The product is composed of precision electrical components. It is critical to keep the product away from moisture and other contaminants. If exposed to a humid environment, make sure the electronics are fully dried or using them again.
- Always check the radio range of the vehicle prior to operation in order to prevent radio loss or interface.
- Operate this product within your If the vehicle is dangerous to retrieve, it’s never worth the risk.
- Always turn on the transmitter before connecting the battery on the model. When turning off the model, always disconnect the battery first, and then turn off the model, always disconnect the battery first, and then turn off the transmitter. If this order is reversed, the model may become uncontrollable and cause serious damage.
- Never allow transmitter batteries to run low as it may cause lass of vehicle.
- Plastics on the vehicle are susceptible to damage or deformation due to extreme heat and cold Do not store the model near any source of heat such as oven or heater. Store the model indoors, in a climate-controlled. room temperature environment.
- Never shorten the receiver antenna; this may affect the transmitting range of the radio system.
Setting the Gear Mesh
The gear mesh is the clearance between the pinion and spur gears in your vehicle. If the motor or gearing components are replaced, check that the gears are not meshing too tightly as this may cause premature wear.
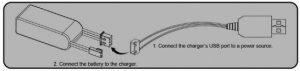
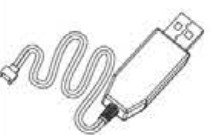
Charging the Battery
- Connect the charger to a USB port then connect the battery to the charger.
- When charging, the status LED is red, when charged. the status LED is green.
- Do not let the battery charge unattended.
- If the battery or charger is hot, disconnect the battery and charger immediately as this may be caused by an internal short-circuit
Lithium Polymer (Lipo) Battery Warning
- Never charge a lithium polymer battery with a charger designed for Nicd, NIMH, or any type of battery chemistry. Use ONLY charger designed for LiPo battery.
- Do not leave LiPo battery unattended during charging.
- Do not overcharge the battery.
- Always charge LiPo batteries on non-flammable heat- resistant surfaces.
- Always use a LiPo-safe bag or container while Do not allow LiPo cells to overheat at any time. Cells which reach greater than 140 Fahrenheit(60°C) will usually become damaged and will catch fire.
- Do not charge the LiPo pack while it is still in the Never charge or store battery packs in a vehicle.
- Do not discharge LiPo, doing so will damage the battery. Do not expose LiPo cell to water or mo sture at any time Do no store battery near open flame or heater.
- Do not assemble LiPo cells or pre-assembled packs together with other LiPo cells or packs.
- Always store LiPo battery in a secure location away from children.
- Always remove the LiPo battery if model is involved in any kind of crash.
- Carefully inspect the battery and connectors for even the smallest damage.
- CAUTION: Cells may become hot after Allow the pack to cool to room temperature prior to recharging.
- Do not allow the electrolyte to get into eyes or an Wash affected areas immediately if they come into contact with e electrolyte. Do not alter or modify connectors or wires of a LiPo battery pack.
- Always inspect the condition of the battery before charging and operating.
- Do not short circuit the LiPo battery.
- Do not have contact with a leaky/damaged battery directly.
- Do not charge battery out of recommended temperature range(0°C-45°C).
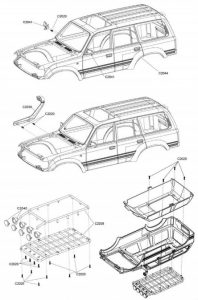

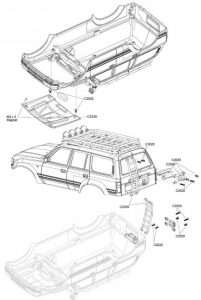
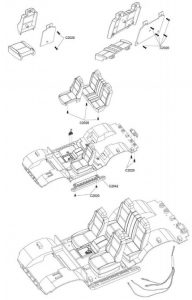

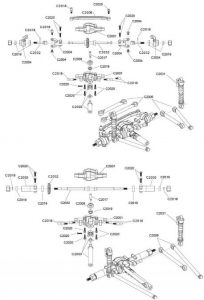
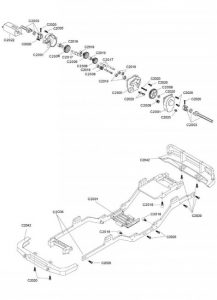
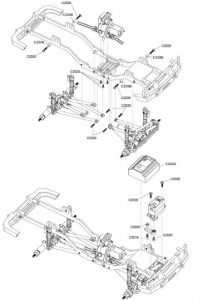
Spare Parts List
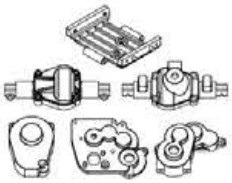
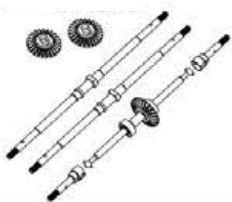
- 1:18 Transmission Gear Box & Axle SetPart No: C2001
- 1:18 Universal Main Drive Shaft & Rear Axle HubPart No: C2003
- 1:18 Front Steering Hub & SpindlePart No: C2004
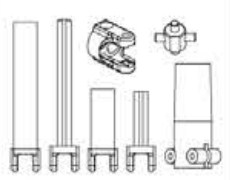
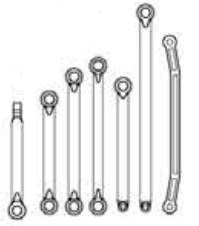
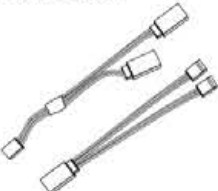
- 1:18 Complete Vehicle Link SetPart No: C2006
- 1:18 Complete Vehicle Gear SetPart No: C2008
- 1:18 Transmission Gear Shalft SetPart No: C2017
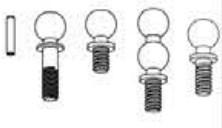
- Ball Stud & Pin SetPart No: C2018
- CR24 Complete Bushing SetPart No: C2019
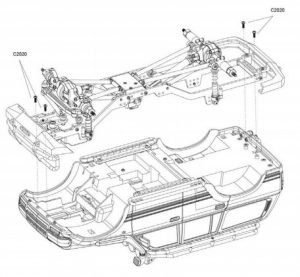
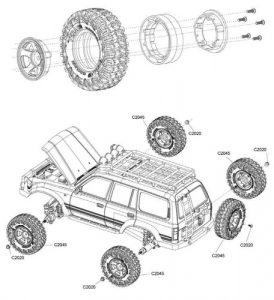
- CR24 Complete Vehicle Screw SetPart No: C2020
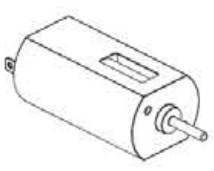
- 55T High Torque MotorPart No: C2022
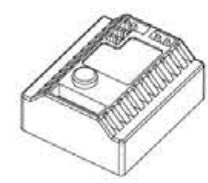
- 1:18 ESC/RX ComboPart No: C2023
- 7.4V 600MAH LipoPart No: C2024
- 8.4V USB ChargerPart No: C2030
- Katana Shocks SetPart No: C2031
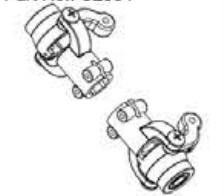
- Katana Front Transmission ShaftPart No: C2032
- Katana LED ControllerPart No: C2033
- 1:18 GriperPart No: C2034
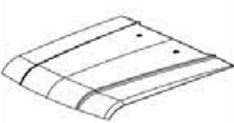
- Katana Hood (RED)Part No: C2035
- Katana Front and Rear Light Cup SetPart No: C2038
- Katana Hood Mount SetPart No: C2037
- Katana Rooftop RackPart No: C2038
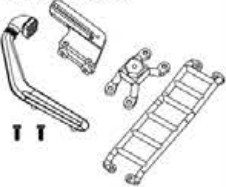
- Katana Ladder and spare Tire BracketPart No: C2039
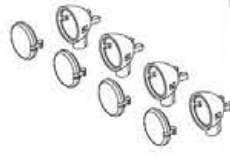
- Katana Spotlight Cup SetPart No: C2040
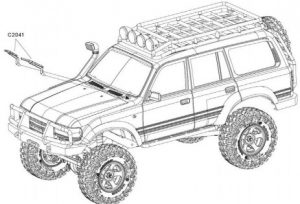
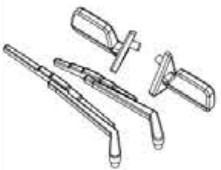
- Katana Rear view Mirror and WiperPart No: C2041
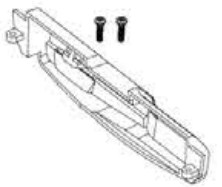
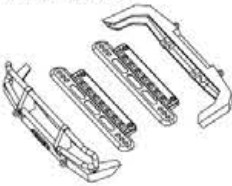
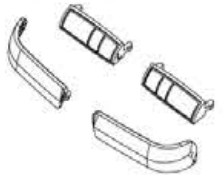
- Katana Bumper and Side PanelPart No: C2042
- Katana LensPart No: C2043
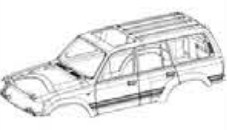
- Katana Body (Red)Part No: C2044
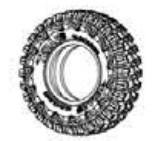
- Teraz Tire 19.2 x 13.5 x 5 x 56Part No: C2045
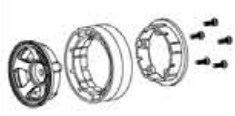
- Katana Wheels SetPart No: C2046


[xyz-ips snippet=”download-snippet”]