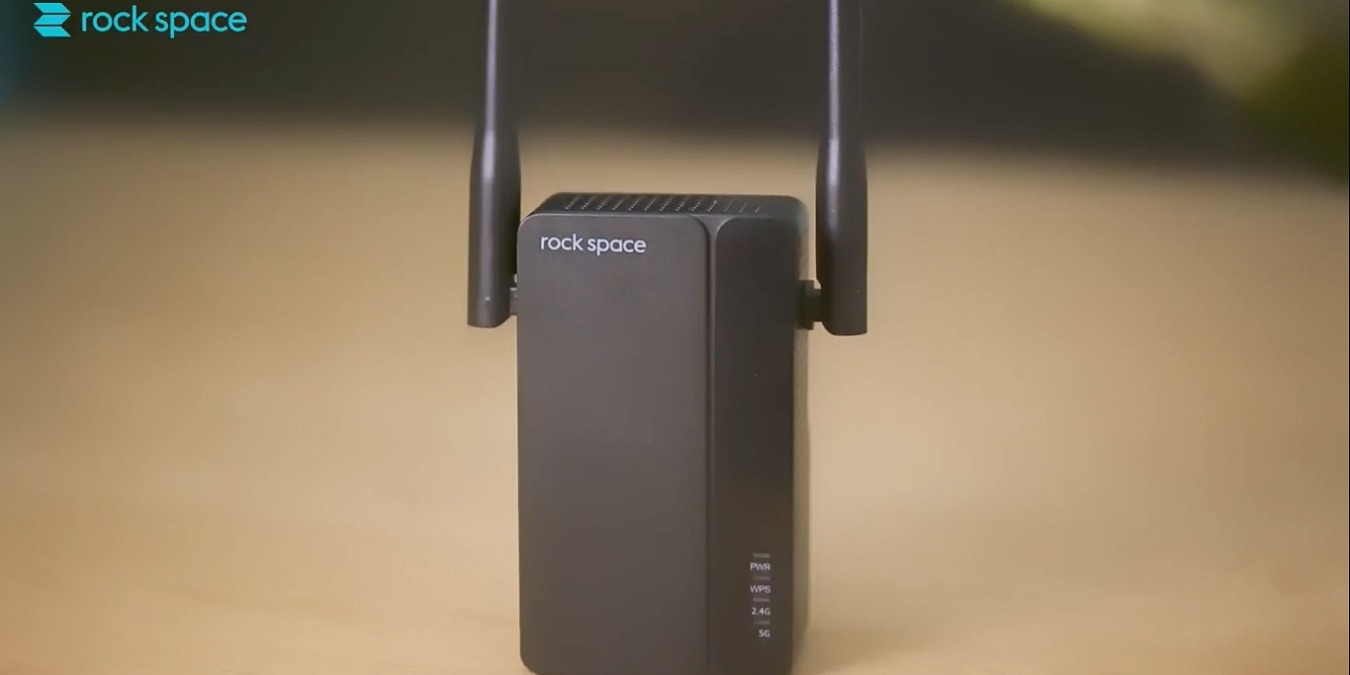
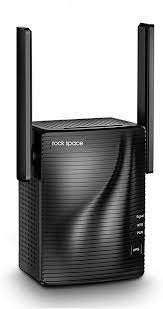
rock space RSD0618 AX1800 Dual Band Wi-Fi Range Extender
Meet Your Extender
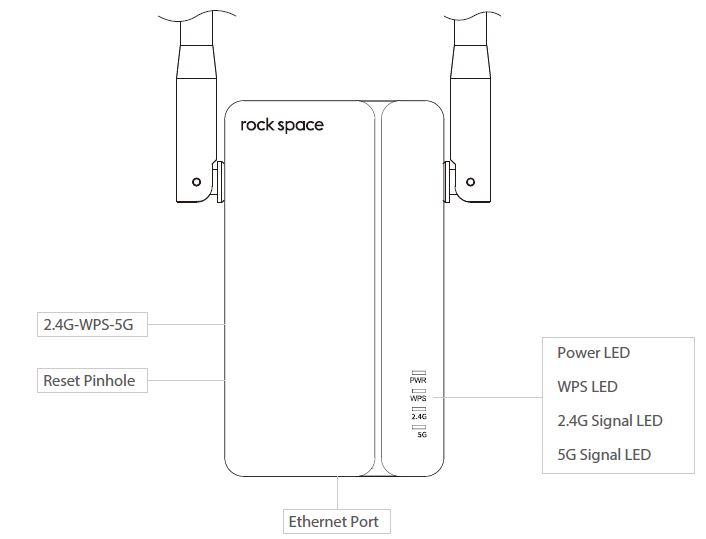
Signal LED: This LED indicates the connection between the extender and the router.Blue: Best connectionOrange: Poor connectionOFF: No connectionWPS LEDOn: Wi-Fi security is enabled (lasts for 2 min).OFF: WPS connection is not enabled.Power LEDSolid on: The extender is powered on.Slow Blinking: The extender is running normally.Fast Blinking: The extender is being reset, ready to reboot.OFF: The extender is powered OFF.
Install the Plug

- Line up the two notches on the extender with the notches on the detachable plug.
- Turn the plug clockwise until you hear a click.


Note: Press the button as shown in blue and turn the plug counterclockwise to remove it.
Power On
Plug the extender into a power outlet next to your router. Wait until its Power LED turns blue and blinks slowly.
Set Up
Method 1: Via a Web Browser
- Connect your computer or smartphone to the extender’s network “rockspace EXT ” . When you are using a computer, unplug the Ethernet cable if any. When you are using a mobile phone, ensure the mobile data is disabled.
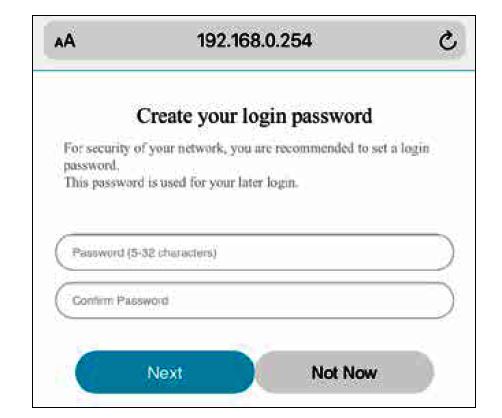
- The login window pops up automatically. If it doesn’t, launch a web browser and enter 192.168.0.254 manually to get started. Create a login password and record it down for later use.Note: If the login window does not appear, refer to FAQ > Q1.
- Select the Wi-Fi network (SSID) you want to extend.
- Enter the password of the Wi-Fi network you want to extend. Wait until the page shows you “Extended successfully”!


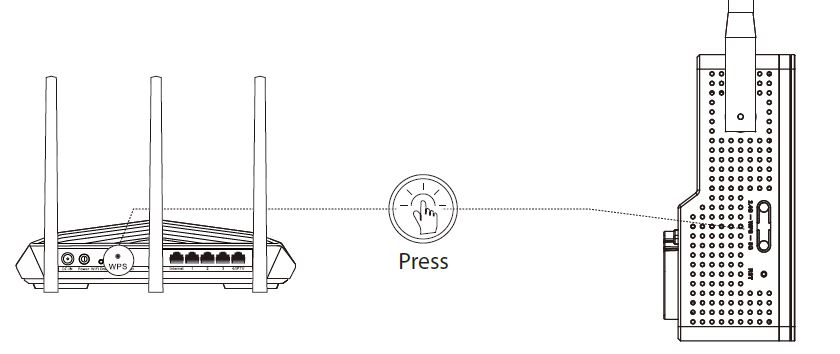
Method 2: Via the WPS Button
- Press the WPS button on your router.
- Within 2 minutes, press the WPS button (2.4G or 5G) on the extender. Refer to Q4 to learn the difference between 2.4GHz and 5GHz Wi-Fi.
- Wait until the Signal LED (2.4G or 5G, depending on the choice you made) on the extender turns blue, indicating successful connection. If the Signal LED does not turn blue, try Method 1.
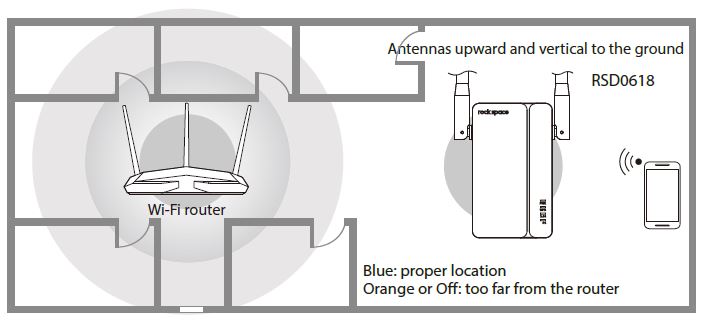
Relocate the Wi-Fi Range Extender
- Plug in the extender about halfway between your router and the Wi-Fi dead zone. The location you choose must be within the range of your router.
- Wait for about 2 minutes until the Signal LED turns blue. If it doesn’t, relocate the extender closer to the router to achieve better signal quality. If the light is always orange or off no matter how you relocate it, refer to FAQ > Q3 > A3, A4.
Wi-Fi Connection
Method 1: Wireless Devices
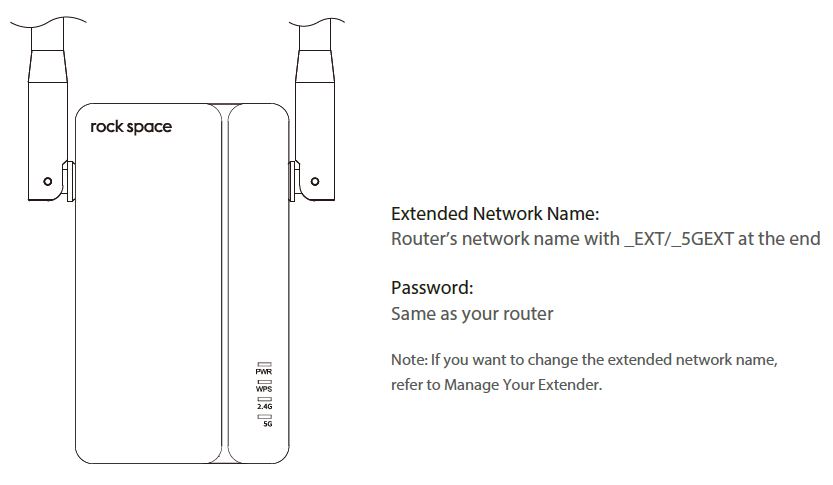
Find the network names with _EXT or _5GEXT added to the end of your existing network in your Wi-Fi network list. By default, the password of the extended network is the same as your existing Wi-Fi network.
Manage Your Extender
- Connect your computer or smart phone to the extender’s network.
- Launch a web browser and enter http://192.168.0.254 in the address bar and log in.Note: If the login window does not appear, refer to FAQ > Q1.
- Manage the extender as needed.
Method 2: Ethernet-Enabled Devices
You can connect a wired device to the extender using an Ethernet cable. The device can them access your existing network through the extender’s Wi-Fi connection.
FAQ
Q1: What should I do if I cannot access the extender’s web management page?
- Make sure your computer or smart phone has connected to the extender’s network ended with _EXT/_5GEXT, and not that of your router.
- If you are using a computer, make sure it is set to obtain an IP address and DNS server address automatically.
- Verify that http://192.168.0.254 is correctly entered in the web browser and press Enter. Use another web browser and try again.
- Reset the extender and try again. If you are still having problems, contact us for FREE 24/7 technical support.
Q2: How do I reset the extender?
With the extender powered on, use a pin to press the Reset Button for 8 seconds. The extender will reboot to its default factory settings. Reset pinhole is on the left of the extender (refer to picture shown in Meet Your Extender).
Q3: What should I do if the extender can not be connected successfully to the router?
A1. Check the Signal LED. Blue light refers to A2. Orange light refers to A3. No light refers to A4.A2. A blue light shows the extender has been connected to the router successfully and within the router’s Wi-Fi coverage. If the network is working normally on other devices by connecting to the router’s Wi-Fi, you might have overloaded the router by connecting too many devices. Disconnect some of the devices and ensure the Wi-Fi extender’s priority connection to the router. If your extender still fails to connect, refer to A5. A3. An orange light indicates the need to change your extender’s location until the light turns blue. The light is always orange no matter how you re-locate it? Make sure there are no metal objectives, closed doors or electromagnetic waves that could interfere with the signal transmission. If your extender still fails to connect, refer to A5. A4. If the Signal LED is off, it shows there is no connection between the extender and the router. Make sure you have not turned off or hidden the router’s Wi-Fi signal. Also make sure you have not initiated encryption mode, MAC filter, or Blacklist of the router. Don’t know how to manage your router? Reset your router to its factory settings or contact your network provider. If your extender still fails to connect, refer to A5. A5. Reset both your extender and router to clear their cache and then undertake all the connection and checking procedures again. ‘Reset and re-start’ is one of the ultimate diagnostic actions you can perform at any time. If you still have problem, contact us for FREE 24/7 technical support and describe your problem including router model no., extender model no. and the solutions you have tried and failed.
Q4: How to choose between 2.4 GHz and 5 GHz?
The primary differences between 2.4 GHz and 5 GHz are bandwidth (speed) and range (coverage). While 2.4 GHz is characterized by longer coverage but comparatively slower data transmission speeds, the 5 GHz offers less coverage but faster data transmission speeds. The 2.4 GHz band is more susceptible to interference as many electronic devices and applianceslike microwaves, baby monitors, garage door openers, etc. use it. So, the 5 GHz band is your best choice to reduce congestion and obtain higher speeds if your device doesn’t need to be moved around much and can be located near your extender. On the other hand, the 2.4 GHz frequency would be more suitable for a device that is moved around a lot throughout the day in a very large space.![]()
References
[xyz-ips snippet=”download-snippet”]