![]()

OWNER’S MANUALD4-70V White/D4-70V Black8- 70V/100V Commercial/Restaurant Wall Mount Speakers
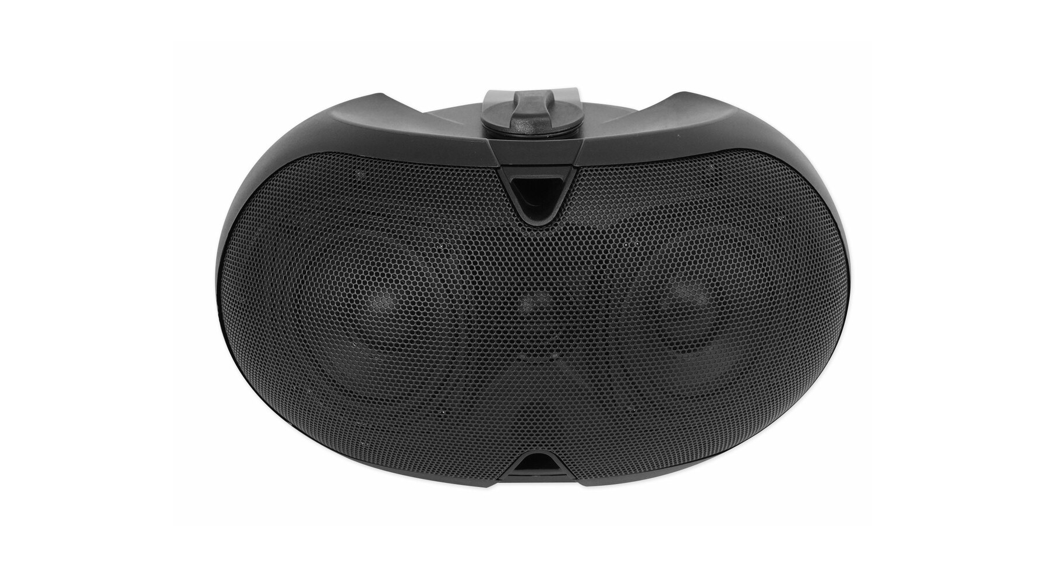
Rockville D4-70 70V/100V commercial wall mount speakers are a great choice for any restaurant, office, school, retail store, or other commercial application. These speakers will sound great for all your PA announcements and background music. Please read this guide carefully for proper use of your D4-70 speakers. Should you need assistance, please call our technical help line at 1-646-758-0144, Monday through Friday, 9am to 5pm EST.
Functions
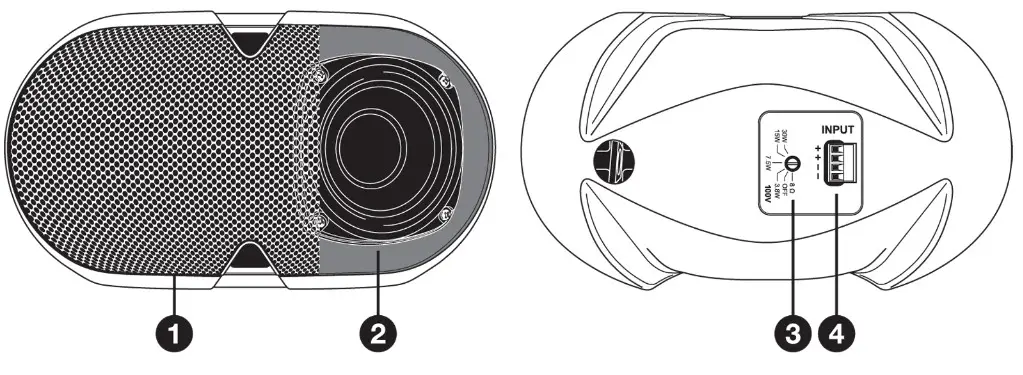
| 1. Metal grill | 3. 70V/100V/8-Ohm Tap Switch |
| 2. Full range speaker | 4. European-style terminal block (euroblock) |
Choosing the Appropriate Tap
70-volt systems are the number one choice for any application where you want to install multiple speakers. With 70 volt there are a lot of advantages over 8-ohm systems. One of the main advantages is the simplicity of the wiring as well as how easy it is to match up the speakers with an amplifier. You always want your 70-volt amp to have at least 15 or 20% more power than the combined watts your speakers are tapped at. For example, if you have a 180-watt/70-volt amplifier, you can install ten 70-volt speakers that are tapped at 15 watts each or twenty-five 70-volt speakers that are tapped at 5 watts each as long as they total close to 150 watts. When we say the word tap, what we are referring to is the selector knob on the back of the D4-70V speakers. It allows you to set how many watts the built-in transformer will allow the speaker to get from the amplifier. The taps set at 3.5, 7.5, 15, and 30 watts for 70-volt input and 7.5, 15, and 30 watts for 100-volt input. This range of taps allows for full customization of the sound for the space in which the speakers are installed. In a restaurant, for example, you can tap your dining room speakers at 15 watts, the speakers in the outside seating area at 30 watts, the ones in the hallway at 7.5 watts, and the speakers in the bathrooms at 3.5 watts. Another great feature of 70-volt speakers is that you can mix and match any type whether they are wall mounted speakers (such as these), ceiling speakers, subwoofers, etc.
Another benefit of 70-volt speaker set-ups is the ability to run very long lines of speaker wire without signal loss. And, the wiring is very simple. You just connect all the positive terminals of the speakers to the positive 70-volt terminal(s) of the amplifier. The negative terminals on the speaker get connected to the negative (COM) terminal(s) of the amp. You do not have to worry about impedance as the power is constant.
Please be sure to check out Rockville’s complete selection of high-quality, 70-volt speakers, amplifiers, and accessories.
Features/Specifications
- Weather resistant with rugged ABS cabinet is perfect for outdoor patio or indoor use
- Curved cabinet design for better sound coverage with an 80° x 120° dispersion
- Dual swivel mounting bracket supports vertical 90° swivel and horizontal 100° swivel
- Polypropylene Cone
- Rubber Surround
- (2) 4″Woofers
- 1″ Kapton Voice Coil
- 1″ Soft Silk Dome Tweeter
- 9.75 oz. Ferrite Magnets
- Detachable Euro-Block terminals with quick disconnect
- Built in 12dB/Octave crossover with dynamic speaker protector
- Crossover details: 2nd order/2500Hz rolloff
- 8 Ohm impedance when tap switch is in the off position
- Frequency Response: 70Hz — 20Kliz
- Sensitivity: 88dB @ 1w/1m
- Built in transformer supports 70V and 100V installations
- Dimensions in inches: 12.05″ x 6.6″x 8?
- Weight: 6.6 Lbs
ROCKVILLE D4 WALL INSTALLATION PROCESS
 Go to https://vimeo.com/560964339 or scan the OR code and watch a short video that shows you how to install and adjust the D4’s wall mount (a) ee bracket.Should you need further assistance, please call our technical helpline at 1-646-758-0144, Monday through Thursday, 9am to 10pm EST, and Fridays, 9:00am to 3pm EST.
 |
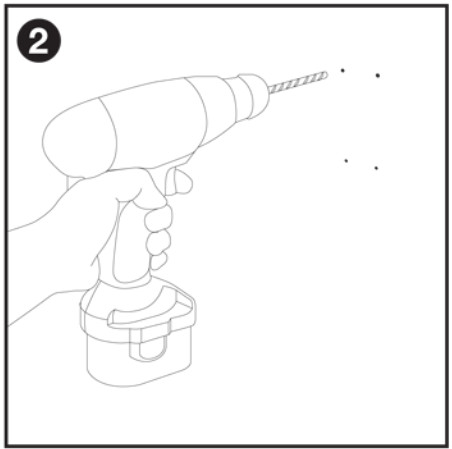 |
| Using the mounting bracket as a template, mark the mounting screw locations. | Drill pilot holes for the screws. Be sure to use the proper drill bit size for the anchors. We recommend using a 7/32” drill bit. |
 |
 |
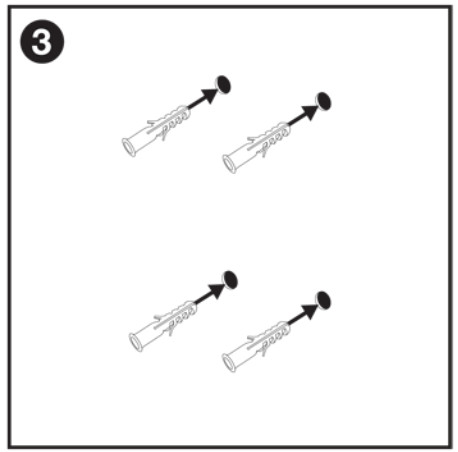
| Insert one of the included anchors into each hole. Do not mount the bracket yet. | Slide the mounting bracket into the speaker bracket as shown above. Make sure the stamped side of the bracket, as well as that of the mount, is facing down. |
 |
 |
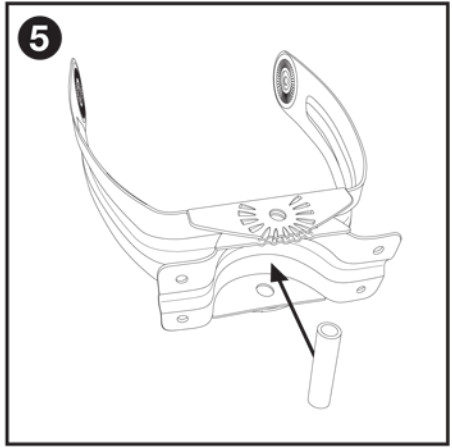
| Insert the hex bolt sleeve. | Align the bracket screw hole with that of the mount and the hex bolt sleeve. Slide the locking washer onto the hex bolt and insert the bolt assembly into the hole. |
 |
 |
| Attach the nut onto the hes bolt and hand tighten, but do not fully tighten. | Place the entire bracket assembly against the wall and align the mounting bracket’s screw holes with the anchors. Tilt the wall bracket down in order to expose the two top holes. Insert one screw in each hole. We recommend using a power tool in order to firmly drive the screws into the wall anchors. |
 |
 |
| Tilt the wall bracket up to expose the two bottom holes. Insert one screw in each hole and firmly drive the screws into the wall anchors. | Prior to mounting the speaker to the wall bracket, set the desired angle at which your speaker will be mounted. |
 |
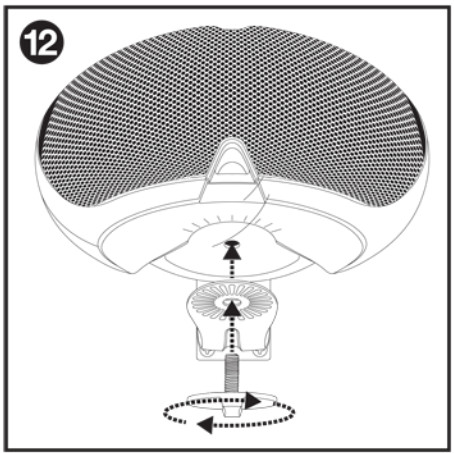 |
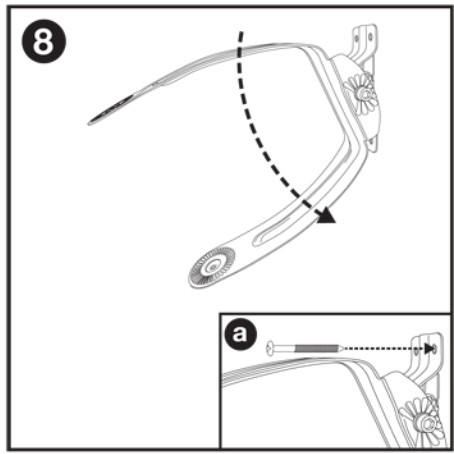
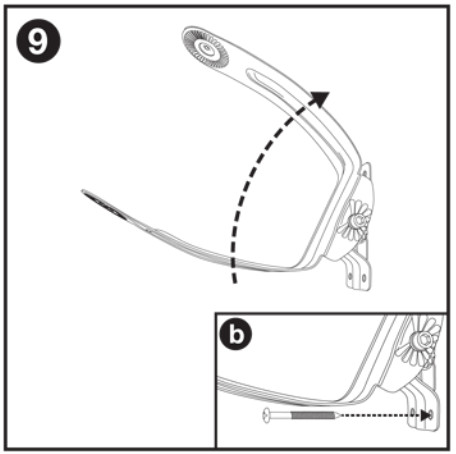
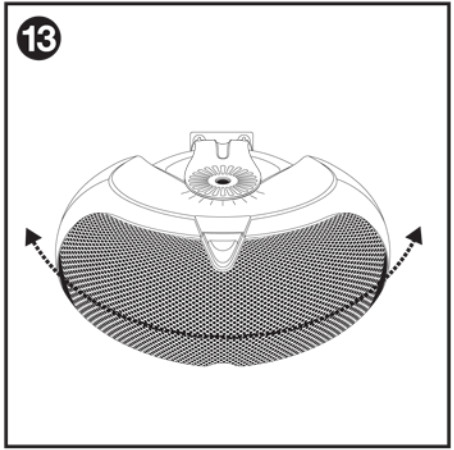
| To set the bracket position, hold the nut on the stamped side with a pair of pliers or an adjustable wrench and use the Allen wrench to tighten the hex bolt until it feels solid. Do not be afraid to overtighten. | Put the speaker in place and insert the bottom tightening screw first. Do not fully tighten. |
 |
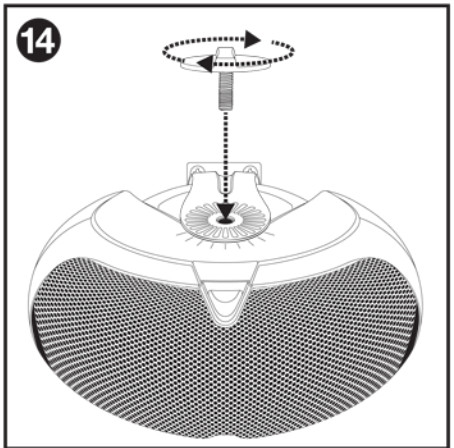 |
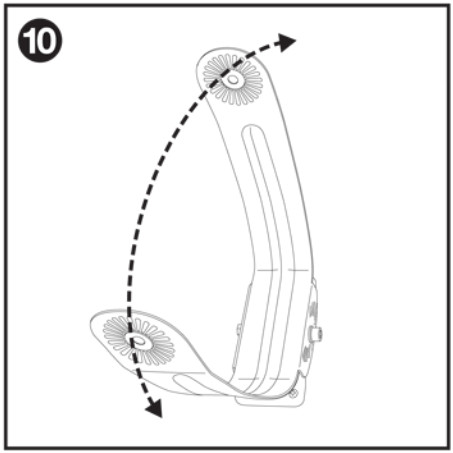
| Adjust the speaker to the desired angle. | Insert an fully tighten the top screw. Fully tighten the bottom screw. Now, enjoy the music! |
RockvilleAudio.com©2020 ROCKVILLE//Features and specifications are subject to change and or improvement without notice.
[xyz-ips snippet=”download-snippet”]