Rockville RCM Pro Microphone User Manual

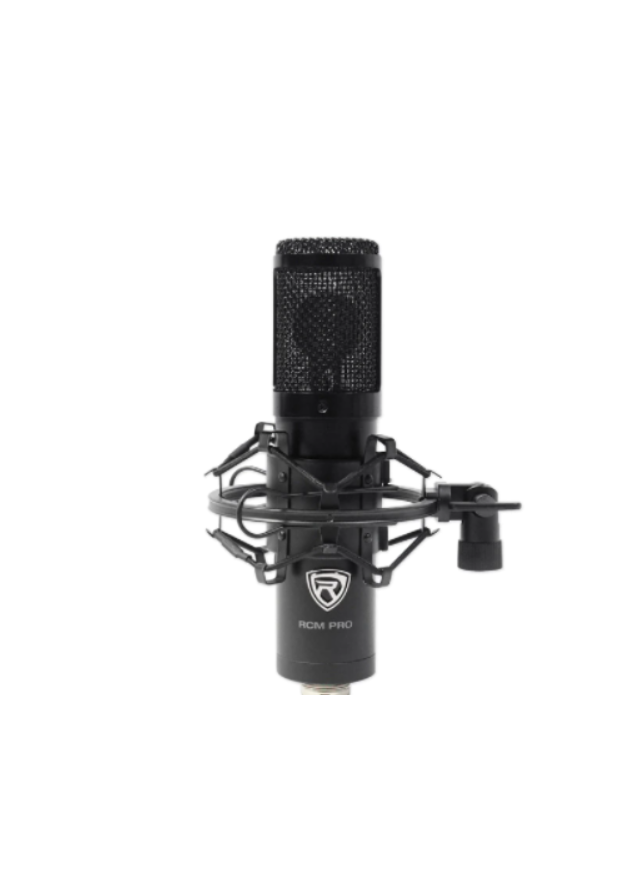
RCM PRO Professional Cardioid Condenser Microphone
The RCM PRO was designed for crystal clear capturing of vocals, acoustic and amplified instruments, as well as room reverb. The frequency pick up pattern makes this microphone amazing in studio applications. Its large frame and metal construction make the RCM PRO tough enough for live sound applications as well! The RCM PRO can be used in multiple ways. You can connect this to the phantom power of your mixer or you can connect it directly to your computer sound card. We include a cable to connect it to your mixer as well as a cable to connect the mic to your computer! This microphone is made of metal. It is very rugged and tough like you would expect from any Rockville product. This microphone has a large diaphragm which is what enables our mic to deliver a wider range of high and low frequencies than our competitors. Our frequency range is tested at 20HZ – 20KHZ! The mic sounds crystal clear with no distortion! The PCB (circuit board) uses surface mounted components which is the same method the expensive brands use. We use only top components that under-go extreme testing by our own audio engineers. The last thing you should know is that our product is very sturdy. When you are recording, you do not want even the slightest noises coming from your mic. Microphones consists of a casing inside of which there is a cartridge. You definitely do not want that cartridge moving around. We made sure to adjust our mechanism so as to ensure the cartridge is firmly in place and not creating any unwanted noises.
 Go to vimeo.com/390113816 or scan the QR code and watch a short video, which showsyou how to set this item up and how to use it.
ATTENTION: If you are using this microphone with the Rockville RDMS70 microphone stand, please refer to the other side of this sheet for instructions on how to attach theRCM-PRO’s shock mount.
FEATURES and SPECIFICATIONS
- Large high quality diaphragm for smooth, natural sound and low noise, plus better bass, mids, and highs on all recordings
- 25mm large cartridge means bigger pickup area to pick up incoming sound
- Very sensitive to incoming sounds
- The mic body is made of aluminum
- The mic head is made of steel
- One piece mic head
- Features two Samsung capacitors (22μ50V and 47μ16V)
- High spl handling and wide dynamic range
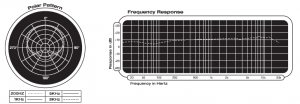
- Polar pattern: Internally polarized condenser cardioid design
- Element: Fixed-charge back plate, permanently polarized condenser
- Frequency Response: 20Hz – 20KHz
- Open Circuit Sensitivity: -30dB±2dB(0dB=1 V/Pa at1 kHZ)
- Output impedance: 200 ohms±30% (at 1 kHZ)
- Impedance: 100 ohms
- Equivalent Noise level: ~70 dB A (IEC581-5)
- Maximum Input Sound Level: 142dB SPL(THD~1 .0% at 1 kHZ)
- Electrical current: ~500Ua
- Noise: 20dB SPL
- Dynamic Range (typical): 124 dB, 1 kHz at Max SPL
- Signal- to- Noise Ratio: 7 4 dB, 1 kHz at 1 Pa
- PCB Layout: Surface mount
- Fixed Crossover Filter cutoff frequency: 50Hz—16 KHz
- Power requirements: 48V DC phantom power or computer soundcard (can connect to the phantom power channel ofyour mixer or can connect to your laptop or computer)
- Output Connector: 3-pin XLR
- Microphone weight: 0.74 lbs
- Microphone height: 7.44 inches
- Applications: Home-studio, Recording studios, broadcasting, podcasts, live performances, and more
INCLUDED
- RCM PRO Condenser Microphone
- 100% copper 10 foot 3.5mm jack to XLR cable to connect mic to your computer or iPad, etc
- 100% copper 10 foot XLR to XLR cable to connect to any mixer with phantom power
- Large plastic anti-wind filter
- Metal shock mount
- Owners manual
- Warranty card
It is important to position the microphone directly in line (on axis) with the person speaking/singing or instrument (or other sound source) to achieve the best frequency response. For use in speaking/singing applications, the ideal placement for the microphone is directly in front of the person speaking/singing. The same placement is optimal when micing an instrument such as an acoustic guitar, drums or piano. Experiment with different mic placements to find the best sound for your particular setup.
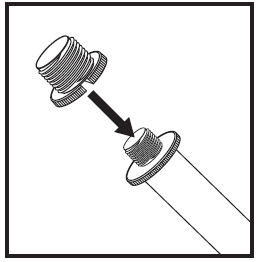
To use the RCM-PRO’s shock mount with the RDMS70 mic stand, you will need to remove the 3/Bth~ to 5/Bth~ adapter attached to the stand’s mic clip.
.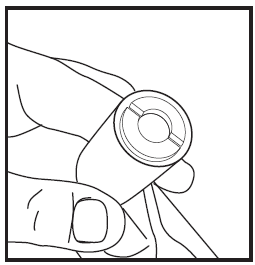
- Remove the microphone clip from the boom stand. Once removed, you will see the 3/Bth inch to 518th inch adapter screwed into the base of the microphone clip.
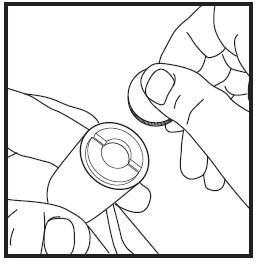
- Use a coin to unscrew the adapter and remove it from the mic clip.
- Screw the adapter back onto the 3/Bth inch threaded piece at the end of the boom arm, being careful to not overtighten. To attach the RCM-PRO’s shock mount to the boom arm,simply screw it onto the adapter. Make sure to not overtighten.
Should you need assistance, please call our technical help line at 1-646-758-0144, Monday through Thursday, 9am to 10pm, and Fridays, 9am to 3pm, EST.
Read More About This Manual & Download PDF:
[xyz-ips snippet=”download-snippet”]