![]()
OWNER’S MANUAL

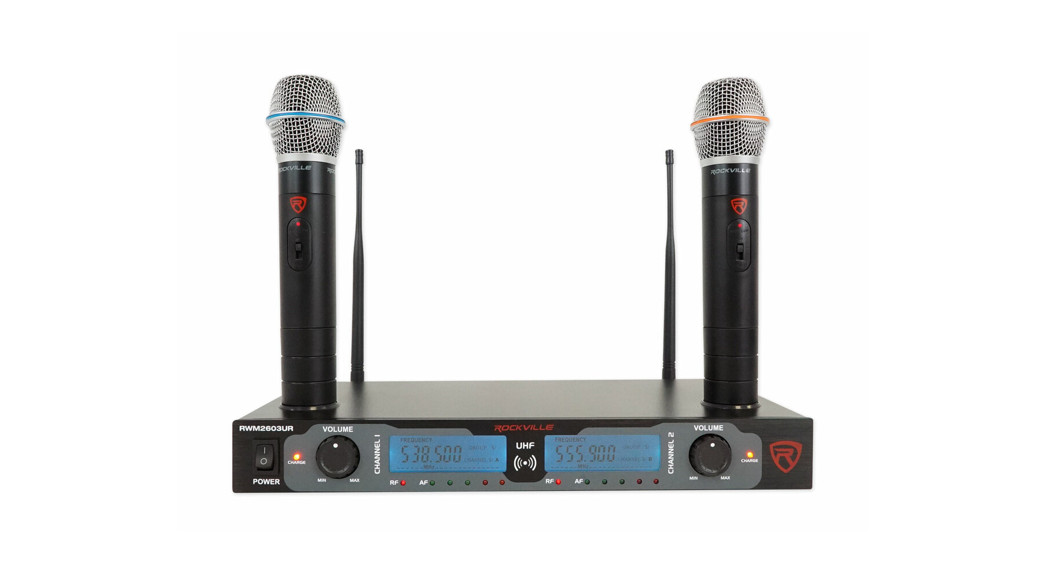
RWM26O3URHIGH PERFORMANCE HAND-HELD WIRELESS DUAL-MICROPHONE SYSTEM Who reads manuals? Instead, go to https://vimeo.com/454897844 or scan the QR code and watch a short video, which shows you how to set this item up and how to use it.
![]() Thank you for purchasing this Rockville high-performance hand-held wireless dual microphone system. Please read this owner’s manual carefully for proper use of your Rockville RWM2603UR Wireless Microphone System. Should you need technical assistance please call our technical helpline at 1-646-758-0144, Monday through Friday, 9am to 5pm EST.
Thank you for purchasing this Rockville high-performance hand-held wireless dual microphone system. Please read this owner’s manual carefully for proper use of your Rockville RWM2603UR Wireless Microphone System. Should you need technical assistance please call our technical helpline at 1-646-758-0144, Monday through Friday, 9am to 5pm EST.
Specs
FEATURES
- High-performance wireless hand held rechargeable microphone system
- Built in charging dock for microphones
- LED microphone charging LED indicator
- Includes RWM2603UR transmitter with (2) rechargeable hand held,
- High sensitivity, unidirectional, wireless cardioid microphones with re-chargeable batteries
- Professional rack mount design with LCD displays
- Featuring a dual filter design to limit feedback and interference
- Individual microphone volume control
- Comfortable ergonomic composite microphone construction
- Low power consumption for longer battery life
- AF/RF LED Indicators
- Ultra signal stability minimizes audio artifacts
- OSA technology: Locates, prioritizes, and selects the clearest frequency for the best sound quality
SPECIFICATIONS
Operating Range*: 200″-260″(indoor), 160″-220″(outdoor)Frequency Range: 500MHz-599MHzFrequency Stability: ±0.005%Modulation Mode: UHFFrequency Response: 50Hz-15KHz(±3 dB)Dynamic Range: 110dBS/N: 90dBT.H.D: < 0.1%(1KHz)Audio Output Jack: (Ch1/Ch2) XLR – 1/4″ balanced + 1/4″ mixedPower Voltage: AC110V-240V 50/60HzRechargeable Battery: 1.2V (can take up to 24 hours to fully recharge)Operating Temperature: 23°F-104°FMic Battery Operating Time: up to 15 hours*Operating range is subject to environmental conditions. Results may vary.
Receiver (Front)
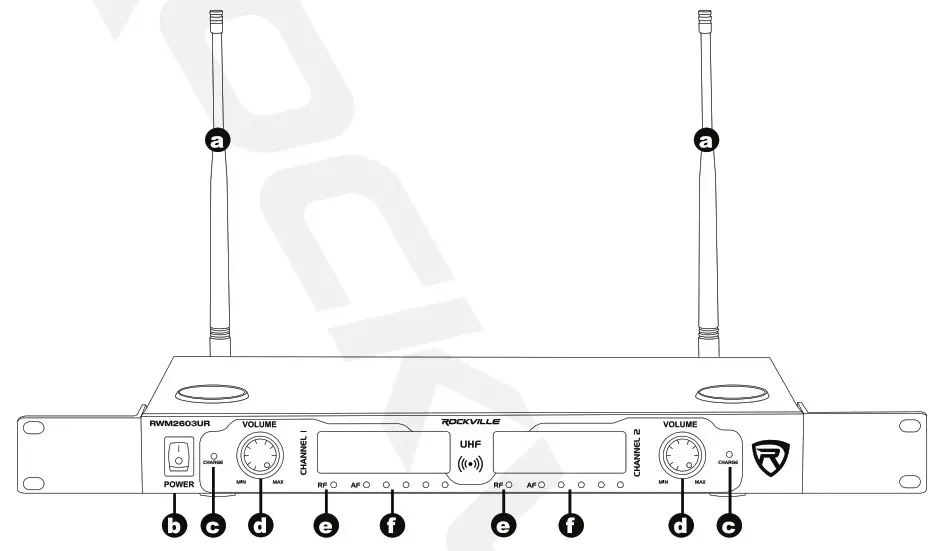
| a. Antenna | c. LED charge indicator | e. Radio frequency LED indicator |
| b. Power ON/OFF switch | d. Volume control knob | f. Audio frequency level LED indicator |
Receiver (Back)
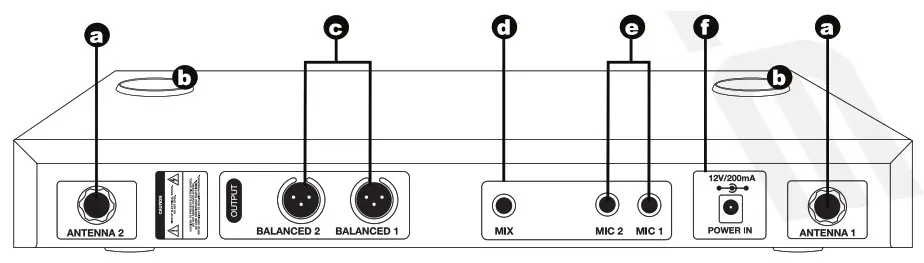
| a. Antenna port | c. Individual channel outputs | e. Individual mic outputs |
| b. Charging port | d. 2 channel mix output | f. Power input |
Microphones

| a. Microphone windscreen | c. Power ON/OFF switch |
| b. Low battery indicator | d. Battery compartment |
Receiver LCD Display

| a. Channel frequency display | b. Group number display | c. Channel number display |
Remember to remove protective plastic film from the LCD display
Setup and Operation
- The receiver should be placed in an area that is stable and least likely to shake the unit.
- The receiver should be at least 3’ off the ground for optimal transmission.
- Connect the antenna, balanced cable AF line, and power supply provided.
- The antenna should extend vertically.
- Switch on the receiver.
- While the receiver is in stand-by, switch on the microphones.
- Adjust volume as necessary.
- Place the microphone base firmly on the charging port to recharge.
 Tip: To minimize feedback avoid operating the microphones in close proximity of or in front of speakers.
Microphone Operation
Standby/ Mute ModePut the hand held microphone switch in the MIDDLE position.The microphone power LED indicator will be on.Now the mic is on standby and mute mode.
Active ModePut hand held microphone switch in the ON position.The microphone power led indicator will be on.Now the microphone is in active mode and is ready for use.The receiver RF LED indicator will be on.
Battery StatusAs the microphone battery power diminishes, the power LED indicator will gradually become darker until it finally turns off.At this point you need to recharge or change the batteries.
Charging the MicrophonesTurn off the power before charging.Place the microphone in the charging port as shown.The initial charge will take longer than subsequent recharges. Please allow it to charge overnight.The charge LED indicator on the receiver will turn off when the microphone is fully charged.
Troubleshooting
| Problem | Solution |
| No sound or faint sound | • Verify all sound system connections or adjust channel volume as needed.• Verify that the receiver is connected to the mixer/ amplifier. |
| • Turn on transmitter.• Make sure the batteries are installed correctly.• Charge or change battery. | |
| • Make sure AC adapter is securely plugged into electrical outlet.• Make sure receiver is powered on. | |
| Audio artifacts or dropouts | • Change receiver and transmitter to a different group and/or channel.• Identify nearby sources of interference (cell phones, Wi-Fi access points, signal processor, etc…) and shutdown or remove source.• Charge or change transmitter battery.• System must be set up within recommended range and receiver kept away from metallic surfaces.• Transmitter must be used in line of sight from receiver for optimal sound. |
| Distortion | Reduce transmitter channel volume. |
| Sound level variations when switching to different sources | Adjust transmitter volume as necessary. |
| Transmitter information does not appear on the Receiver LCD | Transmitter is off. |
FEDERAL COMMUNICATIONS COMMISSION COMPLIANCE INFORMATION
 report this ad
Responsible party name: RockvilleAddress: 600 Bayview Ave,Entrance A,Inwood, NY 11096
Hereby declares that the product Rockville RWM2603UR wireless microphone system complies with FCC rules as mentioned in the following paragraph:
This device complies with Part 15 of the FCC rules. Operation is subject to the following two conditions: (1) this device may not cause harmful interference, and (2) this device must accept any interference received, including interference that may cause undesired operation.
Note: This equipment has been tested and found to comply with the limits for a Class B digital device, pursuant to Part 15 of the FCC rules. These limits are designed to provide reasonable protection against harmful interference in a residential installation. This equipment generates, uses and can radiate radio frequency energy and, if not installed and used in accordance with the instructions, may cause harmful interference to radio communications. However, there is no guarantee that interference will not occur in a particular installation. If this equipment does cause harmful interference to radio or television reception, which can be determined by tuming theequipment off and on, the user is encouraged to try to correct the interference by one or more of the following measures:
- Reorient or relocate the receiving antenna.
- Increase the separation between the equipment and receiver.
- Connect the equipment into an outlet on a circuit different from that to which the receiver is connected.
- Consult the dealer or an experienced radio/TV technician for help.
Visit us at:RockvilleAudio.comDue to constant improvements, these specifications are subject to change without notice.Copyright 2020
[xyz-ips snippet=”download-snippet”]