RoHS Ceiling-fan-1001

Safety Rules
Please read all safety instructions prior to installing your ceiling fan and save this document for future reference. If you are in doubt with any of the information provided or difficulty installing your fan, please the email customer service.
- Before you begin installing the fan, shut power off the circuit breaker for the fuse box.
- Read all instructions and safety information before installing your new fan.
- All wiring must be in accordance with national and local electrical codes. ANSI/NFPA 70. If you are unfamiliar with wiring, use a qualified electrician.
- Do not bend the blades while installing, balancing the blades, or cleaning the fan.
- Do not insert foreign objects in between rotating fan blades.
- Make sure the installation site you choose allows the fan blades to rotate without any obstructions.
- To Reduce the Risk of Electric Shock, Disconnect the electrical supply circuit before installing the light kit.
- After you install the fan, make sure that all mounting components are secured to prevent the fan from falling.
- Turn the fan off and wait for the blades to stop completely before performing any maintenance or cleaning.
Installation
Before Installation
- Carefully open the package. Remove items from the box. Place the motor body on carpet or foam to avoid damage to the finish. Do not discard fan cartons or foam inserts in case of return or repair.
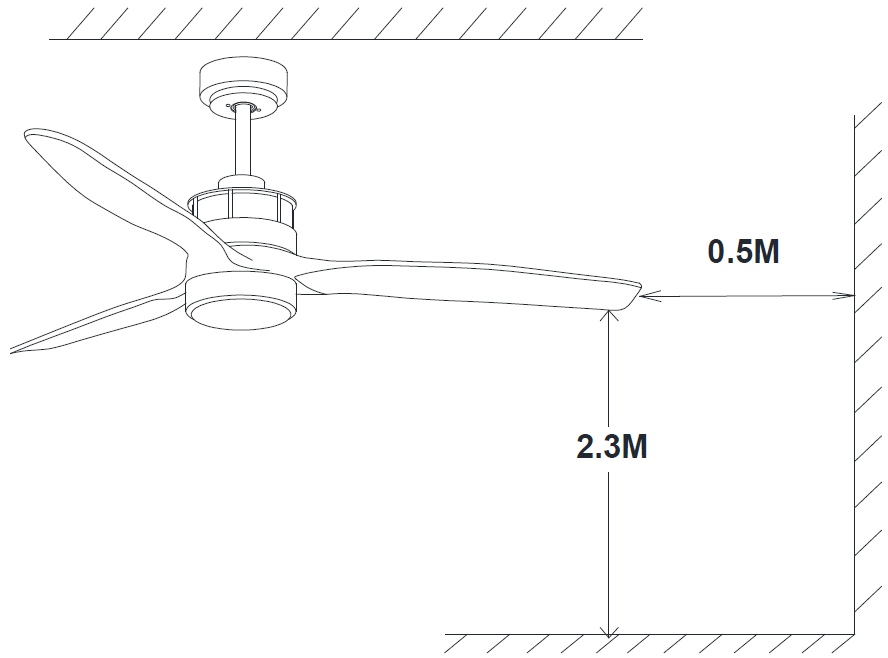
- To prevent injury and damage, ensure that the hanging location allows the blades a clearance and of 7.6ft.(2.3m) and 20in(50cm) from any wall or obstruction.
Tools Needed

You may need the tools below:
- Screwdrivers
- Wrench
- Ladder
- Wire Strippers
- Insulation Tape
- Power drill
Parts Inventory
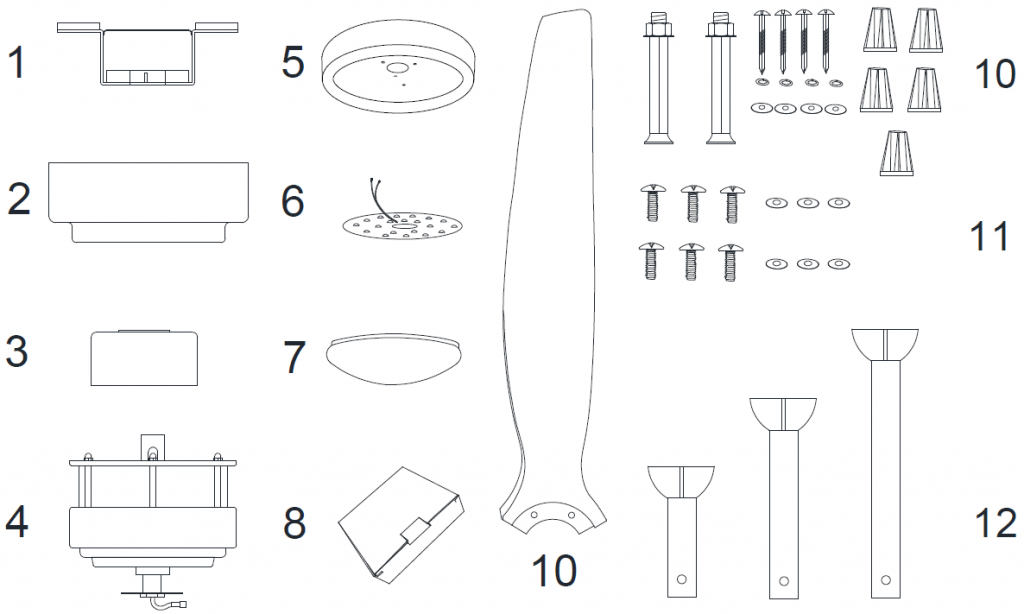
- Mounting Bracket
- Top Canopy
- Downrod Canopy
- Motor Body
- Light Mounting Box
- LED Board
- Light Cover
- Remote Control Kit
- Blades
- Mounting Screws Kit
- Blades Screws
- Downrods (5”/10”/20”)
Secure Bracket
Secure to Outlet Box
If there isn’t an existing outlet box, then install one using the following instructions:
- Disconnect the power by removing the fuses or turning off the circuit breakers.
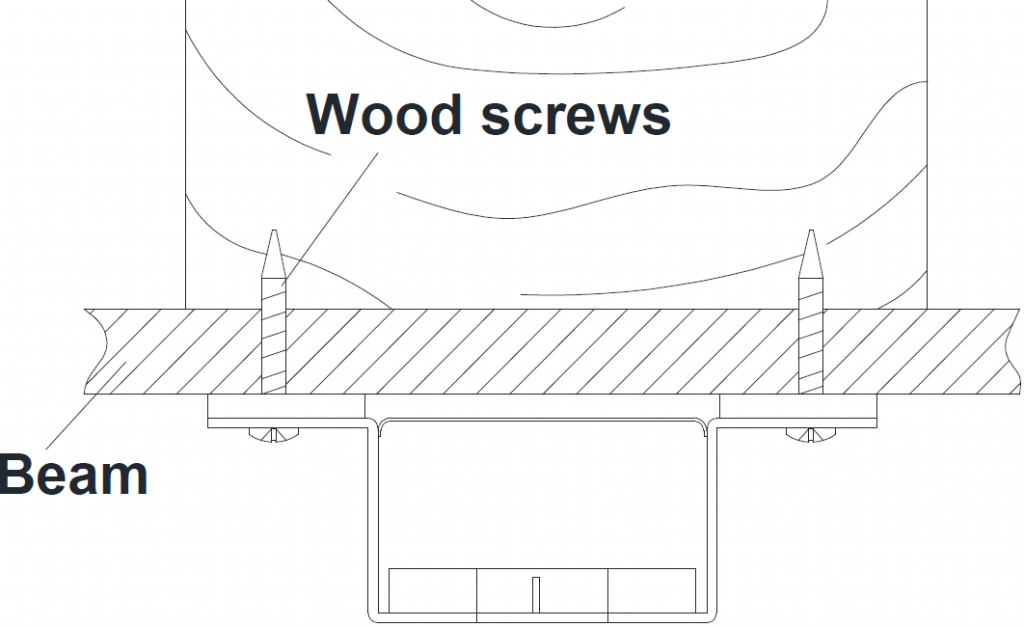
- Secure the outlet box (A) (not included) directly to the building structure. Use appropriate fasteners and materials (not included). The outlet box and its bracing must be able to fully support the weight of the moving fan (at least 35 lbs).
- Figures show three different ways to mount the outlet box (A) (not included).

Using the existing screws provided with your outlet box to secure the mounting bracket to the outlet box tightly (a loose mounting will the fan to wobble).
Secure Bracket
Secure to Ceiling
- Attach the mounting bracket to the ceiling. There are two types of screws included in the pack.
- For Wooden CeilingDrilling a pilot hole in your ceiling with the power drills first, then secure the plate with wood screws

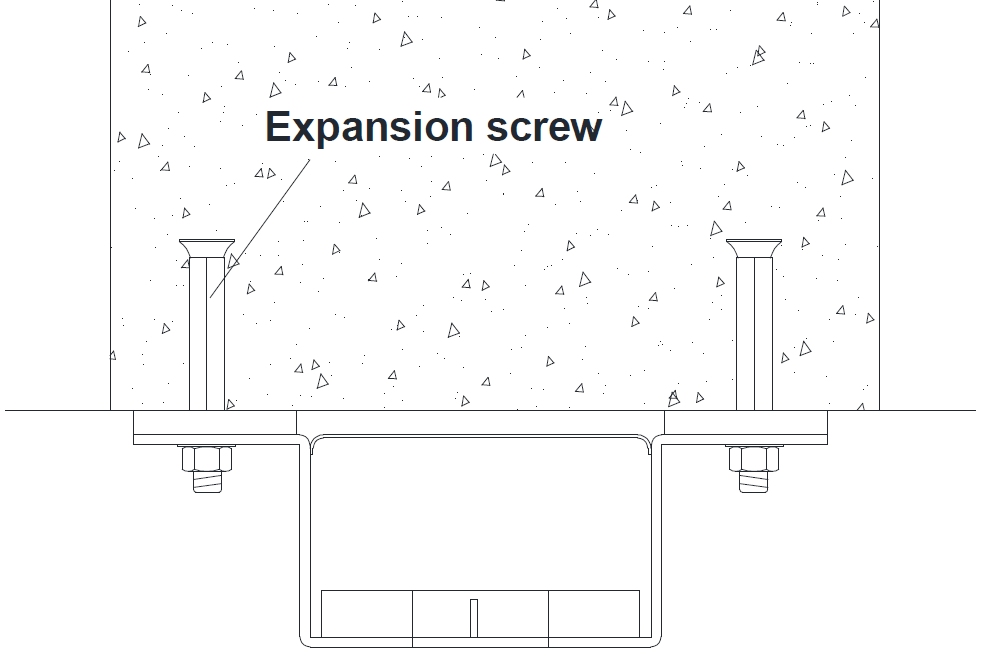
- For Concrete CeilingDrill a hole in the base material with a hammer drill and a correctly sized carbide drill bit for the anchor and clean out the hole of all debris. Knock expansion screw into the hole and then tighten it with a wrench
Assembly of Downrod

Choose the proper downrod
- Put the downrod through the top canopy and the downrod canopy
- Pass the wire from the motor body through the downrod
- Secure the downrod and motor body with downrod setscrews and celvis pin
Mount Fan to Bracket
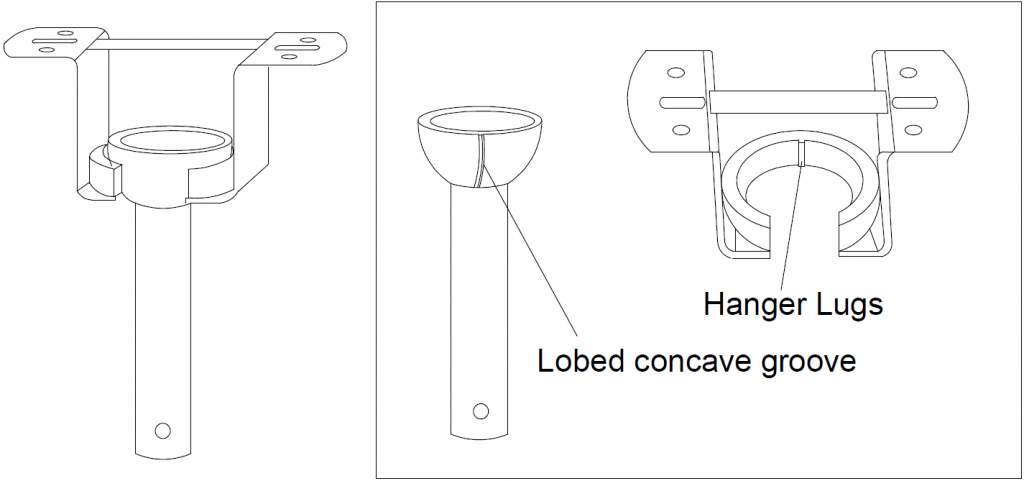
Lift the fan assembly onto the mounting bracket. Ensure the registration slot of the hanger ball ispositioned on the stopper of the mounting bracket toprevent the fan from rotating when in operation.Tips:Seek the help of another person to hold the stepladder and hang the fan body for you.
Wiring

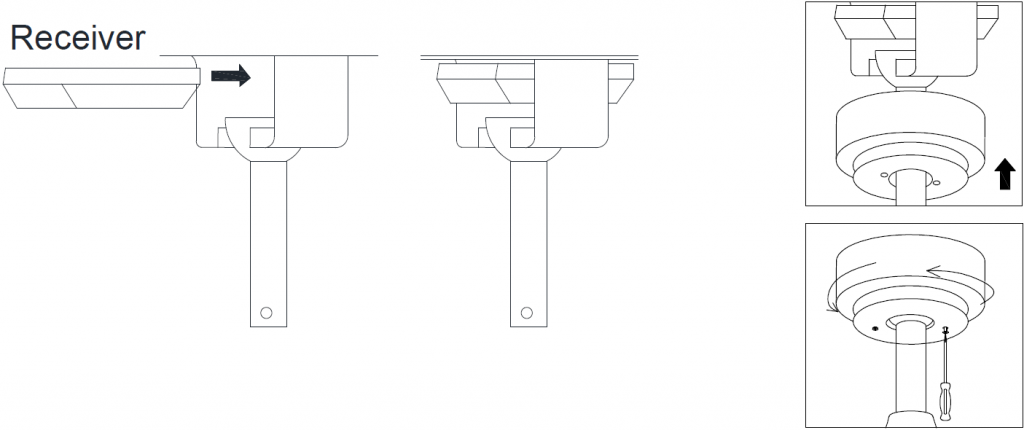
Insert the receiver into the top of the fan body and make wire connections according to wire colors, labels, and diagram above.
* Wrap each wire connector separately with electrical tape as an extra safety measure.* After wiring finished, leave the receiver in the bracket and secure it the the electrical tape then secure the canopy to the bracket
Blade Installation

Insert a blade screw from the package through the blade hole and position it under the motor so that the screw is aligned with the “center” hole position of any group of two screw holes.Using the screwdriver to secure the blade to the motor, but do not over tighten. Repeat for the rest blades. Once all blades screws are in place, gently tighten all screws with the screwdriver.
Installation of Light Kit
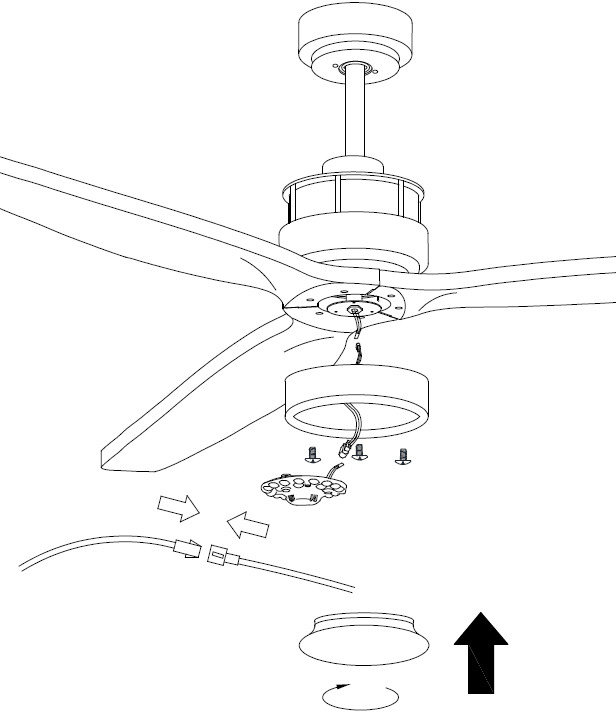
- Remove the screws on the motor plate first.
- Align the hole on the light mounting box to the motor plate.
- Make the light plug on from the motor come through the central hole on the box.
- Insert the screws and tighten them to secure the motor housing
- Connect the plugs and Adopt the LED board to the mounting box
- Align the light cover to the box and rotate it to fasten
Maintenance
Here are some suggestions to help maintain your fan
- Because of the fan’s natural movement, some connections may become loose. Check the support connections, brackets, and blade attachment twice a year. Make sure they are secure.
- Clean your fan periodically to help maintain its new appearance over the year. Do not use water when cleaning. This could damage the motor, or possibly cause electrical shock.
- Use only a soft brush or lint-free cloth to avoid scratching the finish. Cleaning products may damage the finished
- There is no need to oil your fan. The motor has permanently lubricated bearings.
- If installed in a coastal, humid environment, regular surface cleaning may be necessary to avoid deterioration or oxidizing effects of salt or other corrosive elements. A Damp Location rating is not an assurance of finish durability. Preventative measures should be taken depending on the environmental exposures your fan will undergo to preserve and protect the finish quality and appearance of your fan.
WARNINGBefore servicing or cleaning your fan, switch power off at the service panel and lock the service disconnecting means to prevent power from being switched on accidentally.
Troubleshooting
Please read all installation instructions carefully. After reviewing the following tips, if you are unable to solve a problem, please contact customer service for additional assistance.
WARNING: Before servicing or cleaning your fan, switch power off at the service panel and lock the service disconnecting means to prevent power from being switched on accidentally.
Fan not responding to remote control
- Check that all wire connections are secure and made as instructed.
- Verify that power is on and reaching the receiver by a voltmeter.
- Verify that controller batteries are installed with proper polarity as indicated inside the battery cover
Light does not work
- Check wire connections at ceiling and receiver.
- Confirm that LED wire leads and terminal block are properly connected to the LED board.
Fan makes repetitive ticking noise
- Check for obstructions in the rotor path.
- Make sure mounting hardware at the ceiling is secure.
- Make sure all other hardware and blade attachments are tight.
- Give fan adequate “Break in Period” of several hours to several days then repeat steps above.
Fan makes humming noise
- Be sure you are using the control set supplied with your fan
- Make sure all fittings are firmly secured. Loose parts will often cause vibrational noise or humming. Removal and re-attachment can sometimes remedy such resonant vibrational noise.
Fan woobles
- Make sure the mounting plate and hardware at the ceiling are secure and firmly fastened. If necessary, use the wood screws provided to further secure the outlet box to the joist.
- Carefully lower motor housing and verify that the mounting plate is secure to the outlet box, screws are tight.
![]()
[xyz-ips snippet=”download-snippet”]