![]()
![]()

Owner’s Manual
Before using this unit, carefully read “USING THE UNIT SAFELY” and “IMPORTANT NOTES” (the leaflet “USING THE UNIT SAFELY”). After reading, keepthe document(s) where it will be available for immediate reference. © 2020 Roland Corporation
Panel Descriptions
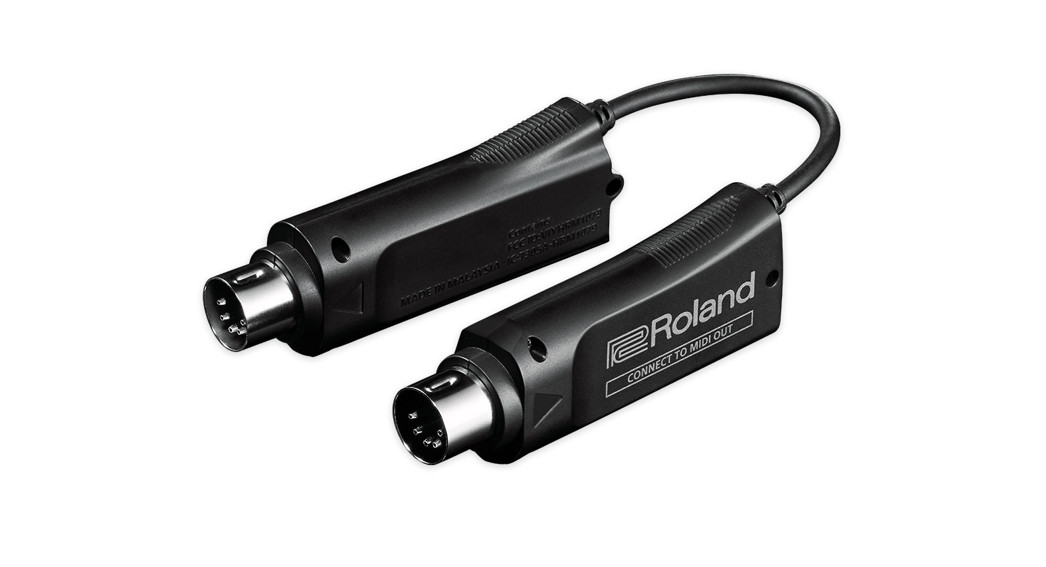
WM-1
- CONNECT TO MIDI OUT jackConnect this to your MIDI device’s MIDI OUT connector.
- CONNECT TO MIDI IN jackConnect this to your MIDI device’s MIDI IN connector.
- [MODE] switch (MODE indicator)Switches the WM-1’s mode.The color of the indicator changes depending on the mode.
 “About the Two Communication Modes” (p. 5)At the time of purchase, the WM-1 is set to “STANDARD (Host) mode .”
 - BatteryInstall one AAA battery.
Installing the Batteries

- Remove the battery cover.
- Taking care to observe the correct orientation of the batteries, insert the batteries into the battery case.
- Close the battery cover.* If you handle batteries improperly, you risk an explosion and fluid leakage. Make sure that you carefully observe all of the items related to batteries that are listed in “USING THE UNIT SAFELY” and“IMPORTANT NOTES” (leaflet “USING THE UNIT SAFELY”).
Battery replacement indicator*When the battery is nearly worn out, the MODE indicator blinks red. Replace the new battery as soon as possible.
Turning the WM-1 On
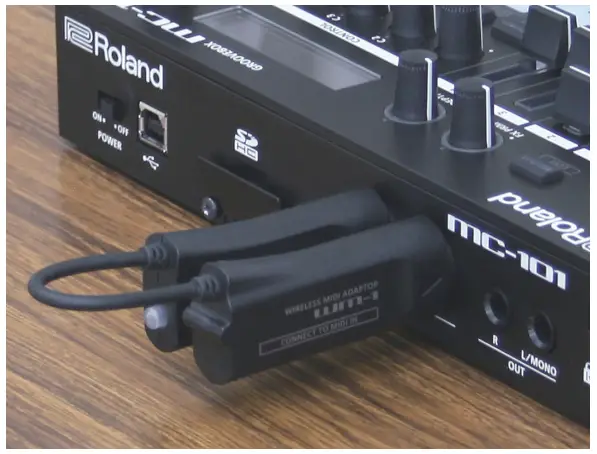
- Connect the WM-1 to your MIDI device, and power on the connected device.The power of the WM-1 turns on in tandem with the MIDI device.
Turning Off the Power
- Turn off the power of the connected MIDI device.The power of the WM-1 turns off in tandem with the MIDI device.
WM-1D

- 1USB portConnect this to your computer’s USB port.
- [MODE] switchSwitches the mode of the WM-1D. “About the Two Communication Modes” (p. 5)At the time of purchase, the WM-1D is set to “STANDARD(Remote) mode” (p. 8).
- MODE indicatorThe color of the indicator changes depending on the mode. “About the Two Communication Modes” (p. 5)

Turning the WM-1D On
- Connect the WM-1D to your computer.The unit powers-on is detected as a general-purpose USB MIDI device, and the driver is installed automatically.
Turning Off the Power
- Disconnect the WM-1D from your computer.
Overview of the WM-1/WM-1D
The WM-1/WM-1D transmits and receives MIDI messages wirelessly. Using the WM-1/WM-1D allows wireless MIDI communication with your MIDI device, computer, tablet, or smartphone. By using the WM-1D with a Windows computer that does not support BLE MIDI, you can also use a wireless MIDI connection on a Windows system.
What is BLE MIDI?This is the technology that uses Bluetooth LE to transmit and receive MIDI messages wirelessly. It is officially known as “MIDI over Bluetooth Low Energy .”
WM-1 (Connected to MIDI Connector)The WM-1 is a wireless MIDI adaptor. It is used by connecting it to a device that is equipped with MIDI connectors.
- Direct connection between hardware products
- Stable synchronization with multiple connections
- Low 3 ms latency
MEMOThe WM-1D is required for wireless MIDI communication with a Windows computer that does not support BLE MIDI.ConnectionsConnect the WM-1 to your MIDI device’s MIDI connectors (IN, OUT).
WM-1D (Connect to USB Port)The WM-1D is a wireless MIDI dongle. To use it, connect it to your computer.Other than its connectors and power supply, it has the same performance as the WM-1 (WM-1 + USB MIDI interface).
- Direct connection between hardware products
- Stable synchronization with multiple connections
- Low 3 ms latency
- Operates on USB bus power\
ConnectionsConnect the WM-1D to the USB port of your computer.

Setting the Communication Mode
About the Two Communication ModesSTANDARD Mode (BLE MIDI)In STANDARD mode, you can connect to a Mac or smartphone that supports BLE MIDI, or connect to the WM-1D connected to a computer.Up to three BLE MIDI devices can be connected to a WM-1 unit that is in STANDARD mode. You can connect not only the WM-1D but also a Mac or smartphone. The STANDARD model has two modes: STANDARD (Host) and STANDARD (Remote).![]() “Advanced Features” (p. 8)FAST modeIn FAST mode, you can connect with lower latency than STANDARD mode.One WM-1/WM-1D unit can be connected to a WM-1/WM-1D that is in FAST mode.NOTE
“Advanced Features” (p. 8)FAST modeIn FAST mode, you can connect with lower latency than STANDARD mode.One WM-1/WM-1D unit can be connected to a WM-1/WM-1D that is in FAST mode.NOTE
- A smartphone can’t be connected in FAST mode.
- If you’re using a Mac with FAST mode, connect using the WM-1D.
Switching the Communication ModeHere’s how to switch between STANDARD mode and FAST mode.1 . Hold down the [MODE] switch for two seconds.The [MODE] switches each time you long-press the switch.WM-1: “STANDARD (Host) ”![]() “FAST”WM-1D: “STANDARD (Remote)”
“FAST”WM-1D: “STANDARD (Remote)” ![]() “FAST”For details on the mode and indicator color, refer to “About the MODE Indicator” (p. 5).
“FAST”For details on the mode and indicator color, refer to “About the MODE Indicator” (p. 5).
About the MODE Indicator
The MODE indicator shows the state of the WM-1/WM-1D in each communication mode, as described below.
| STANDARD (Host) mode | STANDARD (Remote) mode
(p. 8) |
FAST mode | |
| MIDI communication is occurring (other than real-time messages) | Briefly blinks red when a message is received. |
Briefly blinks green when a message is received. |
Briefly blinks orange when a message is received. |
| While pairing | Briefly lit red once, then unlit for one second. |
Briefly lit green twice, then unlit for one second. |
Briefly lit orange three times, then unlit for one second . . |
| When pairing is completed | Rapidly blinks red.
|
Rapidly blinks green.
|
Rapidly blinks orange. |
| While connected via MIDI |  |
 |
|
| When multi-connected and one or more remote devices are not found |  |
||
| When the battery runs low (Low battery) | Briefly lit red four times,then unlit for two seconds. |
||
| While initializing this unit’s connection settings (Factoryreset) |  |
Registering the MIDI Device to Use (Pairing)
“Pairing” is the procedure of registering the MIDI device that you want to use with the WM-1/WM-1D (authenticating the devices with each other).Here’s how to make settings so that MIDI data can be transmitted and received between the WM-1/WM-1D and your MIDI device.MEMO
- Once pairing has been completed between this unit and the WM-1/WM-1D, the connection occurs automatically (memorized), and there is no need to perform pairing again. In the case of Mac or iPhone, the pairing operation is required each time.
- If you initialize an already-paired WM-1/WM-1D, you must initialize the other WM-1/WM-1D unit (on Mac or a smartphone, remove the device) and perform pairing again.
- When you switch the mode, pairing is canceled.
Using STANDARD (Host) Mode (Indicator Is Red)
Connecting the WM-1 with iPhone
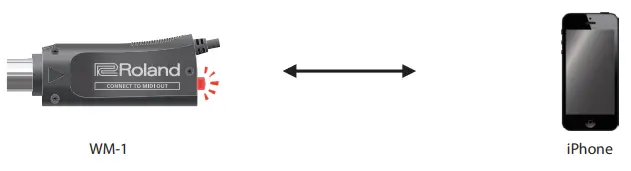
- Connect the WM-1 to your MIDI device.The system begins searching for a target, and the MODE indicator blinks red for a certain length of time.MODE indicator
- From your iPhone app, directly select the WM-1.When pairing is completed, the indicator changes from blinking rapidly to slow blinking.

![]()
Connecting the WM-1 with Mac
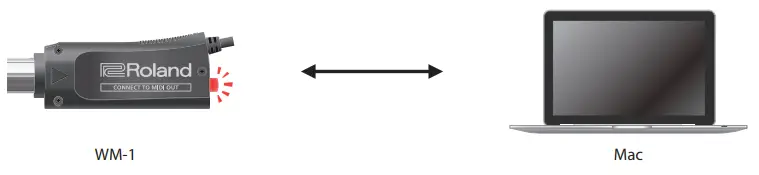
- Connect the WM-1 to your MIDI device.The system begins searching for a target, and the MODE indicator blinks red for a certain length of time.MODE indicator
- On the Mac, start Audio MIDI settings.
- From the [MIDI Studio] menu, select [Open Bluetooth Configuration] to access [Bluetooth Configuration].
- Make sure that the WM-1 is shown, and then click the [Connect] button.


If it is not shown, once again briefly press the WM-1’s [MODE] switch to make the MODE indicator blink red.
![]()
When pairing is completed, the indicator changes from blinking rapidly to slow blinking.
Connecting the WM-1 with a Windows Computer (WM-1D)
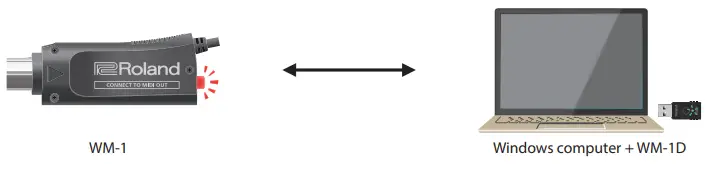
- Connect the WM-1 to your MIDI device.The system begins searching for a target, and the MODE indicator blinks red for a certain length of time.WM-1’s MODE indicator
- Briefly press the WM-1D’s [MODE] switch.The system begins searching for a target, and the MODE indicator blinks green for a certain length of time.The WM-1D’s MODE indicator
When pairing is completed, the indicator changes from blinking rapidly to slow blinking.WM-1’s MODE indicator
![]()
The WM-1D’s MODE indicator
![]()
* Pairing is not possible if both the WM-1 and the WM-1D are in STANDARD (Host) mode. Set one or the other to STANDARD (Remote) mode.* Pairing is not possible if both the WM-1 and the WM-1D are in STANDARD (Remote) mode. Set one or the other to STANDARD (Host) mode.
Registering the MIDI Device to Use (Pairing)
Using FAST Mode (Indicator Is Orange)
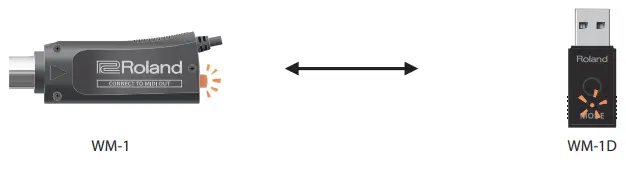
- Set both of the WM-1/WM-1D units to be paired to a FAST mode.“Switching the Communication Mode” (p. 5)The system begins searching for a target, and the MODE indicator blinks orange for a certain length of time.

When pairing is completed, the indicator changes from blinking rapidly to slow blinking.![]() If no target is found, the MODE indicator goes dark. In this case, briefly press the [MODE] switch to resume pairing.
If no target is found, the MODE indicator goes dark. In this case, briefly press the [MODE] switch to resume pairing.
NOTE
- A smartphone cannot be paired using FAST mode.
- To use FAST mode with a Mac, connect using a WM-1D.
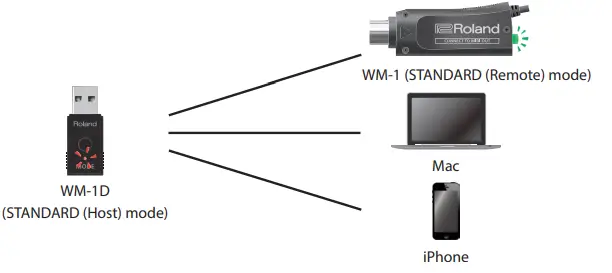
Advanced Features
A maximum of three BLE MIDI devices can be connected to a WM-1/WM-1D in STANDARD (Host) mode (multi-connection). The following BLE MIDI devices can be connected: iPhone or another iOS device, Mac, or a WM-1/WM-1D that is set to STANDARD (Remote) mode.For details on how to set the WM-1/WM-1D to STANDARD (Remote) mode, refer to “Switching Between STANDARD (Host) Mode and STANDARD (Remote) mode” (p. 8).MEMO
- When pairing two WM-1 units in STANDARD mode, one of them must be in STANDARD (Remote) mode.
- When using multi-connection, only one unit of the same device (iPhone, Mac) can be connected.“Limitations” (p. 9)
Switching Between STANDARD (Host) Mode and STANDARD (Remote) mode
- Rapidly press the [MODE] switch twice.The mode changes each time you press rapidly the [MODE] switch twice.“STANDARD (Host) ” “STANDARD (Remote)”For details on the mode and the color of the indicator, refer to “About the MODE Indicator” (p. 5).
MEMOWhen in FAST mode, pressing rapidly the [MODE] switch twice changes to STANDARD (Host) mode.
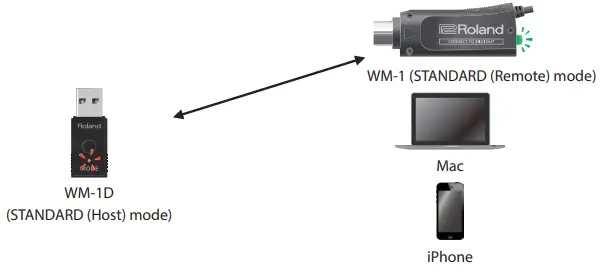
Connecting Three Devices to One WM-1(Multi Connection)
- Briefly press the [MODE] switch of the STANDARD (Host) mode WM-1D and the STANDARD (Remote) mode WM-1.The system begins searching for a target, and the MODE indicator blinks for a certain length of time (the color of the indicator depends on the mode).
 The system begins searching for a target, and the MODE indicator blinks for a certain length of time (the color of the indicator depends on the mode).

When pairing is completed, the indicator changes from blinking rapidly to slow blinking.
![]()
![]()
If no target is found, the MODE indicator goes dark. In this case, briefly press the [MODE] switch to resume pairing.MEMOIf you’re using an iPhone or Mac, that device will have BLE MIDI settings. On its screen, select the WM-1.For an iOS device, select the WM-1 directly from the app.2 . In the same way for the second device, press the [MODE] switch briefly to pair.
3 . In the same way for the third device, press the [MODE] switch briefly to pair.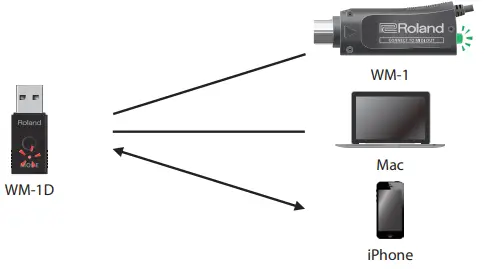
Initializing the Unit’s Connection Settings
- Hold down the [MODE] switch for ten seconds. The MODE indicator blinks orange. When the operation is completed, the indicator goes dark. “About the MODE Indicator” (p. 5)
Limitations
- This unit cannot be used in combination with a BLE MIDI device made by a different manufacturer.
- When using wireless communication via a multi-connection, there might be cases in which tempo synchronization is not stable. In this case, decrease the number of remote devices.
- When using a multi-connection, only one unit of the same device (Mac or smartphone) can be connected.
| The first device can be connected. | |
| First Mac (can be connected) |  |
| First iPhone (can be connected) |  |
| Communication is not stable for the second iPhone. | |
| First Mac (can be connected) | |
| First iPhone (can be connected) | |
| Second iPhone (communication is not stable) |  |
| Communication is not stable for the second Mac. | |
| First Mac (can be connected) | |
| Second Mac (communication is not stable) | |
| Three WM-1/WM-1D units can be connected. | |
| First WM-1D (can be connected) |  |
| Second WM-1D (can be connected) | |
| Third WM-1D (can be connected) | |
- When using MIDI Sync, synchronization of the first measure might not be stable depending on the DAW. In this case, insert an empty measure at the beginning of the song to assist synchronization.
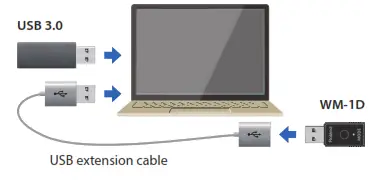
- When using this unit with a computer to which a USB 3.0 peripheral device is connected, interference might cause an operation to be unstable. In particular, instability is more likely if a USB flash drive or hard disk drive is connected. Create distance with the USB 3.0 peripheral when using this unit.
Distancing the USB ports used by the peripheral and the WM-1D

Using a USB extension cable (distancing the peripheral)
Main Specifications
Roland WM-1
| Wireless Format | BLE and proprietary format |
| Wireless carrier frequency | 2. 4 GHz |
| Transmission Range | 10 m (32 feet) line-of-sight (May vary due to local
conditions) |
| Latency (varies depending on radio conditions) | 7.5–15 ms (STANDARD mode)
3 ms (FAST mode) |
| Connectors | MIDI connectors (IN, OUT) |
| Power Supply | Alkaline battery (AAA, LR03) x 1 |
| Current Draw | 14 mA
Battery life for continuous use (differs depending on the conditions of use) Alkaline battery (AAA, LR03): Approximately 60 hours |
| Dimensions (Control side) | 79 (W) x 17 (D) x 29 (H) mm
3-1/8 (W) x 11/16 (D) x 1-3/16 (H) inches |
| Dimensions
(Battery side) |
80 (W) x 17 (D) x 29 (H) mm
3-3/16 (W) x 11/16 (D) x 1-3/16 (H) inches |
| Weight (including battery) | 46 g / 2 oz |
| Accessories | Leaflet “USING THE UNIT SAFELY”
Alkaline battery (AAA, LR03) x 1 |
Roland WM-1D
| Wireless Format | BLE and proprietary format |
| Wireless carrier frequency | 2. 4 GHz |
| Transmission Range | 10 m (32 feet) line-of-sight (May vary due to local
conditions) |
| Latency (varies depending on radio conditions) | 7.5–15 ms (STANDARD mode)
3 ms (FAST mode) |
| Connectors | USB port: USB A type |
| Power Supply | Supplied from the computer via USB |
| Current Draw | 6 mA |
| Dimensions | 43 (W) x 18 (D) x 9 (H) mm
1-3/4 (W) x 3/4 (D) x 3/8 (H) inches |
| Weight | 6 g / 1 oz |
| Accessory | Leaflet “USING THE UNIT SAFELY” |
 report this ad
* This document explains the specifications of the product at the time that the document was issued. For the latest information, refer to the Roland website.
[xyz-ips snippet=”download-snippet”]