
Runcam Racer 5USER MANUAL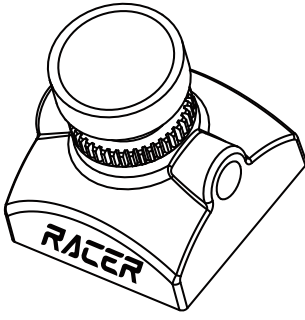
Joystick Control
 UART Control
 UART Control
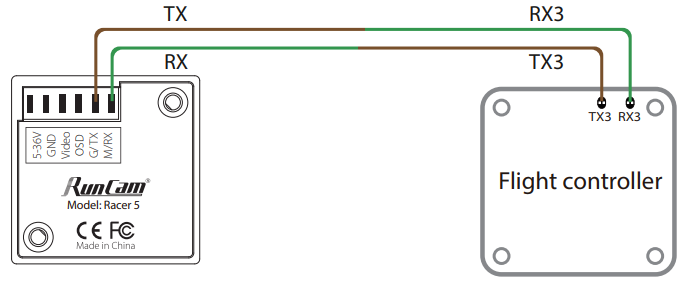
- Flight controller wiringNote: Take UART3 for example
- Betaflight 3.3 or above setting
Identifier Configuration/MS Serial Fix Telemetry Output Sensor Input Peripherals USB VCP 115200Disabled AUTODisabled AUTODisabled AUTO : UART1 115200Disabled AUTO Disabled AUTODisabled AUTO UART2 115200Disabled AUTO Disabled AUTO Disabled AUTOUART3 115200Disabled AUTODisabled AUTO RunCam Device AUTOUART4 115200Disabled AUTODisabled AUTODisabled AUTOUART5 115200Disabled AUTO Disabled AUTODisabled AUTO - UART Control
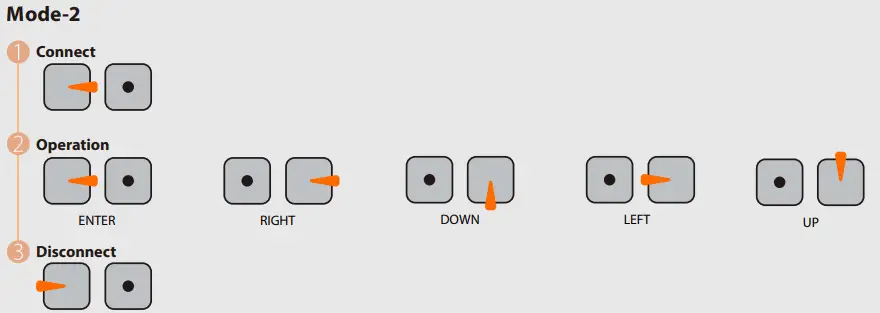
 * When connected, The buzzer on Flight Controller will beep for 3 times; When disconnected, The buzzer on Flight Controller will beep for 2 times only; If connected successfully, you can long-press the up button to enter the OSD menu, right button to switch preset scenes, left button to calibrate voltage and down button to reset OSD.
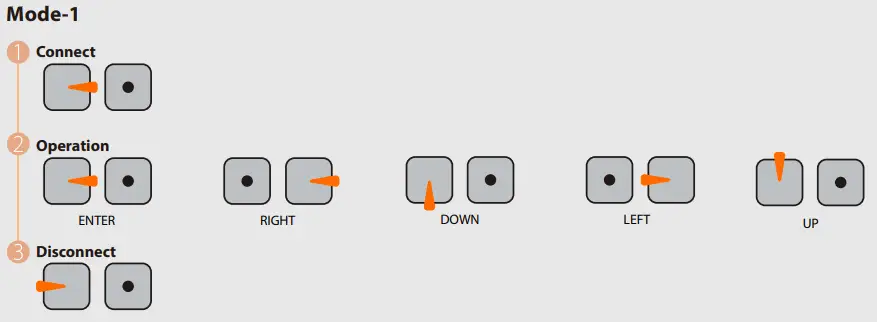
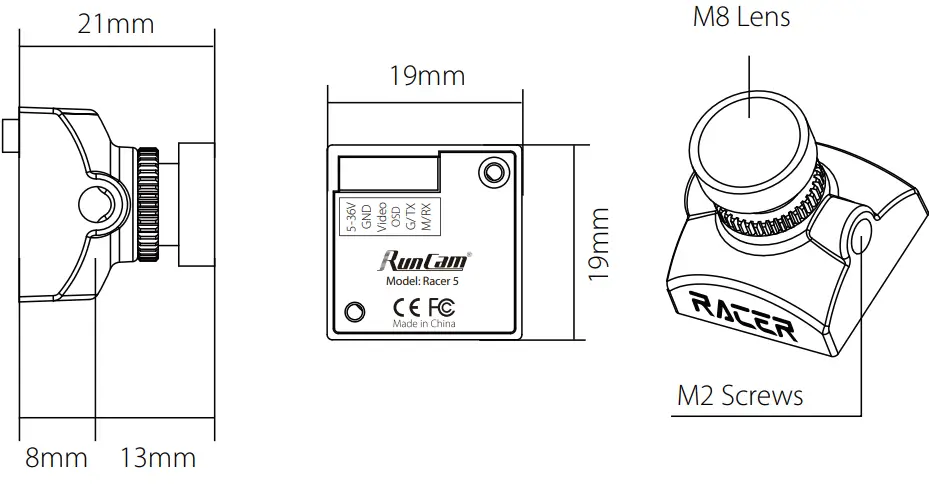
Dimensions & Installation
- QUICK SETTINGS
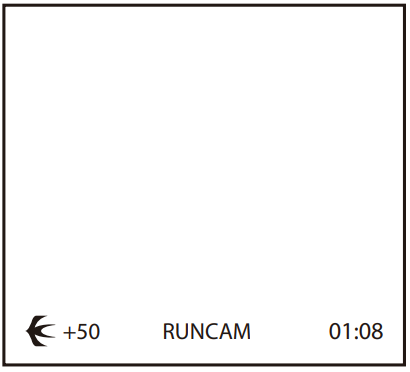
Quick settings:
- Long press UP button for three seconds to access the OSD setting‘s screen
- Long press the LEFT button for three seconds to calibrate the Gyro, The Racer5 camera PCB must be kept horizontal.
- Long press DOWN button for six seconds to reset OSD settings to default
- Long press the RIGHT button for three seconds to switch between the camera presets
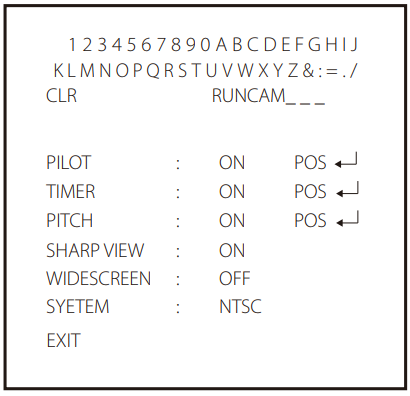
- CLR: clear the ID character;
- ALARM: low voltage warning value, smartly judge the warning value of the battery when it’s low; if set it manually, then it saves the manual preset value;
- Press the middle button to switch ON / OFF, then move to POS to enter the position adjustment.
- Sharp View: Turn on, it will increase the image details, but also noise.
- WIDESCREEN: Dynamic stretching to the aspect ratio of 16:9 to match with a screen in 16:9, the image center won’t change but the edge will be widened.
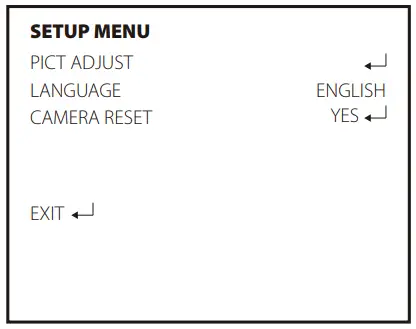
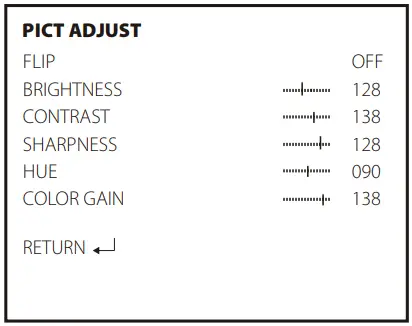
- · SETUP MENU
- LANGUAGE ( ENGLISH / DEUTSCH / FRANCAIS / PYCCKNN / PORTUGUES / ESPANOL / 中文 )
- FLIP ( OFF / H-FLIP / V-FLIP / HV-FLIP )
- BRIGHTNESS ( 128/ 0-255 )
- CONTRAST ( 138 / 0-255 )
- SHARPNESS ( 128 / 0-255 )
- HUE ( 90 / 0-180 )
- COLOR GAIN ( 138 / 0-255 )
Parameters
| Model | RunCam Racer 5 | |
| Image Sensor | Super WDR CMOS Sensor | |
| Horizontal Resolution | 1000TVL | |
| Lens | 1.8mm FOV160° | 2.1 mm FOV 145° |
| Screen Format | 4:3 /Widescreen Switchable | |
| Signal System | NTSC / PAL Switchable | |
| Mirror/Flip | Available | |
| Integrated OSD | Yes | |
| Built-in gyro | Yes | |
| One-Touch Scene Setting | Personal / Lightrax | |
| S/N Ratio | >50dB | |
| Electronic Shutter Speed | Auto | |
| Min. Illumination | ||
| WDR | Super WDR | |
| Day/Night | Color | |
| Menu Control | Cable Control / Remote Control | |
| Power | DC 5-36V | |
| Current | 1 / | |
| Housing Material | ABS | |
| Net Weight | 6.1g | |
| Dimensions | L 1 9mm*W19mm*1-121mm |
[xyz-ips snippet=”download-snippet”]