SAMSUNG Monitor

Samsung monitor turns off or on by itselfYour monitor should only turn on and off when you want it to, and not on its own. When this happens, there usually isn’t anything wrong with the monitor itself. A defective power cord or outlet is the most likely culprit.
If there’s no indicator light displaying, check the power switch, check the power cord, and test the outlet. Unfortunately, this basic troubleshooting is the only way to try to fix the issue yourself. If this doesn’t help the monitor turn on, then it will need service.
Setting Up
Setting up a monitor is usually really simple. It’s just plugging in some wires, right? The answer is yes and no. There are some things you’ll need to take into consideration, like the physical connections the monitor requires, the drivers, and the picture settings. Make sure everything is in order, so you can get the best experience once the monitor is set up.
Choose which type of cable to use
Which cable you use to connect to the monitor will determine how well it is able to perform. For instance, some monitors can only perform at their maximum settings (like refresh rate) when connected with a specific type of cable. (This is typically either HDMI or DisplayPort depending on the model. See your user manual to confirm.) Other than that exception, you will get the best experience by using the least amount of adapters possible and by using the latest and best type of cable possible.
Do I need an adapter?If the port on the monitor and the port on your PC, Mac, or laptop do not match, then you will need an adapter or dongle in order to connect the two. You can find the correct adapter or dongle by looking for one which contains the two types of connections you need, and the word “adapter.” For instance, one of the most common is an USB-C to HDMI adapter for Macs and laptops. If you use DisplayPort instead, you would instead search for a USB-C to DisplayPort adapter, and so forth. Some adapters are very small, some are longer and called dongles, and some replace the entire cable and simply have different plugs on either end.When you are using an adapter, the quality of your connection will be limited to the strength of the weakest link in the chain. For instance if you use a VGA cable and use an adapter to plug it into the HDMI port, it will still only be able to transmit a VGA signal, which is much inferior.
Micro or mini adaptersThe final type of adapter you might need, and this typically only applies to laptops, is one that converts to a mini or micro version of the same type of cable. First make sure whether your laptop is a “micro” or “mini” version of the port (because that’s different) and then search for the adapter you need, for instance: HDMI to micro HDMI adapter.
Best type of cable or port to useDepending on what you have available, here’s what will get you the best results from your monitor:
- Best option: Either HDMI or DisplayPort are the recommended choice as the best type of connection to use. It is best to connect HDMI to HDMI or DisplayPort to DisplayPort, but an adapter to convert from one to the other can be used as a second choice if absolutely needed. Some laptops have a micro or mini version of the port which counts as the same thing, but will need an adapter (see the previous section for more details). For maximum settings like refresh rate, check your user manual to see which of these two cables is better for your particular monitor.
- Second best option: Using USB-C is going to be the way to go if you have a Mac or laptop that doesn’t have an HDMI port or DisplayPort of any kind, but does have USB-C. You will, however, need an adapter to convert to either HDMI or DisplayPort (as mentioned in the previous section about adapters).
- Acceptable option: Although HDMI and DisplayPort are better, DVI is still a useful alternative for some systems. Make sure to connect the DVI port on one end to an equal or better port on the other end. Many cables and adapters can be used for this.
- Backup option: It’s not common, but using a normal USB port (preferably USB 3.0, which is colored blue) and an adapter or docking station can allow you to connect to a monitor, and then adapt that USB connection to any of the previously mentioned types.This is typically not used as the first monitor for the computer, though. And depending on the hardware used, this type of connection may put some additional strain on the computer or exceed the maximum amount of monitors the computer can use simultaneously.Note: Some monitors can connect directly USB to USB, although this is rare.
- Last Resort: VGA should be considered your last choice, since it does not include any of the technological advances seen in the newer connection types. If the only port on one device is VGA, then use a VGA cable or VGA adapter to connect to any port on the other device.
Connect the monitor to a computer
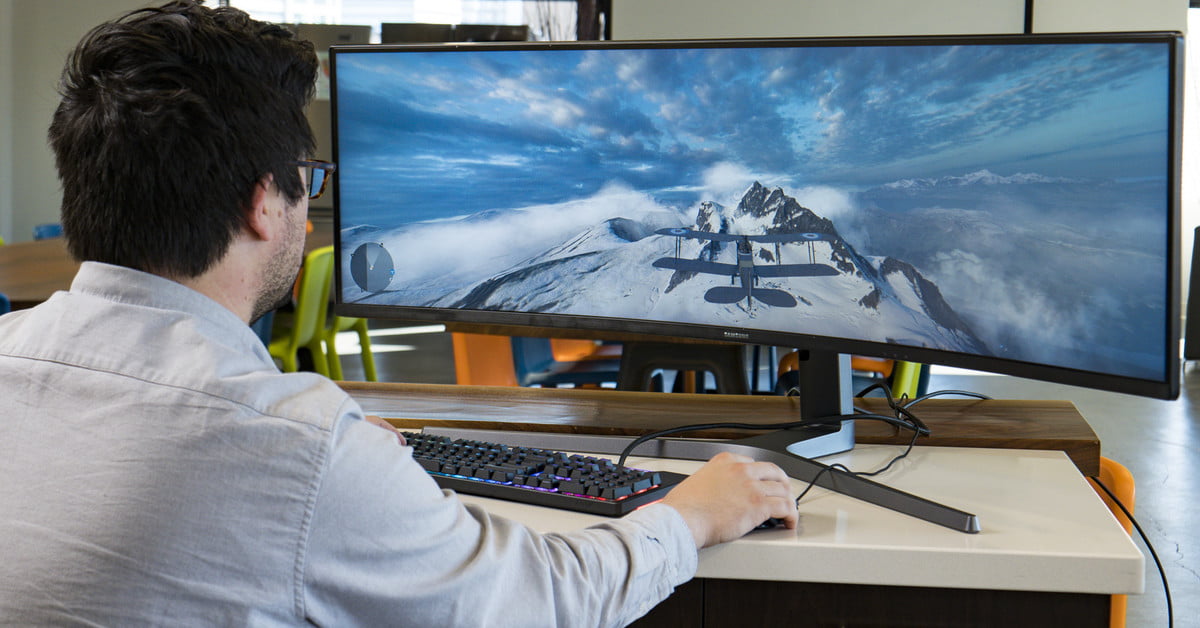
Connecting the monitor to the computer is pretty simple. In fact, you don’t even have to turn thecomputer off to do it. Once you’ve found a good place to put it (not near heat sources oranywhere it would be exposed to liquids or oils, like a kitchen), you can begin installing your monitor. Most models will have a stand to put together first. Check your user manual for instructions.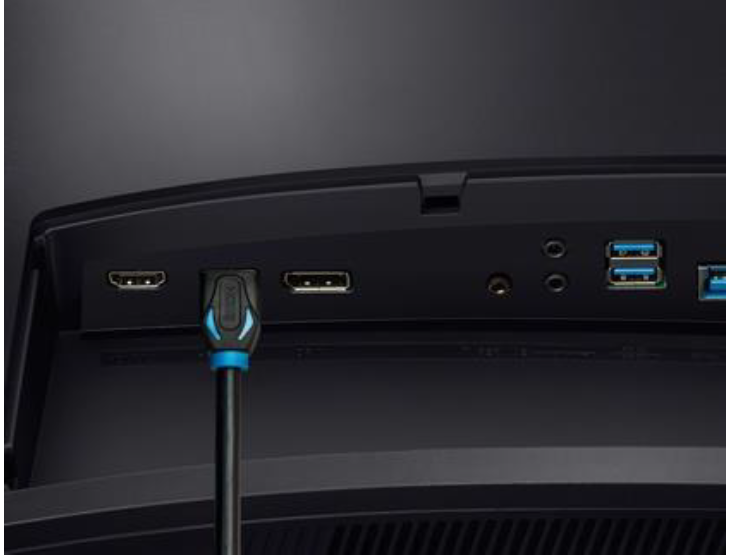
- When you know what kind of port you’re using and any adapters needed (see the previous section for more information), you can begin setting up your monitor. First, connect your monitor to a power source. Plug one end of the power cord into the back of the monitor and the other end into an outlet.
- Next, insert one end of the cable into your computer’s HDMI, Display port, DVI, or VGA port. Then, connect the other end of the cable into the monitor. If needed, use an adapter to connect the two devices.Note: It’s normal for monitors to flicker when a new monitor is connected.
- Your monitor should be available for use immediately, but for fine-tuning, see the “Installing drivers and adjusting settings” section.Note: Setting up a second monitor (or more) has some additional steps. See our guide for more information.
Install drivers and adjust settings
Monitors are plug and play with the latest versions of Windows and Mac computers and should not require any additional software for basic functions. However, if software was provided with your monitor, we recommend installing it to enable any advanced features of the monitor.
Note: It is normal for most monitors to not need updates and therefore not have any listed on our site. However, if there have been any updates to the software, drivers, or firmware for your monitor, they will be available in our Download Center. It is only recommended to install the updates if they fix an issue you are experiencing or offer a feature that you want.
To finish setup of your monitor after you’ve connected it:
- If the monitor came with software, use it to install any desired features. Most monitors do not need any software installation to function, although there may be included software for optional features.
- To get the best performance from your monitor, you’ll want to set the refresh rate to its maximum, and turn on Gsync or Free-sync if you can.
- Next, adjust the picture settings. Samsung monitors come with all kinds of special picture settings, so you can get the most out of your work or gaming. For example, you can turn on Eye Saver mode to prevent eye strain.
- That’s it! Enjoy your new Samsung monitor!

References
[xyz-ips snippet=”download-snippet”]