
![]() The expert for robots in your homeWith one click to the online shop
The expert for robots in your homeWith one click to the online shop
 |
 |
| myRobotcenter.eu | myRobotcenter.co.uk |
![]() Robot vacuum cleanerUser manualSR10J50*** Series
Robot vacuum cleanerUser manualSR10J50*** Series
- Before operating this unit, please read the instructions carefully.
- For indoor use only.
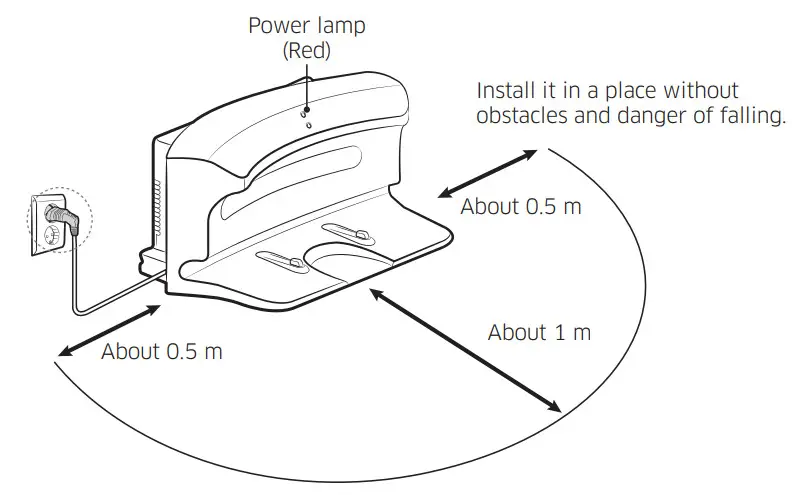
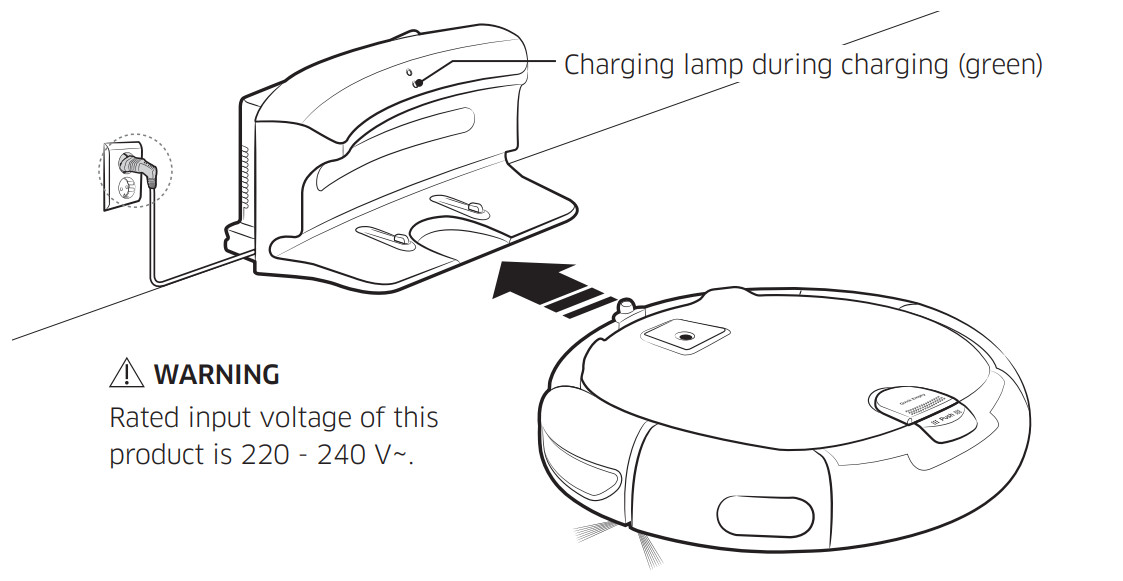
Installation
The power of the charger must be on at all times.
NOTE
- Install the charger in a place where the floor and wall are level.
- Install the charger along the grain of wooden floors.
- If the power switch is off, the robot vacuum cleaner will not charge even if it is docked on the charger.
- Always turn on the power of the charger.– If power is not supplied to the charger, the robot vacuum cleaner cannot find it and cannot automatically recharge.– If the robot vacuum cleaner is left detached from the charger, the battery will drain naturally.
- If the robot vacuum cleaner is in energy-saving mode, power will not come on even if the power switch is turned off and then on. Press and hold the Start/Stop button on the robot vacuum cleaner.
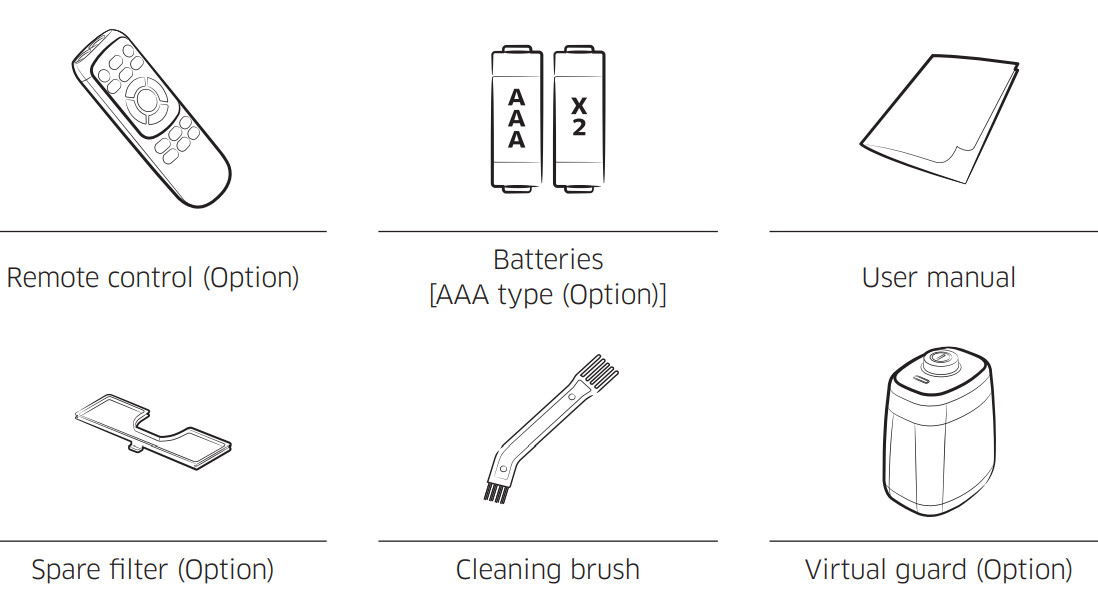
Accessories
Charging
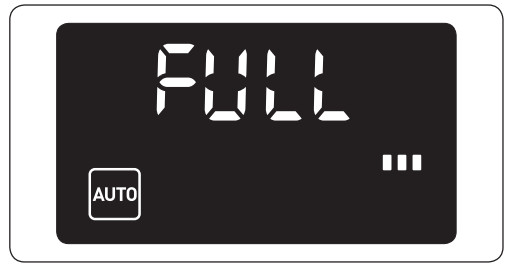
It takes approximately 120 minutes to completely charge when charging for the first time after purchase and can be used for approximately 90 minutes.
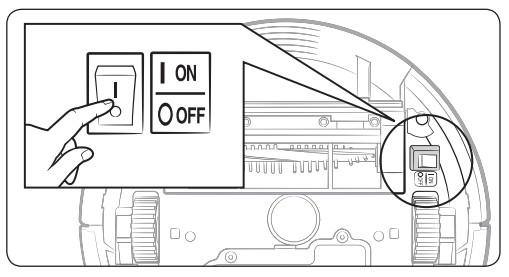
- Turn on the power switch on the bottom.You must turn on the power switch to turn on the robot vacuum cleaner.

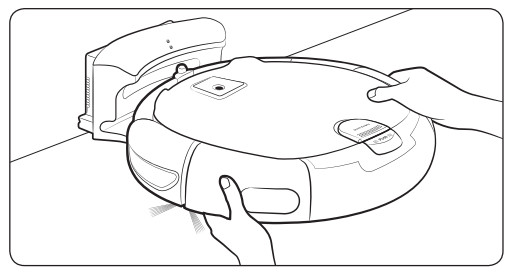
- Manually charge the robot vacuum cleaner by placing it on the charger.Make sure the charge pins of the robot vacuum cleaner and the charger is aligned.
- Check the charging status.“” will turn on according to charging progress and “FULL” will turn on when charging is complete.
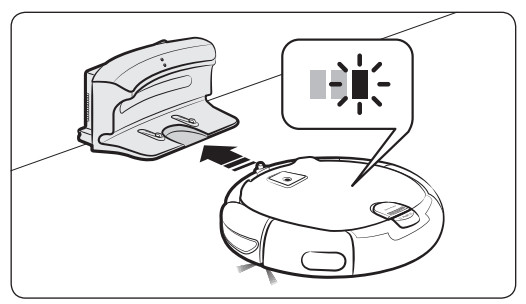
Automatic chargingWhen the battery indicator blinks during cleaning, the robot vacuum cleaner will return to the charger to charge itself automatically.
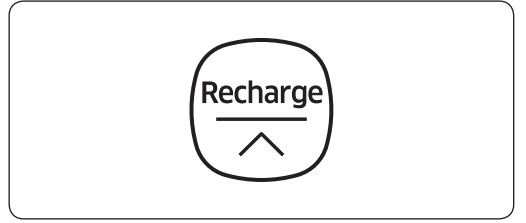
 RechargeYou can command the robot vacuum cleaner to recharge at the charger while it is in cleaning process.
Low battery (Lo)Manually charge the robot vacuum cleaner by placing it on the charger.
√ Steps to take if recharging is not being executed.Check the installation status of the charger when:
- the charger is located in a place where the robot vacuum cleaner cannot easily access it.
- distance between the charger and robot vacuum cleaner is over 5 m apart.– It may take a long time for the robot vacuum cleaner to return to the charger for recharging.
Manually charge the robot vacuum cleaner when:
- the charger is located in a corner.
- the battery is fully exhausted.
- the robot vacuum cleaner is stuck by obstacles (furniture etc.).
- the robot vacuum cleaner can’t climb the threshold near charge. (Height of the threshold that the robot vacuum cleaner can climb: about 1.5 cm and below)
- when the battery indicator blinks and “Lo” is displayed.
- when the robot vacuum cleaner is set on Spot clean or Manual clean mode.
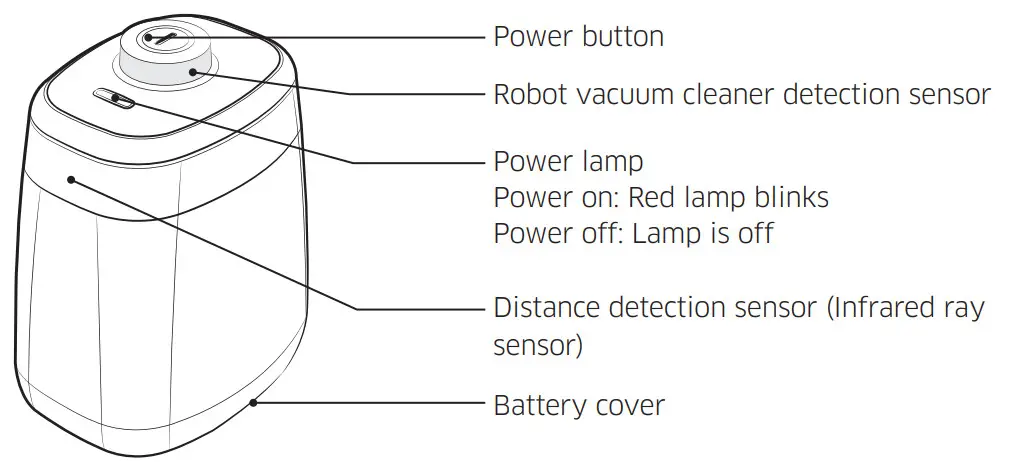
Installing the virtual guard (Optional)
Infrared ray from the Virtual guard will restrict the robot vacuum cleaner from approaching certain areas.
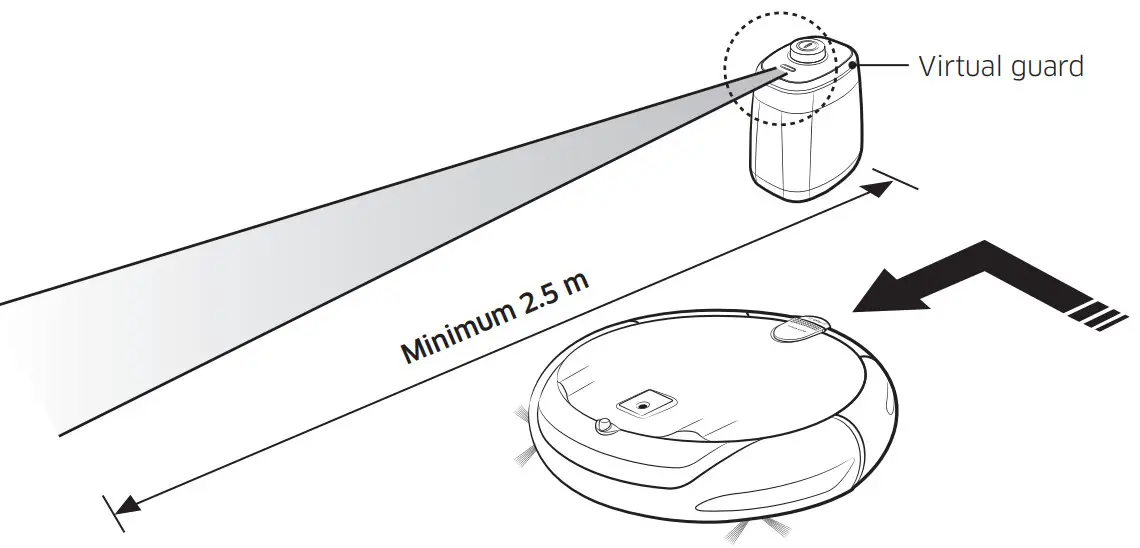
The distance of the virtual wall is 2.5 m at a minimum and may differ depending on the surroundings and movement status of the robot vacuum cleaner.
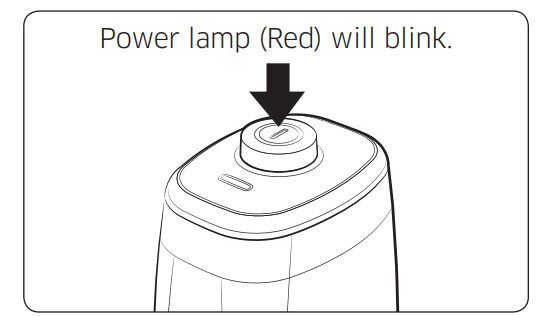
- Press the Power button to turn it on.
- Install the Virtual guard where you want to restrict the robot vacuum cleaner’s entrance.Make sure that the distance sensor is facing in the desired direction you want to create an invisible barrier (which will restrict the robot vacuum cleaner’s approach).
Part name of the virtual guard
Inserting batteries
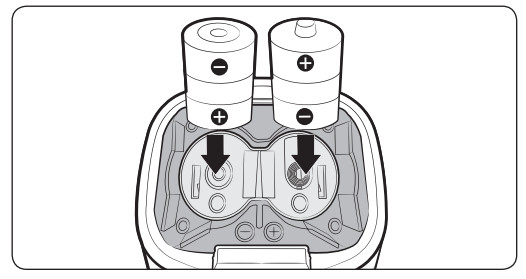
Batteries for the Virtual guard must be purchased separately.
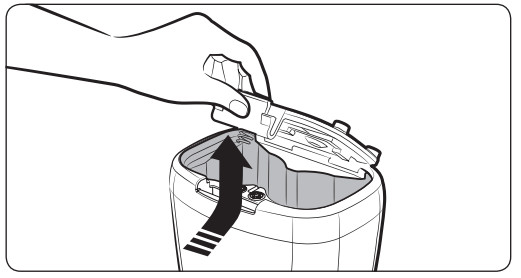
- Open the battery cover of the Virtual guard by pressing the locking tab and lift it up.
- Insert the batteries (D type) as shown in the illustration (check the +, – polarity).
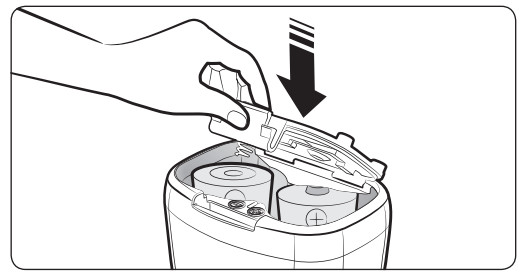
- Insert the tip of the cover into the slot and push the other end to close the battery cover.
Operations
Using the robot vacuum cleaner
You must turn on the power switch before using the robot vacuum cleaner.
Turning the power on/offTurn on/off the power switch on the bottom of the robot vacuum cleaner.
![]() WARNING
WARNING
- When the robot vacuum cleaner is not used for 10 minutes, power will turn off automatically.
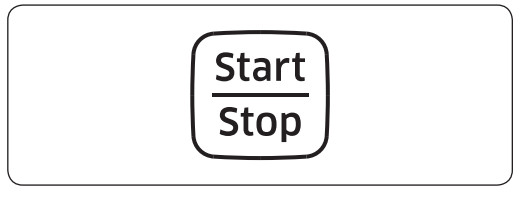 |
Using auto-clean modeThe robot vacuum cleaner moves and cleans automatically until it cleans an entire space once.*Stop cleaning: Press the |
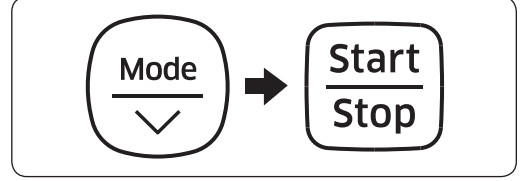 |
Using the cleaning modesYou can select the desired cleaning mode. |
|
RechargeYou can command the robot vacuum cleaner to recharge at the charger automatically while it is in the cleaning process. |
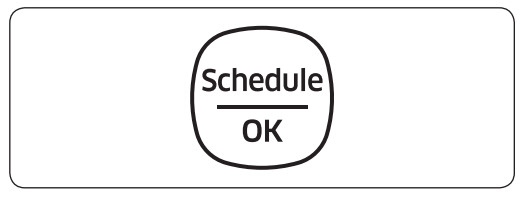 |
Setting scheduleYou can set or cancel an on-time or daily schedule.* Refer to “Setting the schedule”. |
Selecting cleaning mode
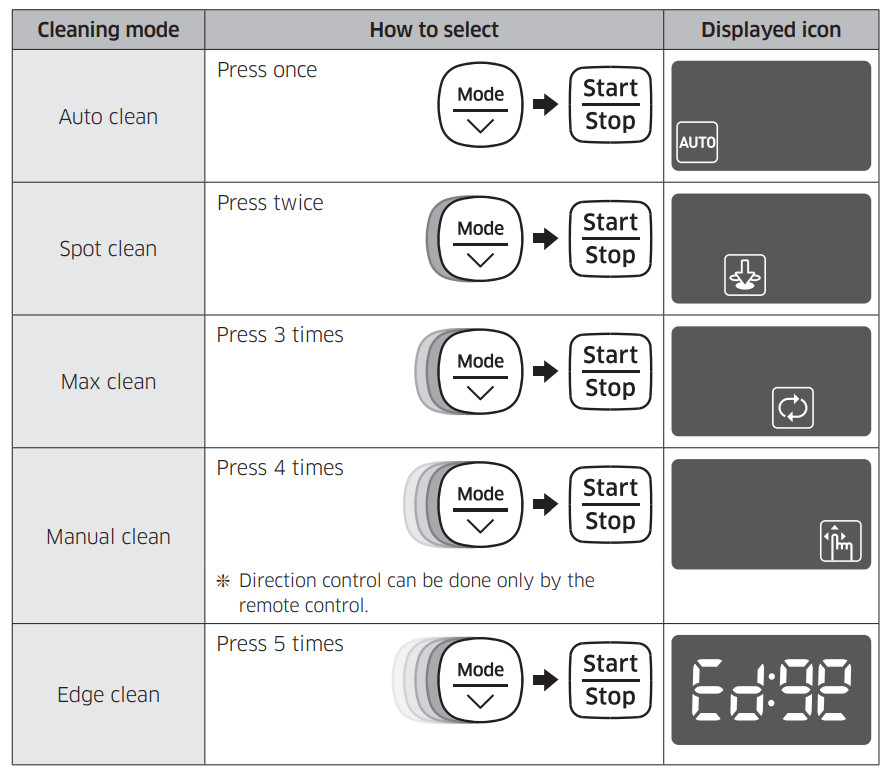
*When the robot vacuum cleaner is being charged, you can only select the Auto clean, Max cleans or Edge clean mode.
Cleaning method for each mode
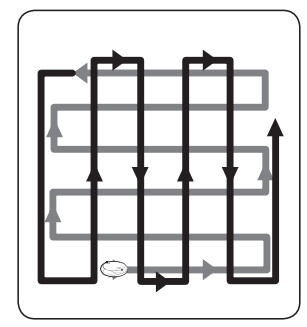 |
Auto cleanCleans automatically until an entire space is cleaned once. |
 |
Auto cleanCleans automatically until an entire space is cleaned once. |
|
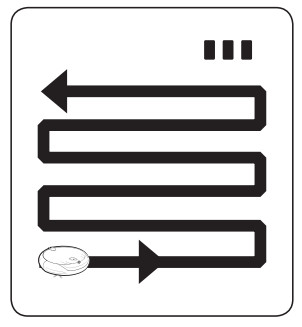
Edge cleanCleans the corners by reaching to them as close as possible. |
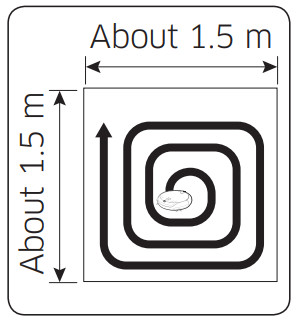 |
Spot cleanCleans a localized area intensely. It can be used to clean bread or cookie crumbs. |
 |
Manual cleanYou can move the robot vacuum cleaner with the remote control to clean the desired spot. |
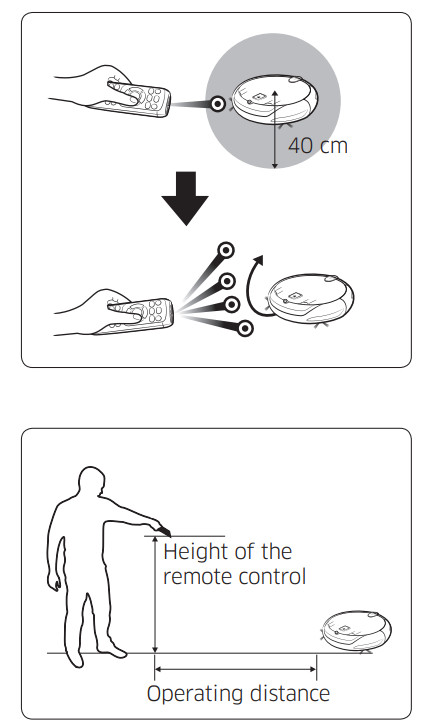
05 Point cleaningOnly available with A-type remote control You can use the remote control to point and clean the desired spot while the robot vacuum cleaner is in the cleaning process.
- Point the red light on the floor within 40 cm around the robot vacuum cleaner’s location.
- Press and hold the Point cleaning button to move the red light to the desired spot.
The robot vacuum cleaner will follow the light while cleaning. Operating distance of the remote control.
| Height of the remote control | 0.5 m | 1 m | 1.5 m |
| Operating distance | About1.5 m | About2 m | About2.5 m |
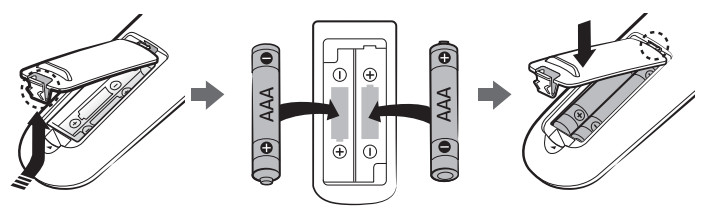
√ Inserting batteriesOpen the battery cover by lifting it up while pressing the locking tab and insert the batteries as shown in the illustration. Then, close the cover until it clicks into place.
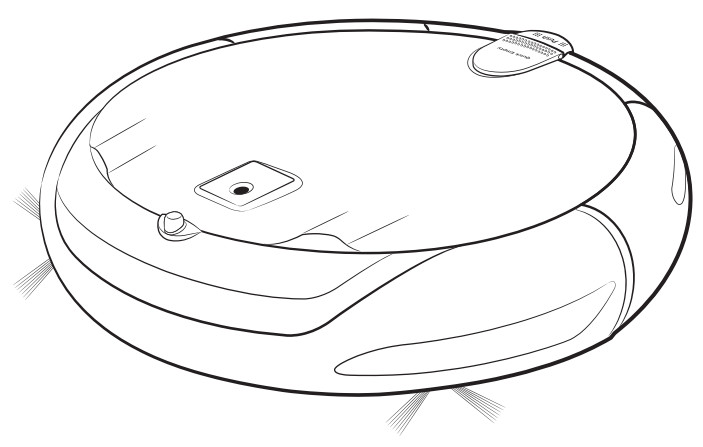
Name of each part
 |
Top
|
Bottom
|
|
Display panel
|
Cleaning and maintaining
You must turn off the power switch before cleaning the robot vacuum cleaner.Cleaning the dustbinClean the dustbin if there’s too much dust in the dustbin.
 |
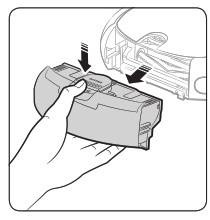
1. Remove the dustbin | 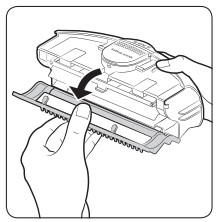 |
2. Open the dustbin cover |
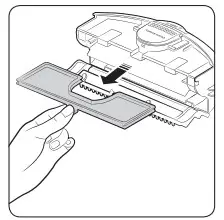 |
3. Remove the filter from the dustbin | |
4. Remove dust in the dustbin and the filter |
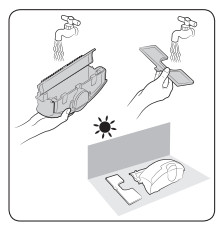 |
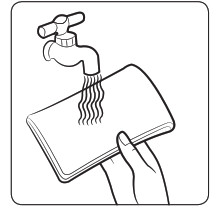
5. Wash the dustbin and the filter | 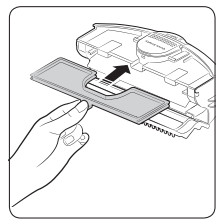 |
6. Reassemble the filter into the dustbin |
 |
7. Close the dustbin cover | 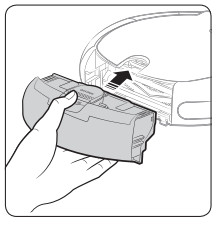 |
8. Reinsert the dustbin into the robot vacuum cleaner |
Emptying the dustbin (Quick Empty)
Use the Quick Empty cover for emptying the dustbin easily.
| 1 Open the Quick Empty cover | |
| 2 Remove dust in the dustbin with a vacuum cleaner | |
| 3 Close the Quick Empty cover |
Maintenance
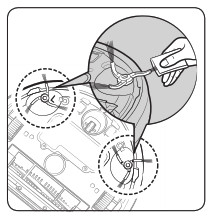
Cleaning the driving wheel
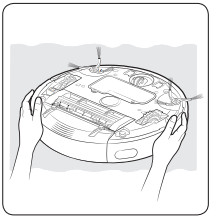 |
1 Put a soft cloth on the floor and place the robot vacuum cleaner upside-down |
 |
2. Use a blunt rod or tweezers to remove the foreign matters |
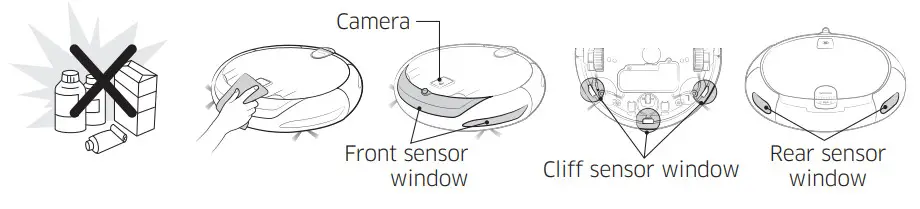
Cleaning the sensors and the cameraLightly wipe with soft cloth.
 |
1. Remove the dustbin | 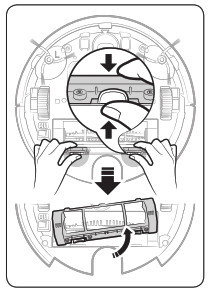 |
2. Remove the power brush cover |
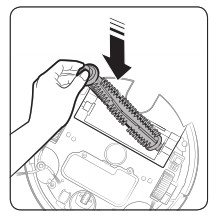 |
3. Remove the power brush | |
4. Clean the power brush |
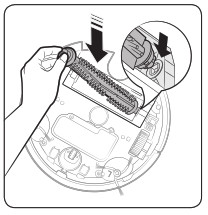 |
5. Reassemble the power brush | 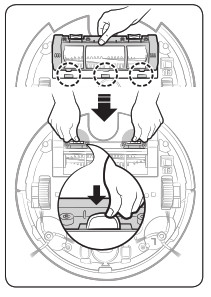 |
6. Reassemble the power brush cover |
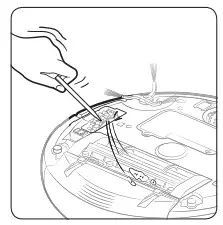
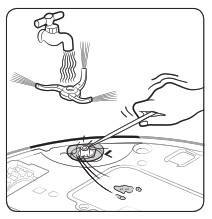
Cleaning the side brushClean the side brush if there’s foreign matter on the brush.
 |
1. Dip a soft cloth into warm water |
 |
2. Wrap the side brushes with the cloth for about 10 seconds and then wipe it |
 report this ad
If hair or string is caught between the main unit and the side brush, follow the below steps.
|
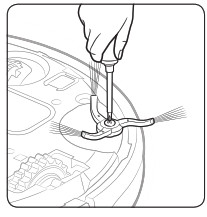
1. Remove the side brushes |
 |
2. Clean the side brushes |
 |
3. Reassemble the side brushes |
References
[xyz-ips snippet=”download-snippet”]