Saramonic Matched Pair Compact Cardioid Condenser Microphones User Manual
Specifications
|
Type |
Condenser Microphone |
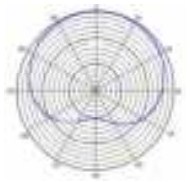
| Directional Pattern | Cardioid |
| Capsule | 14mm condenser capsule |
| Frequency Range | 22Hz to 18kHz |
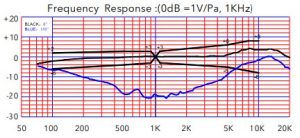
| Sensitivity | -40±3dB (0dB=1V/Pa,at 1kHz) |
| Output Impedance | 200 ohm |
| Maximum SPL | 135 dBU |
| Signal / Noise | 75 dB SPL |
| Power Requirements | 24V phantom powe |
| 48V phantom power | |
| Output Connection | 3 Pin XLR |
| Dimension | 100 × 20 × 20 mm |
| Net Weight | 39g (about 1.4 oz) |
Frequency Response
Packing List
- SR-M500 microphone x 2
- Stand mount x 2
- Windshield x 2
Product introduction
General introductions
The Saramonic SR-M500 is a pair of studio quality condenser microphones with ultra-low noise and full frequency response, designed for studio recording and live on stage. They are ideal for stereo recordings like drum overheads, stereo room recordings, acoustic instruments, choirs, or anywhere you would employ a small diaphragm condenser microphone, either individually or as a stereo array. Except for recording music, the SR-M500 is also excellent for environmental recordings and indoor dialogue on film sets. It features a cardioid polar pattern which allows to record the desired sound source while reducing the level of other surrounding instruments, noises or sound sources.
Highlights
- 14mm capsule with gold-plated membrane
- Cardioid polar pattern
- Lightweight all-metal construction
- Ultra-low noise
- Gold plated XLR output connectors · Powered by 48V or 24V phantom power
- Includes microphone clips and windshields
Set up guide
Powering the SR-M500
Connect all cables ready before supplying phantom power to the microphones, and never remove the microphone cable while the power is connected. The SR-M500 requires 48V DC or 24V DC phantom power. If the mixer or preamp does not contain this phantom power, then an external phantom power supply is needed. Some phantom power supplies do not supply the voltage at which they are rated. If the required voltage is not supplied, the dynamic range and general performance of the microphone will be reduced. We strongly recommend to use a reputable high quality power supply. Damage caused by a faulty power supply is not covered under warranty.
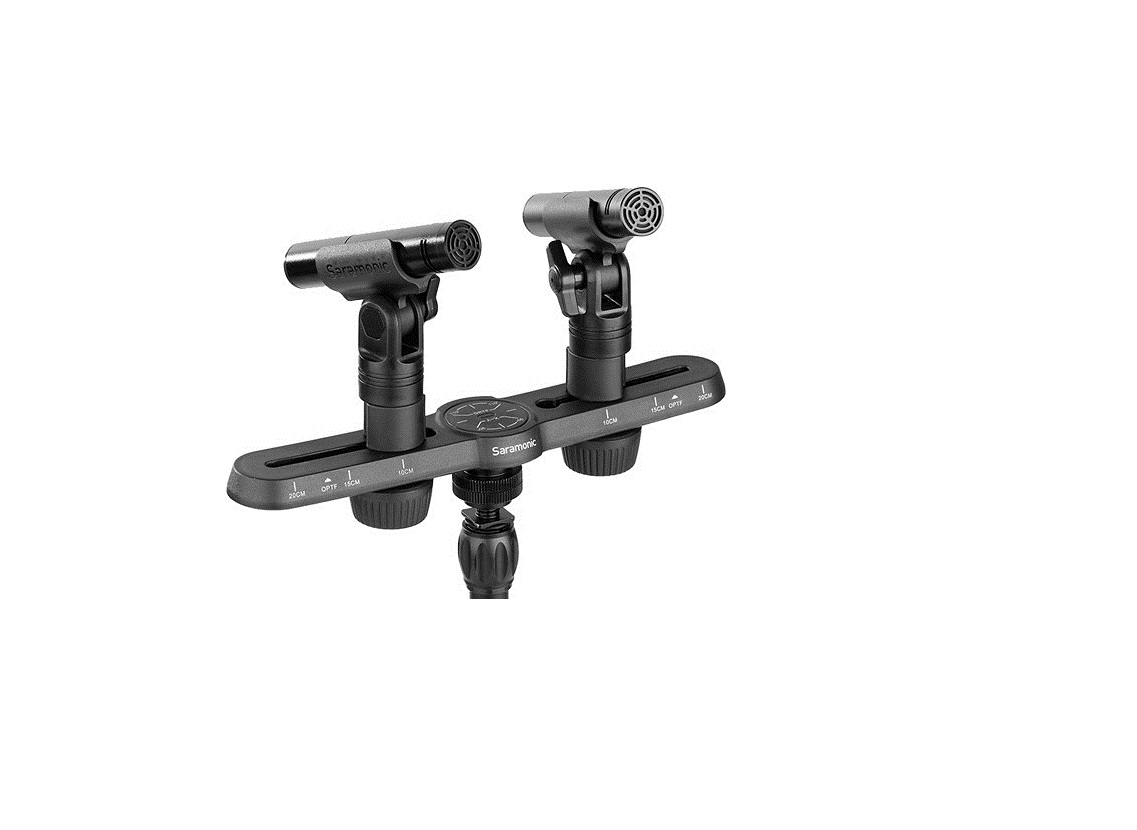
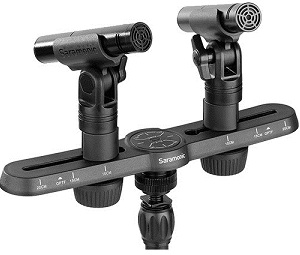
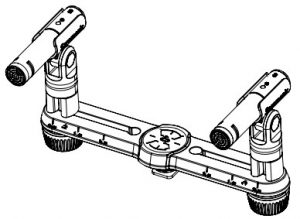
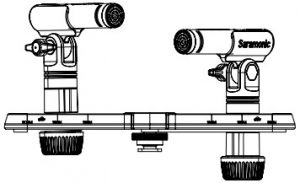
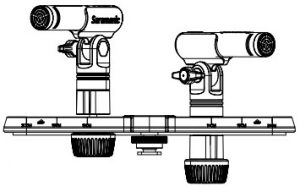
Mounting the SR-M500
The SR-M500 is supplied with a pair of stand mounts. They feature a standard 5/8″ thread in the base and a 3/8″ thread adapter is supplied to provide great versatility in mounting. To mount the SR-M500, please place the base of the microphone at the back of the mount and firmly push down towards the front until the microphone clicks into the mount.
General Operation
The SR-M500 microphone head should always facing towards the sound source that you wish to record.When recording any sound source, whether it’s vocals, instruments or anything else, please always spend time experimenting with the mic placement, adjust the microphone position as many times as you need to ensure you are picking up the best possible sound. Then you are ready to start the recording work.
Microphone Placement
Whether using the SR-M500 as a single microphone or stereo pair, there are no set rules in the microphones placement, but the tips below may help achieve great results in most scenarios.
Stereo Spaced Pair
To mount SR-M500 in a spaced pair configuration, you’ll need to place the microphones on two separate microphone stands. It is best to experiment with the exact positioning and direction of the microphones while listening to the signal, to ensure phase compatibility. The Spaced pair is ideal for recording sound sources or instruments that cover a wider area such as choirs and ensembles, or require more than one point-source to pick up a true representation of the sound. It can also produce incredible results on individual instruments when used correctly.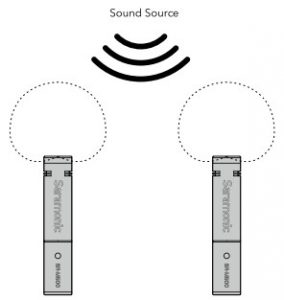
Stereo X-Y
To mount SR-M500 in X/Y configuration, you’ll need to place the microphones either on a stereo bar, or on two separate microphone stands. The microphones should be placed at 90º to one another (right angle) with the capsules stacked above each other vertically. X/Y configuration makes the sound you record not only sounds great in stereo, they will also sound great when playback in mono. While X/ Y configuration is great for mono compatibility and ease of use, the stereo image will not be as wide as other techniques such as ORTF or a spaced pair configuration.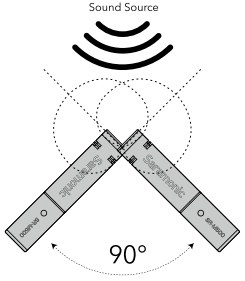
Stereo ORTF
To mount SR-M500 in ORTF configuration, you’ll need to place the microphones either on a stereo bar, or on two separate microphone stands. The microphones should be placed at 110º to one another with the capsules 17 cm apart and facing outward. The ORTF technique was originally designed to mimic the response of human hearing. In ORTF configuration, the increased distance between the capsules will produce a wider stereo image than X/Y configuration.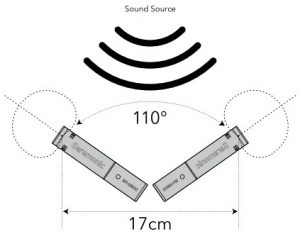
References
[xyz-ips snippet=”download-snippet”]