![]()
SCANNERQuick Guide
Box Contents
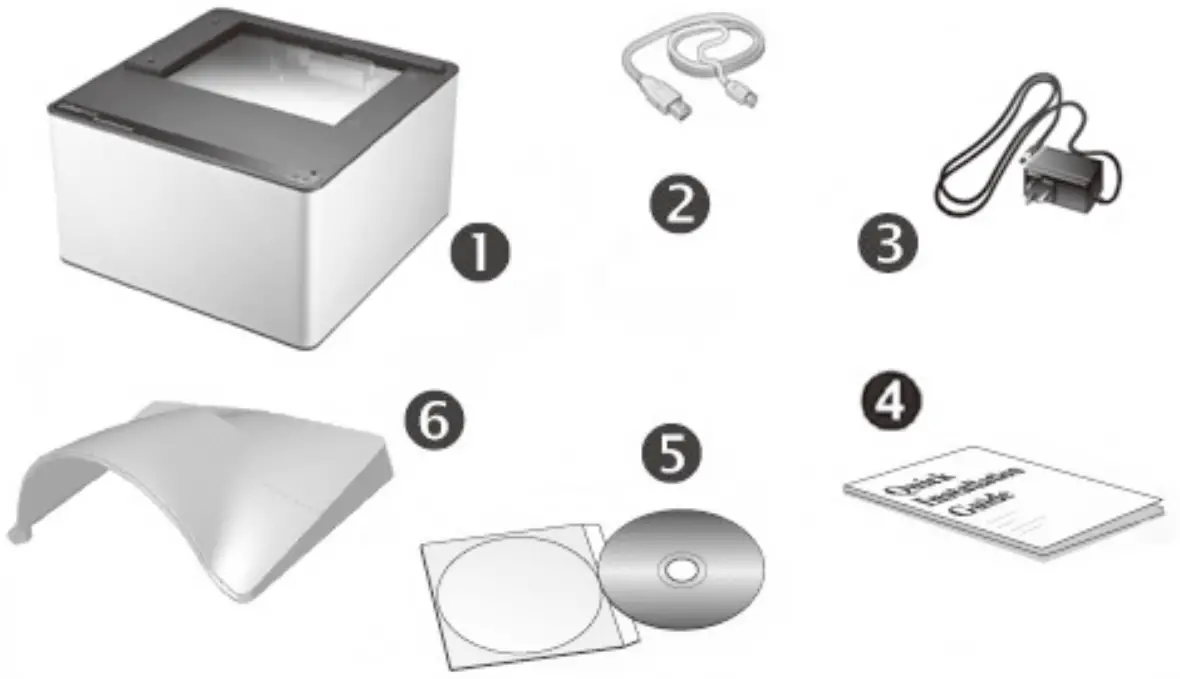
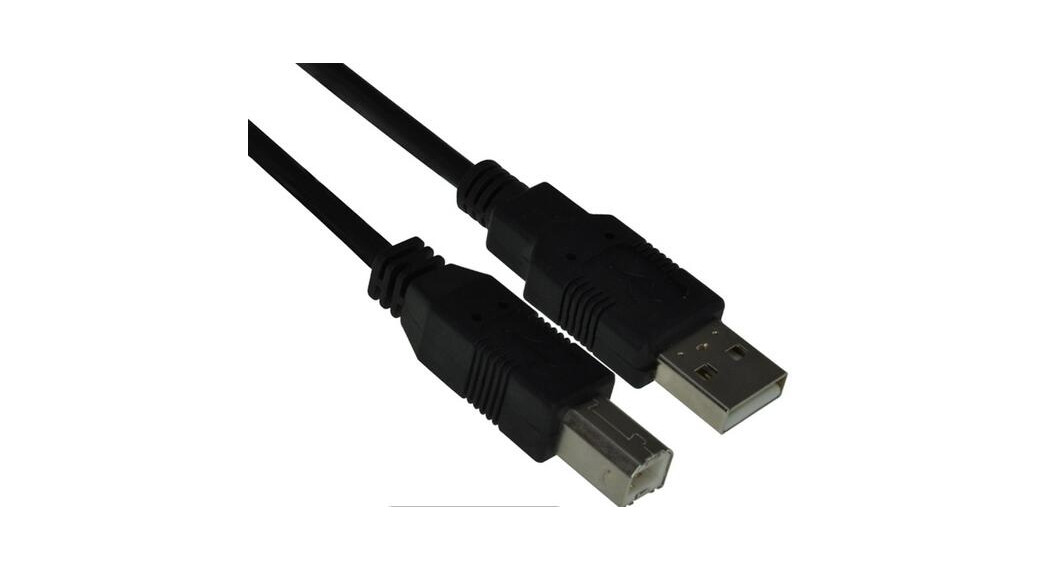
1. Scanner *2. USB Cable3. AC Adapter(Only for X150 / X200)4. Quick Guide5. Setup/Application CD-ROM6. Cover (Except X-Cube)* The scanner illustration(s) may appear different than from the actualscanner itself.
Installation and Setup
Step 1. Connecting the Scanner to Your ComputerX50 / X100 / X-Mini / X-Cube
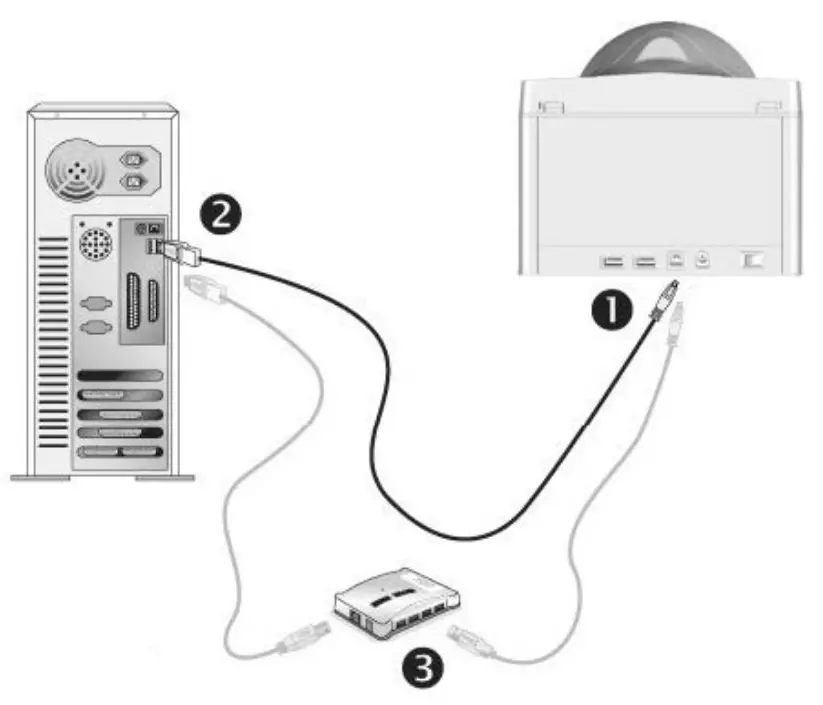
- Plug the square end of the included USB cable into the USB port at the rear of the scanner.
- Plug the rectangular end of the USB cable into an available USB port on your computer.
- If you plan to connect your scanner to a USB hub, make sure that the hub is connected to the USB port in your computer. Next, connect the scanner to the USB hub.
X150 / X200
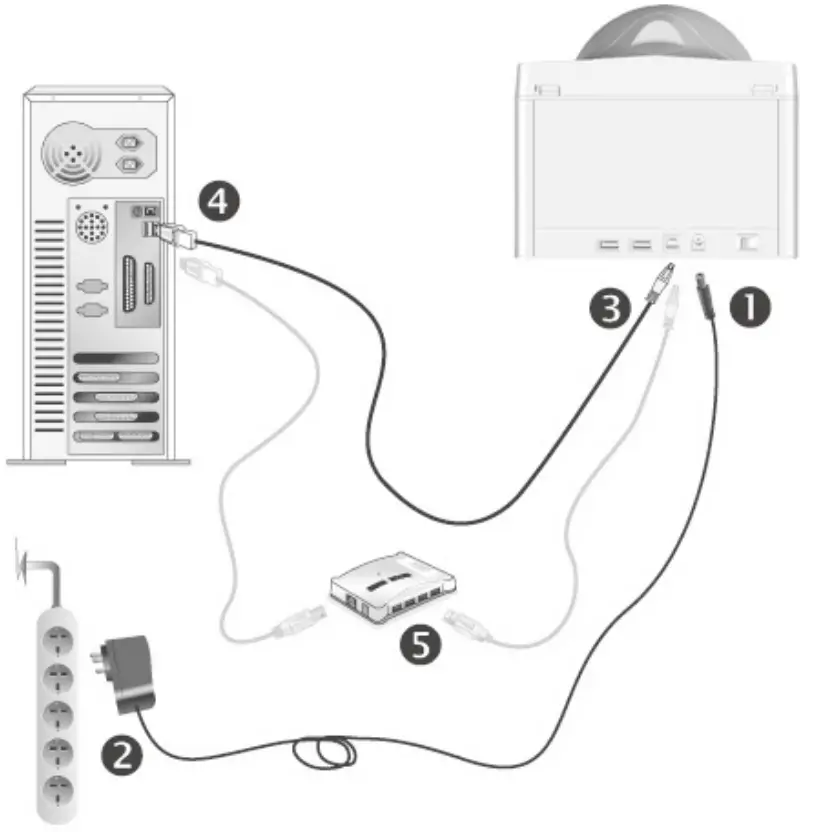
- Plug the AC adapter into the scanner’s power receptor.
- Plug the other end of the power cable into a standard AC power outlet.
- Plug the square end of the included USB cable into the USB port at the rear of the scanner.
- Plug the rectangular end of the USB cable into an available USB port on your computer.
- If you plan to connect your scanner to a USB hub, make sure that the hub is connected to the USB port in your computer. Next, connect the scanner to the USB hub.
- Switch the scanner power on.
Step 2. Installing the Software
- If the USB components on your computer are functioning correctly, they will automatically detect the scanner causing the Add New Hardware Wizard or Found New Hardware Wizard to be launched.
 InformationIf your computer is off when the scanner is connected, the “Add New Hardware Wizard” message will not be displayed until the computer is on and Windows starts.
 - For Windows 7:When the Setup/Application CD is for several scanner modelsa. Insert the Setup/Application CD-ROM, included with your scanner, into your CD-ROM drive. Click Run install.exe in the AutoPlay window.b. Click on the Yes button if the User Account Control dialog pops up.Follow the instructions in the pop-up installation message.c. In the Device Manager window, right-click on this scanner under Other devices and select Update Driver Software from the pop-up menu.Click Browse my computer for driver software in the window that appears, and click the Browse button.d. In the Browse For Folder window, select the folder or the CD-ROM drive that contains this scanner’s driver and click the OK button to return to the previous screen. Click the Next button and click Install this driver software anyway if the Windows Security window appears. Afterward, please skip to procedure4.When the Setup/Application CD is for one scanner modela. Insert the Setup/Application CD-ROM, included with your scanner, into your CD-ROM drive. Click Run install.exe in the AutoPlay window.b. Click on the Yes button if the User Account Control dialog pops up.Afterward, please skip to procedure 4.
- For Windows 8 & Windows 10:a. Insert the Setup/Application CD-ROM, included with your scanner, into your CD-ROM drive. Click on the pop-up notification, then click Run install.exe in the pop-up window. If you miss the pop-up notification, please eject and re-insert the Setup/Application CD-ROM.b. Click on the Yes button if the User Account Control dialog pops up.Afterward, please skip to procedure 4.
- Follow the on-screen instructions to install all software that your new scanner requires. If the pop-up wizard window appears click Next, and click Install this driver software anyway in the Windows Security window then click Finish in the wizard window.
- After the software is installed, close all open applications and click theFinish button to restart your computer.
 InformationIf your computer is off when the scanner is connected, the “Add New Hardware Wizard” message will not be displayed until the computer is on and Windows starts.
![]() Attention
Attention
Save the Setup/Application CD in case you need to reinstall the driver and software in the future.
 You may also consult the complete “user’s guide”, which is automatically installed on your computer with the scanner software.
[xyz-ips snippet=”download-snippet”]