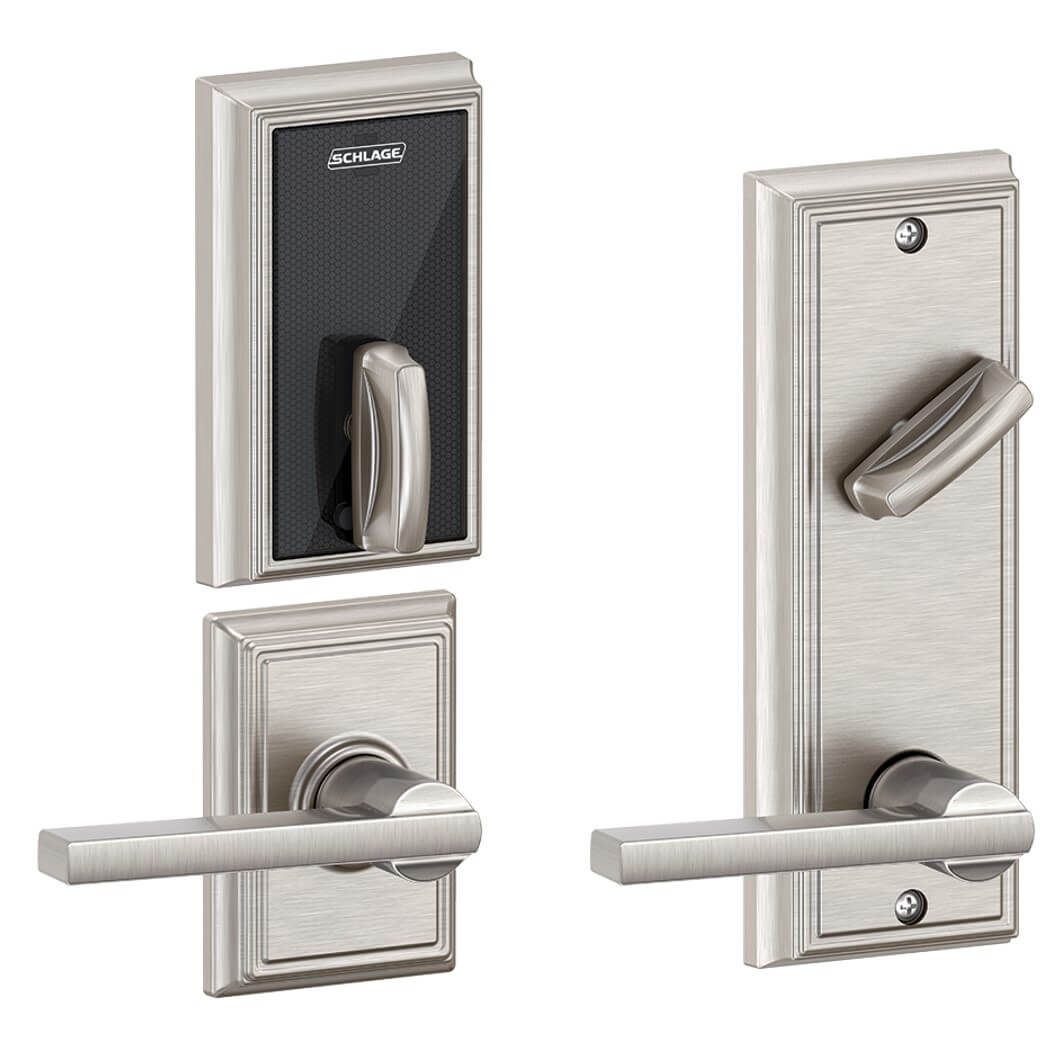
Schlage Control™ Smart Interconnected Lock
with Engage Technology
Model FE410F Installation Instructions
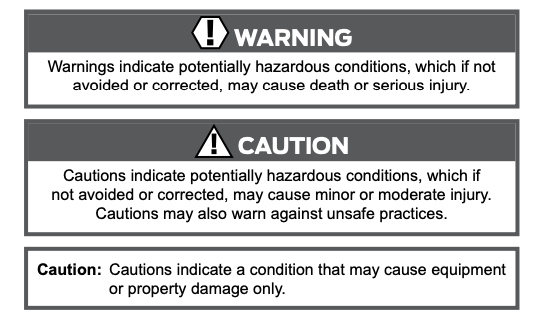
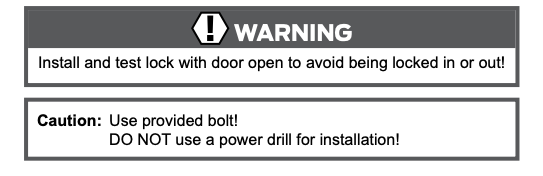
Warnings and Cautions
Prepare for Installation
Tools Needed
- Phillips screwdriver
- Tape measure
Optional Tools
- Flathead screwdriver
- TorxTM driver
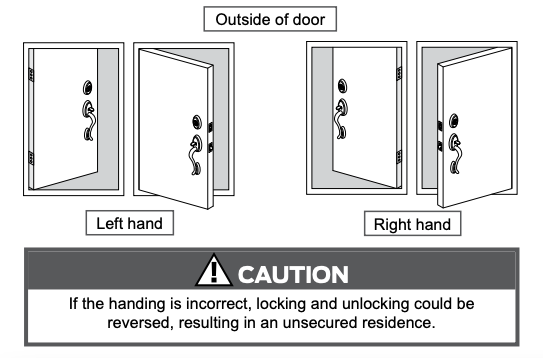
Determine the Handing
Determine the handing of your door. Directions for changing lock handing are provided throughout the instructions.
Important Notes
Check door dimensions
See consumer.schlage.com/Service-Support for door preparation instructions if dimensions are different.

![]() The firecup cannot be installed on a 1 3/8” (35 mm) thick door, and the lock will not retain the UL rating.
The firecup cannot be installed on a 1 3/8” (35 mm) thick door, and the lock will not retain the UL rating.
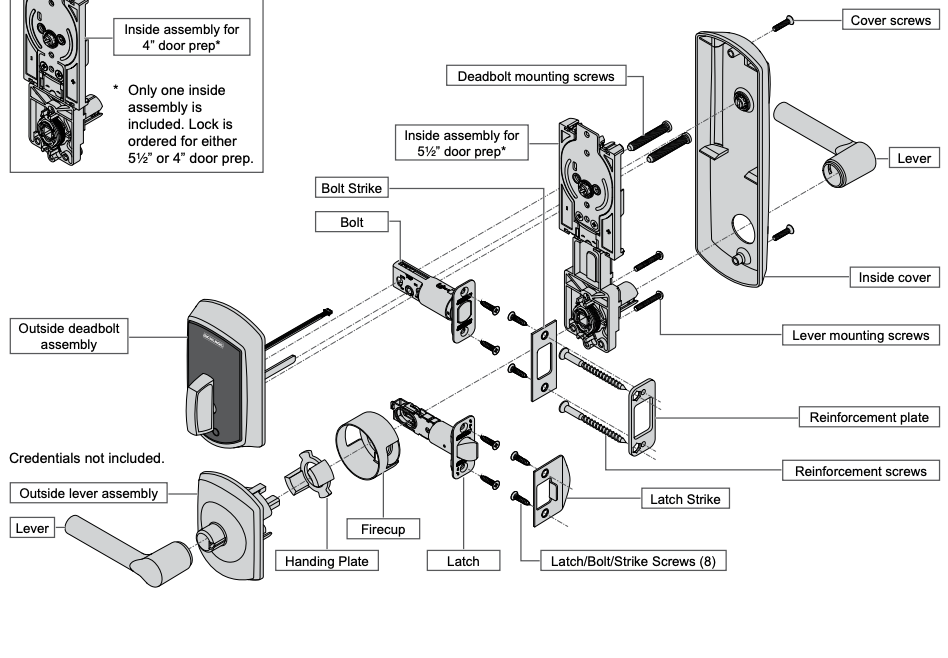
Install the Lock
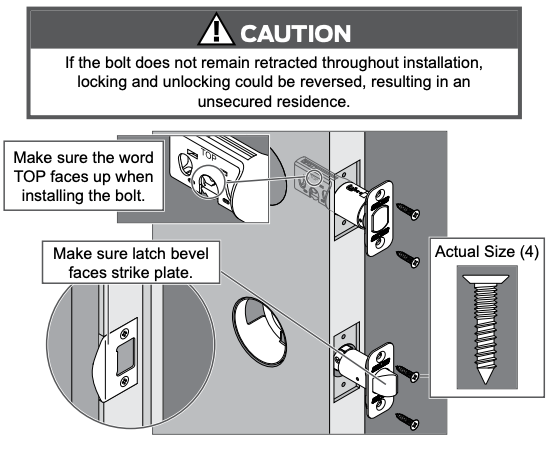
1. Install the bolt and latch.
Caution: Use provided bolt!
1a Adjust bolt length, if necessary.

1b If desired, change to the square-corner faceplate.
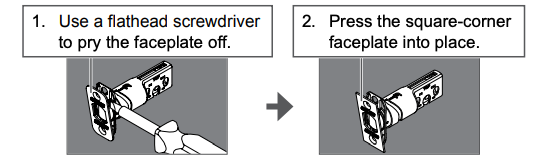
![]() The faceplate for the latch can be changed in the same way.
The faceplate for the latch can be changed in the same way.
1c Install the firecup into the lower hole.
![]() DO NOT install the firecup on a 1 3/8” thick door.
DO NOT install the firecup on a 1 3/8” thick door.
1d Install the bolt and the latch into the door.
2. Install the top part of the lock.
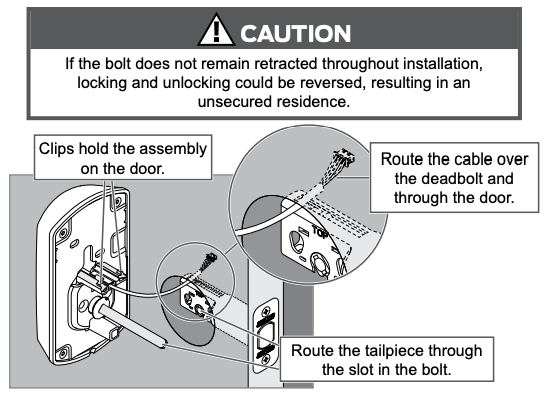
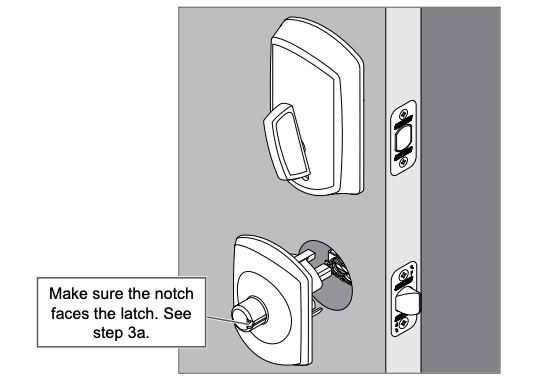
2a Install the outside deadbolt assembly on the outside of the door.
2b Adjust the spindle on the inside assembly, if necessary.

![]() See Determine the Handing on page 2 to determine the hand of your door.
See Determine the Handing on page 2 to determine the hand of your door.

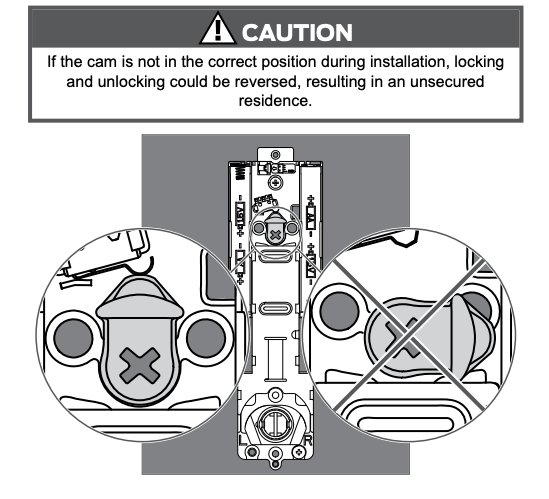
2c Make sure the cam on the inside assembly is in the correct position.
2d Install the inside assembly on the inside of the door.
![]() Bolt must remain retracted!
Bolt must remain retracted!
2e Secure the inside assembly with the two top screws.
![]() If the screw holes are blocked by the cam, see step 2c.
If the screw holes are blocked by the cam, see step 2c.
3. Install the bottom part of the lock
3a Install the handing plate into the lever assembly.

![]() See Determine the Handing on page 2 to determine the hand of your door.
See Determine the Handing on page 2 to determine the hand of your door.

3b Install the lever assembly on the outside of the door.
![]() The lever will be installed later.
The lever will be installed later.
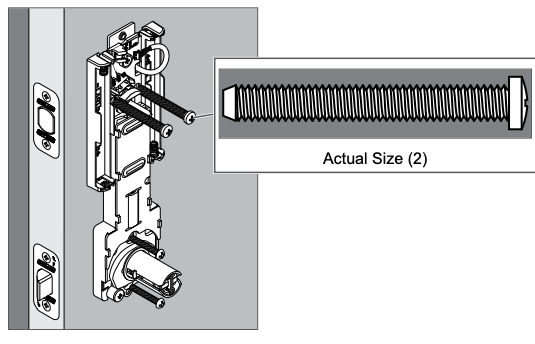
3c Secure the inside assembly with the two bottom screws.
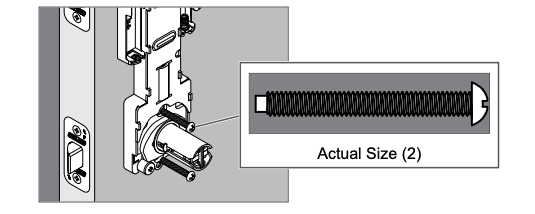
3d Move the handing screw and cam stop to the appropriate position, if necessary.
![]() See Determine the Handing on page 2 to determine the hand of your door.
See Determine the Handing on page 2 to determine the hand of your door.

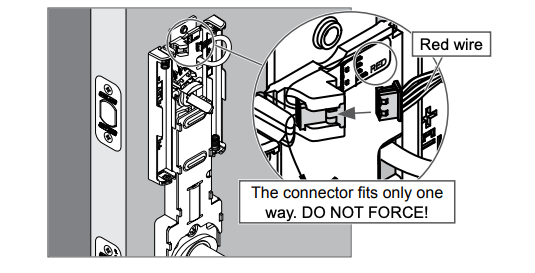
4. Apply power to the lock
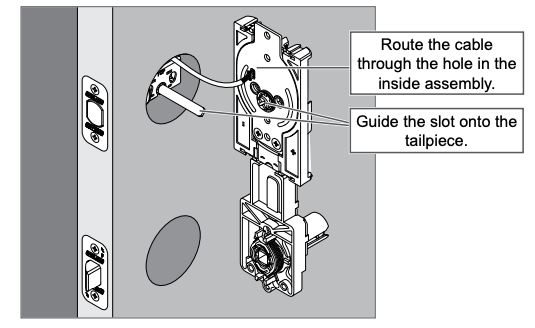
4a Connect the cable to the inside assembly.
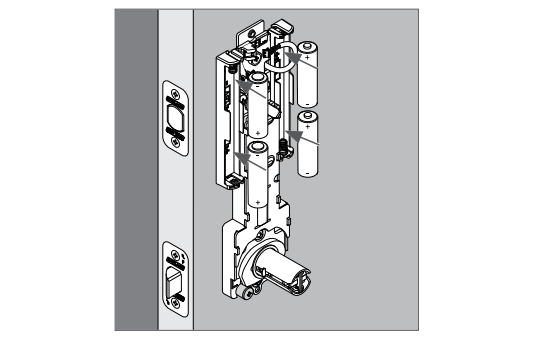
4b Install the batteries.
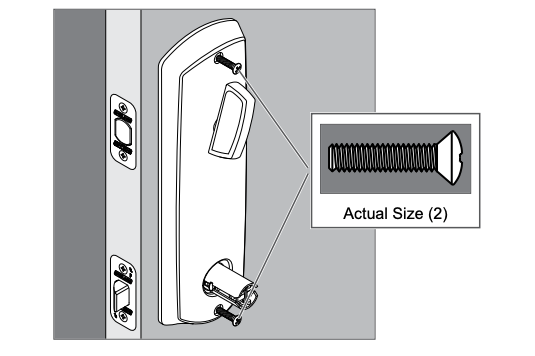
5. Install the inside cover
5a Place the inside cover on the door.

5b Secure the inside cover with two screws.
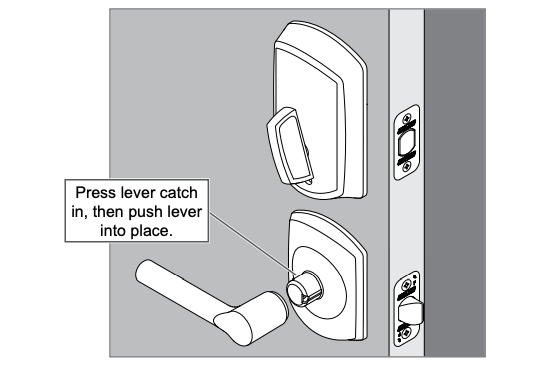
6. Install the levers
6a Install the lever on the inside of the door.
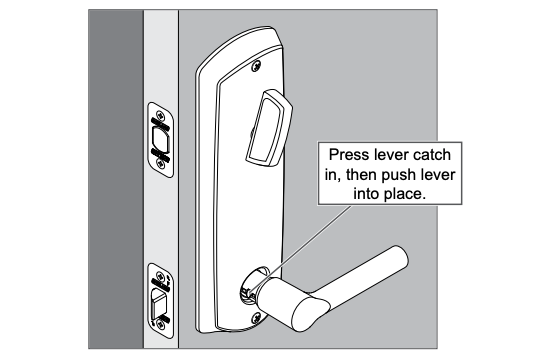
6b Install the lever on the outside of the door.
7. Install the strikes
7a Install the strikes into the frame.
![]() Install all the parts shown for maximum security.
Install all the parts shown for maximum security.

8. Test the lock
8a Extend and then retract the bolt using the inside bolt throw.
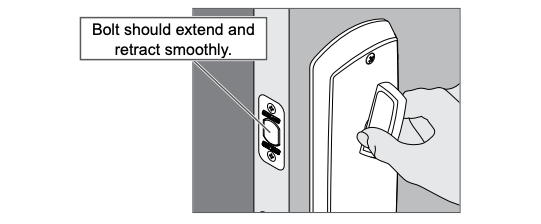
![]() Outside bolt throw should spin freely until a valid credential is presented.
Outside bolt throw should spin freely until a valid credential is presented.
8b Extend the bolt using the bolt throw and then rotate the inside lever.
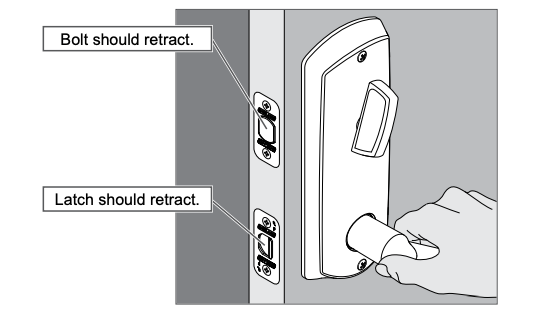
8c Rotate the outside lever.

If the lock did not operate as described, please see Troubleshooting on page 8.
9. Set up the lock
Continue to www.schlage.com to download the Schlage Control Smart Locks User Guide.
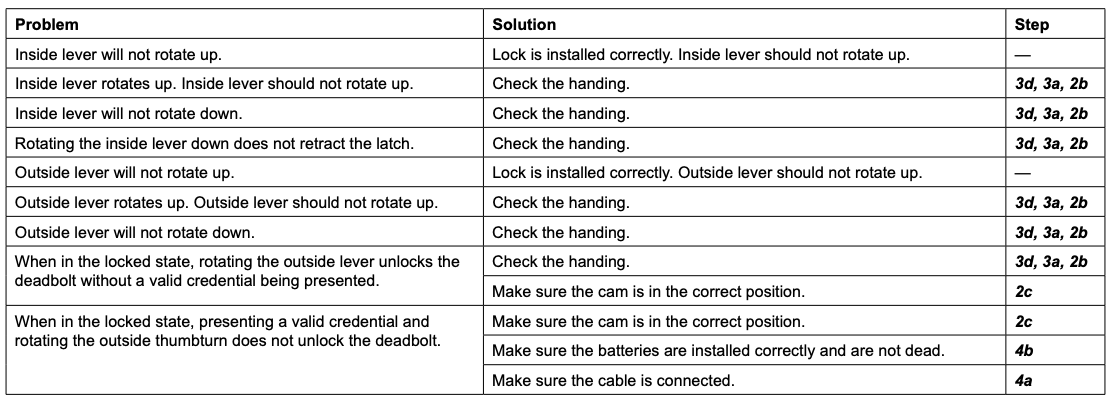
Troubleshooting
Most installation problems are related to handing. See Determine the Handing on page 2 to determine the hand of your door.
Schlage Control Smart Interconnected Lock FE410F User Manual – Schlage Control Smart Interconnected Lock FE410F User Manual –
[xyz-ips snippet=”download-snippet”]