
![]()
P518-149

Installation Instructions
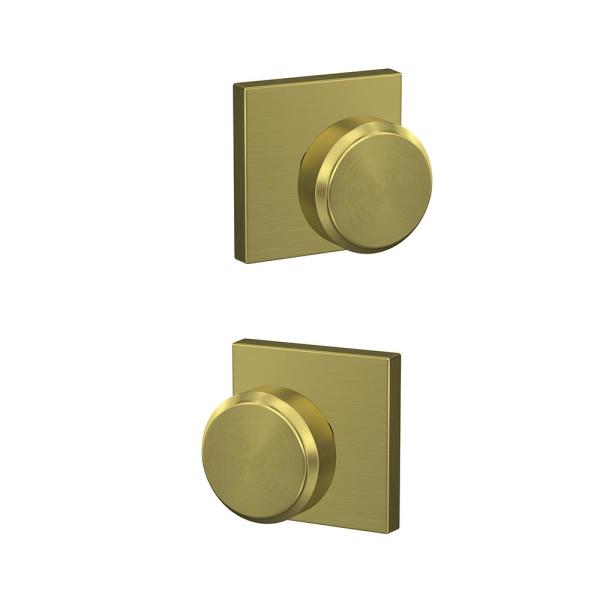
Model FC21, Combined interior
![]() This lock can be installed as passage (hall/closet) or privacy (bed/bath). See the included Privacy function kit.
This lock can be installed as passage (hall/closet) or privacy (bed/bath). See the included Privacy function kit.
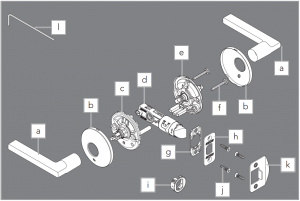
a. Knob/Lever
b. Trim
c. Exterior chassis
d. Latch
e. Interior chassis
f. Chassis screws
g. Backplate
h. Faceplate
i. Drive-in faceplate
j. Latch/strike screws
k. Strike
l. Hex wrench (Do not discard!)
1 Watch the installation video.
Go to Schlage.com/faqs-custom.

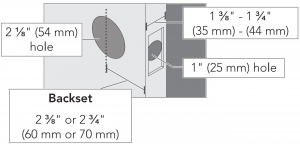
2 Check door dimensions.
2a If dimensions do not match, you may need to modify your door.
For further assistance, call Customer Service at (888) 805-9837.
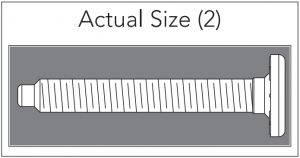
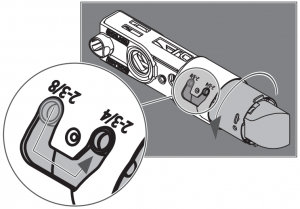
2b Check latch length.
Measure the backset as shown above.
- 2 ³⁄₈” (60 mm): no adjustment is necessary.
- 2 ³⁄₄” (70 mm): see the Adjust latch section.
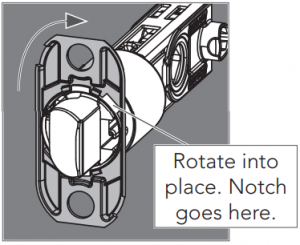
3 Install the latch
3a Install backplate.

This backplate is backward.
OR
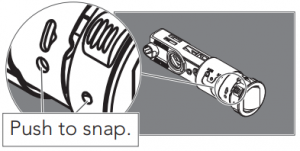
3a Install drive-in faceplate.
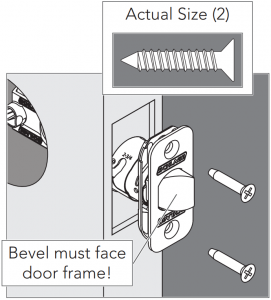
3b Add faceplate and secure with screws.
OR
3b Use wood block and hammer.

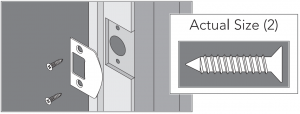
4 Install the strike onto the door frame.
Use included strike for best performance.
5 PRIVACY FUNCTION ONLY: Choose privacy pin location.
Location is based on preference and does not change the function.
Pin on bottom, go on to step 6
OR
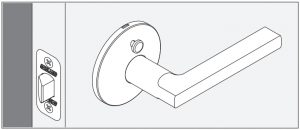
Pin on top, go to Schlage.com/faqs-custom.
6 Identify the exterior and interior chassis
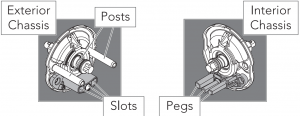
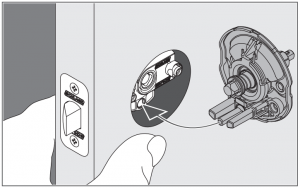
7 Install the exterior chassis.
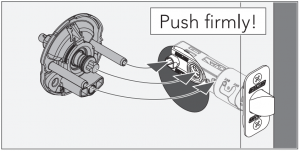
8 Install the interior chassis.
8a Chassis is spring-loaded. Push pegs into slots and hold in place.
8b Secure with two (2) screws.
Make sure chassis is straight!

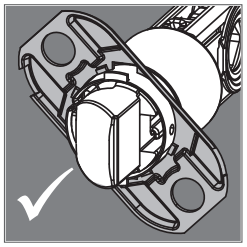
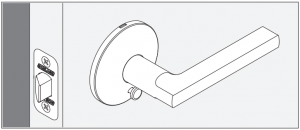
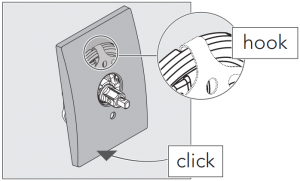
9 Install the trim.
![]() Align hole in trim with hole in chassis.
Align hole in trim with hole in chassis.
OR
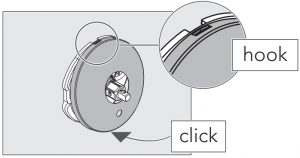
Repeat for the other side of the door.
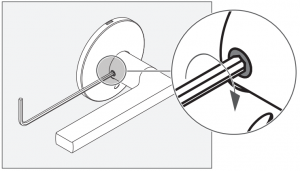
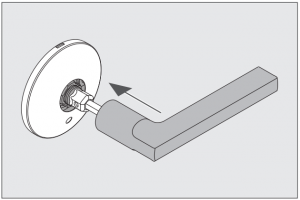
10 Install the exterior knob/lever.
10a Push knob/lever firmly into place.

10b Then tighten set screw.
11 PRIVACY FUNCTION ONLY: Install the privacy pin.
Follow the included
Privacy function kit instructions.

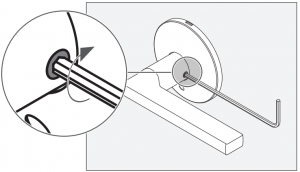
12 Install the interior knob/lever.
12a Push knob/lever firmly into place.
12b Then tighten set screw.
Adjust latch
For 2 ³⁄₄” backset, rotate and pull latch out to long setting.
Customer Service
(888) 805-9837 www.schlage.com
Schlage Custom FC21 Combined Interior Lock Installation Manual – Schlage Custom FC21 Combined Interior Lock Installation Manual –
[xyz-ips snippet=”download-snippet”]