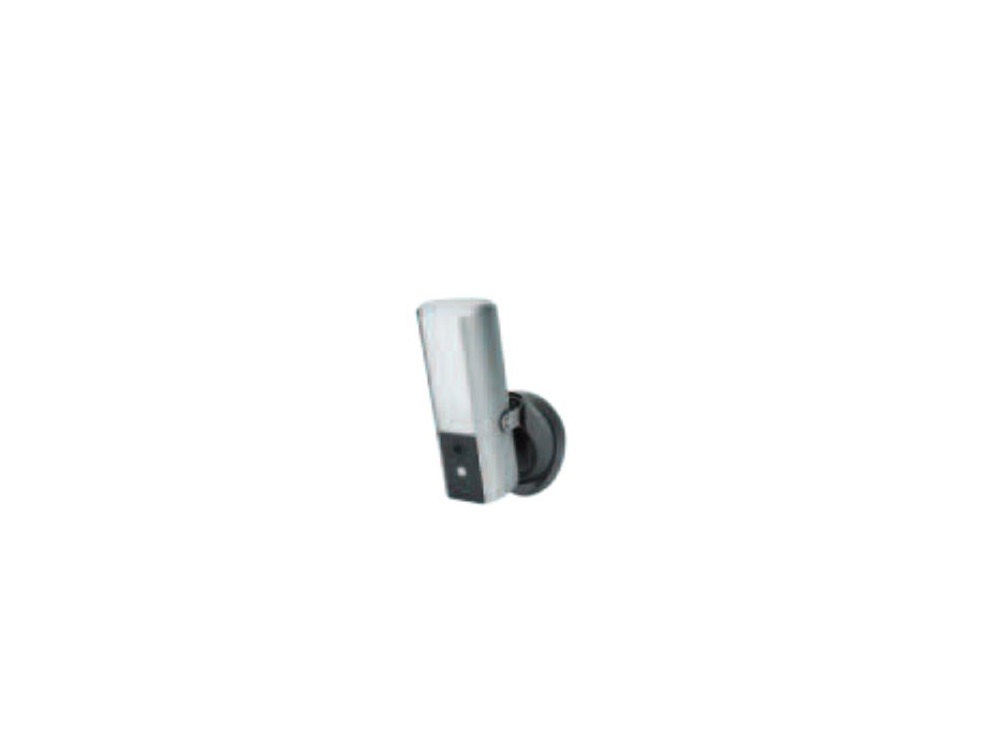
SecuFirst LCA230 Lighting Camera User Guide

www.secufirst.eu www.alcelectronics.eu
1. Box Content
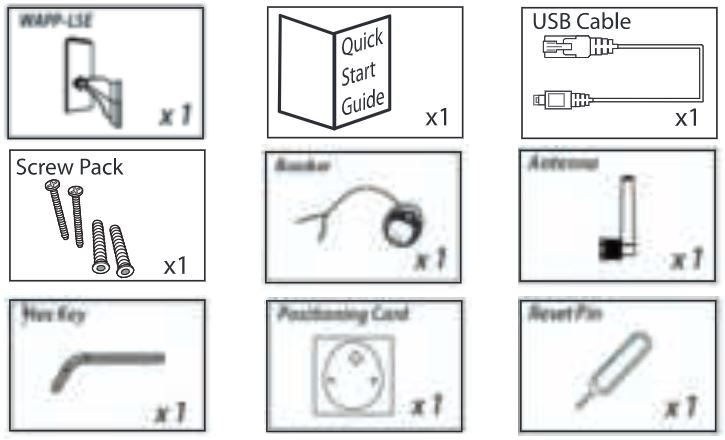 Note: To record video kindly use a Class 10 micro SD card of Maximum 128GB, not included2.
 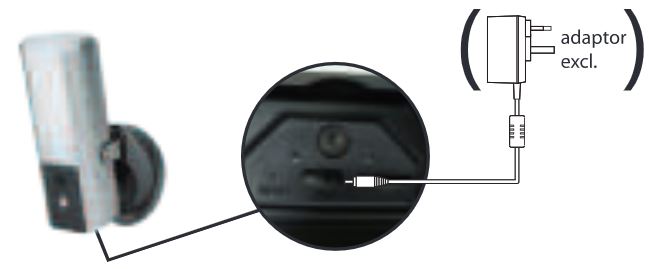 3.
3.  4.
4.  5.
5. 6.
6. 7.
7. 8.
8. 9.
9. 10.
10. 11.
11.
- Box content
- Screw off the cover on the bottom of the light to connect the USB cable to the camera and an adaptor (excl.) Note, the USB cable is only needed for installation. Screw on the WiFi antenna to the back of the light. DO NOT connect an Ethernet cable during installation.
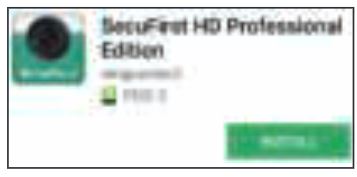
- Download the Securest HD Professional Edition app from the google plays tore (Android) or Apple store (iOS).
- Go to the Wi-Fi settings of your smartphone or tablet. Connector a Wi-Fi signal called “HD-0 …. :’. The password of this Wi-Fi network is 12345678 (Note, this connection has no internet available, this is correct). Note, if this Wi-Fi signal is not being showed, remove the ethernet cable and adaptor and plug in the adaptor again, or reset the camera (See additional information below).
- Open the app “Securest HD Professional Edition” and tap “Press to add new system”.
- Tap “Wireless setup” and wait for 10 seconds.
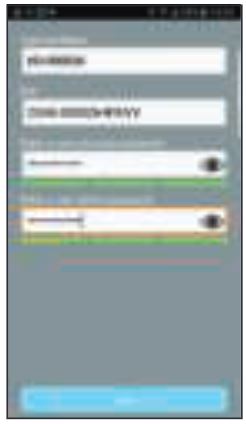
- Insert 2 new passwords.1. Security password (To have live view).2. Ad min password (To change settings of the camera). Tab” OK” and insert the 2 passwords which contain:A) Minimum of 12 characters.B) At least one capital letter (Example: A).C) At least one small letter (Example: a).D) At least one digit (Example: 1).E) At least one reading sign (Example:!).The new difficult passwords is for your own protection so other unwanted people cannot have access to your camera. Tab “Save” button.
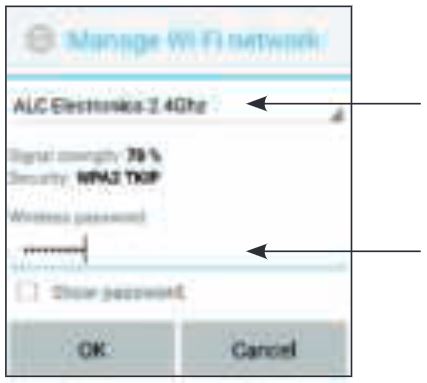
- Select your own Wi-Fi network. There will be displayed 1 network but you can view all networks close to the camera by tab the small arrow on the right side of the displayed network. After you have selected your Wi-Fi network insert your own Wi-Fi password (Note, this is your own Wi-Fi passwords, not the password you have entered in step 7 above). Tab “Save” button. Note, The Wi-Fi network”HD-0 ….. :’will not be visible again. It’s only during the installation of the camera.
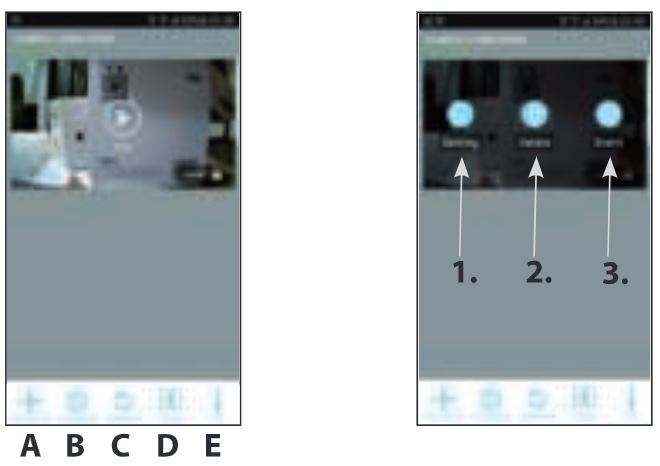
- The IP camera will restart. Please wait about 100 seconds. The screenshot will show “Connected” and you can tab on “Play” to have the live view.A) Make a snapshot of the image you have on your phone.B) Audio unmute / muteC) Record the live video manuallyD) Panic Alarm. Press to activate the serene.E) Talk back via the camera from the smart device. You can speak while holding this button (Push to talk)F) Light always Off (Note, the light function only works when the adaptor is disconnected and light is connected to the 230V directly)G) Light always On (Note, the light function only works when the adaptor is disconnected and light is connected to the 230V directly)HJ Light automatic On if their is movement when it’s dark outside.(Note, the light function only works when the adaptor is disconnected and light is connected to the 230V directly)I) Dim function. Movie the circle with your fingers to adjust the light strength. (Note, the light function only works when the adaptor is disconnected and light is connected to the 230V directly)J) Return to main menu.
- Settings in the main menu.A) Add a new device. Only needed when you buy another Sect First branded item. We have an all-in 1 app for the categories: IP camera, Door Entry, Alarm, Home automation and Lighting.B) Edit settings. When you tab on this button then 3 buttons will appear in the screenshot.1) Settings2) Erase current camera from this app.3) Events to look back at recordings (only if you have insert a micro SD card into the camera). Tab the “Edit setting” button below to remove the3 buttons in the screenshot.C) Reconnect button. If the camera doesn’t show “Connected’; tab this button.D) Quad view.E) Info button.
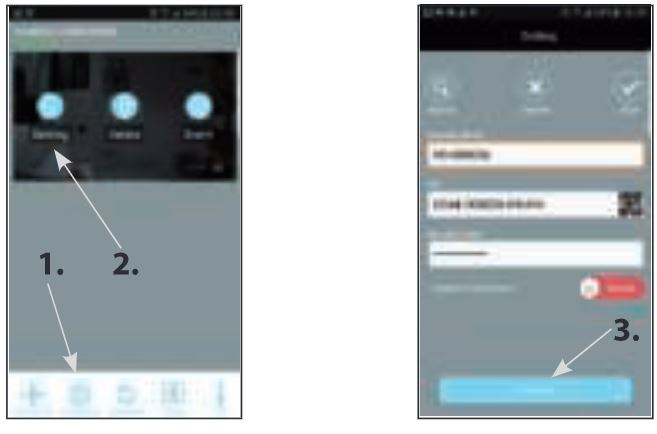
- To go to the advanced setting tab “Edit settings” and then the “Settings” button in the screenshot. Please enter your Camera name, example: Garden camera, then tab “Save”. To go to the advanced setting tab “Edit setting” and then the” Setting” button in the screenshot. Below in the next screen tab on the button “Advanced”. Insert the second password of step 7 (Dam in password). All the Advanced settings are explained in our big manual.
- Your product is now installed and ready to mount outside. Remove the USB cable and screw on the cover. Kindly follow the installation paper which is also included in the box.
- Downloads available on our website www.secufirst.eu* Big manual* How to install movies
Additional information
Video recording.
Insert a micro SD card, maximum 128GB, Class 10 preferably of the brand SanDisk or Kingston (Not included). Please disconnect the power before you install the micro SD card. Put the micro SD card in the micro SD card slot which is located behind the cover at the bottom of the light. Finally you need to format the SD card in the advanced settings of the app (FAT32).
Installation 2nd Smart device.Download and install the “Securest HD Professional Edition”app on your smart device. Open the app and tap “Press to add new system”. Tap “Excising System”. Enter camera name (Your own choice), DID code and password. Tab “Save” Button, then “Yes” to save the system.
Reset the camera to default.Screw off the cover at the bottom of the lamp. The camera can be reset to default settings by holding a paperclip on the reset button for 15 seconds. You notice the camera is reset when the blue LED startsflashing quickly. The camera will reboot and after 60 seconds you hear a peeping sound. The reset is completed. Reset the device is needed in case of:A) Installation cannot be completedB) Forgot your passwordC) Change to a new Wi-Fi network in another location.

![]()
Model: LCA230Lighting Camera
[xyz-ips snippet=”download-snippet”]