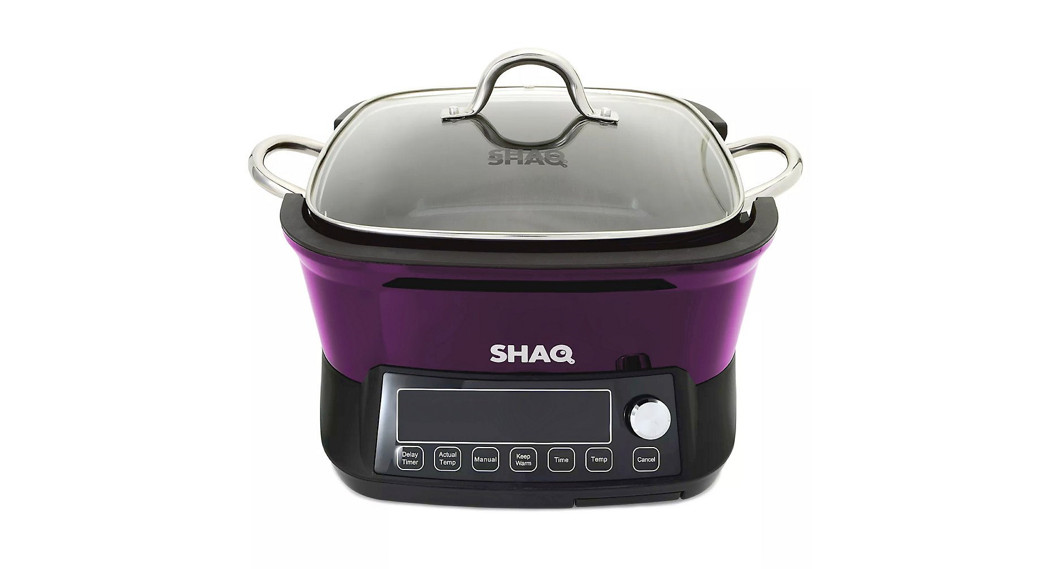
SHAQ MFC6-Y02, MFC4-Y03 Smart Cooker
BEFORE YOU BEGIN
The Shaq Smart Cooker will provide you many years of delicious family meals and memories around the dinner table. But before you begin, it’s very important that you read this entire manual, making certain that you are totally familiar with this appliance’s operation and precautions.
HOW DOES IT WORK?
The induction cooking process heats a cooking vessel through the use of magnetic induction instead of by thermal conduction from an open flame or an electrical heating element. Because inductive heating directly heats the vessel, rapid increases in temperature can be achieved and maintained.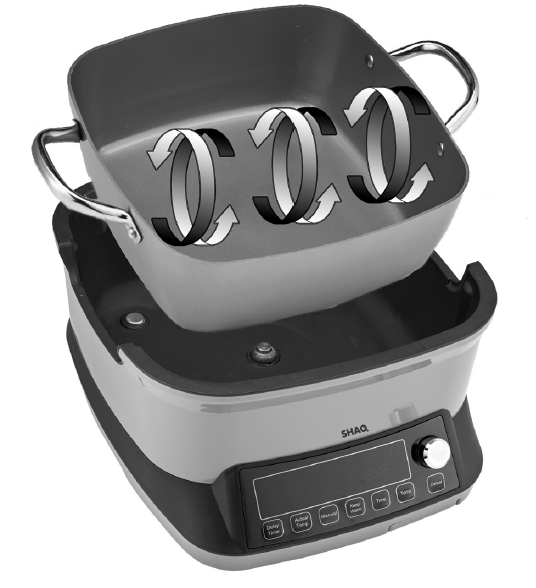 When magnetic metal-based cookware is used, the magnetic field transfers to the bottom surface of the cookware, resulting in high heat sufficient for cooking.The induction cooking method has heating performance comparable to that of a gas burner, but it is significantly more energy efficient.In order for the process to work, a cooking vessel must be made of or contain a magnetic metal such as cast iron or stainless steel.
PERFECT COOKING RESULTS
Maintaining specific cooking time and temperature is as important to a good recipe as the ingredients.With the Shaq Smart Cooker, you can set and adjust the temperature and time to suit your recipe.No more constant adjusting of the flame height and no more guesswork. The Shaq Smart Cooker delivers perfect cooking results without the use of dangerous open flames, exposed electrical elements, excessive heat, or wasted energy.
| MODEL NUMBER | SUPPLY POWER | RATED POWER | CAPACITY | TEMPERATURE | DISPLAY |
| MFC6-Y02 | AC 120V / 60Hz | 1300W | 6.8 Qts. | 100° F–450° F | LED |
| MFC4-Y03 | AC 120V / 60Hz | 1200W | 4.5 Qts. | 100° F–450° F | LED |
IMPORTANT SAFEGUARDS
WARNING
When using electrical appliances, always follow these basic safety precautions.
- Read all instructions carefully to prevent injuries.
- This appliance is not intended for use by persons with reduced physical, sensory, or mental capabilities or a lack of experience and knowledge unless they are under the supervision of a responsible person or have been given proper instruction in using the appliance. Do not leave unattended with children or pets. Keep the appliance and cord away from children. Anyone who has not fully read and understood all operating and safety instructions contained in this manual is not qualified to operate or clean this appliance.CAUTION: People with a pacemaker or similar medical device should exercise caution when using or standing near an induction unit while it is in operation, as the electromagnetic field may affect the working of the pacemaker or similar medical device.
- ALWAYS PLACE UNIT ON A FLAT, HEAT-RESISTANT SURFACE. Intended for counter top use only. DO NOT operate on unstable surface. DO NOT place appliance Base on or near a hot gas or electric burner or in a heated oven. DO NOT operate the appliance in an enclosed space or under low-hanging cabinets. Proper space and ventilation is needed to prevent property damage that may be caused by steam released during operation. NEVER operate the appliance near any flammable materials, such as dish towels, paper towels, curtains, or paper plates. DO NOT let the cord hang over the edge of the table or counter or touch hot surfaces.
- USE CAUTION when moving the Pan during or after a cooking cycle.
- Always handle hot pans with oven mitts while cooking. Place hot pans on heat-resistant surfaces when not seated in the appliance Base.
- CAUTION HOT SURFACES: This appliance generates heat and steam during use. To avoid injury, do not touch the hot surfaces during operation. Proper precautions must be taken to prevent the risk of personal injury, fires, and damage to property.
- DO NOT USE this appliance for anything other than its intended use.
- NEVER FILL THE PAN to more than two thirds capacity. Many foods increase in volume or bubble vigorously while cooking and might boil over the top. Cooking with the lid will prevent splatter and possible injury if bubbles burst and touch exposed skin.
- The use of accessory attachments not recommended by Tristar may cause injuries.
- A short power-supply cord (or detachable power-supply cord) is provided to reduce the risk resulting from becoming entangled in or tripping over a longer cord.
- NEVER plug into an outlet located below the counter. The hanging cord may present a hazard.
- NEVER cover the steam release port on the Lid or the air vents on the back of the base of the appliance.
- DO NOT use this appliance outdoors.
- DO NOT OPERATE if the cord or plug are damaged. If the appliance begins to malfunction during use, immediately unplug the cord from the power.
- DO NOT USE OR ATTEMPT TO REPAIR A MALFUNCTIONING APPLIANCE. Contact Customer Service for assistance (see the back of the manual for contact information).
- UNPLUG THE UNIT from the outlet when not in use and before cleaning. Allow the appliance to cool before attaching or removing parts.
- NEVER immerse the appliance Base in water. If the appliance falls or accidentally becomes immersed in water, unplug it from the wall outlet immediately. Do not reach into liquid if the appliance is plugged in and immersed. Do not immerse or rinse cords or plugs in water or other liquids.
- To prevent risk of injury, replace only with authorized parts as recommended by Tristar.
- NEVER leave cookware or any pan empty over a hot burner. This could ruin the pan.
- NEVER put your cookware in the microwave or toaster oven. This is a hazard that can cause electric sparks or fire and could possibly damage the appliances and your cookware.
- NEVER leave your cookware unattended. This helps to avoid potential injury to children or the risk of fire.
- ALWAYS supervise children who are near cookware when in use, or injury may result.
- DO NOT handle hot cookware without hand protection, especially when using the Pan inside the oven. Use oven mitts because the pan and handles will be very hot.
- Exercise caution when using the Glass Lid. As with any glassware used for cooking, the Lid could shatter due to sudden temperature changes or due to impact if it is dropped or knocked against a hard object.
- If the Glass Lid should crack, chip, or become damaged, STOP USING it immediately.
- DO NOT attempt to repair cookware if it is damaged.
- This product is for home use only. It is NOT INTENDED for camping or commercial use.
- DO NOT use aerosol cooking sprays. These sprays will build up on cookware and become difficult to remove while reducing the non-stick coating performance.
- This appliance is not intended for deep frying foods. Extreme caution must be used when moving the Smart Cooker when it contains hot liquids or hot oil.
- Only use the provided vessel and approved parts to avoid damage to the appliance.
- Do not put any food or liquid in the base of the appliance.
- Do not place any metal objects inside (or on) the base of the appliance. Metal will activate the induction pads. Do not place your hands on the induction heating element when hot. It will retain heat and burn you.
- Do not touch hot surfaces. Use the handles or knobs.
- The fondue function is not intended to be used with oil.
- Risk of electrical shock. Cook only in removable container. Only use the Base with the Pan.
- Before using your new Shaq Smart Cooker on any countertop surface, CHECK with your countertop manufacturer or installer for recommendations about using appliances on your surfaces. Some manufacturers and installers may recommend protecting your surface by placing a hot pad or trivet under the appliance for heat protection. Your manufacturer or installer may recommend that hot pans, pots, or electrical appliances should not be used directly on top of the countertop. If you are unsure, place a trivet or hot pad under the Shaq Smart Cooker before using it.
SAVE THESE INSTRUCTIONS – FOR HOUSEHOLD USE ONLY
CAUTION: ATTACHING THE POWER CORD
• NOTE: The Shaq Smart Cooker is fitted with a Quick-Release Magnetic Power Cord.• Plug the power cord into a 120V grounded outlet with no other appliances on the same outlet. Plugging other appliances into the outlet will cause the circuit to overload.• In the event of appliance malfunction, disconnect the Power Cord quickly from the appliance with a gentle tug where it is connected to the appliance.• Never tug the plug forcefully from the wall outlet.• NEVER USE WITH AN EXTENSION CORD. A short power-supply cord (or detachable power-supply cord) is provided to reduce the risk from becoming entangled in or tripping over a longer cord.• DO NOT USE WITH ANY OTHER ELECTRICAL OUTLET or modify the plug.• A short power supply cord is provided to reduce risk of becoming entangled or presenting a tripping hazard.
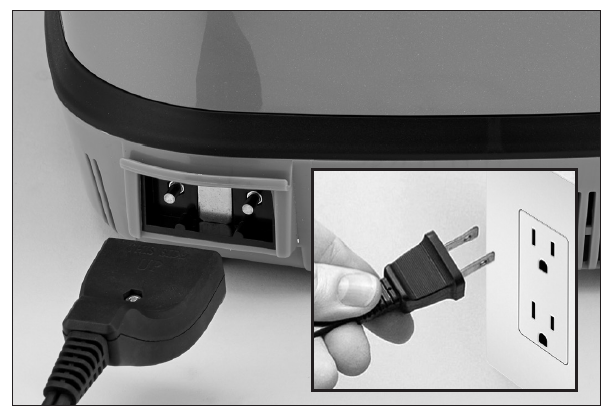
This appliance has a polarized plug (one blade is wider than the other). To reduce the risk of electric shock, this plug is intended to fit into a polarized outlet only one way. If the plug does not fit fully into the outlet, reverse the plug. If it still does not fit, contact a qualified electrician. Do not attempt to modify the plug in any way.
Features & Benefits
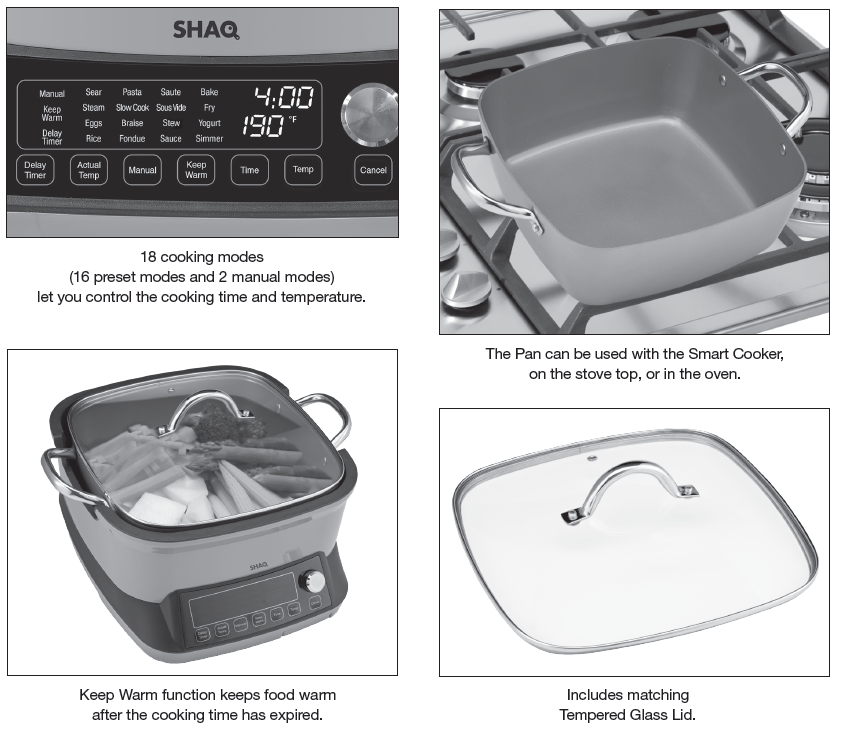
• Model MFC6-Y02 includes 11″ Cerami-Tech Pan with matching Tempered Glass Lid.• Model MFC4-Y03 includes 9.5″ Cerami-Tech Pan with matching Tempered Glass Lid.• The Pan can be used with the Smart Cooker, on the stove top, or in the oven.• 18 cooking modes (16 preset modes and 2 manual modes) let you control the cooking time and temperature.• Keep Warm function keeps food warm after the cooking time has expired.
Parts & Accessories
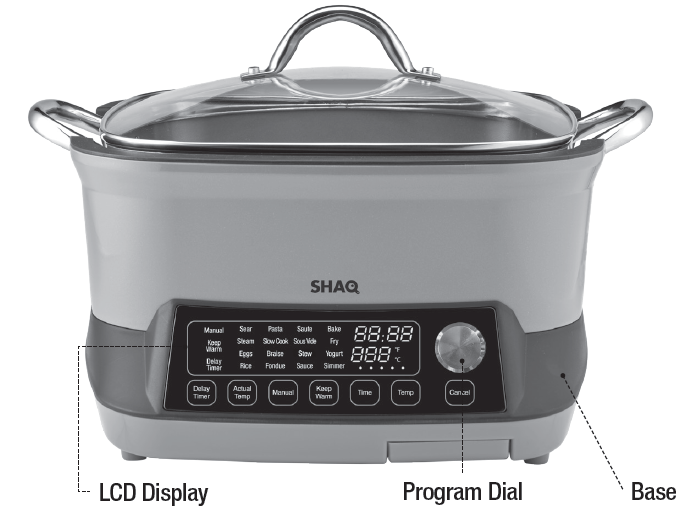
Your Shaq Smart Cooker has been shipped with the parts and accessories shown below.Check everything carefully before use. If any part appears damaged, do not use this product and contact Customer Service using the number located in the back of this manual.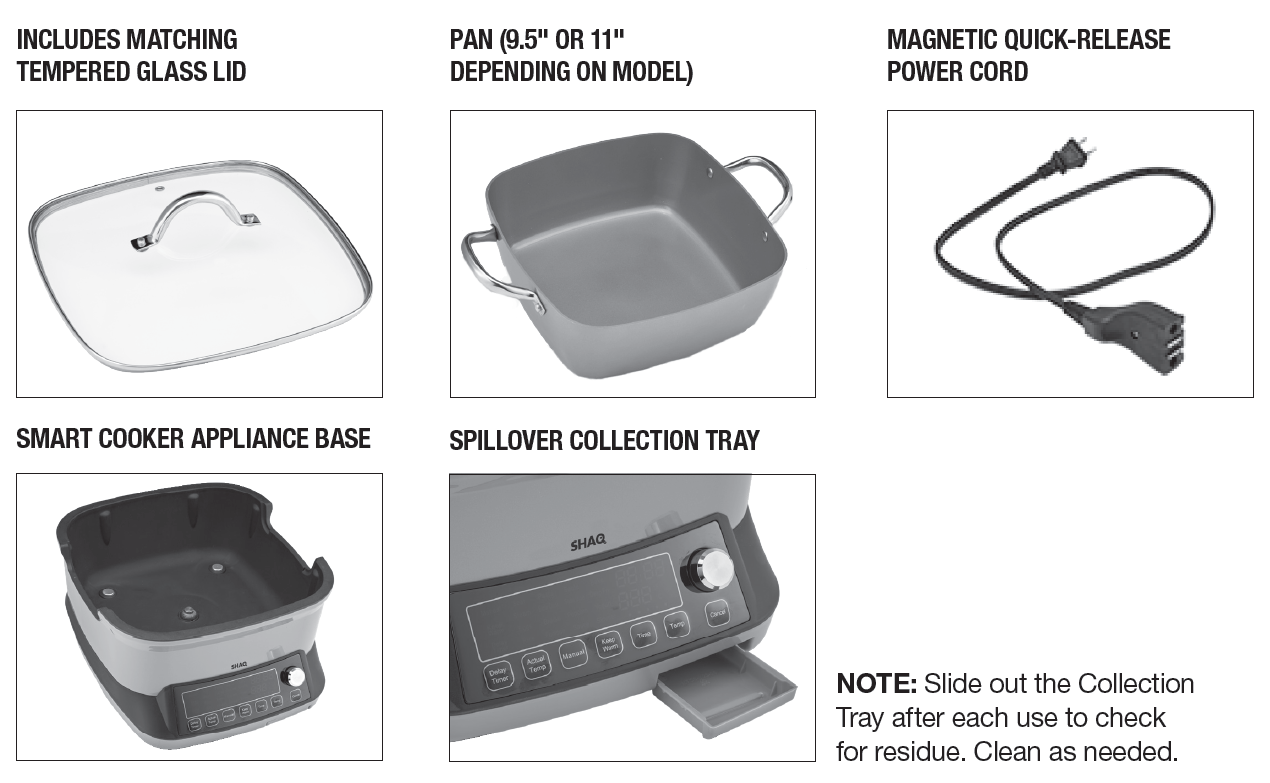
Using The Digital Control Panel
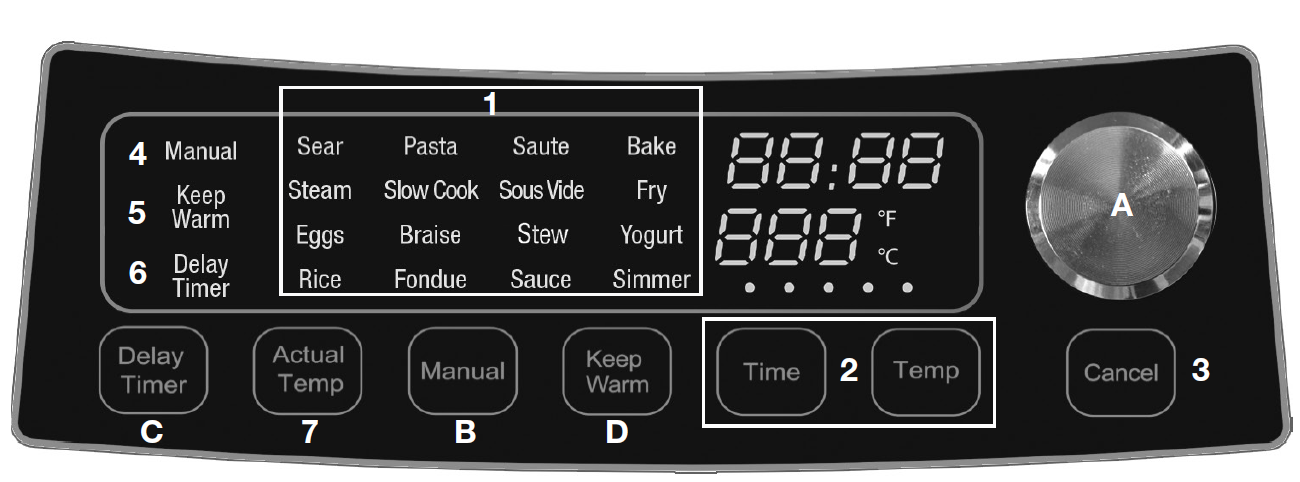
TO START: Attach the Magnetic Power Cord to the back of the appliance as shown on pg. 6. Plug the Power Cord into the wall outlet. The Digital LED Display will illuminate and the fan will turn on briefly and a series of dashes will display.
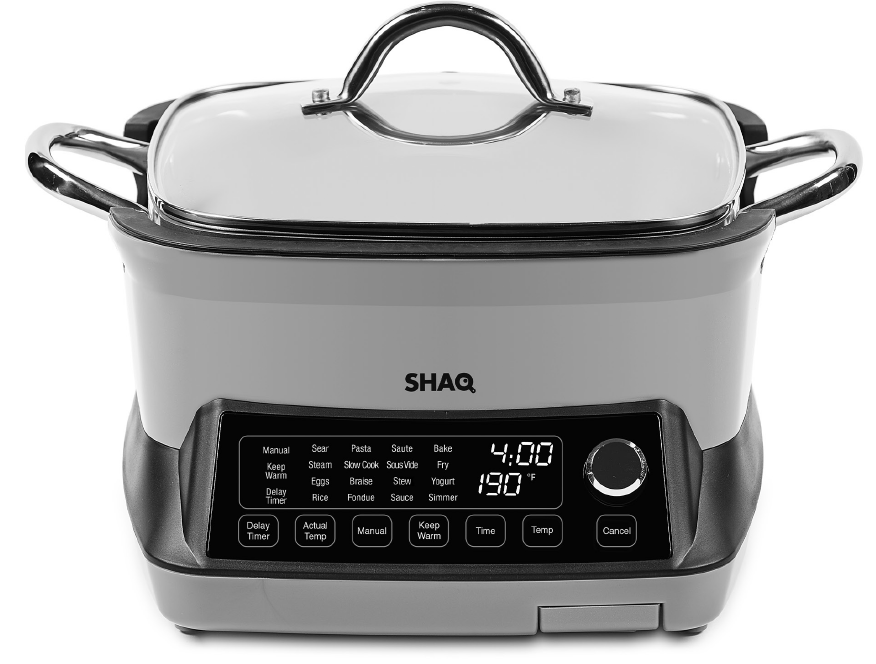
- Selecting a Preset Cooking Mode: 16 preset cooking modes are available: Sauté, Sear, Slow Cook, Sous Vide, Fry, Simmer, Bake, Steam, Braise, Stew, Yogurt, Rice, Pasta, Eggs, Fondue, and Sauce.To select a cooking mode, rotate the Program Dial (A) to the right or left. The selected mode will illuminate the Digital LED Display. Press the Program Dial once and the cooking process will begin and the preset time and temperature will be displayed.
- Adjustable Preset Functions: The cooking time and temperature may be adjusted for some cooking modes. Press the Time or Temp Button and rotate the Program Dial to the desired setting. The time and temperature may be changed at any time during the cooking process.
- Pressing the Cancel Button will stop any cooking process immediately.
- The Manual Preset allows you to bypass the preset modes and set your own cooking time and temperature. Press the Manual Button (B), press the Time Button (2), rotate the Program Dial to the desired time, press the Temp Button (2), and rotate the Program Dial to the desired temperature. Press the Program Dial once to begin the cooking process.
- Keep Warm Function: Most presets will keep your food warm until you are ready to serve it. You may adjust the time for keeping food warm by selecting the Keep Warm Button (D) and turning the Program Dial to select the desired time.
- Delay Timer: Many Presets have a Delay Timer feature (C) that will cook your meal at a later time.
- Actual Temp: When a cooking mode is selected, the appliance takes time to reach the predetermined cooking temperature. You may select this button at any time to check the appliance’s current temperature.
General Operating Instructions
BEFORE USING THE SMART COOKER FOR THE FIRST TIME
- Read all material, warning stickers, and labels.
- Remove all packing materials, labels, stickers, and clear or blue protective film.
- Wash the Pan and Glass Lid with warm, soapy water. NOTE: Only the Pan and Lid are dishwasher safe. Never wash or submerge the appliance Base in water or the dishwasher.
- Wipe the inside and outside of the appliance Base with a clean, moist cloth.
- Before cooking food, preheat the Smart Cooker for a few minutes to allow the appliance to burn off the manufacturer’s protective coating of oil. Wipe the appliance with warm, soapy water and a dishcloth after the burn-in cycle.
PREPARING FOR USE
- Place the appliance on a stable, level, horizontal, and heat-resistant surface.
- Select or set the cooking mode for your recipe.
A VERSATILE APPLIANCEThe Shaq Smart Cooker is designed to cook a wide variety of your favorite foods. The charts and tables provided within this manual and the Recipe Guide will help you get great resultsPlease refer to this information for proper time/temperature settings and proper food quantities.
RECOMMENDATIONS & TIPSRe-Season Your Pan: With repeated use and washing, the characteristics of ceramic coating may fade, but you may revitalize the coating by re-seasoning your cookware:
- Add a small amount of vegetable oil to a clean paper towel. Rub the oiled paper towel all over the entire INTERIOR surface of the pan.
- Put the pan over low heat on the stove top for 30 secs. to 1 min., removing the pan if the oil starts to smoke.
- Remove the pan from the heat and let it cool.
- Once the pan has cooled, use a clean cloth or paper towel to wipe away any excess oil. Then, your pan is ready to use.
For best results, re-season your pan after a few uses or after cleaning it in a dishwasher.
Proper Cooking Utensils: To prevent scratching the coating, we recommend using nonmetal utensils with your cookware. Do not cut food on the cookware using sharp utensils, such as forks, knives, mashers, or whisks, that can scratch the cooking surface.Removing Stubborn Residue: When food is burned on the cookware, a stubborn black residue may remain. If regular cleaning does not loosen it, soak in hot water and 1 tbsp. of non-lemon detergent for 15 mins. Allow the water to become lukewarm before you drain and rinse. Wipe with a plastic spatula or nonabrasive sponge to loosen residue. Repeat if necessary.
GETTING STARTED
NOTE: The Pan must be inserted into the appliance Base to start a cooking cycle.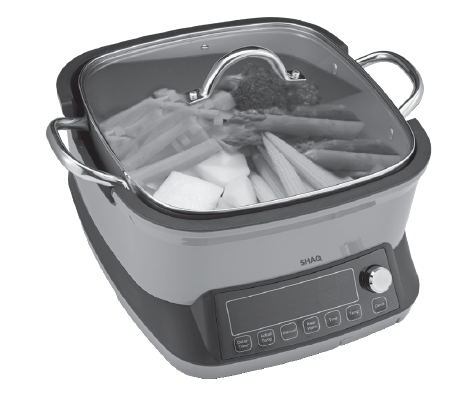
• Select and prepare recipe for cooking.• Place all ingredients in the Pan.• Place the Pan in the Base as shown.• Add Lid if necessary.• Attach the Magnetic Power Cord to the appliance Base and plug into 120V grounded outlet as shown on p. 6.
STEP BY STEP
- Once the appliance is plugged in, it will beep once. A series of dashes will appear in place of the Time and Temperature (see Fig.1).
- Rotate the Program Dial left or right and select the desired Preset Mode. The preset Time and Temperature will be displayed (see Fig.2). To begin the cooking process, push the Program Dial once.
- Depending upon the cooking mode, the time count down will not begin until predetermined cooking temperature is reached.
- When the cooking time has elapsed, the appliance will switch to Keep Warm for most cooking modes.

CUSTOMIZING THE COOKING PROCESS
As you become more familiar with the appliance, you might want to tweak the settings to suit your individual taste. Adjusting the cooking time and temperature and setting up the cooker for Time Delay cooking and Manual Presets are all possible with the Shaq Smart Cooker. See p. 15 for detailed instructions.
Cooking Mode Presets Explained
| COOKING MODE PRESET | FUNCTION |
| Sauté | Heats the pan for use as a fry pan. |
| Sear | Used for browning foods. Heats the Pan to the highest temperature (450° F/232° C) for use as a fry pan. |
| Slow Cook | Cooks food at a low temperature for a long time. |
| Sous Vide | Temperature-controlled water cooking. |
| Fry | Fry food with oil. Not for deep frying. Never fill the Pan with more than one (1) inch of oil. Set the timer for the desired doneness. |
| Simmer | Cooks food gently at a low temperature below boiling. |
| Bake | Used for baking. |
| Steam | Used for steaming foods. A small amount of water will come to a boil to
create steam. Best used with a steaming rack or fry basket with the Glass Lid covering the Pan. |
| Braise | Used to cook large or whole pieces of meat, fish, or vegetables by searing and then simmering slowly in very little liquid. |
| Stew | Used to cook smaller pieces of meat, fish, or vegetables by sautéing in oil and then simmering in liquid without boiling. Use with or without the Glass Lid covering the Pan. |
| Yogurt | Dual temperature program for yogurt making. |
|
Rice |
When the Rice preset is selected, the display will show a rotating symbol. The timer will not count down when using the Rice preset because the cooking time will vary depending on the quantity of rice being cooked. The Smart Cooker will switch to Keep Warm mode when the cooking cycle is complete. |
| Pasta | Used for boiling water. Best used with the Glass Lid. The timer should be set to the desired cooking time once the pasta starts to cook. |
| Eggs | Controlled time egg cooking. |
| Fondue | Cook and keeps food warm at a low temperature (180° F/82° C). |
| Sauce | Cooks food at a low temperature for a long time. Used for sauces for slow liquid cooking. |
Cooking Guidelines & Tips
PRESET MODE CHART
The times and temperatures on this chart show the basic default settings for the appliance. As you become familiar with the Shaq Smart Cooker, you will be able to make minor adjustments to suit your taste. NOTE: The Slow Cook, Sous Vide, Yogurt, Manual, and Sauce presets often require manual time and temperature settings.
| MODE | TEMPERATURE | TIME |
| Sauté | 350° F/176° C | 20 mins. |
| Sear | 450° F/232° C | 20 mins. |
| Slow Cook | 195° F/90° C | 4 hrs. |
| Sous Vide | 140° F/60° C | 60 mins. |
| Fry | 375° F/190° C | 45 mins. |
| Simmer | 205° F/96° C | 60 mins. |
| Bake | 240° F/115° C | 15 mins. |
| Steam | 212° F/100° C | 10 mins. |
| Braise | 215° F/102° C | 2 hrs. |
| Stew | 210° F/99° C | 45 mins. |
| Yogurt | 180° F/82° C | 4 hrs. |
| Rice | 212° F/100° C | Varies |
| Pasta | 212° F/100° C | 20 mins. |
| Eggs | 212° F/100° C | 20 mins. |
| Fondue | 180° F/82° C | 25 mins. |
| Sauce | 200° F/93° C | 20 mins. |
INTERNAL TEMPERATURE MEAT CHART
Use this chart and a food thermometer to ensure that meat, poultry, seafood, and other cooked foods reach a safe minimum internal temperature.*For maximum food safety, theU.S. Department of Agriculture recommends 165° F for all poultry; 160° F for ground beef, lamb, and pork; and 145° F, with a 3-minute resting period, for all other types of beef, lamb, and pork. Also review the USDA Food Safety Standards.
| FOOD | TYPE | INTERNAL TEMP.* |
| Beef & Veal | Ground | 140° F/60° C |
| Steaks, roasts: medium | 145° F/63° C | |
| Steaks, roasts: rare | 125° F/52° C | |
| Chicken & Turkey | Breasts | 165° F/74° C |
| Ground, stuffed | 165° F/74° C | |
| Whole bird, legs, thighs, wings | 165° F/74° C | |
| Fish & Shellfish | Any type | 145° F/63° C |
|
Lamb |
Ground | 160° F/71° C |
| Steaks, roasts: medium | 140° F/60° C | |
| Steaks, roasts: rare | 130° F/54° C | |
| Pork | Chops, ground, ribs, roasts | 160° F/71° C |
| Fully cooked ham | 140° F/60° C |
SOUS VIDE
SOUS VIDE
What is Sous Vide?In the Sous Vide method of cooking, food is sealed inside a plastic bag immersed in water and cooked at a lower temperature. Sous Vide allows for greater control and evenly cooked results. The Sous Vide method holds food at the perfect level of doneness for much longer than regular cooking methods would allow.
What are the Basic Steps?
- The food must be in a sealed plastic bag or vacuum-sealed bag.
- Submerge pouches into the water bath after the liquid has reached your desired temperature.
- Cook for at least the minimum amount of time called for in your recipe.
- Remove each pouch carefully from the water bath. Note: Meat, poultry, or fish can be seared in a hot pan to create a crisp surface immediately before serving.
| FOOD | TEMPERATURE | TIME | COOKING TIP |
| BEEF | |||
| Rare | 125° F/52° C | 1 hr. 15 mins. | Sear with butter in hot skillet |
| Medium Rare | 135° F/57° C | 1 hr. 15 mins. | Sear with butter in hot skillet |
| Medium | 140° F/60° C | 1 hr. 15 mins. | Sear with butter in hot skillet |
| Medium Well | 150° F/65° C | 1 hr. 15 mins. | Sear with butter in hot skillet |
| Well Done | 160° F/71° C | 1 hr. 15 mins. | Sear with butter in hot skillet |
| Rib Roast (Medium) | 140° F/60° C | 6–14 hrs. | Sear all over, slice thin |
| PORK | |||
| Roast | 155° F/68° C | 3 hrs. | Sear in skillet with butter & herbs |
| Chops (Medium) | 145° F/63° C | 1 hr. | Sear in skillet with butter & herbs |
| Chops (Well Done) | 160° F/71° C | 1 hr. | Sear in skillet with butter & herbs |
| POULTRY | |||
| Chicken Breast | 150° F/65° C | 1 hr. | Sear in skillet with butter & herbs |
| Dark Meat | 165° F/74° C | 1 hr. | Sear in skillet with butter & herbs |
| FISH | |||
| Filet or Steak | 125° F/52° C | 45 mins. | Sear in skillet with butter & herbs |
| EGGS | |||
| Poached | 150° F/65° C | 1 hr. | Serve on toast or muffin |
| VEGETABLES | |||
| Green | 180° F/82° C | 5–20 mins. | Toss with olive oil, salt & nuts |
| Root | 180° F/82° C | 1.5–3 hrs. | Slice/toss with butter
& herbs |
The Sous Vide Cooking Cycle
- Fill the Pan with Water. Place the Pan into the Smart Cooker. Turn the Program Dial to Sous Vide.
- Adjust the cooking time and temperature and then press the Program Dial to confirm.
- Cover with the Glass Lid.
- The appliance will beep once the water reaches the desired temperature. Add the sealed bags to the water. The timer begins once the appliance has reached the desired temperature and will beep again once the timer has expired.
CAUTION: Remove hot cooking bags with plastic tongs to prevent piercing and burns from hot water. Use oven mitts.
Tip: When using the Sous Vide function the timer will not begin counting down until the desired temperature is reached. Reaching the desired temperature may take 30 minutes or more. You can always check the temperature by pressing the Actual Temp button on the control panel.
YOGURT
1. Place the Pan into the Smart Cooker.2. Fill the Pan with 2 quarts/1.89 liters of milk.3. Turn the Dial to Yogurt.4. Push the Dial to confirm.5. Cover with the Glass Lid.6. The appliance will heat the milk to 180° F/82° C. Then, the appliance will beep and stop heating to let the milk cool to 110° F/43° C.7. Once the milk cools to 110° F/43° C, the appliance will beep several times.8. Remove 1 cup of the milk and combine it with 1 cup of fresh yogurt with active cultures. Add the milk/culture mixture to the milk in the Smart Cooker and stir gently until incorporated. The Smart Cooker will maintain a temperature of 110° F/43° C for approximately 7 hours.9. The appliance will beep once the timer is done.
EGGS
1. Place the Pan into the Smart Cooker.2. Add the desired amount of water.3. Add the eggs.4. Turn the Dial to Egg.5. Push the Dial to confirm.6. Cover with the Glass Lid.
Boiled Eggs In ShellSOFT: Cook 6 mins. Drain, cool in ice water, and peel.MEDIUM: Cook 9 mins. Drain, cool in ice water, and peel.HARD: Cook 15–18 mins. Drain, cool in ice water, and peel.
RICE
1. Place the Pan into the Smart Cooker.2. Add the water, rice, salt, and oil.3. Turn Dial to Rice.4. Push the Dial to confirm. Cover with the Glass Lid.5. The display will state 212° F/100° C and the rotating circle will spin during the cooking cycle.
Ratio for Long-Grain White RiceCombine 1 ½ cups of liquid with 1 cup of rice; this will yield about 2 cups rice or enough for 4 (½-cup) servings.Ratio for Brown RiceCombine 2 cups of liquid with 1 cup of brown rice; this will yield about 2 cups rice or enough for 4 (½-cup) servings.
SLOW COOKING TIP
When slow cooking, the timer will not begin counting down until the desired temperature is reached. Reaching the desired temperature may take 30 minutes or more. You can always check the temperature by pressing the Actual Temp button on the control panel.
Frequently Asked Questions
Can I use any type of pan to cook in my Shaq Smart Cooker?No, use only the original Deep Square pan with induction base!
Does the appliance get hot?The Shaq Smart Cooker itself barely gets warm, except directly beneath the cooking vessel. As soon as the cooking vessel is removed from the Smart Cooker the element turns off and automatically cools down. However, the surface just beneath the pot takes a bit more time to cool. Avoid touching it.
Does induction cooking require special techniques?You will need to familiarize yourself with the settings used for different purposes. A common problem for new users is that in the beginning they may overcook food as they don’t realize how much heat is generated so quickly. If you are new to induction cooking, we recommend practicing by boiling a pot of water. Repeat this several times with different levels of water on different heat settings. You will soon get a good feel for how quickly the pot heats up. This absolutely can change the way you cook – if you are busy and you need to attend to another task, you should set the appliance to OFF until you return. When you return, the Pan heats up instantly.
DISPLAY ERROR INDICATOR
DO NOT USE OR ATTEMPT TO REPAIR A MALFUNCTIONING UNIT. Contact customer service for further information.NOTE: E6 error may be caused by too little liquid in hot pan. The appliance will display E6. Shut off appliance, turn on appliance, add more liquid or turn down heat setting.
| DISPLAY SHOWN | CAUSE OF ERROR |
|
E1 |
Input voltage too low |
|
E2 |
Input voltage too high |
|
E3 |
Circuit board failure
(NTC for IGBT short circuit or open) |
|
E4 |
Temperature sensor opened |
|
E5 |
Temperature sensor short circuit |
|
E6 |
Overheat |
Cleaning & Storage
EASY MAINTENANCE
- When cleaning the Pan, allow the Pan to cool completely before washing. Never immerse hot cookware in water as this will cause irreparable warping.
- Cleaning your Pan is quick and easy. After each use, wash it in hot water with mild soap or dish detergent. Rinse thoroughly and wipe dry immediately with a soft dish towel. If any food particles remain, fill the cookware with hot water and liquid dish detergent, soak until the water becomes lukewarm, and use a sponge or soft cloth to remove any remaining food particles.
- Do not use steel wool or metal pads. They could leave coarse scratches.
- Hand wash the appliance Base. DO NOT submerge the base in water. To hand wash, wipe the inside and outside of the appliance Base with a clean, moist cloth.
- Make sure that the device is properly cleaned before storing it in a dry place.
DISHWASHER SAFEOnly the Pan and Glass Lid are dishwasher safe. Although these components are dishwasher safe, we recommend cleaning by hand. Hand-washing preserves the life of the cookware and helps to maintain its appearance. If cleaning in the dishwasher, follow the suggested guidelines:
- Load the dishwasher carefully. Other dishes and flatware may mark the surface of your cookware.
- Be sure to remove soil from other dishes and flatware. It can be abrasive to nonstick coating.
- We recommend using a non-lemon detergent.
- Regular dishwasher cleaning will eventually scratch any surface.
Note: Unplug the Magnetic Power Cord prior to cleaning the Shaq Smart Cooker. Do not use any caustic cleaning agents or abrasive scrubbing pads on the appliance.
- To protect yourself from electric shock, NEVER immerse the device, or the Power Cord in water or other liquids.
- DO NOT use any petroleum products, which will damage the outer appliance housing and the Control Panel.
- DO NOT use/store any flammable, acid, or alkaline materials or substances near the device, as this may reduce the service life of the device and lead to deflagration (fire) when the device is turned on.
- DO NOT stack heavy objects on top of the appliance. Excessive weight could possibly damage the appliance.
CERAMIC COATING 5-YEAR GUARANTEE
We guarantee that the Shaq Smart Cooker’s pan will not warp, rust, dent or chip with normal consumer use for 5 years. In addition, the cookware is covered under a 60-Day Money-Back Guarantee.
If fewer than 60 days have passed since you received the product, you may be eligible for a full refund of your purchase price. You may review our 60-Day Money-Back Guarantee by visiting http://www.tristarcares.com/guarantee-and-return-policy.php
If more than 60 days have passed since you received the product and the product warps, rusts, dents or chips with normal consumer use, you may return the product to us for replacement or refund. You will not be eligible for a refund, repair, or replacement if the product has been subject to accident, misuse, abuse, improper maintenance or repair, or unauthorized modification.
Your order number can be used as the return merchandise authorization number (RMA). If the product was purchased in a retail store use “RETAIL” as the RMA. You are responsible for the cost of returning the product. You can locate your order number at www.customerstatus.com. You can call customer service at 1-973-287-5113 or send an email to [email protected] for any questions.Pack the product carefully and include in the package a note with (1) your name, (2) mailing address, (3) phone number, (4) email address, (5) reason for return, (6) proof of purchase or order number, (7) and a check or money order for $19.99 P&H per unit for replacement requests (if requesting a refund, do not send a check or money order for $19.99 for P&H). If we cannot replace the product, we may refund your purchase price. If we refund the purchase price, we will refund you the check or money order amount submitted with your return. In addition, (8) specify on the note whether you are requesting a refund or replacement.
We do not make any warranties, express or implied, about the product.However, you do have the benefit of this lifetime guarantee.Write the RMA on the outside of the package and send the product to the following address:Shaq Smart CookerTristar Products500 Returns RoadWallingford, CT 06495
This product has been manufacturedto the highest standards. Should you have any questions, our friendly customer service staff is here to help you.Visit us at www.TristarCares.com, email us at [email protected],or call us at 973-287-5113
References
[xyz-ips snippet=”download-snippet”]

