
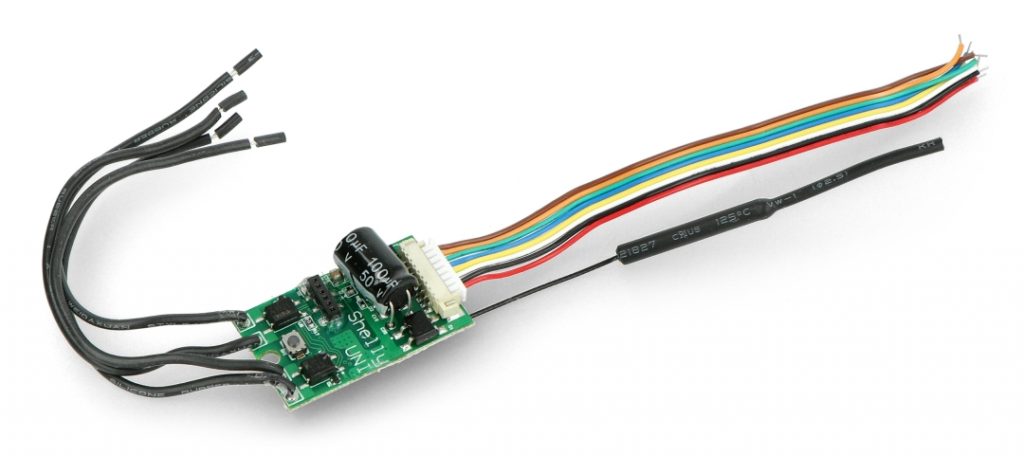
Shelly UNI
INITIAL INCLUSIONBefore installing/mounting the Device ensure that the grid is powered off (turned down breakers).
- Connect sensor DS18B20 to the device as shown in fig.1. Incase that you want to wire DHT22 sensor use scheme from fig.2.
- In case that you want to connect binary sensor (Reed Ampule) use scheme from fig.3A for DC power supply or fig.3B for AC power.
- In Case that you want to connect button or switch to the device use the scheme from fig.4A for DC power supply or fig.4B for AC power.
- For wiring a ADC use scheme from fig.6
CONTROL OF THE INPUTS
- Reading of standard logical levels, independent from the applied voltage on the inputs(potential free)
- It cannot work with programed limits of the levels, because they aren‘t ADC attached to the inputs
- When there is Voltage from:
- AC 12V up to 24V – it is measured as logical “1” (HIGH). Only when the voltage is below 12V it is measured as logical “0” (LOW)
- DC: 2,2V up to 36V – it is measured as logical “1” (HIGH). Only when the voltage is below 2,2V it is measured as logical “0” (LOW)
- Maximum allowed Voltage – 36V DC / 24V ACFor more information about the Bridge, please visit: http://shelly-api-docs.shelly.cloud/#shelly-family-overview or contact us at: [email protected] You may choose if you want to use Shelly with the Shelly Cloud mobile application and Shelly Cloud service. You can also familiarize yourself with the instructions for Management and Control through the embedded Web interface.
CONTROL YOUR HOME WITH YOUR VOICEAll Shelly devices are compatible with Amazon Echo and Google Home. Please see our step-by-step guide on: https://shelly.cloud/compatibility/
Shelly Cloud gives you the opportunity to control and adjust all Shelly® devices from anywhere in the world. All you need is an Internet connection and our mobile application, installed on your smartphone or tablet.
RegistrationThe first time you load the Shelly Cloud mobile app, you have to create an account which can manage all your Shelly® devices.
Forgotten PasswordIn case you forget or lose your password, just enter the e-mail address you have used in your registration. You will receive instructions to change your password.
WARNING! Be careful when you type your e-mail address during the registration, as it will be used in case you forget your password.
First steps
After registering, create your first room (or rooms), where you are going to add and use your Shelly devices Shelly Cloud gives you opportunity to create scenes for automatic turning on or off of the Devices at predefined hours or based on other parameters like temperature, humidity, light etc. (with available sensor in Shelly Cloud). Shelly Cloud allows easy control and monitoring using a mobile phone, tablet or PC.
Step 2Choose “Add Device”. In order to add more Devices later, use the app menu at the top right corner of the main screen and click “Add Device”. Type the name (SSID) and password for the WiFi network, to which you want to add the Device.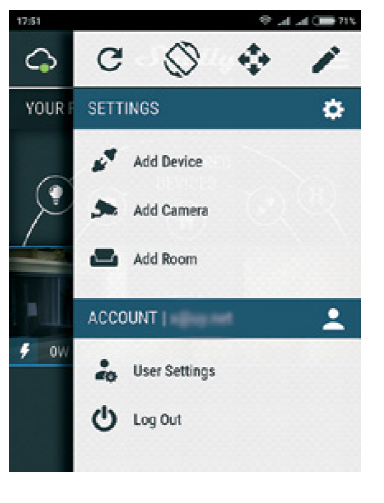
Step 3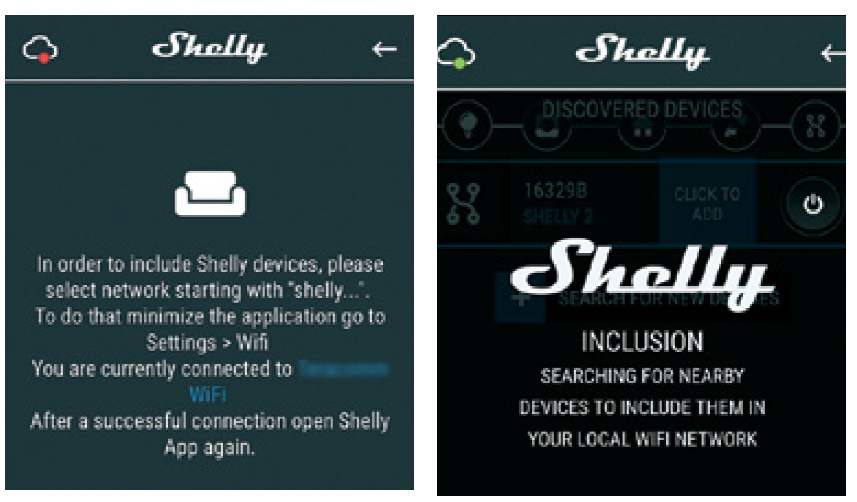
If using iOS (left screenshot)Press the home button of your iPhone/iPad/iPod. Open Settings > WiFi and connect to the WiFi network created by Shelly, e.g. shellyuni-35FA58.
If using Android (right screenshot):your phone/tablet will automatically scan and include all new Shelly Devices in the WiFi network that you are connected to. Upon successful Device Inclusion to the WiFi network you will see the following pop-up
Step 4Approximately 30 seconds after discovery of any new Devices оn the local WiFi network, а list will be displayed by default in the “Discovered Devices” room.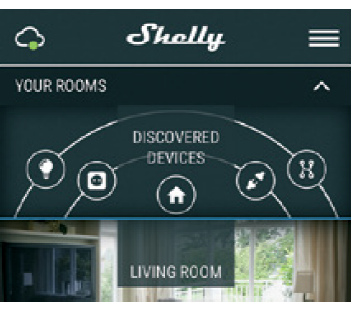
Step 5Enter Discovered Devices and choose the Device you want to include in your account. Step 6Enter a name for the Device (in the Device Name field). Choose a Room, in which the Device has to be positioned. You can choose an icon or add a picture to make it easier to recognize. Press “Save Device”.
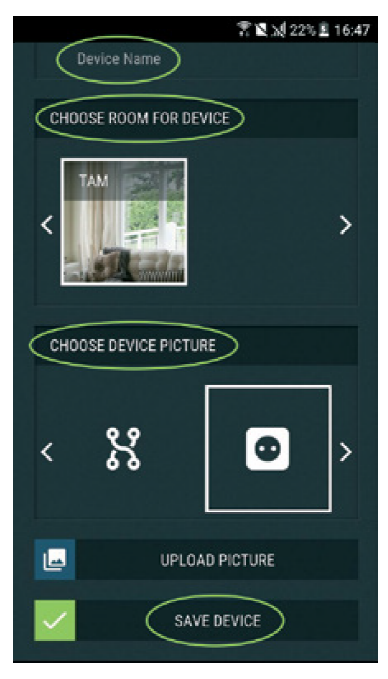
Step 7To enable connection to the Shelly Cloud service for remote control and monitoring of the Device, press “YES” on the following pop-up.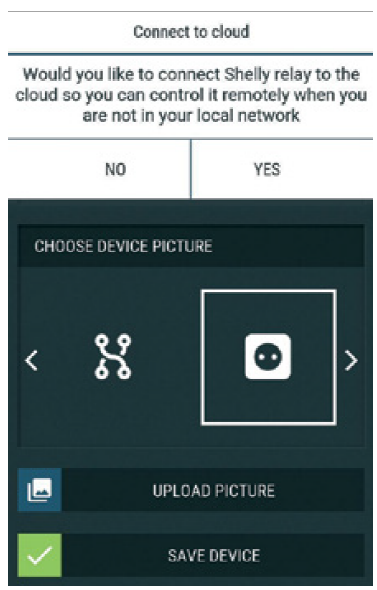
Shelly Device Settings
After your Shelly device is included in the application, you can control it, change its settings and automate the way it works. To enter at the details menu of the respective Device, simply click on it’s name.
From the details menu you may control the Device, as well as edit its appearance and settings:
- Edit device – allows you to change the Device’s name, room and picture.
- Device settings – allows you to change settings. For example, with Restrict login you may enter a username and interfacein Shelly. You may automate the Device operationsfrom this menu as well.
- Timer – to manage the power supply automatically – Auto OFF – After turning on, the power supply will automatically shutdown after a predefined time (in seconds). A value of 0 will cancel the automatic shutdown. -Auto On – After turning off, the power supply will be automatically turned on after a predefined time (in seconds). A value of 0 will cancel the automatic power-on.
- Weekly schedule – Shelly may turn on/off automatically at a predefined time and day throughout the week. You may add unlimited number of weekly schedules. This function requires an Internet connection. To use Internet,a Shelly Device has to be connected to a local WiFi network with working internet connection.
- Sunrise/Sunset – Shelly receives actual information through the Internet about the time of sunrise and sunset in your area. Shelly may turn on or off automatically at sunrise/ sunset, or at a specified time before or after sunrise/sunset. This function requires an Internet connection. To use Internet, a Shelly Device has to be connected to a local WiFi network with working internet connection.
Settings
- Power on default mode – Тhis setting controls whether the Device will supply power or not the output as a default whenever it is receiving power from the grid: – ON: When the Device is powered, by default the socket will be powered.– OFF: Even if the Device is powered, by default the socket will not be powered.
- Restore last mode – When power is restored, by default, the appliance will return to the last state it was in before the last power off/shutdown.
- Button Type
- Momentary – Set Shelly input to be buttons. Push for ON, push again for OFF.
- Toggle switch – Set Shelly input to be flip switches, with one state for ON and another state for OFF.
- Firmware update – Shows present firmware version. If a newer version is available, you can update your Shelly Device by clicking Update.
- Factory reset – Remove Shelly from your account and return it to its factory settings.
- Device information – Here you can see the unique ID of Shelly and the IP it got from the Wi-Fi network.
THE EMBEDDED WEB INTERFACEЕven without the mobile app, Shelly can be set and controlled through a browser and WiFi connection of a mobile phone, tablet or PC.Abbreviations used
- Shelly-ID – the unique name of the Device. It consists of 6 or more characters. It may include numbers and letters, for example 35FA58.
- SSID – the name of the WiFi network, created by the Device, for example shellyuni-35FA58.
- Access Point (AP) – the mode in which the Device creates its own WiFi connection point with the respective name (SSID).
- Client Mode (CM) – the mode in which the Device is connected to another WiFi network.
Initial inclusionStep 1Install Shelly to the power grid following the schemes described above and place it into the console. After turning the power on Shelly will create its own WiFi network (AP).WARNING! If you do not see an active WiFi network with SSID like shellyuni-35FA58, reset the Device. If the Device has been powered on, you have to restart by powering it off and on again. Power on shelly Uni and press the resetswitch button until the LED on the board goes in ON. If not, please repeat or contact our customer support at: [email protected]
Step 2When Shelly has created an own WiFi network (own AP), with name (SSID) such as shellyuni-35FA58. Connect to it with your phone, tablet or PC.Step 3Type 192.168.33.1 into the address field of your browser to load the web interface of Shelly.
GENERAL – HOME PAGE
This is the home page of the embedded web interface. If it has been set up correctly, you will see information about settings menu button, current state (on/off), present time.
- Internet & Security – you can configure the internet and WiFi settings
- External sensors – you can set up temperature units and offset
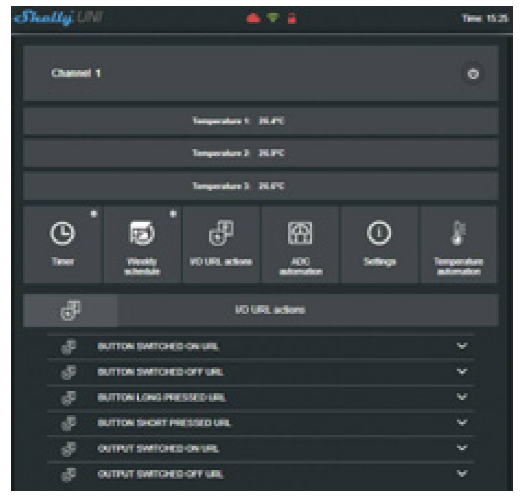
- Sensor Url actions – you can configure url actions by channels
- Settings – you can configure different settings -Device name, ADC range, Firmware
- Channel 1 – Settings of output channel 1
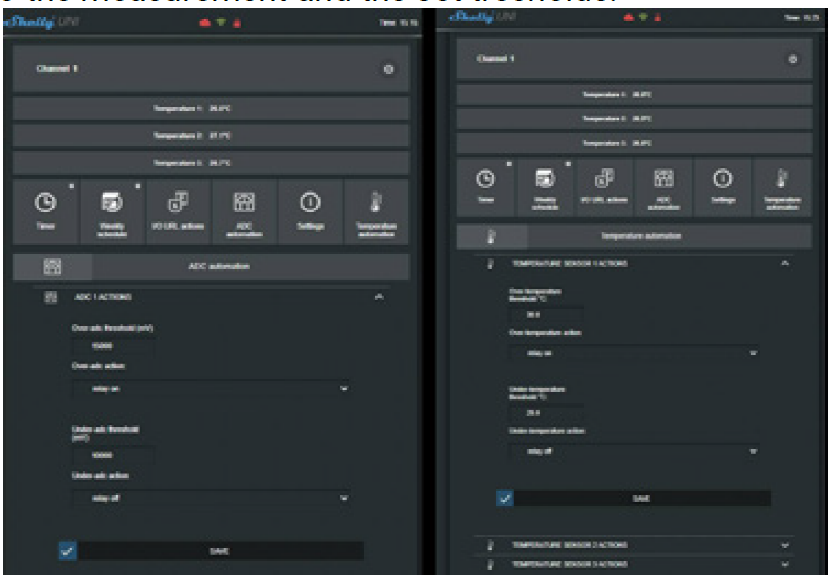
- Channel 2 – Settings of output channel 2 There is 2 type of automation:
- ADC can control the outputs according off measured voltage and set tresholds.
- Temperature sensors can control also outpits according to the measurement and the set tresholds.
 ATTENTION! If you have entered incorrect information (wrong settings, usernames, passwords etc.), you will not be able to connect to Shelly and you have to reset the Device.WARNING! If you do not see an active WiFi network with SSID like shellyuni-35FA58, reset the Device. If the Device has been powered on, you have to restart by powering it off and on again. Power on shelly Uni and press the reset switch button until the LED on the board goes in ON. If not, please repeat or contact our customer support at Shelly.cloud
 - Login – access to the Device
- Leave unprotected – removing the notification for disabled authorization.
- Enable authentication – you can turn authentication on or off. This is where you can change your username and password. You must enter a new username and the new password, then press Save to save the changes.
- Connect to cloud – you can turn the connection between Shelly and Shelly Cloud on or off.
- Factory reset – return Shelly to its factory settings.
- Firmware upgrade – Shows present firmware version. If a newer version is available, you can update your Shelly Device by clicking Update.
- Device reboot – reboots the Device.
 ATTENTION! If you have entered incorrect information (wrong settings, usernames, passwords etc.), you will not be able to connect to Shelly and you have to reset the Device.WARNING! If you do not see an active WiFi network with SSID like shellyuni-35FA58, reset the Device. If the Device has been powered on, you have to restart by powering it off and on again. Power on shelly Uni and press the reset switch button until the LED on the board goes in ON. If not, please repeat or contact our customer support at Shelly.cloud
CHANNEL CONFIGURATION
Channel ScreenIn this screen you can control, monitor and change the settings for turning the power on and off. You can also see the current status of the connected appliance to Shelly, Buttons Settings, On and OFF. To control Shelly pressChannel:
- To turn on the connected circuit press “Turn ON”.
- To turn off the connected circuit press “Turn OFF”
- Press the icon to go to the previous menu.
Shelly Management SettingsEach Shelly can be configured individually. This lets you personalize each Device in a unique manner, or consistently, as you choose.
Power On Default StateThis sets the channels’ default state when powered from the power grid.
- ON – By default when the Device is powered and the connected circuit/appliance to it will be powered as well.
- OFF – By default the Device and any connected circuit/ appliance will not be powered, even when it is connected to the grid.
- Restore last state – by default the Device and the connected circuit/appliance will be returned to the last state they occupied (on or off) before the last power off/shutdown.
Auto ON/OFFAutomatic powering/shutdown of the socket and the connected appliance:
- Auto OFF after – After turning on, the power supply will be automatically shut down after a predefined time (in seconds). A value of 0 will cancel the automatic shutdown.
- Auto ON after – After turning off, the power supply will be automatically turned on after a predefined time (in seconds). A value of 0 will cancel the automatic start.
Manual Switch Type
- Momentary – When using a button.
- Toggle switch – When using a switch.
- Edge switch – Change status on every hit.
Sunrise/Sunset hoursThis function requires an Internet connection. To use Internet, a Shelly Device has to be connected to a local WiFi network with а working Internet connection. Shelly receives actual information through the Internet about the time of sunrise and sunset in your area. Shelly may turn on or off automatically at sunrise/sunset, or at a specified time before or after sunrise/sunset.
On/Off scheduleThis function requires an Internet connection. To use Internet, a Shelly Device has to be connected to a local WiFi network with working internet connection. Shelly may turn on/off automatically at a predefined time.![]()
References
[xyz-ips snippet=”download-snippet”]