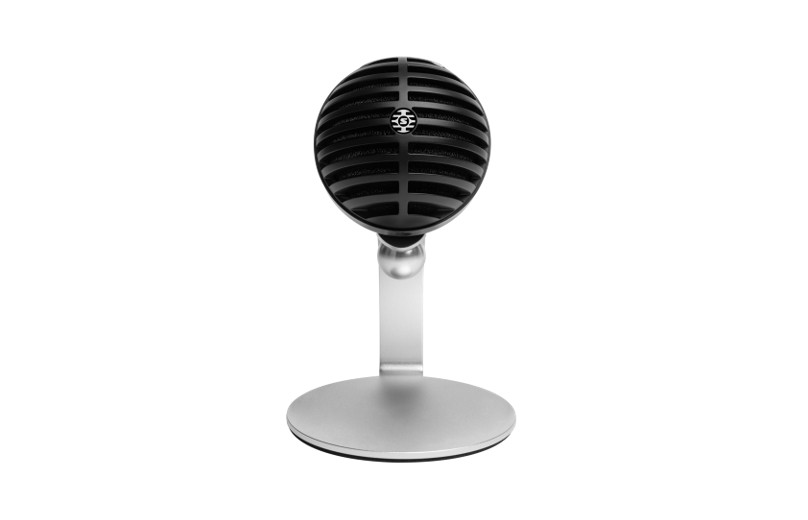
MV5CHome Office Microphone
The Shure USB home office microphone, MV5C, user guide. Version: 1.0 (2021-A)
MV5C Home Office Microphone
General Description
The Shure MV5C microphone connects directly to a computer over a USB connection. Ideal for conferencing applications, the MV5C features a preset speech mode for clear vocal reproduction.
Features
- Convenient, Compact Design: This sleek and durable microphone mounts on the included MV5C desktop stand or any stand with a 1/4″ threaded adapter.
- Plug and Play: The MV5C automatically becomes the active audio input device when plugged into a computer. The audio output will remain the computer speakers or headphone output.
- Preset Modes: Minimize setup time with the preset DSP mode designed to automatically adjust your gain, equalization and compression for speech applications.
Quick Setup
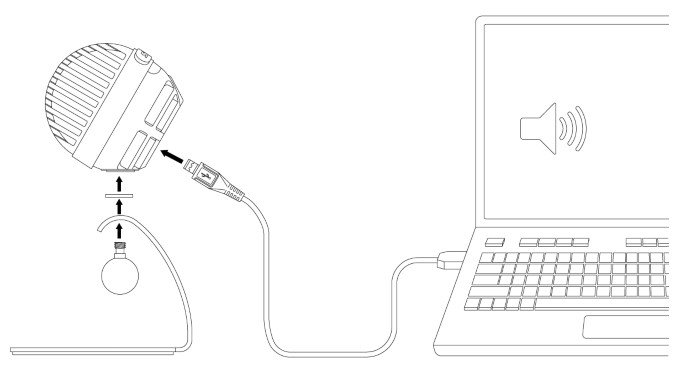
- Connect the microphone to a computer or mobile device. Use the appropriate cable (USB-A or USB-C).The center green status LED indicates a successful connection.
- Confirm that the MV5C is the selected audio device.Most computers and mobile devices automatically detect the MV5C and assign it as the primary audio device. If your computer settings default to another device, open the sound control panel and select MV5C.Note: The first time you connect to the MV5C, audio playback will remain assigned to the previously selected output. This means the microphone will be enabled for audio input, but not output. Output will still come through your computer speaker or headphone output.
- Hold the MODE button while plugging in the MV5C to enable the MV5C headphone output.The MV5C headphone output is not enabled to ensure that your audio playback is not interrupted. However, to enable the MV5C headphone output, hold the MODE button while you connect the MV5C. The headphone LED will turn green to indicate that the headphone output is active.
- Press the MODE button to toggle speech mode on and off.Speech mode is a gain, compression and EQ preset designed to optimize voice tone and clarity. The green speech icon LED indicates that speech mode is on.
- In your conferencing application, select the MV5C as the input source.See your software user guide for information on assigning input sources.For more information about monitoring options, see the Monitoring Options for the MV5C section.
Connections and Controls
- Mode Selection ButtonPress to turn speech mode on and off.
- Mute ButtonPress to mute the microphone input. All MV5C LEDs will turn red when microphone is muted.
- Headphone Volume ControlAdjusts the headphone volume when the MV5C headphone output is enabled.
- Headphone OutputPlug in any headphones with a 3.5 mm (1/8 inch) connector.
- Micro USB PortUse the appropriate cable (USB-A or USB-C) to connect the MV5C to a computer.
- Monitor Indicator (Headphone LED)
LED Behavior Status Green Headphone output is enabled. Direct monitoring is on. Red Headphone output is enabled. Direct monitoring is off. Off Headphone output is disabled. Note: Direct monitoring refers to listening to playback through the MV5C headphone output.
- Status Indicator
LED Behavior Status Green Active USB connection Red (all 3 LEDs) Muted - Speech ModeThe LED indicator illuminates when speech mode is selected.
Preset Modes
These selectable modes adjust settings for gain, equalization, and dynamics to bring out the best sound characteristics for your voice recording needs.
| Mode | Application | Characteristics |
|
|
Use for speech or vocals in conferencing applications |
A mix of preset gain, compression and EQ processing that optimizes the sound of your voice for clarity. A de-esser reduces sibilance (the harsh sound that occurs when words with an “S” are spoken). |
|
|
Suited for any application |
A completely unprocessed signal (no equalization or compression settings used). Adds flexibility when processing the audio after recording. |
Placement
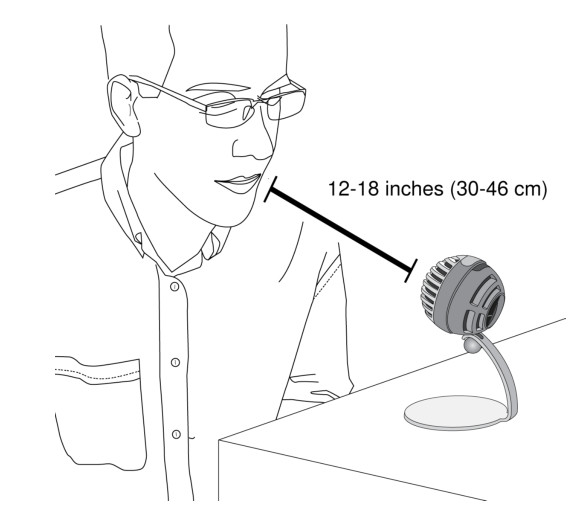
For conferencing applications, place the MV5C 12-18 inches (30-46 cm) away from your face and select speech mode. For best results, place the microphone just to the left or right of your keyboard with the circular Shure logo pointed towards your mouth. This properly orients the microphone for optimal sound pickup.
Adjusting Microphone Level
Microphone level (gain) typically does not need adjustment when using the microphone with a conferencing platform. However, if you hear distortion or the audio is too low, adjust the microphone level in the audio or sound control panel of your computer.
Keep the following in mind:
- Set the microphone level before adjusting headphone volume.
- The headphone volume does not affect the signal level sent to the computer.
Adjusting Headphone Level
Easily adjust the headphone monitoring level by using the MV5C thumbwheel by enabling the MV5C headphone output.
Accessing the Control Panel
Windows
- Open the Settings window, select System > Sound.
- Select Shure MV5C as your input device.
- Adjust the gain by using the Levels slider.
Mac®
- In SystemPreferences,select Sound.
- Select the Shure MV5C device as your Input and Output source.
- Use the Inputvolume slider to adjust the gain.
Monitoring Options for the MV5C
Listening Through the Computer OutputConnect the MV5C to your computer using the USB cable and listen through your computer’s built-in speakers or headphone output. If you are listening to computer audio playback, the headphone LED on the MV5C will be off because the headphone output is off. Listening Through the Headphone Output (Direct Monitoring)When the MV5C headphone output is enabled, the headphone jack provides an equal blend of the direct microphone signal (your voice) and audio playback from the computer (your conference). This allows you to conveniently adjust the headphone volume for both with one control, the MV5C thumbwheel.
Press and hold the MV5C Mode button while connecting to your computer using the USB cable. Now connect headphones to the MV5C headphone output to hear the audio playback. If you are listening to audio from the headphone out put, the headphone LED on the MV5C will be green.
To turn off headphone audio, press and hold the MV5C mode button. The headphone LED will turn amber.
Tip: When first connecting the microphone to your computer, make sure to raise the volume level in the sound control panel of the computer for a strong audio signal. Then adjust headphone level for comfortable monitoring.
Troubleshooting
| Issue | Solution |
| The middle LED does not illuminate | Make sure that the MV5C is fully plugged in. |
| Audio is too low |
Check the computer sound control panel settings. When first connecting the MV5C to your computer, make sure to raise the computer volume level. |
| Audio sounds bad |
Check the sound control panel of the computer to ensure that the MV5C is fully plugged in and selected as your audio device. |
| Audio is distorted |
Use the audio meter to ensure that volume peaks are within the target range. If level is reaching the top of the input meter, turn the gain down. |
| Device not working with USB hub. |
The MV5C requires 250 mA per port. Check USB hub documentation for current/port specification. |
| General troubleshooting | Quit and re-start your app.Reboot the computer. |
Note: Contact Shure Service and Repair if you continue to experience any issues.
System Requirements and Compatibility
| Windows | Windows 7 and higher Minimum RAM = 64 MB USB 2.0 |
| Macintosh | OS X Lion 10.7 and higher Minimum RAM = 64 MB USB 2.0 |
Specifications
DSP Modes (Presets)Speech/Flat
Cartridge TypeElectret Condenser (16 mm)
Polar PatternUnidirectional (Cardioid)
Bit Depth16-bit/24-bit
Sampling Rate48 kHz
Frequency Response20 Hz to 20,000 Hz
Adjustable Gain Range0 to +36 dB
Sensitivity-40 dBFS/Pa at 1 kHz [1][2}
Maximum SPL130 dB SPL [2]
Headphone Output3.5 mm (1/8)
Power RequirementsPowered through USB connector
Mute Switch AttenuationYes
Mounting StandIncluded
Stand Adapter1/4 inch 20 thread (standard tri-pod mount)
HousingPC/ABS
Net Weight
| Without Mounting Stand | 0.09 kg(3.17oz.) |
| With Mounting Stand | 0.16 kg(5.64oz.) |
Dimensions66 x 67 x 65 mm H x W x D
Dimensions with Stand89 x 142 x 97 mm H x W x D
Cable1 m USB-A cable/1 m USB-C cable[1]1 Pa=94 dB SPL[2]
At Minimum Gain, Flat Mode
Polar Pattern
 Frequency Response
Accessories
Furnished Accessories
| MV5 Desktop Stand | AMV5-DS |
| 1 m USB cable | AMV-USB |
| 1 m USB-C cable | 95C38076 |
[xyz-ips snippet=”download-snippet”]


