![]()
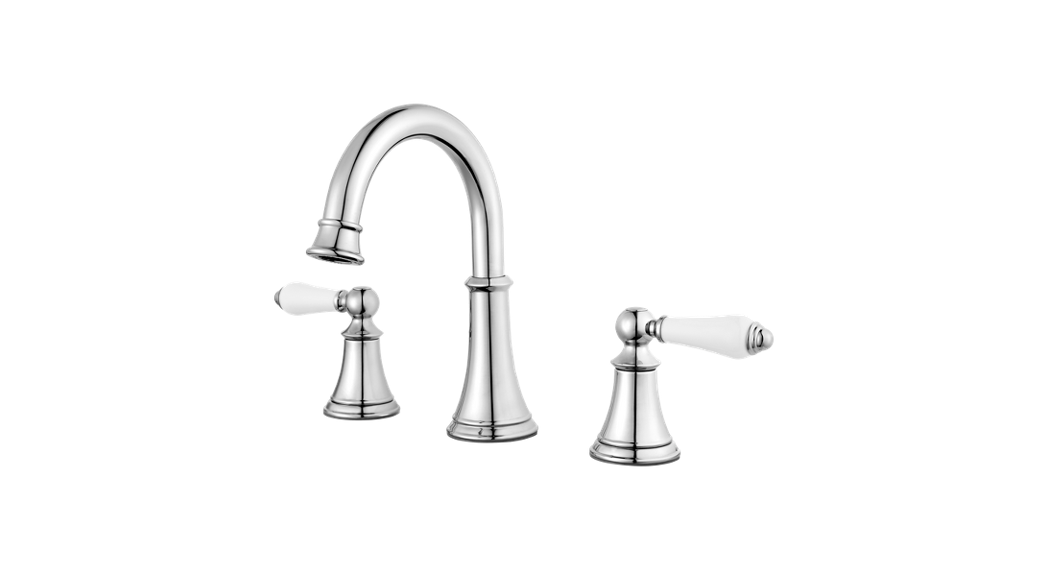
BOCA RATONWIDESPREAD GOOSENECK BATHROOM FAUCET GRIFO DE BAÑO EXTENDIDOSKU: 948587
BEFORE YOU BEGINWe recommend consulting a professional if you are unfamiliar with installing plumbing xtures. Signature Hardware accepts no liability for any damage to the faucet, plumbing, sink, counter top, or for personal injury during installation.Observe all local plumbing and building codes.Unpack and inspect the faucet for shipping damage. If any damage is found, contact our Customer Relations team at 1-800-221-3379.
GETTING STARTEDEnsure that you have gathered all the required materials that are needed for the installation. For these instructions, it is assumed that the old faucet has been completely removed and any necessary repairs or modications to the water supply have been completed.
TOOLS AND MATERIALS: HERRAMIENTAS Y MATERIALES:
|
Plumbers Tape |
Phillips Screwdriver | Pliers Pinzas |
| Adjustable Wrench | Hex Wrench |
Silicone Sealant (100% Neutral Cure) |
INSTALLATION
- Shut o water supply.

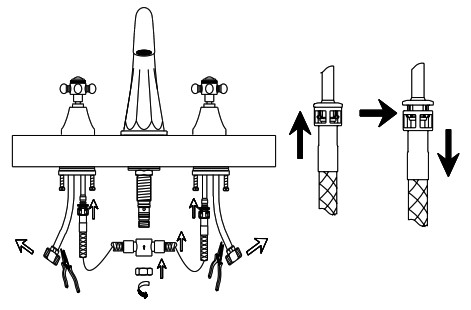
- Remove assembled parts from the faucet body
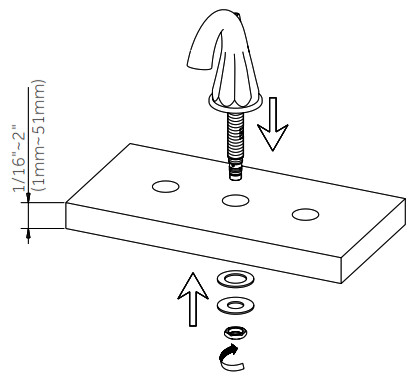
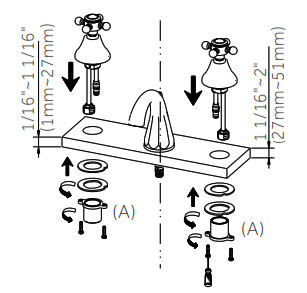
- Place the spout in the center hole of sink. Secure faucet as showed above.
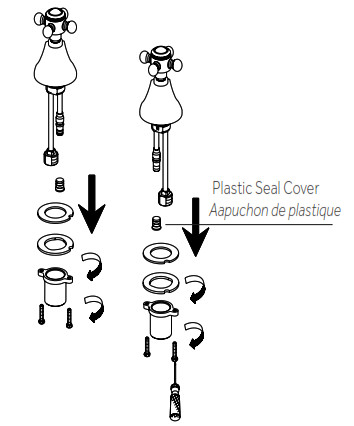
- Remove assembled parts and plastic seal cover from the faucet body.
- Place the handle bodies through the left & right holes. Re-assemble the parts and tighten mounting nut.Note: Part A can be ipped (as shown on the right side) to accommodate for a thicker counter.
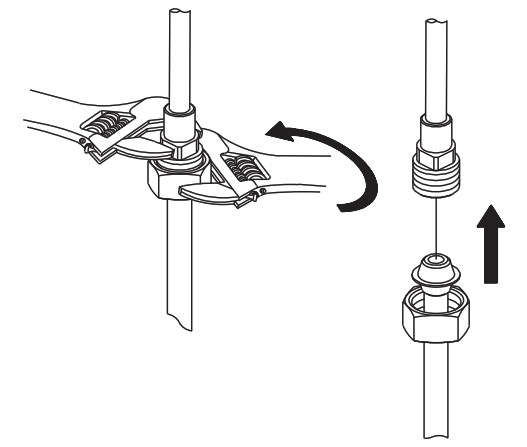
- Connect handle assembly to the faucet body with water supply hose. Push supply hose adapter with hose coupling until you hear a “click”.
- Tighten end of shank with wrench and slip coupling nut onto inlet port.
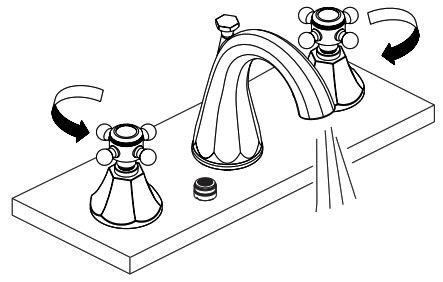
- After installing faucet, remove aerator and turn on water to remove any left over debris. Re-assemble aerator.


POP-UP DRAIN INSTALLATION
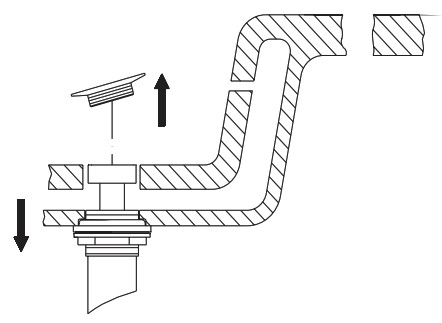
- Remove old pop-up drain assembly.
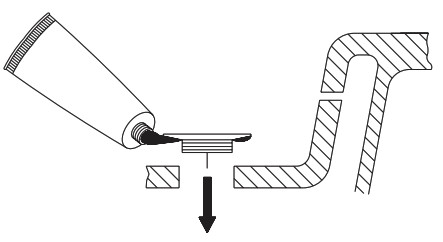
- Place a ring of silicone sealant around drain opening of sink.
- Insert threaded end of drain body up through drain hole and attach ange to body.
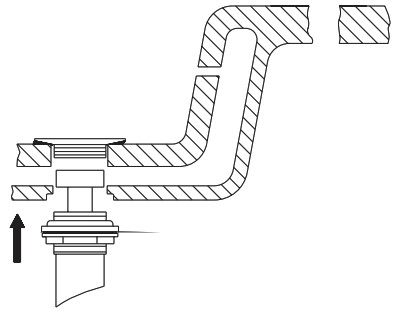
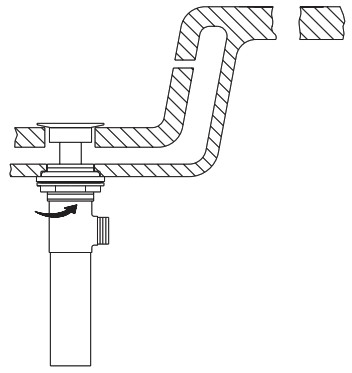
- Thread lock nut from underside of sink until rubber washer sits securely inside opening of sink. Tighten lock nut.
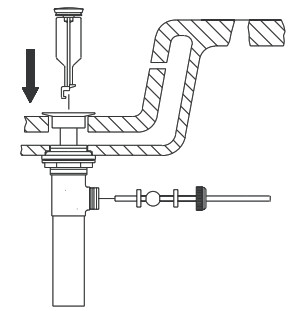
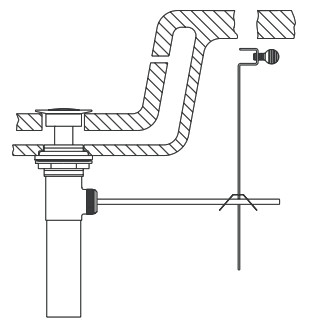
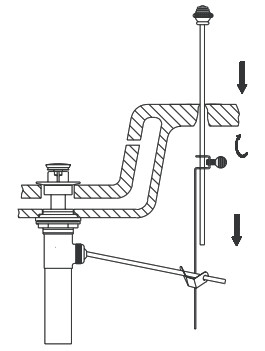
- Insert main plunger into drain. Insert ball rod into rod port and into hole at bottom of main plunger.
- Place one end of spring clip on end of ball rod. Pass the tip of the rod through the hole in the lift rod strap and then through the hole on the other end of the spring clip.
- Insert bottom of lift rod into hole at top of lift rod strap. Tighten with thumb screw.
NoteThis product is engineered to meet the EPA WaterSense ow requirement. The ow rate is governed by the aerator or ow controller. If replacement is ever required, be sure to replace it with a WaterSense compliant aerator or ow controller to retain the 
| NO. | Part name |
| 1.1 | Index Button-Cold |
| 1.2 | Index Button-Hot |
| 2 | Metal Handle Assembly |
| 3 | Mounting Hardware |
| 4 | Retainer Nut |
| 5 | Ceramic Disc Cartridge |
| 6 | Handle Valve Body |
| 7 | Mounting Hardware Assembly |
| 8 | Spout Assembly |
| 9 | Spout Trim Ring |
| 10 | Mounting Hardware |
| 11 | Supply Hose, 28” Tuyau |
| 12 | Lock Nut |
| 13 | Aerator |
| 14 | Lift Rod |
| 15 | Pop-up Assembly |
| 16 | Wrench |
![]()
1.800.221.3379signaturehardware.com
[xyz-ips snippet=”download-snippet”]