SimPure Y7 Countertop Water Purification System Owner’s Manual
 Health & Safety
SimPure® products are designed with safety in mind. However, personnel using these units must be familiar with any potential dangers. All safety information detailed in this handbook should be reviewed before installing and operating this water purification system.
![]() This product is not a toy; please keep children away from the water system or use under adult supervision. Please keep packing materials out of children’s reach.
This product is not a toy; please keep children away from the water system or use under adult supervision. Please keep packing materials out of children’s reach.![]()
![]()
![]()
![]()
![]()
![]()
![]()
![]()
![]()
![]()
![]()
![]()
![]()
![]()
![]()
![]()
![]()
![]()
![]()
![]()
![]()
![]()
![]()
![]()
![]()
![]()
![]()
![]()
![]()
![]()
Operating Guidelines
The following table lists the operating parameters for this product. Operating this product outside these specifications may cause system performance issues and may even lead to personal injury and void any warranty. Please contact SimPure® for further advice and support.
| Operating Parameters | |
| Model | SimPure® Y7 |
| Production Rate (up to)Dependent on feed water type and temp. | 6.4 fl. oz (190 ml/min) (3 Gallons/hr.(11.4 L/hr.)) |
| Filter Life ExpectanceDependent on feed water type and temp. | 528 Gallons (2,000L) |
| Feed Water Type | Municipal potable/tap water or well water meeting government drinking water standards |
| Feed Water Temperature | 41-100 ℉ (5-38 ℃) |
| Rated Voltage | 110V 60Hz AC |
| Rated Power | 60W |
| Dimensions | 16.3 x 15.98 x 7.36 Inches (414 x 406 x 187 mm) |
| Weight | 14.8 Ib (6.7 kg) |
| Storage Reservoirs | 1.3 Gallons (5 L) Feed Water Reservoir0.4 Gallons (1.5 L) Pure Water Reservoir |
| Feed Water TDS* Level | < 500 PPM |
* TDS = Total Dissolved Solids, which is the total weight of all solids dissolved in a given volume of water, expressed in units of mg per unit volume of water (mg/L), also referred to as parts-per-million (ppm). With a SimPure® TDS meter, you can easily compare the system outlet quality with your source water to help monitor the performance of the System.
Installation guide
System Contents
Your SimPure® Y7 Countertop Water Purification System was carefully assembled, packaged, and shipped complete with all the parts you should require to get the System up and running.
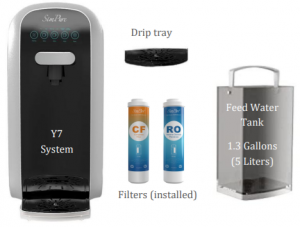

Unsure about something? Is there a problem?Please contact SimPure® through our website or toll-free number.
Customer Service: [email protected]Toll-Free:1-866-528-4572Website: www.simpurelife.com
System Features
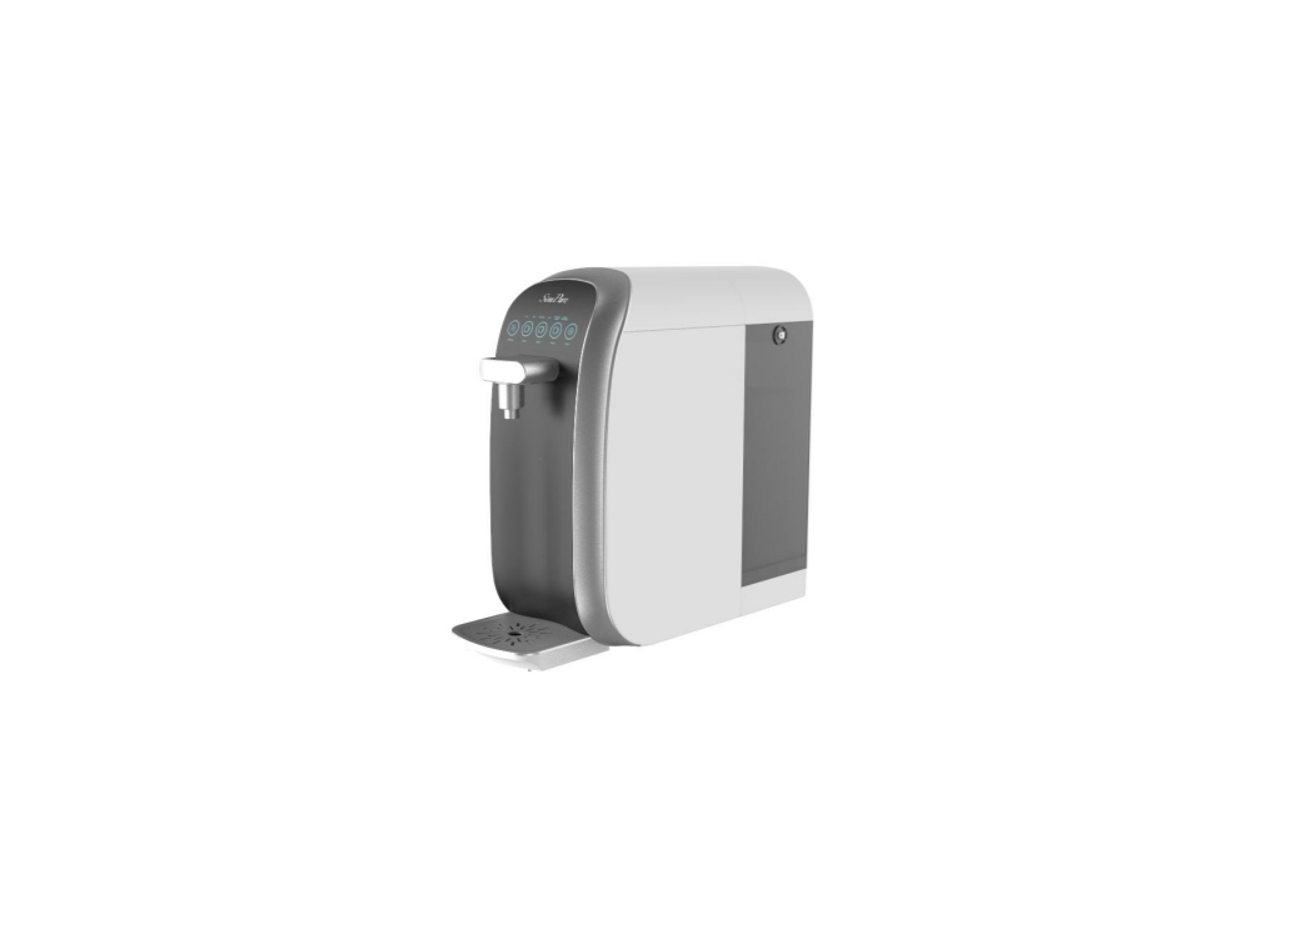
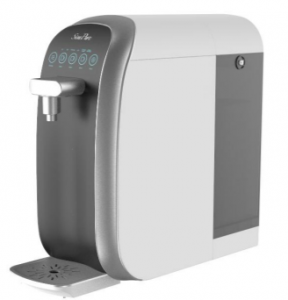
Compact design, no plumbing required, simply plug the SimPure® Y7 Countertop Water Purification System into an electrical outlet and fill with potable (tap) water to be purified. Push the control button to dispense.
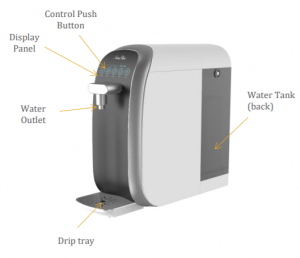

SimPure® products care for you, Your family, our planet. Stay simple, Stay pure
Control and Display Panel
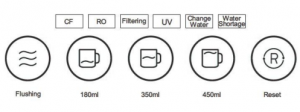

CF / RO
Indicates when the user needs to replace the filters
Filtering
Indicates System is filtering water.
UV
Indicates the Ultraviolet light is operating to control virus/germs.
Change Water
Indicates the Feed Water Tank contents must be emptied and refilled.
Water Shortage
Indicates the internal pure water reservoir level is low.
Flushing.
Indicates the System is flushing.
180ml / 350ml / 450ml Dispense.
Indicates the System will dispense the selected amount of purified water.
Reset
Indicates when the filter cartridges are exhausted
Please refer to page 12 for full detailed descriptions of each function.
Connecting up the System
Step 1
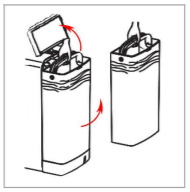

Unpacking- Choose a suitable countertop, flat, secure, and out of easy reach of small children. Place the drip tray under the outlet. Allow rear space for access. Open the feed water tank cover and lift out the water tank. The System is already pre-fitted with the filter cartridges for your convenience.
Step 2
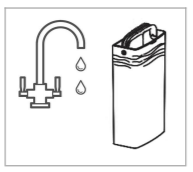

Fill water tank- Fill with potable (tap) water, then carefully fit the Feed Water Tank into the base of the System, making sure the tank lid is installed correctly, or the System will not operate. When refilling the Tank, always EMPTY the remaining water before refilling. DO NOT exceed the MAX level.
Step 3
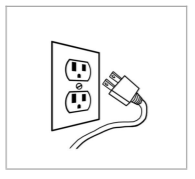

Turn the System on – Plug into an electrical outlet. All indicator lights will be on and flash twice. You will hear 2-beeps. Flushing, 180ml, 350ml, 450ml, and Reset indicators will all be lit for a short period when the systems turned on.Flushing System – After powering up the unit, it will automatically flush for up to 30 seconds.
Notes: There is no power switch; unplug device should you need to turn it off.
Flushing System
Installing New Filters
If you are commissioning the System for the first time or have just replaced the filter cartridges, please follow these steps 3-5 times to ensure the System gets adequately flushed before use.As soon as the System connects to power, it will automatically flush for 30 seconds. However, if the Feed Water Tank is above the MAX level, the System will only flush for 18 seconds.
Infrequent System Use or System Startup
To ensure the freshness of the drinking water, flush the System using the following steps. If the Feed Tank water has not been emptied/refilled for more than three days, air bubbles, particulates or slightly poor taste may be evident, this is normal, please follow these flush instructions to remedy the situation.
Note: When first using the System, please check the System and observe there are no leaks due to transit or other damage. If you find a water leak, please disconnect the power and contact the SimPure® customer service center for advice.
Step 01
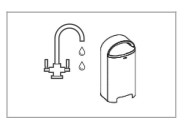

Always start the System flush with a new tank of potable (tap) water. Remove the Feed Water Tank, empty and fill with clean, fresh potable (tap) water.
Step 02
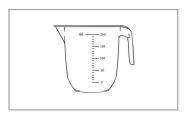

Place a measuring jug or large container on the drip tray and have a second container ready to alternate as we need to flush the Feed Water Tank through the System.
Step 03


Wait for the filtering indicator to turn off then push the Flushing button for 5 seconds. The System will continue to dispense water for about 5 minutes until the internal pure water tank empties.Step 04
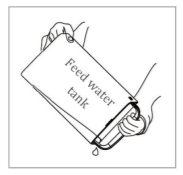

Once the unit has stopped, empty the remaining water in the Feed Water Tank and pour away the liquid dispensed from the System. Repeat steps 1-4 a further 3-5 times to ensure the System gets adequately flushed before use.
![]()
![]()
![]()
![]()
![]()
![]()
![]()
![]()
Dispensing Purified Water
Step 01
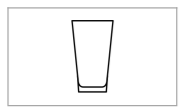

Place a glass or cup on the drip tray of the System under the dispense nozzle.
Step 02


Select your preferred water dispense volume; you will hear 1-beep; the selected volume indicator light will light. The System will dispense the corresponding amount (6 fl oz. (180ml), 12 fl oz. (350ml), or 15 fl oz. (450ml)) of purified water and then stop automatically, indicated by 1-beep and the indicator light turns off.
CONGRATULATIONS! You have completed the installation!
Operational Guide
Display IndicatorsThe SimPure® Y7 uses advanced features to monitor and operate your System.
CF / RO Indicator Light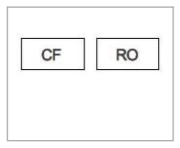

The two indicators lights remind the user when to replace the filters;Steady – >90% exhausted – order new filter Flashing – ≥100% exhausted, you will also hear 10-beeps. Replace filter(s)CF = Composite FilterRO = Reverse Osmosis Membrane
Filtering Indicator Light
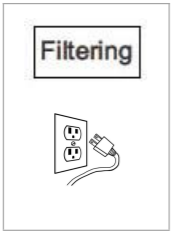

Steady – This signifies that the System is filtering waterSafety Protection – If the internal purified water tank has not refilled after 30 minutes, the System will enter into protection mode, with all indicator lights on, and you will hear 10-beeps. The System will stop filtering water (purified water can still dispense). Reset the System by reconnecting the power.
Flushing Indicator Light & Button


Power on – The System will automatically flush for the first 30 seconds. If the Feed Water Tank exceeds the MAX level – The System will flush for only 18 seconds.Manual Flush – Push the button, and the System will flush for 60 seconds and stop. To cancel the manual flush, push the button a second time. While flushing, the indicator light will be on.Emptying function – Push and hold the Flushing button for 5-seconds; purified water will start to flow from the outlet until the internal Tank empties. You will hear 1-beep; the Flushing button will be lit blue. To manually stop dispensing water, push any other button, the blue light goes off.
UV Indicator Light


Steady – While purifying water, the UV light will operate, staying on a further 1-hour after the pure water tank is full.Startup – When the System is reconnected to the power outlet, the UV will function for the first 3-hours and then shut off automatically.Standby – The UV light will operate for 15 minutes every 20 minutes to help maintain microbial control of the purified water.
Change Water Indicator Light
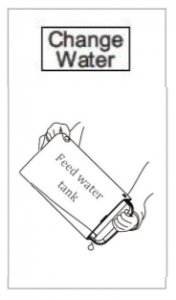

Flashing –Feed tank water lower than the Min. Level. You will hear 10-beeps, and the System starts up, releasing pressure for 10 seconds. Once complete, remove the Feed Tank, empty ALL the remaining concentrate water, and refill with fresh potable (tap) water (do not reuse the remaining water as it will be high in salts). Refit the Feed Water Tank to the System.Steady – Feed Tank has been removed from the base. Light will go out when the Tank is returned into the System.
IMPORTANT: If you do not remove and empty the Feed Water Tank and instead add water directly to the Tank, the Change Water indicator light cannot be cleared. Lift the Feed Water Tank out of the System, empty the concentrate and refill with fresh potable (tap) water, then replace the Tank into the System to clear the Change Water indicator light.
Water Shortage Indicator Light
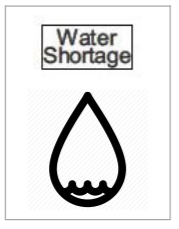

Steady – Internal pure water reservoir lowFlashing – The System automatically starts filtering water refilling the internal reservoir. NO water can be dispensed while the light is flashing.Off – When filtered water is available in the internal reservoir, the Water Shortage indicator light goes out, and you can dispense water again
Filter Replacement
Step 1
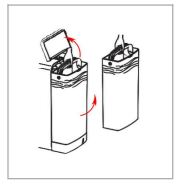

Remove the power plug from the electrical socket to turn the System off. Open the Feed Water Tank cover. Lift out the Tank, empty all remaining water, and place it in a safe place. You should now be able to see the filter cartridges (located behind the Tank).
Step 2
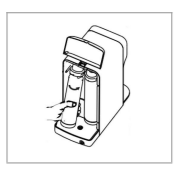

Lift each filter cartridge from the bottom towards you and turn counterclockwise to remove. Insert the new filter cartridge in the correct position, turn clockwise until you feel a click. Note: You can safely dispose of the exhausted cartridges (non-toxic).
Step 3


Refill the Feed Water Tank and fit back into the System and close the cover. Plug the System back into an electrical outlet.
Step 4


Now we need to Reset the filter change reminder. To do this, hold the Reset button down for 3- seconds; you will hear 2-beeps.
Step 5
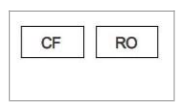

Push the Reset button again to select the filter cartridge you have just changed; the indicator light will be lit.
Step 6
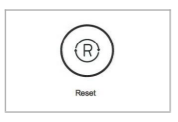

Hold the Reset button down for at least 3- seconds to complete the reset process; you will hear 3-beeps, and the System will return to regular operation.
Note: If there is no operation within 10 seconds, during each stage of the filter reset process, the System will exit the setting state automatically.
Step 7
Follow the system flush instructions on page 9 to rinse the new filter cartridge.
| Replacement Filter Part Number | ||
| Part No. | Description | Replacement Schedule (Months) |
| HEDPF1004_S15 | CF Cartridge Filter | 3-6 |
| HEDPF2004_S15 | Reverse Osmosis Membrane | 6-12 |
Note: Due to the difference in feed water quality, the above is an estimate only. Please contact SimPure® for purchase options:
Feed Water Tank Cleaning
To maintain your System, it’s recommended to clean the Feed Water Tank and components after every three months of use; this helps to extend the service life of the filter elements. Check the Feed Water Tank strainer, diversion sleeve, and two check valves located on the bottom of the Tank are clean.
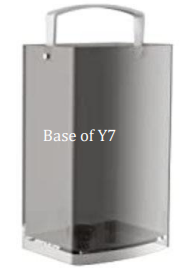

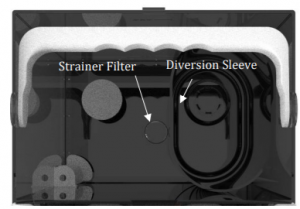

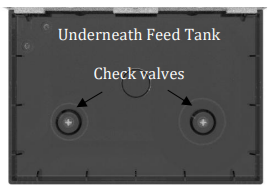

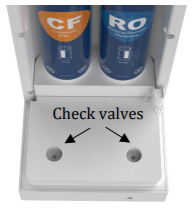

Tank Strainer and Sleeve Cleaning instructions
Remove the Feed Water Tank and empty the water, located in the bottom of the Tank you will see the strainer and diversion sleeve, pull them both out. Clean the parts with a brush under running water. Once clean, refit them. Next clean the check valves. Refill the Feed Tank with clean water and place back into the System base, making sure to locate it correctly.
| Troubleshooting Guide | |
| Problem | Possible Solution |
| Plug the System into the electrical outlet and | |
| make sure the outlet switch is on (if applicable) | |
| You will hear 2-beeps when connecting to the | |
| The Water System | power. |
| 1 | will not turn on or respond when pressing the control |
| Plug the System into a different electrical outlet to check the outlet is working. | |
| panel | If the System does not turn on after following |
| the instructions above, please contact SimPure® | |
| customer service for assistance. |
| Troubleshooting Guide | ||
| Problem | Possible Solution | |
|
2 |
The System does not dispense water or make purified water |
Check to see if the float in the Feed Water Tank is floating near the top of the water level. |
| The Feed Water Tank is not installed correctly, check it is located onto the System base precisely. | ||
| Feed Water tank level too low, drain concentrate and refill the Tank with freshwater; check theFiltering indicator is lit. | ||
| The internal pure water storage tank (non-Feed Water Tank) is low, and the Water Shortage indicator is lit. Wait 5-10 mins before dispensing water (Water Shortage indicator light is off). | ||
| 3 |
The System doesn’t operate or respond to the control buttons, or lights don’t illuminate. |
System locked or stuck. Unplug the unit from the electrical outlet for 3 minutes then reconnect. |
| Hardware damage. Contact SimPure® customer service for advice. | ||
| 4 |
Water taste is poor or has a strange smell |
If the System is new, please flush the System (page 9). |
| If the System has not been used for a long time or the filters are exhausted, replace both filters and flush the System. (page 15 and page 9). | ||
|
5 |
The System makes excessive noise during operation
Note: The System does make noise when processing water; this is normal. |
The Feed Tank water level is very low. Empty the Feed Water Tank and refill with fresh potable (tap) water. |
| There’s an air blockage in the water production system. Unplug the unit from the electrical outlet for 3 minutes then reconnect. Flush the System
1-3 times before use using (Page 9). |
||
| Water quality is poor; filters have blocked early (before replacement schedule). Replace filter both filters. |
Warranty
SimPure® warrants to the customer that its residential countertop water purification systems will be free from defects in material and workmanship under normal use and service for a period of 1 year. We will replace or repair any part of the SimPure® purification systems that we find to be defective in operation due to faulty materials or workmanship within one year since the date of the original purchase. Used replaceable filter cartridges and membranes are excluded.
General Conditions
SimPure® obligation to the customer under these warranties shall be limited, at its option, to replacement or repair of items covered by these warranties. Prior to return or repair of covered items, the customer must obtain a return goods authorization number from SimPure® and, at SimPure® option, return the item with freight prepaid by the customer. Damage to any part of this System because of misuse, misapplication, negligence, alteration, accident, installation, or operation contrary to our instructions, incompatibility with accessories not installed by SimPure®, or damage caused by freezing, flood, fire, or Acts of God are not covered by this warranty. In all such cases, regular charges will apply. This limited warranty does not include service to diagnose a claimed malfunction in this unit. This warranty is void if the claimer is not the original purchaser of the unit or if the unit is not operated with certified safe potable municipal or well water. We assume no warranty liability in connection with this System other than that specified herein. This warranty is in lieu of all other warranties, expressed or implied, including warranties of fitness for a particular purpose. SimPure® liability hereunder shall not exceed the cost of the product. Under no circumstances will SimPure® be liable for any incidental or consequential damages or for any other loss, damage or expense of any kind, including loss of use, arising in connection with the installation or use or inability to use the covered items. These warranties are governed by the laws of the state of Washington, USA, and may change at any time without notice.
Our Products & Services
Consumables
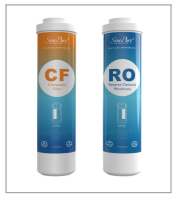

A full selection of consumable items to maintain your SimPure® countertop water purification system well into the future are available from SimPure® online or through your local Distributor.
Tools & Accessories
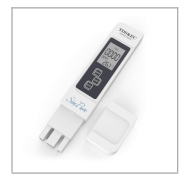

SimPure® Test equipment helps monitor the performance of your SimPure® water system, making sure it’s performing as expected. Test your water today!
Products
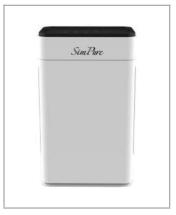

SimPure® products help to improve your life. Air Purifiers to improve the air you breathe for your home and car. Showerhead filters to improve your water quality and care for your skin and hair. BPA Free Portable water bottle with filter.
Read More About This Manual & Download PDF:
References
[xyz-ips snippet=”download-snippet”]

 Health & Safety