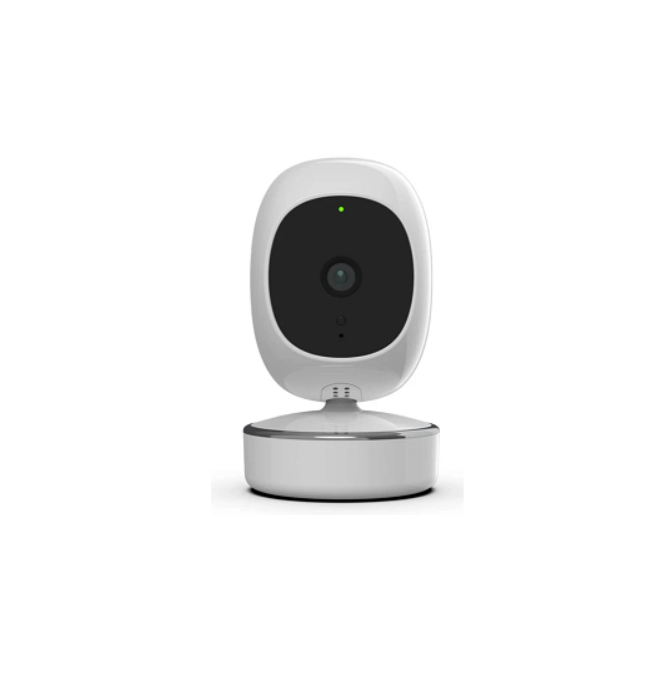
Simshine Security Canera SimCam Indoor 1 User Manual
About the manual
This user manual is mainly about the product setup and installation. The in-APP instructions can guide you through every step of using the product.Need help from our support team? Email to : https://www.simshine.ai/supportEN Download the latest user manual at the above address.
Product profile
Sim Cam 1S uses on-device AI to proactively detect and record real events. It provides you with timely and actionable insights, free of subscription fees and privacy compromise.
Key features and benefits
- AI motion detection – SimCam 1S can alert you to the presence of persons, pets and vehicles in a specific activity zone – no false alerts.
- Facial recognition – keep track of the safety of your family with customized facial recognition alerts.
- Lightning-fast detection – be alerted to the event as it happens without delay.
- 24/7 video at a glance – See the whole day video in just a minute with the daily report, smart event recording and continuous recording.
- 1080P & starlight night vision – identify a person from up to 30 feet with more details, day and night.
- 360° tracking – automatically pan to follow a person on the move.
- Local processing & storage – Never have to pay any subscription fee or concern your privacy.
- AI home automation – automate other smart home devices with human activities.
What’s in the box

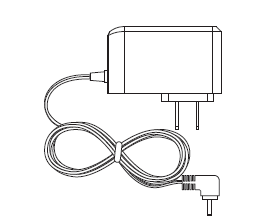
SimCam indoor 1S camera x 1 AC power adapter & cable x 1


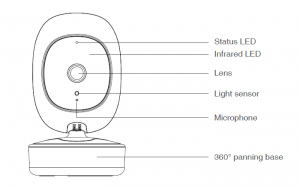
Product Diagram
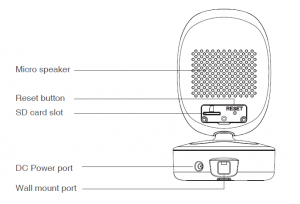
Download SimHome APP
Scan the QR code below to download and install the SimHome APP to your mobile device. You can also search for “SimHome” in Google Play or IOS App Store.Open the APP and follow the onscreen instruction to create an account with your email address and login into your account.

Power on the SimCam Indoor 1S
Plug the power cable into the DC power port on the back of the camera. Plug the AC adapter into a 100-220V AC power outlet.The status LED will blink red indicating that the camera is powered on. After a minute or two, the status LED will blink green indicating that it is ready to connect to WiFi.

Tip: If the light does not blink green, please press the reset button and hold it for 5 seconds to reset the device
Add a new device to the APP
Open the SimHome APP, tap “+” in the upper right corner, choose the device’s type, tap “Next”, enter your WiFi name and password, tap “Next”, enter the device’s name and select alocation, tap “Next” and you will see a QR code on your mobile device. Point the QR code to your camera’s lens. When you hear “connected”, it indicates the QR code scanning is completed.When the status LED turns solid blue, it indicates that the camera is connected to WiFi. Tap “Next” and swipe down on the main screen of the APP to refresh the device list.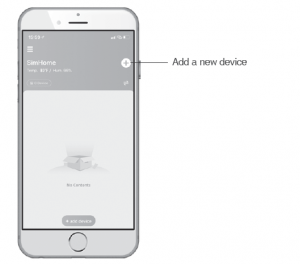
Status LED guide
| Status light color | Camera’s status |
| Solid red | The camera is powered on. |
| Blinking green | The camera is ready to scan the QR code. |
| Solid blue | The camera is connected to WiFi. |
| Solid green | The camera is connected to WiFi, but not connected to the Internet. |
Install the SimCam 1S
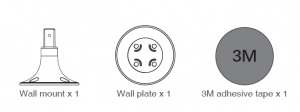
Test the WiFi at the spot where you want to install the camera. Hold the camera where you want to install it and check the live stream on the APP. If you see the videosmoothly with the status LED in solid blue, the WiFi is strong enough at the chosen spot. Make sure the camera is installed within the reach of a power outlet.Fasten the wall plate to a flat wall with wall screws. If the wall is made of brick or stone, you may need to use wall anchors to hold the screws. Attach the wall mount to the wall plate and secure it with mounting screws. Attach the camera to the wall mount and secure it with the holder screw. Use the live feed on the APP to pan and tilt the camera to your desired position.
Tip: Make sure the wall can bear at least three times the total weight of the camera and wall mount.
Warranty
What does this warranty cover?
Simshine warrants that each Simshine’s product you purchase is free from any defects in material or workmanship under normal use during the Warranty Period. The warranty period for aSimshine product is twelve (12) months from the day when the product is delivered to the first end-user. During the Warranty Period, SimShine will repair or replace, at no charge, products orparts of a product that proves defective because of improper material or workmanship, under normal use and maintenance.
What is not covered by this warranty?
Defects caused by incorrect use or improper installation not following the product manual instructions; Defects caused by unauthorized modification, repairs, disassemblyor use with third-party components or product; The serial number has been removed or defaced from the Simshine product; Damages caused by lightning, fire, earthquake, tornado, or other events of force majeure; Consumables parts, including but not limited to batteries, unless damage is due to defects in material or workmanship of the product; Simshine products purchased from an unauthorized reseller; Damage caused by third-party service providers who are not
authorized by Simshine; Fail to provide proof of purchase that you are the authorized user of the product; Any non-Simshine branded products, such as batteries, SD cardand cables, even if sold or shipped with Simshine products; Products marked as “Sample” or “Not for Sale”, or sold “AS IS”; This warranty cannot be transferred from the original end-user toothers; Any indirect or consequential damages or losses resulting from the product failure such as loss of data and loss of business.
Return & Refund
If customers are not completely satisfied with the Simshine product, they can return it within 30 days after the receipt of the product.To be eligible for a return, the product must be unused and returned in the same condition that you received it. It must also be in the original packaging. Products that show any signs ofwear, or that are not packaged like new with all accessories and manuals will not be accepted under this return policy. To complete your return, we require a receipt or proof of purchaseand the serial number. Customers will have to pay all the return shipping costs. No restocking fee will be charged for the return of a product. Once your returned product is received and inspected, we will email you a notification of receipt. We will also notify you of the approval or rejection of your refund. If you are approved, then your refund will be processed, and a credit will automatically be applied to your credit card or original method of payment, within a certain amount of days. Please note shipping charges are non-refundable.
How to obtain warranty service?
Contact Simshine support team by email or Simshine authorized resellers/repair centers and describe the product issues. They will attempt to identify and resolve theproblem of your product by offering you tips and advice, software or firmware updates. If the problem cannot be identified or resolved through remote assistance or software updates, you will be requested to return the product to the address provided by Simshine or authorized resellers. Simshine will examine the returned product to identify the problem, if Simshine determines that the problem in question is not covered by this warranty, you will have to apply for paid repair service.
Warranty card
If you want to claim warranty service, please fill out the warranty card below and return it with the product.
Read More About This Manual & Download PDF:
References
[xyz-ips snippet=”download-snippet”]

