MIDI Maestro
MIDI MaestroManual Firmware 1.1.6 App firmware 1.4.x
WelcomeMIDI Maestro ManualREACH US! We love to help! 🙂In order to benefit from all the latest features, it is necessary to have the most recent firmware version installed.To check the Firmware version on your MIDI Maestro, press the Mode button on the back panel to go to the Main Menu, the firmware version will show in the lower left screen. As of the writing of this manual, it is 1.1.6.Don’t have the latest firmware? Download it from the MIDI Maestro App, and make sure it’s updated, the current phone app version is 1.3.9 for Android and 1.4.1 for iOS. Find the app and download it from the Google Play Store for Android,or on the Apple Store for iOS, search for “Singular Sound MIDI Maestro”. (Read section 3 using the MIDI Maestro to learn how toupdate your unit.)
MIDI Maestro Manual
1
Table of Contents1. Introduction Understanding the MIDI Maestro 2. Connections Powering and connecting thepedal to everything 3. Using the MIDI Maestro Navigating the MIDIMaestro, connecting to devices, and the visual display 4. MIDI Everything you need to know 5. The Modes The layout of the two included modes on the MIDI Maestro 6. MIDI Maestro Smartphone App Create, download, and upload custom modes. 7. Technical Specifications 8. Warranty 9. Changelog*The Table of Contents is clickable for easy navigation*
MIDI Maestro Manual
2
IntroductionThe MIDI Maestro places the full power of MIDI control at your feet. Make the most of any setup by choosing exactly how you want your MIDI commands to be arranged and control up to 16 MIDI channels independently. The functions of each button on the MIDI Maestro can be edited with the MIDI Maestro smartphone app. Look it up by searching “Singular Sound MIDI Maestro” on the Google Play store or the Apple Store for a free download!Do you use the BeatBuddy and/or the Aeros Loop Studio? The MIDI Maestro has built-in default modes for each unit for a plug-and-play experience right out of the box!
12 3 4 56 7 8
1. Power Port (250mA, 9V center-negative)
2. Power Button
3. Extension Pedal IN
4. Expression Pedal IN
5. Pairing Button
6. Mode Button
7. MIDI IN
8. MIDI OUT
MIDI Maestro Manual
3
Connections
Power
The MIDI Maestro uses a 9V 500mA center-negative power supply. If you use a power supply of more than 9V or plug it directly into AC power you will destroy your MIDI Maestro, and your warranty will NOT be valid! This would be painful for everyone – especially your MIDI Maestro. Do not do this!The power supply must have a minimum of 250mA (0.25 Amps) for the MIDI Maestro to turn on. More amps won’t harm your MIDI Maestro. If you use a centerpositive adapter, it won’t harm your MIDI Maestro either, but your MIDI Maestro won’t turn on.
Using your pedal board’s power supply
If you would like to use your pedal board’s `octopus’ power supply (a single power supply that powers all of your pedals), make sure it is 9V and center negative (most are) BEFORE plugging it in! To calculate if your pedal board’s power supply has enough Amps to power the MIDI Maestro, add up all of the Amps that your other pedals require (usually written on the bottom of the pedal. Remember: 1000 mA [milliAmps] = 1.0 A [Amps]) and add 0.25 Amps for the MIDI Maestro’s requirement. If this total is more Amps than your power supply can produce (for example, thetotal of all of your pedals plus the MIDI Maestro is 2.5 Amps but your power supply can only produce 2.0 Amps), then the MIDI Maestro won’t turn on (neither will any of your other pedals), because there isn’t enough power available. PLEASE NOTE: Plugging the MIDI Maestro (a digital pedal) into the same power supply as analog pedals (most effect pedals) can cause noise interference in the analog pedal sound. If you experience this, please use a separate power supply for the MIDI Maestro.
MIDI Connection
The MIDI Maestro is best used as the MIDI transmitter or “master” device, meaning it is the unit controlling all of the other connected units. In order to use the MIDI Maestro as the transmitter (master), connect a standard 5-pin male to male MIDI cable to the MIDI OUT port on the MIDI Maestro. Then, connect that cable to the MIDI IN port of the next device in the MIDI daisy-chain (the units connected sequentially via MIDI).
MIDI Maestro Manual
4
ConnectionsThe MIDI Maestro also passes all MIDI commands that come into its MIDI IN port to the OUT port, this on its own is known as MIDI Thru. The MIDI Maestro technically works using MIDI Merge, it sends both the commands it generates and the commands it receives (from MIDI IN) through the OUT port.
Here is an example of a typical set up using the MIDI Maestro.Bluetooth ConnectionThe MIDI Maestro can connect to the MIDI Maestro Smartphone App in order to update the MIDI Maestro firmware, update the default modes on the MIDI Maestro, and update/add a custom mode. Simply press and hold the Pairing button on the back panel until the tiny blue light on the top of the MIDI Maestro front panel begins to blink. If the light is solid, that means a bluetooth connection has been established.The MIDI Maestro can also work with any MIDI BLE enabled device. You do not need to pair your phone with the MIDI Maestro as a bluetooth device for it to work as a BLE MIDI device within an app like OnSong, for example. The app will automatically pair with the Maestro, no need to connect it directly to your phone via Bluetooth, just have Bluetooth enabled on your phone. (read more about setting up MIDI Maestro BLE commands in Section 6 MIDI Maestro Smartphone App).
MIDI Maestro Manual
5
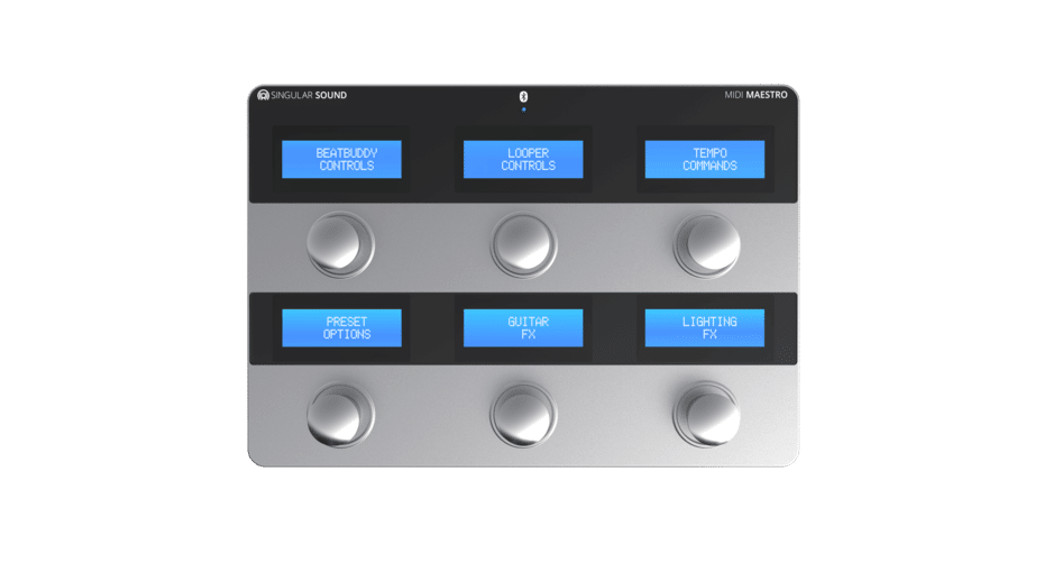
Using the MIDI MaestroFirst UseTurn on the MIDI Maestro by pressing the On/Off button on the back panel, the blue LED screens will light up and you should see something like this:
MenuThe MIDI Maestro menu is navigated by pressing one of the 6 buttons:· Custom Mode (Top-Left) – This opens the uploaded custom mode, these modes are made and uploaded to the MIDI Maestro via the MIDI Maestro app. (See more about the MM app in section 5 MIDI Maestro Phone Application.)· BeatBuddy Mode (Top-Center) – The built-in default mode for plug and play use with Singular Sound’s BeatBuddy.· Aeros Mode (Top-Right) – The built-in default mode for plug and play use with Singular Sound’s Aeros Loop Studio.· Firmware Version (Bottom-Left) – Shows the current Midi Maestro firmware loaded on your unit. The current firmware version is 1.1.6.· Cancel (Bottom-Center) – Re-opens the last used mode (Aeros Mode/BeatBuddy Mode/ Custom Mode).· Calibrate Ext Pedal (Bottom-Right) – This opens the dialog for setting up an external expression pedal. See Calibrate Expression Pedal below.
MIDI Maestro Manual
6
Using the MIDI Maestro
If the Bottom-Left screen has a firmware version number lower than 1.1.6, please use the following procedure to update the firmware:Press and hold the Pairing button on the back panel so the MIDI Maestro is in pairing mode. Open up the MIDI Maestro phone app (we’ll call it the MM app) and press the upper left menu button.
Press “Update Firmware” to update the MIDI Maestro firmware. Once complete, press “Update Default Modes” to update the default modes on your MIDI Maestro. Make sure to do it in this order.Calibrate Expression Pedal: Connect your expression pedal to the Expression Pedal ¼” jack. First, set your pedal to the maximum, and select “Set Pedal to Max & Press” (Bottom-Right), then set the minimum in the same fashion. Then, you have the choice to select either “Re-calibrate” (Top-Right), or “Confirm and Exit” (BottomRight) which will return you to the last used mode (Aeros Mode/ BeatBuddy Mode/ Custom Mode). You always have the option to select “Exit / Cancel” (Bottom-Left) during this process to cancel and return to the last used mode.How the MIDI Maestro WorksModesThe MIDI Maestro is organized into “Modes”. A Mode is a specific configuration of MIDI commands on the MIDI Maestro. There are three modes: BeatBuddy Mode, Aeros Mode, and Custom Mode. You send the MIDI commands by pressing one of the 6 footswitch buttons on the MIDI Maestro. A screen above each button will have some text to describe what commands that button will send.ButtonsEach of the 6 buttons has two physical states, when it is pressed and when it is released. MIDI Commands can be sent either when it is pressed, released, or both. For simplicity we will refer to pressing and releasing a button once as a `button action’.
MIDI Maestro Manual
7
Using the MIDI Maestro
One example of why this is useful is when using the BeatBuddy Mode. Pressing the footswitch button labeled “Part 2” sends the command to begin the transition to song part 2, and releasing the button sends the command to complete the transition. So you can extend a transition by holding down the button before releasing it.
Commands
A command is a specific MIDI message (CC, PC, PB, Note On/Off — read more on this in section 4 MIDI pg. 10) that is sent from the MIDI Maestro to a MIDI receiver (slave) device. MIDI commands can be sent via a MIDI cable and/or wirelessly over MIDI BLE (Bluetooth Low Energy). The command can change a number of things, from the receiver (slave) device’s behavior to setting parameters, like volume and panning. Every button on the MIDI Maestro can have up to 8 different MIDI commands per button. This can be doubled by adding a toggle to the button, learn more about toggles on pg. 11.
Pages on the MIDI Maestro
A Mode is organized into “pages”. Each page consists of 6 button configurations (as displayed on the MIDI Maestro screens). If you change `pages’, you will see the text description of the screens change, and the commands the buttons send change along with it. You can have up to 10 pages in a custom mode. A footswitch plugged into the MIDI Maestro’s Ext. port can be used to navigate the pages (see External Footswitch below). Buttons can also have a “redirect” command coded on them, this means that when you press that footswitch button it will also change the current page of the mode you’re on. For example, in Aeros Mode, pressing the footswitch button that says `2×2 Commands –>’ will redirect the Maestro to the page that has all the 2×2 Commands. In the default modes we usually include a “->” (enter) or “<–” (exit) symbol to indicate that this button has a redirect command coded on it.
External Footswitch – Use a momentary switch (like the Footswitch+) that uses a TRS (Tip-ring-sleeve) ¼” connector. The left and right buttons on your footwitch can be used to navigate the pages on the MIDI Maestro in the modes (Aeros Mode/BeatBuddy Mode/Custom Mode). Pressing the Left footswitch button goes to the next page, while the right button goes to the previous page. The external footswitch does nothing while in the Main Menu. Using a footswitch to scroll through pages saves you the necessity of using one of the MIDI Maestro buttons to redirect to a new page.
MIDI Maestro Manual
8
Using the MIDI MaestroType of footswitch – It is highly recommended that you use the official Singular Sound Footswitch+ (sold separately). If you are not using a Footswitch+, make sure that the third party footswitch is compatible with the MIDI Maestro. The MIDI Maestro is compatible with standard momentary dual footswitches which have a single TRS ¼” output (one switch is connected to the Left channel and the other to the Right). It is NOT compatible with ABY switches.Tips and Tricks· Holding down the Bottom-Center and Bottom-Right buttons enters “clutch mode” where you could move the expression pedal to a new position without sending MIDI messages. This is useful if you run out of expression pedal range and want to reset.· Holding down both the Bottom-Left and Bottom-Center buttons at the same time returns the MIDI Maestro to the Main Menu hands-free, so you can change modes without having to bend down.· Send multiple commands to several units on different MIDI channels (1-16) using just one button, up to 8 commands per button, and up to 16 if toggling is enabled. Each MIDI command can be sent on a separate channel to control a different device (see Section 4 – MIDI for more info on channels). That’s up to 96 commands per page!· Want to start an action and complete it after holding a footswitch button? You can set one command to be sent on the press and the other on the release! This is how transitions work on the BeatBuddy mode.
MIDI Maestro Manual
9
MIDIWe go from the basic to very complex topics, feel free to read, skim, or totally avoid this section!BasicsWhat is MIDI?MIDI (Musical Instrument Digital Interface) is the digital language that musical equipment uses to communicate. By using MIDI, the MIDI Maestro can send commands to a number of devices on up to 16 separate channels by daisychaining the MIDI connections.What is a daisy chain?All it means is that you connect the devices in sequence. A transmitter device (sometimes referred to as the `MIDI Master’ device in other manuals) will send MIDI commands from the MIDI Out port and a receiver device (sometimes referred to as `MIDI slave’) will accept that signal through the MIDI In port. For example, Device A MIDI Out is connected to Device B MIDI In, then Device B MIDI Out is connected to Device C MIDI In, and so on. The MIDI Messages start on Device A and get sent down the chain. It cannot be sent the other way around (from B back to A). The MIDI Maestro is most likely going to be the main transmitter device, so it would be first in the chain.MIDI MappingMIDI mapping involves setting up a MIDI device to adjust how it behaves. The MIDI Maestro can be configured to send different commands that are specific to other units.MIDI InstrumentA MIDI Instrument is a device that communicates using the MIDI protocol. This means that it sends (and possibly receives) information using the structure, timing, and mechanisms defined in the MIDI standard. For example, almost all electronic pianos meet this description.It is of note that MIDI information can be sent through different methods, most commonly a large 5- pin MIDI cable, a small 5-pin MIDI cable, USB cable, or Bluetooth.
MIDI Maestro Manual
10
MIDI
What is a MIDI Channel?A MIDI Channel is a way to separate MIDI commands so that they only affect the intended device. Each device in the MIDI daisy chain can be set to listen to a specific MIDI channel and ignore MIDI commands sent on other channels. Although most devices have the option to listen on all channels — this is sometimes called OMNI — each MIDI command is sent through only one channel at a time.The MIDI Maestro can send commands on any of the 16 channels.TogglingThe MIDI Maestro is able to toggle its buttons between two digital states, which means it can send one set of commands on button action 1, and a new set of commands on button action 2. Then, you alternate between the states with each new action on that button. Remember, a `button action’ represents both physical states of pressing and releasing once.For example, pressing a button once sends CC 40 value 0 (can represent a Mute command for a device) and then pressing the button again will send CC 40 value 1 (can represent an Unmute command).Each button on the MIDI Maestro can toggle, so they can either have two states (toggle is on), or not toggle at all — so they would send the same messages every time you activate the button.Types of Commands· CC (Continuous Control) — A MIDI message that can have a value range from 1-127 (128 total values). Each CC command usually relates to a specific operation like volume control, muting, soloing, etc. There are 128 possible CC commands from CC:0 to CC:127. o Each value can have a different outcome, depending on the listening MIDI device’s MIDI mapping. o For example, CC:40 value 1 could unmute a track and CC40 value 0 could mute that track (this depends on what CC# and values the receiver (slave) device uses for muting).
MIDI Maestro Manual
11
MIDI· PC (Program Change) — Also known as a Patch Change, it is a MIDI message that changes a patch preset on the listening device. There are 128 possible PC commands (0-127). Unlike CC commands, PC commands do not have values. o For example, a MIDI keyboard may have several patches, or sounds, for different instruments like Acoustic Piano, Electric Piano, Marimba etc. On this device, PC:0 could represent a patch like Acoustic Piano, and PC:1 could represent a patch like Electric Piano.· PB (Pitch Bend) — A MIDI message that has a range of 016383 (16,384 different values) with a center at 8192. This allows for operating parameters that need a lot of precision, like volume, pitch modulation, or wetness, for example.· Note On/Off — Much like what it sounds, a Note On command starts the playback of a MIDI note, while Note Off cuts off the sound. o Without a Note Off command, some sounds will never stop playing back, or will follow their original decay rate and that can make things sound very messy. o Note Off commands are not always needed with percussive sounds. Adding the Note Off command should not cause any trouble even if it’s not necessary. If for some reason you’d like to omit sending the Note Off command, refer to the target device’s MIDI manual to confirm it is necessary. o Middle C (aka C4) is note 60. (61 is C#, 62 is D, so on and so forth) o Velocity is measured from 0-127, 0 being so “soft” it probably is not audible, 127 being as “hard” as the note can sound. Imagine the difference between a drummer tapping a snare with their drumstick lightly and them hitting the snare with all their force. Although velocity and volume are related, they are not the same thing.
MIDI Maestro Manual
12
MIDI
MIDI Standards
Routing – MIDI Thru, Merge, and OutDevices can vary on how MIDI data is sent along a daisy chain. There are three main hardware routing options that are typically available: MIDI Thru, MIDI Merge, and MIDI Out.· MIDI Thru — The device passes all MIDI commands received from the MIDI In port to the MIDI Out Port. The device does not send out its own generated MIDI commands.· MIDI Merge — The device sends MIDI commands it generates and all MIDI commands it receives from the MIDI In port to MIDI Out port. (Like the MIDI Maestro)· MIDI Out — The device only sends the MIDI commands it generates to the MIDI Out port.Some devices may have internal settings for MIDI routing. Others have dedicated MIDI Thru ports. Refer to your device’s manual for specifications on MIDI routing.
General MIDI
In the world of MIDI, some devices are made to adhere to a set mapping of commands and values. This is especially true with Drum kits. In order to make a standardized set of drum sounds for a wide range of styles most devices follow the General MIDI Drum Map.
General MIDI Drum Map Midi Note – Drum Instrument
35 – Acoustic Bass Drum 36 – Bass Drum 37 – Side Stick 38 – Acoustic Snare 39 – Hand Clap 40 – Electric Snare 41 – Low Floor Tom 42 – Closed Hi Hat 43 – High Floor Tom 44 Pedal Hi Hat 45 – Low Tom 46 – Open Hi Hat 47 – Low Mid Tom 48 – Hi-Mid Tom 49- Crash Cymbal 1 50 – High Tom 51 – Ride Cymbal 1
52 – Chinese Cymbal 53 – Ride Bell 54 – Tambourine 55 Splash Cymbal 56 Cowbell 57 – Crash Cymbal 2 58 – Vibra slap 59 – Ride Cymbal 2 60 – Hi Bongo 61 – Low Bongo 62 – Mute-Hi Conga 63 – Open-Hi Conga 64 – Low Conga 65 – High Timbale 66 – Low Timbale
67 – High Agogo 68 – Low Agogo 69 – Cabasa 70 – Maracas 71 – Short Whistle 72 – Long Whistle 73 Short Guiro 74 – Long Guiro 75 – Claves 76 – High Wood Block 77 – Low Wood Block 78- Mute Cuica 79 – Open Cuica 80 – Mute Triangle 81Open Triangle
MIDI Maestro Manual
13
MIDI
It is common for a device to follow General MIDI for its PC commands. However, since every device is different, it is also common for devices to not follow General MIDI mapping. Check your device’s manual for how it handles PC commands.
Here is a list of the General MIDI PC commands:
Piano· 0 Acoustic Grand Piano · 1 Bright Acoustic Piano · 2 Electric Grand Piano · 3 Honky-tonk Piano · 4 Electric Piano 1 · 5 Electric Piano 2 · 6 Harpsichord · 7 ClavinetChromatic Percussion· 8 Celesta · 9 Glockenspiel · 10 Music Box · 11 Vibraphone · 12 Marimba · 13 Xylophone · 14 Tubular Bells · 15 DulcimerOrgan· 16 Drawbar Organ · 17 Percussive Organ · 18 Rock Organ · 19 Church Organ · 20 Reed Organ · 21 Accordion · 22 Harmonica
Stringed Instruments· 24 Acoustic Guitar (nylon) · 25 Acoustic Guitar (steel) · 26 Electric Guitar (jazz) · 27 Electric Guitar (clean) · 28 Electric Guitar (muted) · 29 Overdriven Guitar · 30 Distortion Guitar · 31 Guitar Harmonics · 32 Acoustic Bass · 33 Electric Bass (finger) · 34 Electric Bass (pick) · 35 Fretless Bass · 36 Slap Bass 1 · 37 Slap Bass 2 · 38 Synth Bass 1 · 39 Synth Bass 2 · 40 Violin · 41 Viola · 42 Cello · 43 Contrabass · 44 Tremolo Strings · 45 Pizzicato Strings · 46 Orchestral Harp · 47 Timpani · 48 String Ensemble 1 · 49 String Ensemble 2 · 50 Synth Strings 1 · 51 Synth Strings 2 · 52 Choir Aahs · 53 Voice Oohs · 54 Synth Choir · 55 Orchestra Hit · 56 Trumpet · 57 Trombone · 58 Tuba · 59 Muted Trumpet · 60 French Horn · 61 Brass Section · 62 Synth Brass 1
· 63 Synth Brass 2 · 64 Soprano Sax · 65 Alto Sax · 66 Tenor Sax · 67 Baritone Sax · 68 Oboe · 69 English Horn · 70 Bassoon · 71 Clarinet
MIDI Maestro Manual
14
MIDIPipe· 72 Piccolo · 73 Flute · 74 Recorder · 75 Pan Flute · 76 Blown bottle · 77 Shakuhachi · 78 Whistle · 79 OcarinaSynth Lead· 80 Lead 1 (square) · 81 Lead 2 (sawtooth) · 82 Lead 3 (calliope) · 83 Lead 4 (chiff) · 84 Lead 5 (charang) · 85 Lead 6 (voice) · 86 Lead 7 (fifths) · 87 Lead 8 (bass + lead)Synth Pad· 88 Pad 1 (new age) · 89 Pad 2 (warm) · 90 Pad 3 (polysynth) · 91 Pad 4 (choir) · 92 Pad 5 (bowed) · 93 Pad 6 (metallic) · 94 Pad 7 (halo) · 95 Pad 8 (sweep)
Synth Effects· 96 FX 1 (rain) · 97 FX 2 (soundtrack) · 98 FX 3 (crystal) · 99 FX 4 (atmosphere) · 100 FX 5 (brightness) · 101 FX 6 (goblins) · 102 FX 7 (echoes) · 103 FX 8 (sci-fi)Ethnic· 104 Sitar · 105 Banjo · 106 Shamisen · 107 Koto · 108 Kalimba · 109 Bagpipe · 110 Fiddle · 111 ShanaiPercussive· 112 Tinkle Bell · 113 Agogo · 114 Steel Drums · 115 Woodblock · 116 Taiko Drum · 117 Melodic Tom · 118 Synth Drum · 119 Reverse CymbalSound effects· 120 Guitar Fret Noise · 121 Breath Noise · 122 Seashore · 123 Bird Tweet · 124 Telephone Ring · 125 Helicopter · 126 Applause · 127 Gunshot
MIDI Maestro Manual
15
MIDI
MSB and LSBFair Warning, this gets a little bit complicated, we tried to translate this into something humans can understand.MSB (Most Significant Bit) and LSB (Least Significant Bit) commands allow for a greater variety of commands to be sent while still using a value set that is limited from 0-127 (All MIDI messages — except Pitch Bend [PB] — have 128 possible values associated with them). Think of MSB and LSB as an extension to the limit of having 128 values for a MIDI message. There are 128 (0-127) LSB commands for each of 128 (0-127) MSB commands. That means you have a total of 16,384 banks just from the MSB and LSB.MSB and LSB commands are usually a sequence of 3 MIDI messages. Two CC commands which have both the CC message itself and the value associated, and a PC command which actually makes the change on the receiver (slave) MIDI unit.The MSB Bank command is activated and set using CC:0 and the same goes for the LSB Bank command which uses CC:32, this is a standard for MIDI devices. If you use the Singular Sound BeatBuddy, you will find it needs a PC command to use CC:0 and C:32. Read more about how the BeatBuddy behaves using MSB and LSB on pg. 18.The value of the CC command (CC:0 or CC:32) decides which specific layer of the MSB and LSB banks is being activated. In terms of hierarchy, MSB comes before LSB and LSB is before the Program Change message. The Program change adds an additional 128 values to each of the MSB and LSB message configurations, that means a total of 2,097,152 values.The math may seem confusing. A good way of summarizing it is by noticing that we have 128 MSB values, which are combined with 128 LSB values, and then with an additional 128 PC values. The relationship is multiplicative, so we have a total of 128 x 128 x 128 possible values. Similar to binary math (we know, super fun!) you must organize the numbers in this order: MSB > LSB > PC.This means you must select the MSB bank before the LSB bank, and the LSB bank before the PC command for it to work correctly.MIDI Maestro Manual
16
MIDILet’s try out some MSB LSB math so that it makes more sense: Let’s say that you want to get the number 1 as a value from the MSB LSB command. First you would send the value CC:0 to the receiver (slave) device with a value of 0, Then you would send CC:32 with a value of 0 as well. Finally you would send a PC:1 command. Your device could interpret this sum value as 1 (0 +0+1). This is shown in the chart below.Let’s say that you changed the LSB value with CC:0 to a value of 1. This would mean that you already have selected the second layer of LSB. Remember every MSB layer has 128 LSB layers, and every LSB layer has 128 PC commands per layer. So now if you send CC:0 value 0, CC:32 value 1, and a PC:1 command your sum would be 129 (0+128+1). This is shown in the chart below.Have you gotten lost yet? Don’t worry, it gets more complicated! Let’s say you change the MSB layer to value 1:So you send CC:0 value 1, CC:32 value 1, and PC:1. Once MSB is set to the second bank, the sum value you choose cannot be less than 16,384. Why would you need to do this? Ask the MIDI gods (a.k.a the Gearslutz forum). So back to where we were, if you send CC:0 value 1, CC:32 value 1, and PC:1, that will equal 16513 (16384 +128 +1). This is shown in the chart below. Have your calculator handy!
MIDI Maestro Manual
17
MIDI
Now let’s try one last one on your own. Let’s say you send CC:0 value 2, CC:32 value 2, and PC:50. Come on at least try! 16,384×2 + 128×2 +50. Don’t forget your dear Aunt Sally…Wow, you got it, how did you do that… that’s right it is 220174!This is the basis for how MSB and LSB math works. Many devices, however, will use MSB and/or LSB to select folders and the PC command to select something like a patch or a sound on a keyboard, for example. Some MSB and LSB layers could be defined to access specific folders in the keyboard, check out this calculator for MSB and LSB changes as reference.This is similar to how the BeatBuddy uses MSB and LSB, read below to learn about how the BeatBuddy uses MSB and LSB.Folder/Song Select on the BeatBuddy using MSB and LSBA more specific example of using the MSB and LSB commands is when selecting songs on the Singular Sound BeatBuddy. Please take note, the BeatBuddy does not create a giant sum value from the MSB LSB and PC commands, it only uses the MSB and LSB commands to select the folder and subfolder, and then the PC command selects the song in the sub-folder.So… MSB = Folder full of 128 folders LSB = Sub-folder in the folder PC = Song in the sub-folderYou can select a BeatBuddy folder and song with the MIDI Bank Select and Program Change (PC) messages.· The folder is selected with the Bank Select Message (Bank MSB and LSB) and the song is selected with the program change (PC).· Each of the 128 values of Bank MSB value can have 128 folders as selected by the value of Bank LSB. This gives a potential of 128 MSB x 128 LSB = 16,384 different folders with 128 songs each.· The order of the folders / songs are sorted by the BeatBuddy Manager. · The order of the folders / songs corresponds to the number used by the MIDImessages +1. Remember computer nerds start with 0. · This means that Program Change Message must have a value of 0 to play thefirst song in the menu.MIDI Maestro Manual
18
MIDI
Please note that the BeatBuddy’s song does not change until the Program Change message is received, i.e. bank messages alone are not enough to change a program.We know this is confusing — but MIDI was designed by computer nerds, not normal people like us, and computer nerds like to start with 0 instead of 1.RPNs and NRPNsRPNs (Registered Parameter Number) and NRPNs (Non-Registered Parameter Number, or as musicians like to call it, “nerpins” when they want to sound cute instead of nerdy) both work in the same way. RPN’s are specified by the MIDI standard, and NRPN’s are specified by particular manufacturers. Refer to the manual of the device you are using to understand how it uses NRPNs in its MIDI mapping. RPNs and NRPs are just like standard MSB and LSB commands, but are set up using other CC commands than CC:0 and CC:32.Read more about RPNs and NRPNs hereHow to Use NRPNsRefer to the manual of your MIDI device to see if and how it uses NRPNs. The most typical method is by activating two CC commands to be treated just like a bank MSB and bank LSB. These can be set to a range of parameters on different devices. One example is how the Singular Sound BeatBuddy sets the tempo.
MIDI Maestro Manual
19
MIDISome devices require you to set the CC commands that will become the NRPN MSB and LSB banks before using them. You do this by first pressing CC99 with a value equal to the new Bank MSB CC command. Then by pressing CC98 with a value equal to the new Bank LSB CC command. Please refer to your device’s manual to see if this is necessary.For example, you first send the command CC99 value 65, now a CC65 command will activate a specific MSB layer. Then, you send a CC98 command with a value of 66. Now, a CC66 that follows a CC65 command will select an LSB layer.For some systems, like the BeatBuddy’s Tempo, the amount of commands allowed from just the MSB and LSB commands are enough to cover the range of values the unit can use. In other cases, the unit may use a PC command after the MSB and LSB commands to increase the value range.NRPNs and the BeatBuddySince the BeatBuddy’s tempo ranges from 40BPM – 300BPM, we can’t use just one CC command to cover the whole range because a CC command can only have 128 values.There are two ways of changing the tempo.· With INC/DEC (increase/decrease) messages which adjust the tempo up or down by 1 BPM· By skipping directly to a specific tempo BPM using the MSB/LSB system, like in the Song Selection system.However, it’s a bit more complicated because, unlike the Song Selection system where you have dedicated CC commands to represent the MSB (CC:0) and LSB (CC:32), there are no dedicated CC commands for Tempo.So we use the “NRPN Register” (Non-Registered Parameter Number) which is a general purpose MSB (CC:99) and LSB (CC:98). This can be used to control tempo, any other parameter, or multiple parameters at once.Currently we’re only using it to control tempo, but we follow the MIDI Standard protocol to leave room for further control in the future. Because of this capability for multiple parameter control, the steps below are followed. INC/DEC (see https://www.midi.org/specifications)MIDI Maestro Manual
20
MIDIHere are the common steps to do to control the BeatBuddy’s tempo. It follows the Data INC/DEC specification of the MIDI protocol:
Tempo MSB & Tempo LSBIn order to directly set the tempo to a specific BPM, you need to use the Tempo MSB and Tempo LSB. The Beatbuddy will update its current tempo only when receiving the LSB message.So the order of the message should be MSB value first, then the LSB value. Don’t forget, the value of the Tempo can only be set with both MSB (CC:106) and LSB (CC:107).Take note, the BeatBuddy does not need to access numbers larger than 16384, so it uses MSB and LSB math without the PC command added. Check out how the math works in the table below.MIDI Maestro Manual
21
MIDI· Tempo MSB & Tempo LSB o In order to directly set the tempo to a specific BPM, you need to use the Tempo MSB and Tempo LSB. The BeatBuddy will update its current tempo only when receiving the LSB message. o So the order of the message should be: 1. MSB value 2. LSB value o Don’t forget, the value of the Tempo can only be set with both MSB (CC:106) and LSB (CC:107).Here are a few examples of MIDI message combinations:
Find out more about general MIDI mapping here.MIDI Maestro Manual
22
The ModesIn this section we will detail the different commands available in the Default Modes, BeatBuddy Mode and Aeros Mode. These modes are ideal for a plug-and-play experience when using the Singular Sound BeatBuddy and/or Aeros Loop Studio with the MIDI Maestro.Remember that every button on the MIDI Maestro can have up to 8 different MIDI commands per button. This can be doubled by adding a toggle to the button, learn more about toggles on pg. 11.BeatBuddy Mode
MIDI Maestro Manual
23
The Modes
MIDI Maestro Manual
24
The ModesAEROS Mode
MIDI Maestro Manual
25
The Modes
MIDI Maestro Manual
26
The Modes
Custom ModeYou have the power to make or download any MIDI mapping you’d like, read the next section, MIDI Maestro Smartphone App, to learn how to create a custom mode using the MM app.Here are some custom modes detailed by our customers:Using MIDI Maestro to Wirelessly Control YouTube/Video on PC Using MIDI Maestro To Wirelessly Control YouTube/Video on Android MIDI Maestro, BOSS Katana and Katana Librarian App
MIDI Maestro Manual
27
MIDI Maestro Smartphone AppGetting startedFirst, download the free MIDI Maestro Smartphone App (we’ll call it the MM app for short). You can find the app on the Google Play Store or Apple Store by searching “Singular Sound MIDI Maestro”.Once downloaded, you are ready to start the customization process! Already have the app? Double check if you have any pending updates on your phone to a newer version.The app will ask you to allow “Access to location”, make sure to allow. Don’t worry, we’re not stalking you! This is required by the BLE (BLuetooth Low Energy) Protocol. We do not save any location data while you are using the app.The Main Screen
MIDI Maestro Manual
28
MIDI Maestro Smartphone AppThis is the main screen of the MM app, from this screen you can edit the Button Layout of the commands being sent. Read more about Custom Modes on pg. 31. To access other parts of the app and see the current firmware version press the Menu button .At the bottom of the screen, you will find the app version in grey text.
MIDI Maestro Manual
29
MIDI Maestro Smartphone AppMM App MenuMy Commands – Opens the My Commands screen to edit, delete, or share all locally saved commands.My Custom Modes – Opens the My Custom Mode screen to open, rename, delete, or share all locally saved Custom Modes.Browse Commands – Opens the Online Commands Library, this is a list of commands shared by other users.Browse Custom Modes – Opens the Online Custom Modes Library, this is a list of custom modes shared by other users.Update Default Modes – Updates the Default Modes on the MIDI Maestro (Set MIDI Maestro to pairing mode by pressing the button on the back to work).*Update Firmware – Updates the Firmware on the MIDI Maestro (Set MIDI Maestro to pairing mode by pressing the button on the back to work).**Please see page 5 of the manual for an explanation of Bluetooth connections.Update MIDI Maestro FirmwareOnce you’ve verified the app is up-to-date, hold the pairing button on the MIDI Maestro’s back panel to enter pairing mode (you do not have to connect your phone directly to the MIDI Maestro using bluetooth in order to use it with the MM app, you just need to have your phone’s bluetooth enabled). Once the blue light at the top of the MIDI Maestro’s front panel is blinking, press Update Firmware on the MM app menu to update the MIDI Maestro firmware. If you’re up to date, the app will cancel the update and let you know you’re already up to date.
MIDI Maestro Manual
30
MIDI Maestro Smartphone AppUpdate MIDI Maestro Default ModesNote: Always update firmware before updating the default modes.Occasionally, we will modify the Default Modes on the MIDI Maestro. In order to be sure you have the latest versions, hit Update Default Modes on the MM app menu. If you’re up-to-date, the app will cancel the update and let you know they’re already up to date.As soon as you’re sure both are up to date, power-cycle (turn off and back on) your MIDI Maestro to finalize the updates.Custom ModesNote: Always update the Firmware and default modes before uploading your custom mode.The MM app gives you the ability to create any configuration of commands into your own custom mode for use on the MIDI Maestro. You can program every button on each MIDI Maestro page. A Custom Mode can have up to 10 pages.You can create a template of the Custom Mode of the beatbuddy or the Aeros default modes. Simply create a new mode, and select either Blank, BeatBuddy, or Aeros to decide the template that you will use. If you choose Blank, the mode will not be based on any template, and you will start from the beginning of the creation process. Notice, all Singular Sound Default Mode commands are available to you before you create any commands. Read more about commands on pg. 37. This feature still has known bugs in the Android version 1.3.9.
MIDI Maestro Manual
31
MIDI Maestro Smartphone App
Your locally stored Custom Modes can be found and created in the My Custom Modes screen which is accessible from the Main Menu.
MIDI Maestro Manual
32
MIDI Maestro Smartphone AppMy Custom Modes Screen
From this screen you can delete, edit, share and search for all locally saved custom modes. All downloaded modes will appear here.Your app will automatically be open on your first blank Mode, it will be called “My First Mode”, you can change this name later, delete it, or create a new one by going to the My Custom Modes screen using the Main Menu.
MIDI Maestro Manual
33
MIDI Maestro Smartphone AppPages, Slots, and Button LayoutsA Page on the MM app is equivalent to a page on the MIDI Maestro, meaning page 1 on the MM app affects only page 1 on the MIDI Maestro. Each MM app page has 6 slots, meant to represent the 6 MIDI Maestro screens. You can switch pages by pressing the blue left and right arrows.Slots are equivalent to a MIDI Maestro Screen, the top 3 screens are represented by slots 1-3 from left to right. The bottom 3 screens are represented by slots 4-6 from left to right. Each slot can hold one Button Setup.By holding your finger on the slot you can drag and rearrange the individual Button Setups to change the button layout on the MIDI Maestro. You can see which slot corresponds to which screen on the MIDI Maestro by referencing the graphic to the left of the slot.
MIDI Maestro Manual
34
MIDI Maestro Smartphone AppButton Setup
By clicking on a slot you are brought to the Button Setup screen, in this screen you will name the Button Setup using the Top and Bottom text fields. The text you write here will be displayed on the corresponding MIDI Maestro screen once you upload your Custom Mode to the MIDI Maestro. This is also where you will add all the commands that will be sent with this button action. Remember, a button action represents the button being pressed and released once. Your newly added commands will be placed in the Commands List.MIDI Maestro Manual
35
MIDI Maestro Smartphone AppEvery Button Setup can have up to 8 different MIDI commands, and a button can toggle between two digital states (each state with up to 8 commands). You can also set up to four commands per toggle state to be sent as BLE commands. That means you have the option of having up to 16 commands sent via the MIDI Out on a single button. In order to add a command, press the big blue plus sign in the bottom right of the screen to go to the My Commands Screen.Note that when a toggle is enabled, the new button action state can have its own name. For example, the first state would show the name Pause, and the second name would say Unpause. So the screen on the MIDI Maestro would switch back and forth with every button action.
MIDI Maestro Manual
36
MIDI Maestro Smartphone AppCommandsMy Commands Screen
Here you will see a list of all the locally stored commands you have in the order they were added. From this screen, pressing the Blue plus sign will create a new blank command. You can use the search bar to look for your command.
You can also edit existing commands by pressing the edit icon command , or upload the command to the Singular Sound server for others to download
,delete the
MIDI Maestro Manual
37
MIDI Maestro Smartphone AppCommand EditingIf you create a new command, you will see the following screen with empty fields:
Fill in the text fields with the appropriate information.MIDI Maestro Manual
38
MIDI Maestro Smartphone AppCommon FieldsCommand Name – Create a name for your command.Device(s) – Name the device this command is mapped for.Description – Describe what this command does. Type – Choose the type of MIDI message being sent (CC, PC, PB, Note On/Off). Please refer to the MIDI section to learn more about MIDI channels. Channel – Choose the MIDI Channel this command will be sent on. Please refer to the MIDI section to learn more about MIDI channels.Specific FieldsControl Change (CC)
· Command – The specific CC command number. · Value – the value of the specific CC command.MIDI Maestro Manual
39
MIDI Maestro Smartphone AppProgram Change (PC)· Value – Sets the specific PC command. Note On/ Off
· Note – Sets the note played back by receiving device. Middle C= 60, halfsteps are equal to 1.· Velocity – Sets the Velocity of the note playback. This has to do with how loud the sound is played dynamically, it is related to volume but is not the same.Pitch Bend (PB)
· MSB – Chooses the MSB Bank · LSB – Chooses the LSB BankMIDI Maestro Manual
40
MIDI Maestro Smartphone AppEditing an Existing CommandAny existing command can be edited from the My Commands screen by pressing this icon , you can access the My Commands screen from the MM app Main Menu (press `My Commands’), or when adding commands to the Button Setup.
Deleting an Existing CommandAny command can also be deleted by pressing on the Trash Can icon Commands screen.
on the My
MIDI Maestro Manual
41
MIDI Maestro Smartphone AppEditing Commands ListEach command that you add to the Button Setup will show 5 interactive symbols as shown below:
Once commands are added, pressing and holding anywhere on the command will allow it to be dragged and reorganized. Commands will be sent in order from top to bottom.The Commands List has three distinct parts: The trigger (what causes the message to be sent), the medium (how the message is sent), and the option to remove.TriggerOn-Press – This command will be sent when the MIDI Maestro Button is pressed. Up to 8 commands can be sent on the press.On-Release – This command will be sent when the MIDI Maestro Button is released. Up to 8 commands can be sent on the release.
MIDI Maestro Manual
42
MIDI Maestro Smartphone AppMediumVia-MIDI Out – This command will be sent via the MIDI Maestro’s MIDI Out port.Via-BLE MIDI – This command will be sent wirelessly via BLE (Bluetooth Low Energy) MIDI from the MIDI Maestro. There must be a BLE MIDI connection for this to work. There can be up to 4 BLE commands sent per toggle state.RemoveIf the Button Setup is saved, this command will be removed from the Commands List.All changes are applied once the Button Setup is saved.ToggleIf the Button Setup includes a toggle, there will be two Commands Lists as shown below. Remember, each button action (press/release) can have up to 8 commands on it. Don’t forget to always hit “Save” at the top of the Edit Button Setup screen before leaving a Button Setup that has been modified.
MIDI Maestro Manual
43
MIDI Maestro Smartphone AppUploading to the MIDI MaestroOnce you have finished mapping the Custom Mode on the app, you can upload it to the MIDI Maestro. Turn on the MIDI Maestro and press the Pairing button on the back panel until the Blue LED light on the front panel is blinking. Then, using the MM app, hit the Upload button in the top right corner of the screen to begin the upload.The App will show a progress bar for the upload and will read “write completed” when it is done. Power cycle the unit (turn on and off) to see changes written into the MIDI Maestro
If there is an issue with connection, try restarting the MM app, if that doesn’t work, try turning off the MIDI Maestro and power-cycle (turn off and on) your phone’s Bluetooth.If you have issues connecting still, please contact for assistance.
MIDI Maestro Manual
44
MIDI Maestro Smartphone App
Sharing and Downloading Modes and Commands
Any Custom Mode and Command can be shared for other users to download.
To share a command you must open the My Commands screen which you can
access from the Main Menu or when adding commands to your Button Setup. Press
the share button
to share the command.
Similarly, you can share a Custom Mode by going to the My Custom Modes screen and pressing the share button.
To download a command, go to the Commands Library page from the Main Menu,
you can search for a command by its device or by its name. Once you have found
the command, press the download button
to add it to your My Commands
screen.
MIDI Maestro Manual
45
MIDI Maestro Smartphone AppTo download a Custom Mode, go to the Custom Modes Library page from the Main Menu and you can search for a Custom Mode by its name. Once you have found the Mode, press the download button to add it to your My Custom Modes screen.
MIDI Maestro Manual
46
Technical Specifications· Dimensions: 8.375 x 5.75 x 1.875 · Weight: 1 lb 12 oz · Anodized Aluminum · Easy to press, barefoot ready buttons · Expression pedal + extension pedal ports · Standard 5-pin MIDI IN/OUT ports · Durable metal housing · 3 presets that can be switched quickly using a small “mode” button on theback, BeatBuddy Mode, Aeros Mode, and Custom Mode (requires app) · Custom mode can contain up to 10 pages of 6 individual button setups,each button setup can contain up to 16 MIDI commands · Wireless MIDI over Bluetooth BLE · Input Power: 9v, Center Negative, 300 mA
MIDI Maestro Manual
47
WarrantyYour MIDI Maestro comes with a full two year warranty on parts and workmanship from the date of purchase. During this period we will repair or replace (at our option) defective units free of charge.Most issues can be solved by writing to us at If we cannot help you fix the problem, we may have you send the MIDI Maestro in for servicing.The warranty remains valid only if the serial number on the unit is not defaced or removed. It does not cover damage due to misuse, unauthorized tampering, accident or neglect.To validate your warranty please register your MIDI Maestro within 30 days of purchase at singularsound.com/warrantyThanks for reading the manual, now you’re the maestro of MIDI with your MIDI Maestro!If there is anything you don’t understand, or think that can be explained better, please contact us at , or visit our Forum at http://forum.singularsound.com
MIDI Maestro Manual
48
ChangelogMIDI MAESTRO1.1.6 Changelog: Bug Fix · Allow MIDI Clock to pass through the MIDI Maestro
MIDI Maestro Manual
49
References
[xyz-ips snippet=”download-snippet”]