
UR SoftGripper
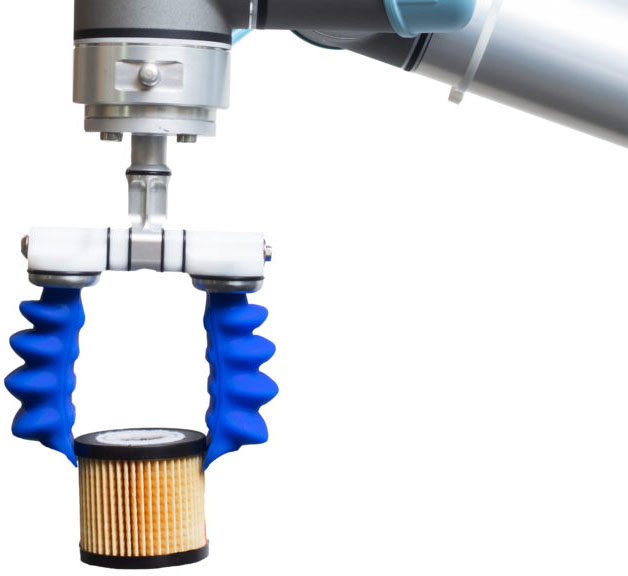
Introduction
Start your adventure by connecting your new SoftGripper to the Universal Robots hardware. To make the Installation a breeze, we are certified by the UR+ Program, meaning that the package you have got on hand has all the components needed for a swift start. From the SoftGripper itself, over the control-box and the URCap Software package to addon to the UR Graphical Programming Environment: In this step by step guide, you will get to know how make all parts work in your setup.If you need further information or help, go to soft-gripping.com, soft-gripping.shop or write an email to [email protected].
Installation
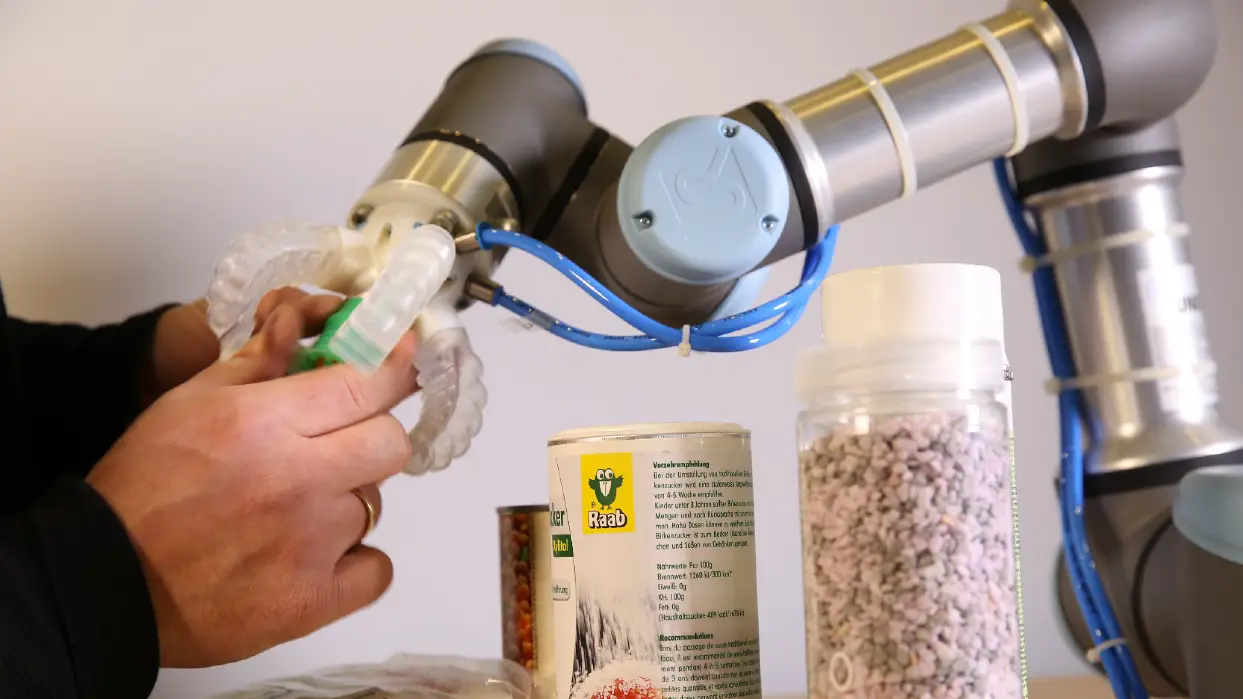
We have prepared two product lines: SoftGripper and SoftGripper – Developer Edition. Here we present the Developer Edition, as it is more modular and therefore requires more assembly steps. Nevertheless, both versions can be controlled by the same URCap. Make sure you have all parts ready before assembling and begin with the base and the adapter. A step by step video guide is also available to lead you through the process.
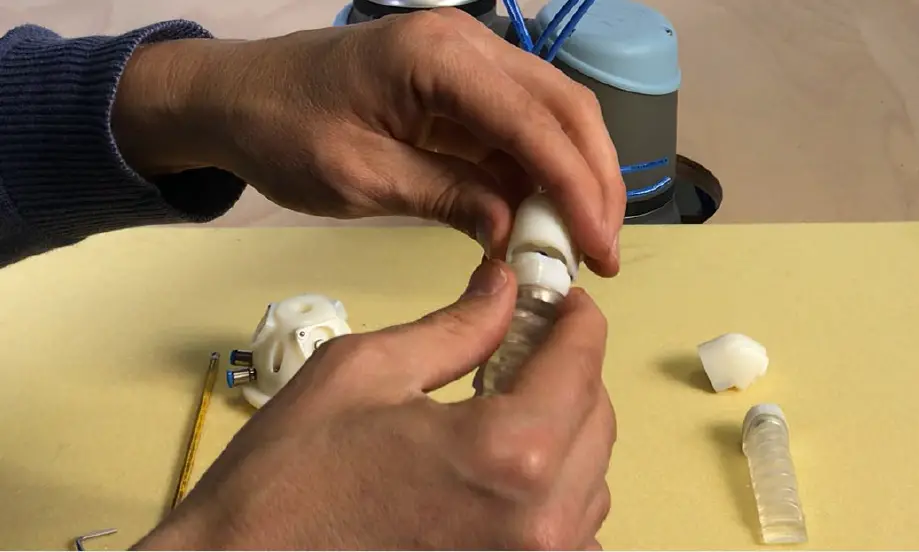
Start by mounting your SoftGripper on the connector that corresponds to your robot (e.g. ISO 9409-1-40-4-M6).
The base and connector are then attached to the robot and fixed with screws.
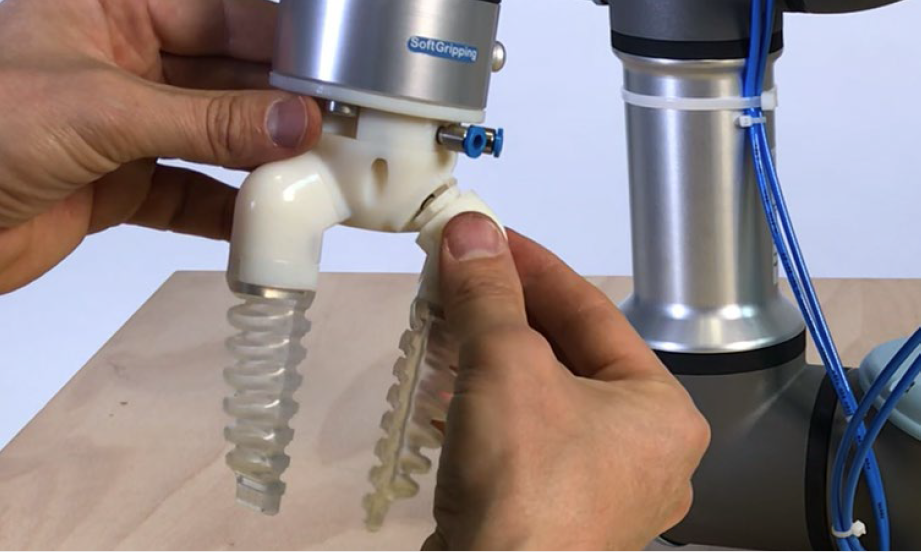
If you use angle adapters, connect them to the fingers using the bayonet lock.
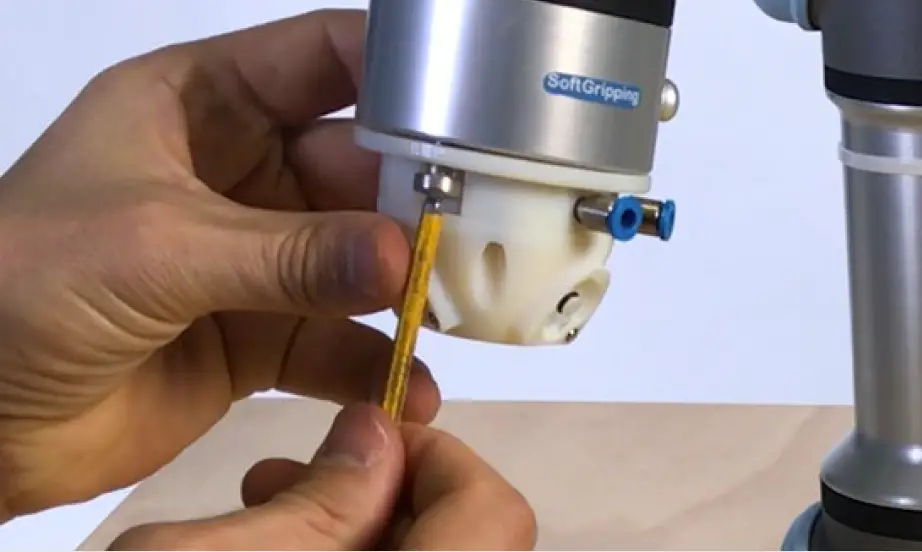
The fingers are then attached to the base using a bayonet lock as well. To do this, the finger is inserted into the appropriate opening and turned until it clicks into place.
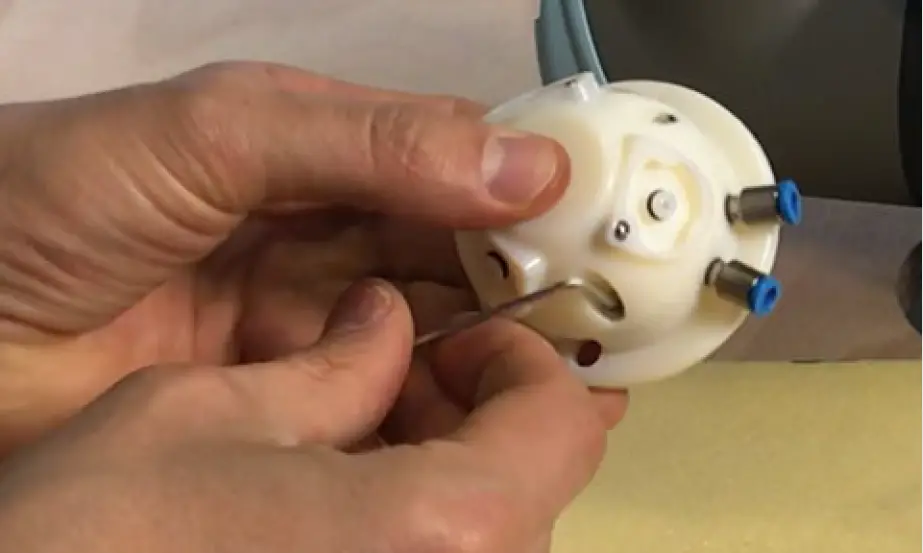
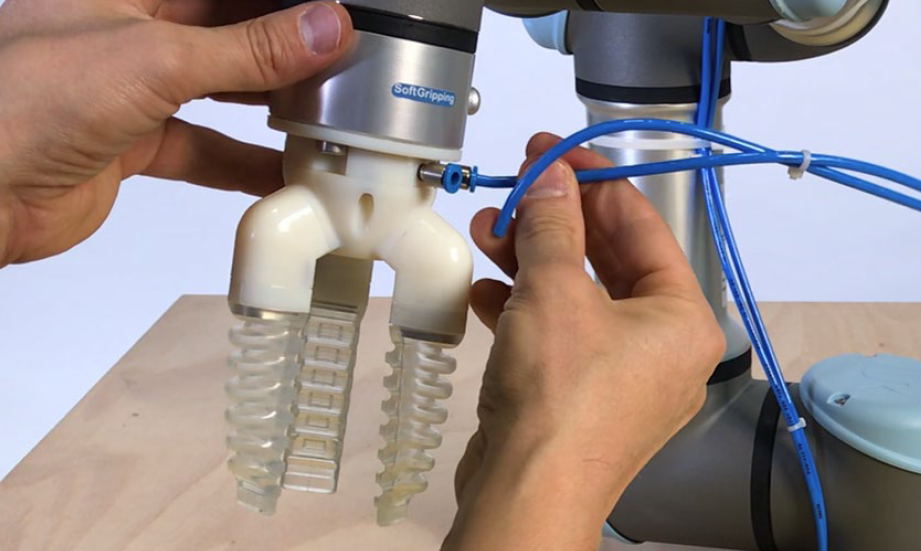
Finally, the connections for pressure and vacuum are attached to the SoftGripper.
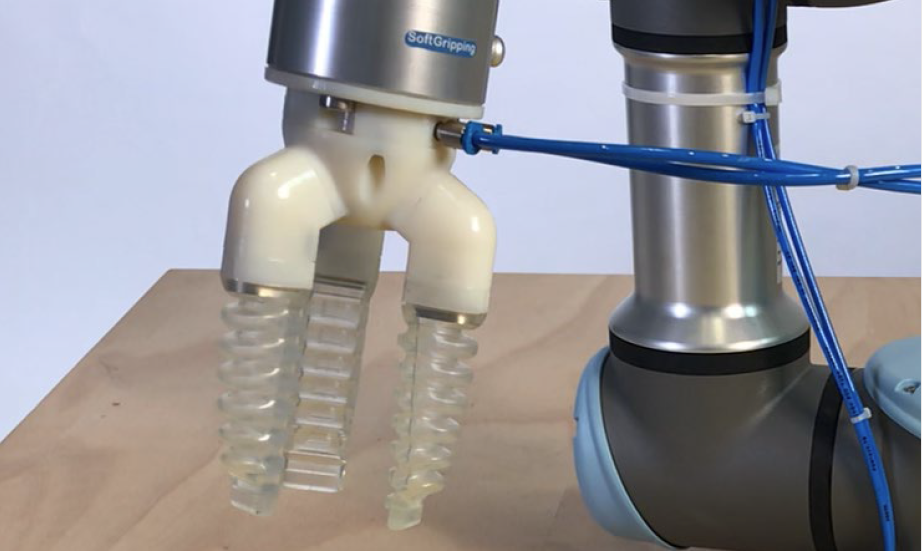
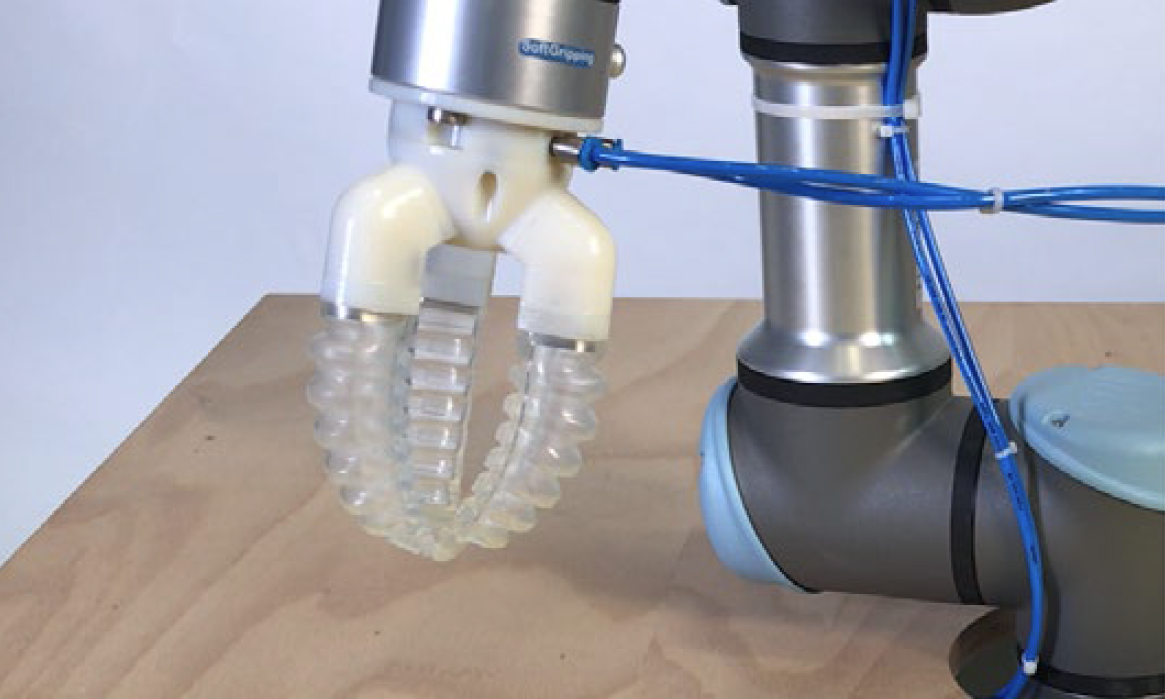
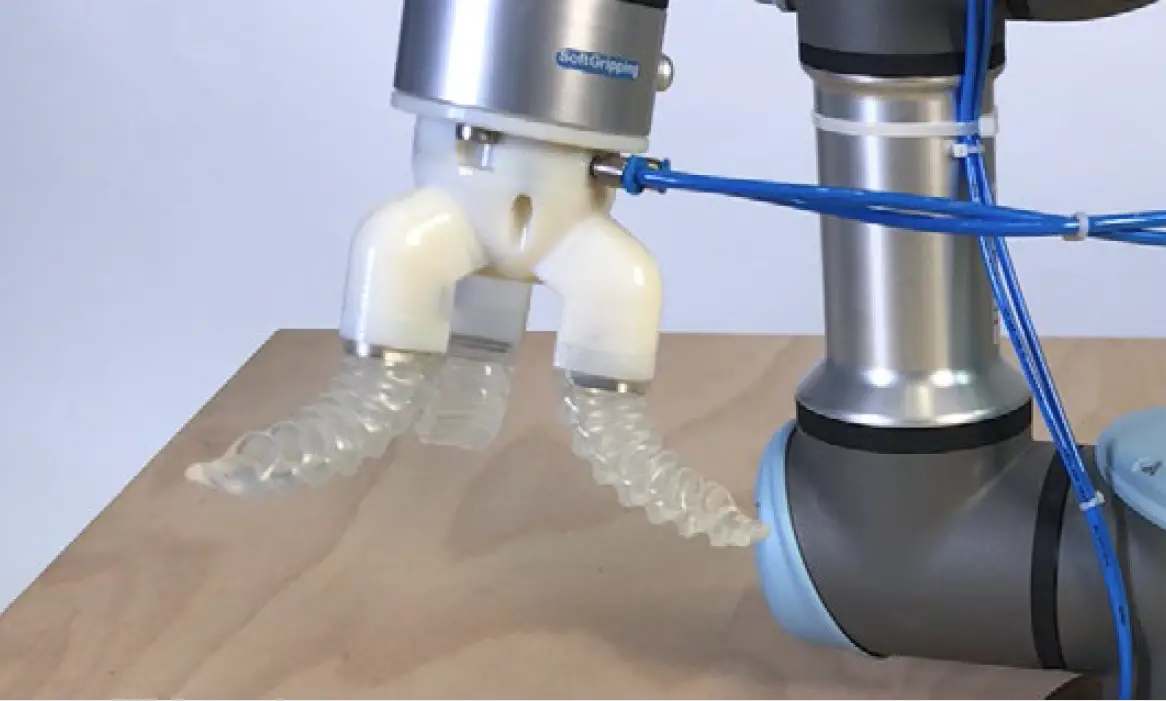
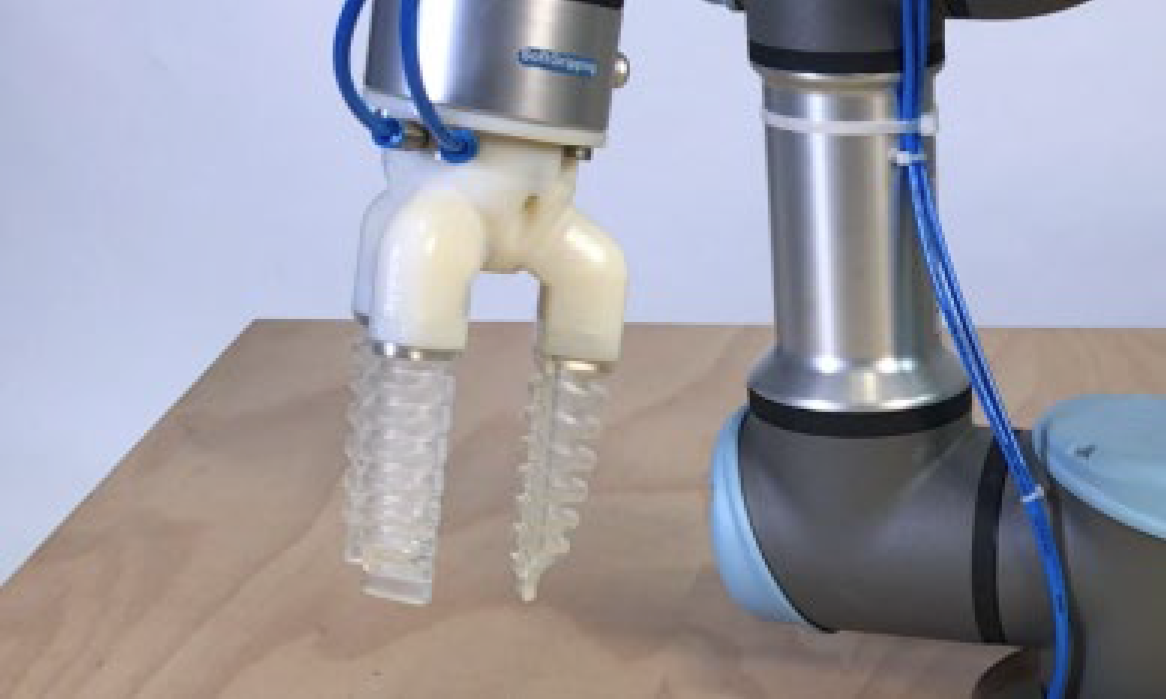
If you have followed the procedure so far, this is how your assembled SoftGripper should look like. Now you can start with the Software and programming.
Installing the Control Box
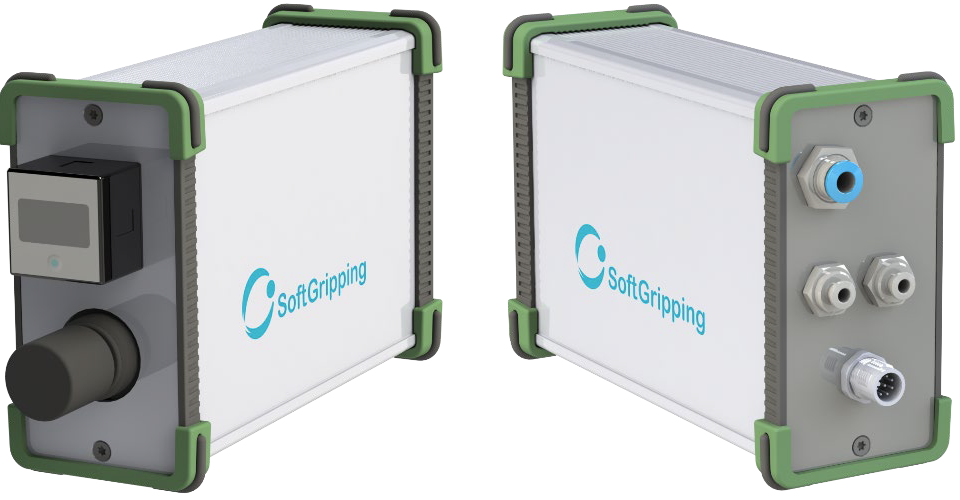
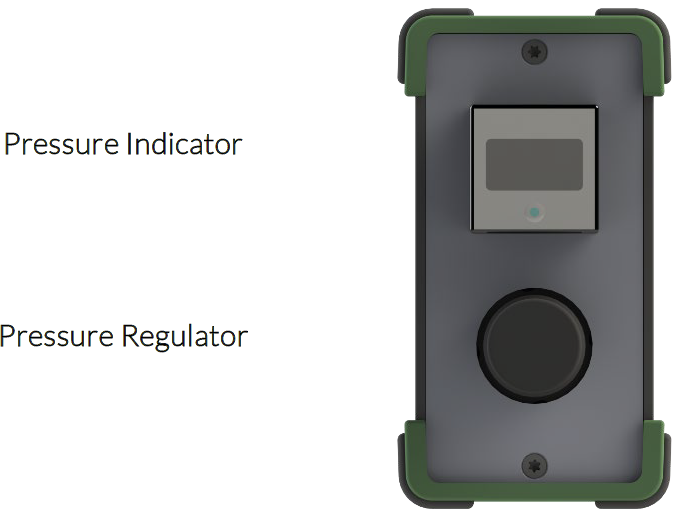
All SoftGrippers require pneumatics. You can use your own controller and pneumatics with our SoftGrippers, but if you need a Control Box, we have one prepared for your needs. On the front side the current pressure settings can be seen and adjusted via the knob. In the back, you can find the Inputs, Outputs as well as the power and communication connector.
Control Box – Front View
Control Box – Back View
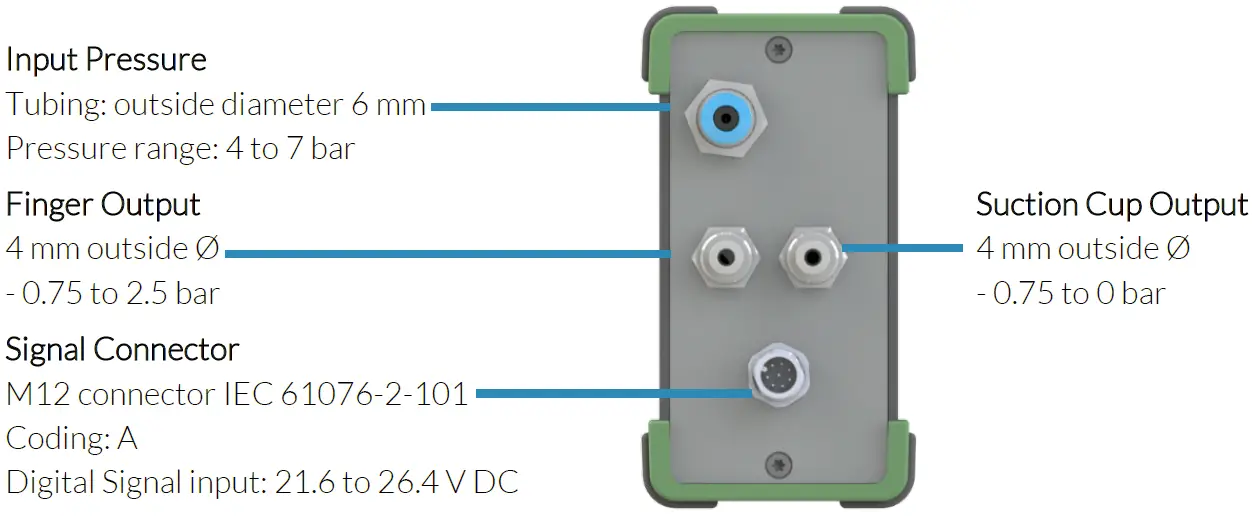
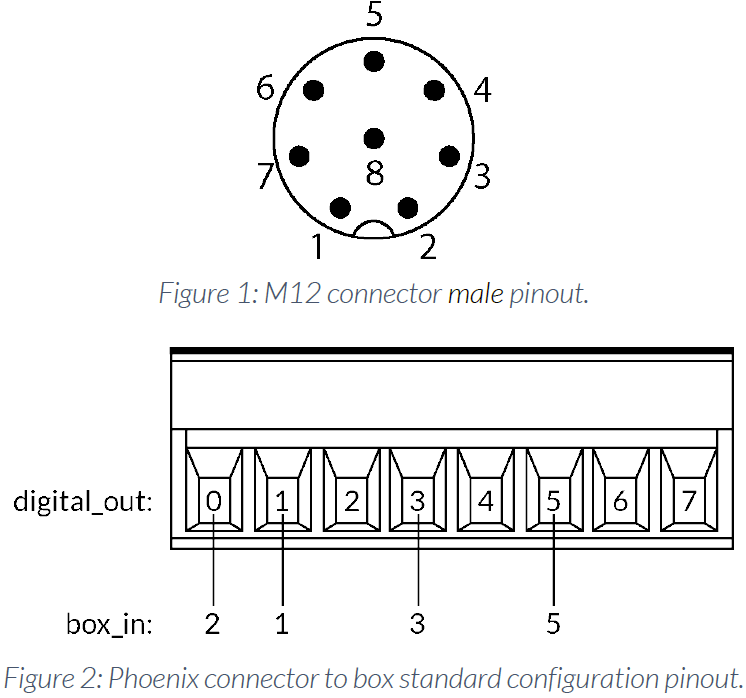
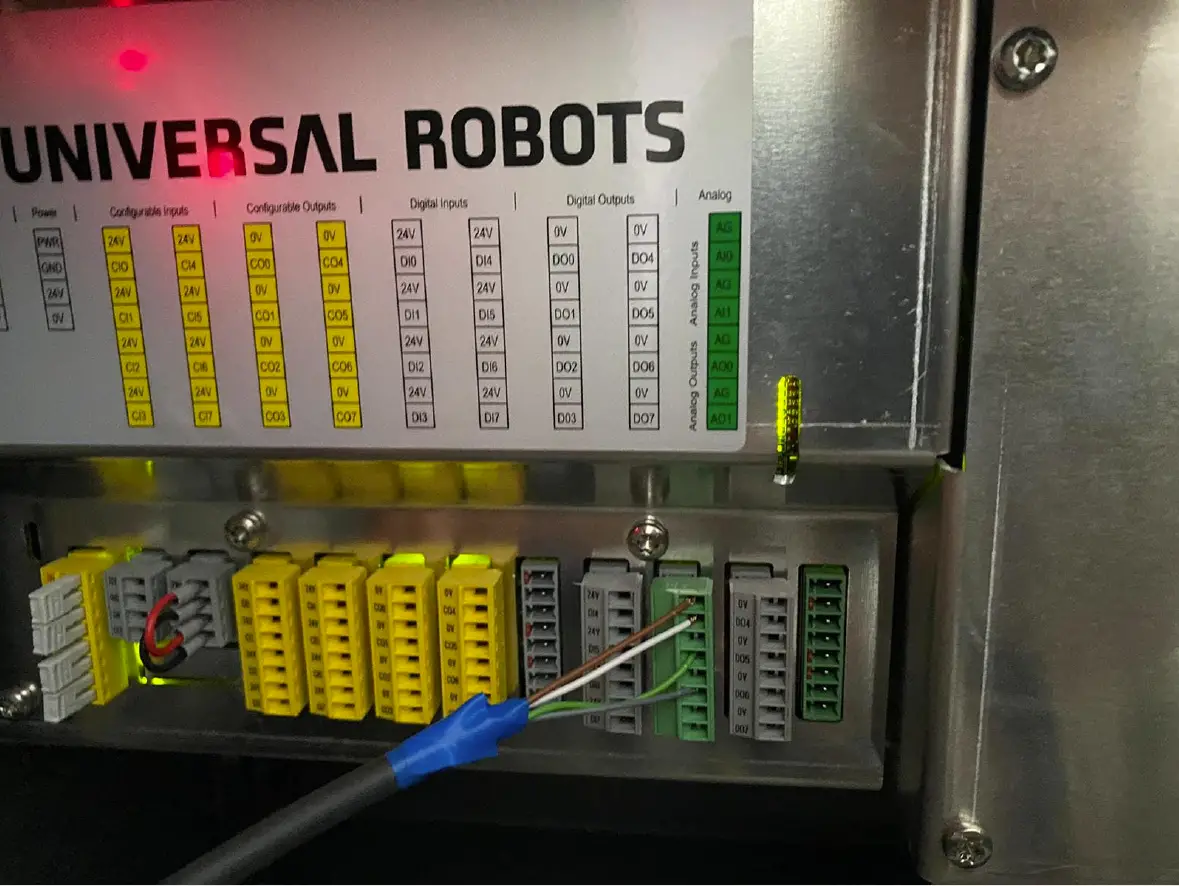
The top connector is reserved for the input from the compressor, be sure to use a maximum of 7 bar of pressure to avoid damaging the device. In the second row you will find the pressure output to the Suction Cup and Fingers. Finally, the M12 connector IEC 61076-2-101 supplies the equipment with power as well as the signal to set the Finger’s and Suction Cup’s position. Mind the operating voltage of 21.6 to 26.4 V DC. You can find the exact pinout in the box below:
|
Pin |
Function |
Color |
|
1 |
Finger Release |
White |
|
2 |
GND |
Brown |
|
3 |
Finger Grip |
Green |
|
4 |
NC |
Yellow |
|
5 |
Suction Cup Active |
Grey |
|
6 |
NC |
Pink |
|
7 |
NC |
Blue |
|
8 |
NC |
Red |
Using the URCaps
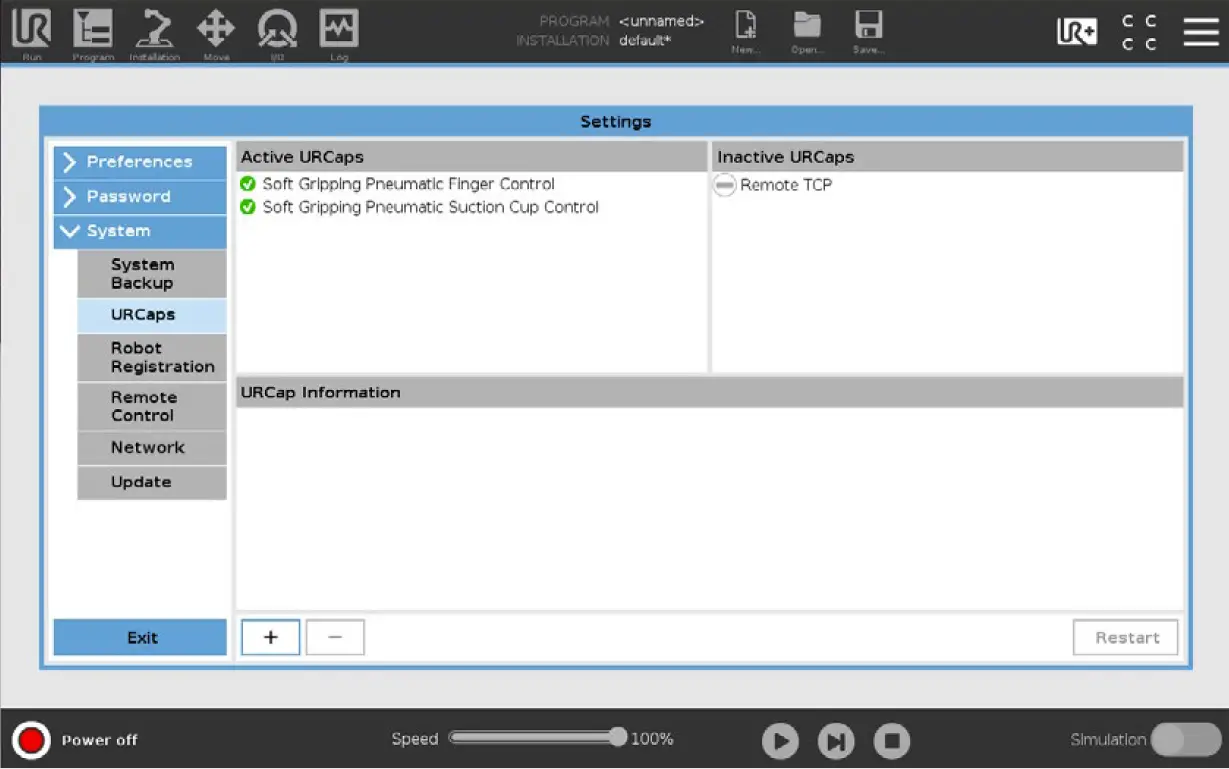
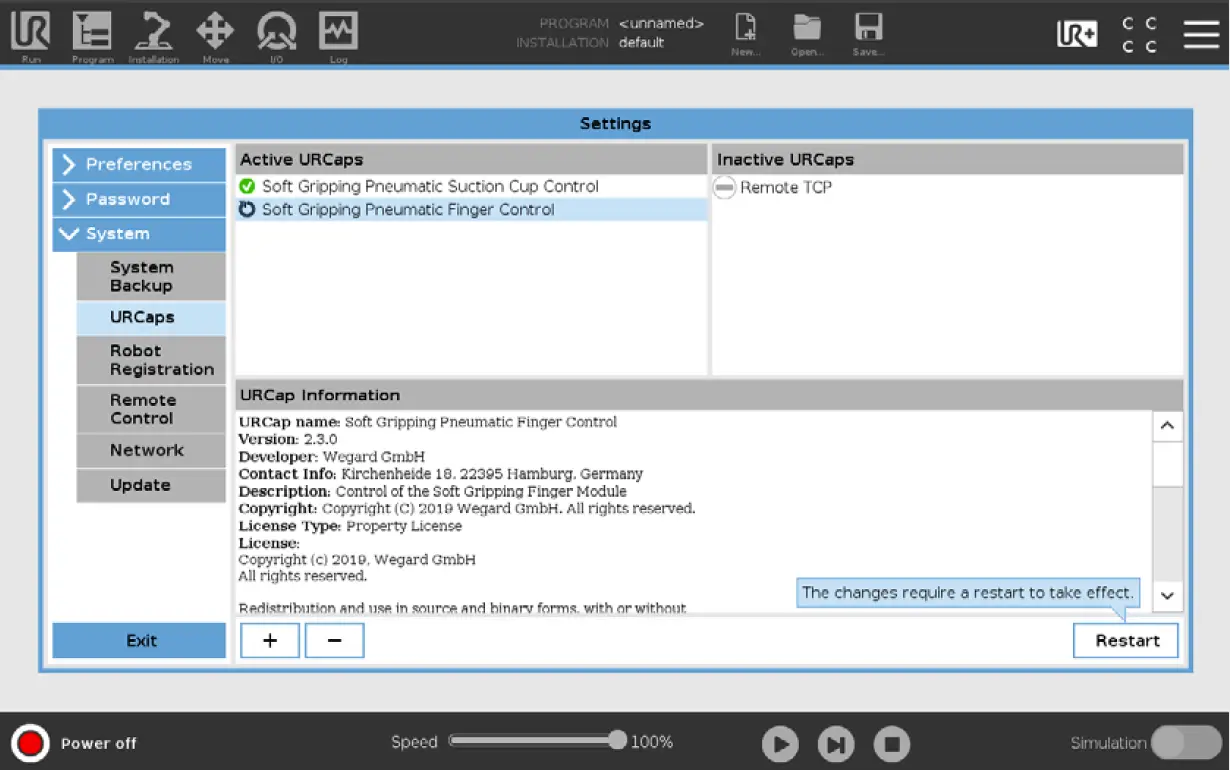
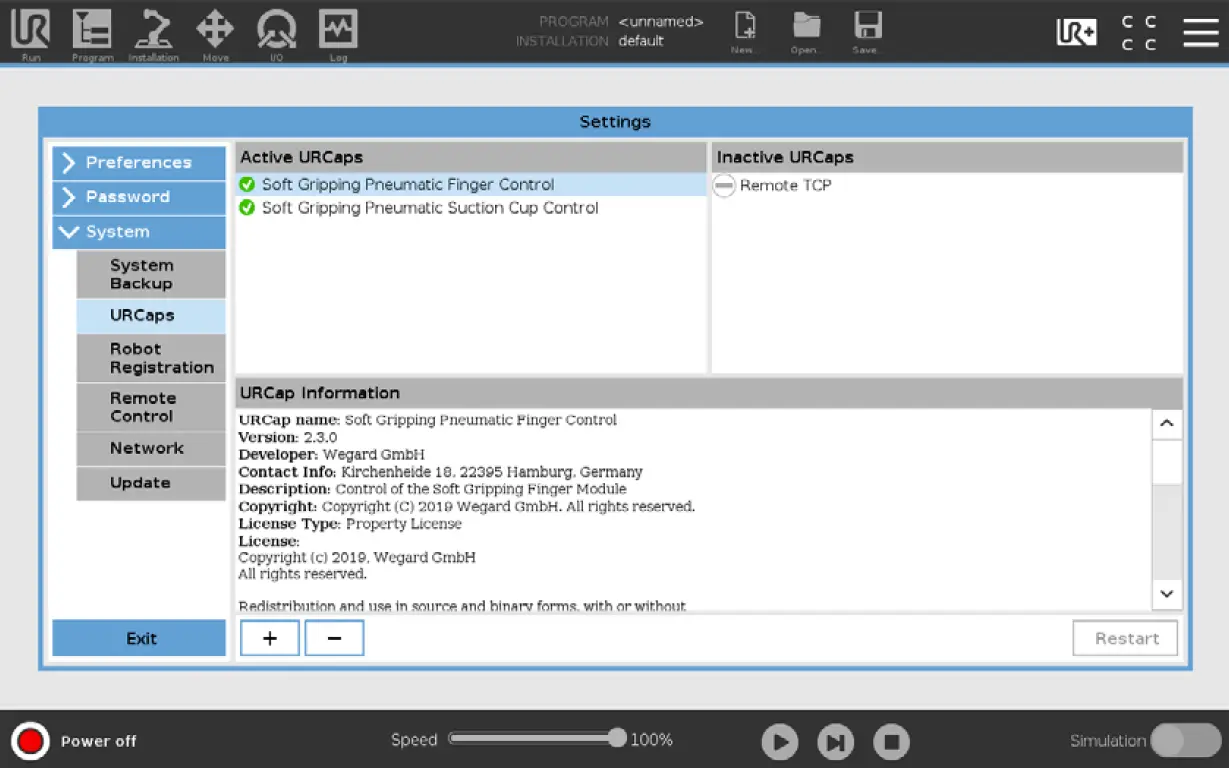
You can find the URCaps required for the operation on a flash drive attached. Plug it into your machine and deploy the addon in the Settings menu. Remember that the minimum system requirements for your robot are 3.11.0.82155 or 5.5.1.82186 respectively.
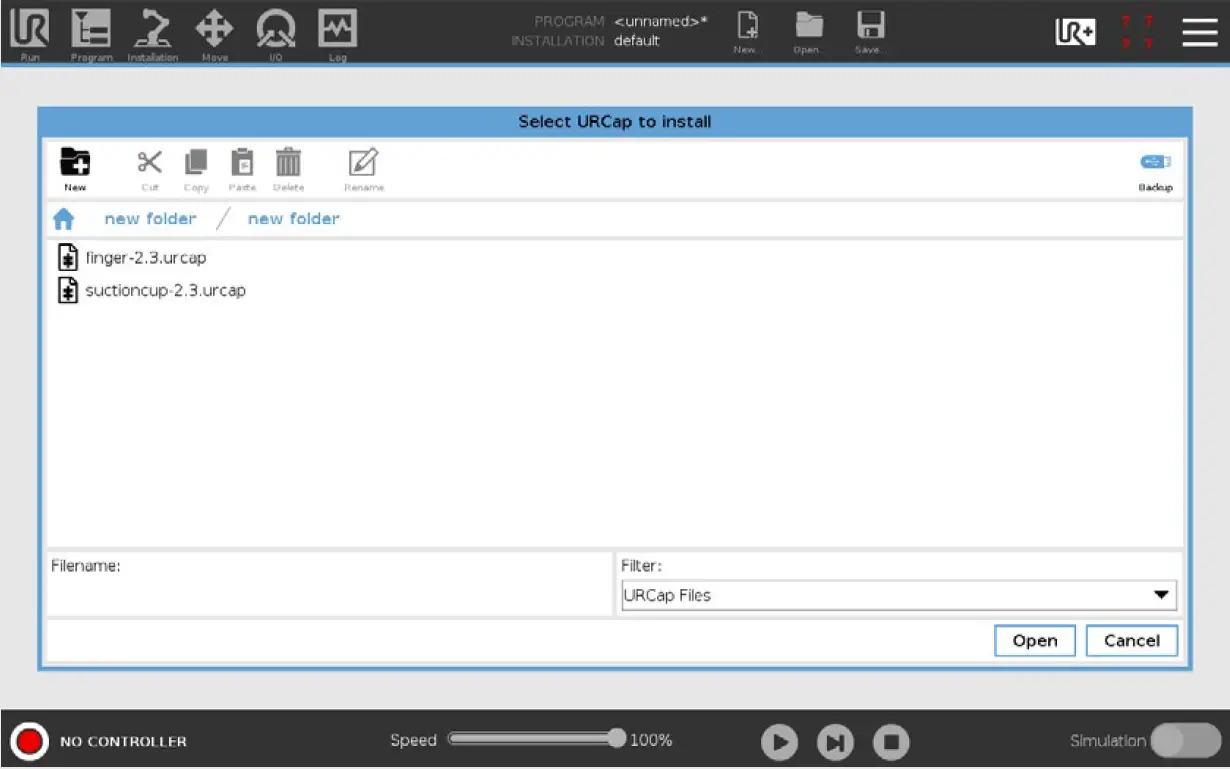
The URCap importing tool can be found under in the System > URCap submenu.
Select finger.urcap or suctioncup.urcap and tap the Open button to include the module.
After activating URCaps for the Finger and Suction Cup modules, restart the robot and return to the Program.
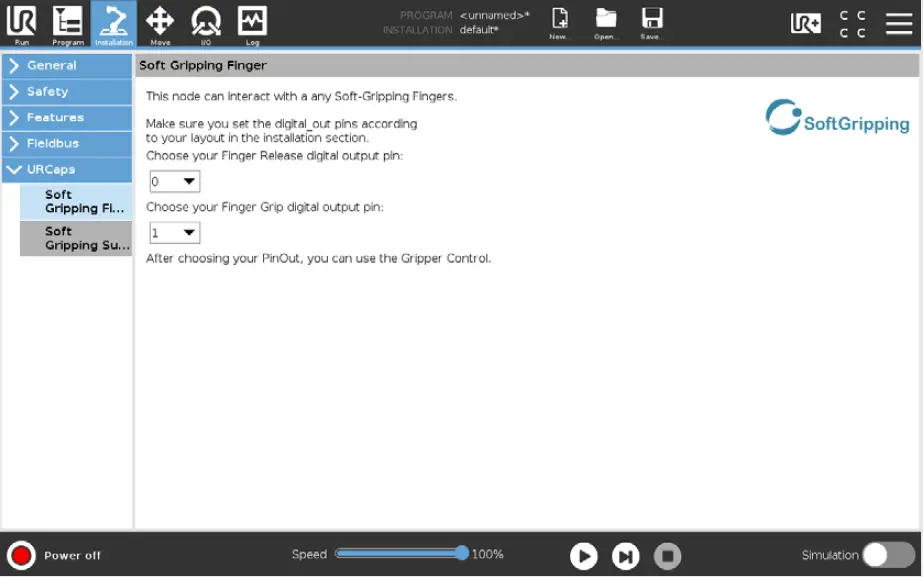
First, make sure to select the right Digital Output Pins for the SoftGripper’s pressure control. To edit the default settings, go to the Installation tab. You will find the Pin configuration in the URCaps menu. Of course, you can edit the Pins for Fingers and Suction Cups separately.
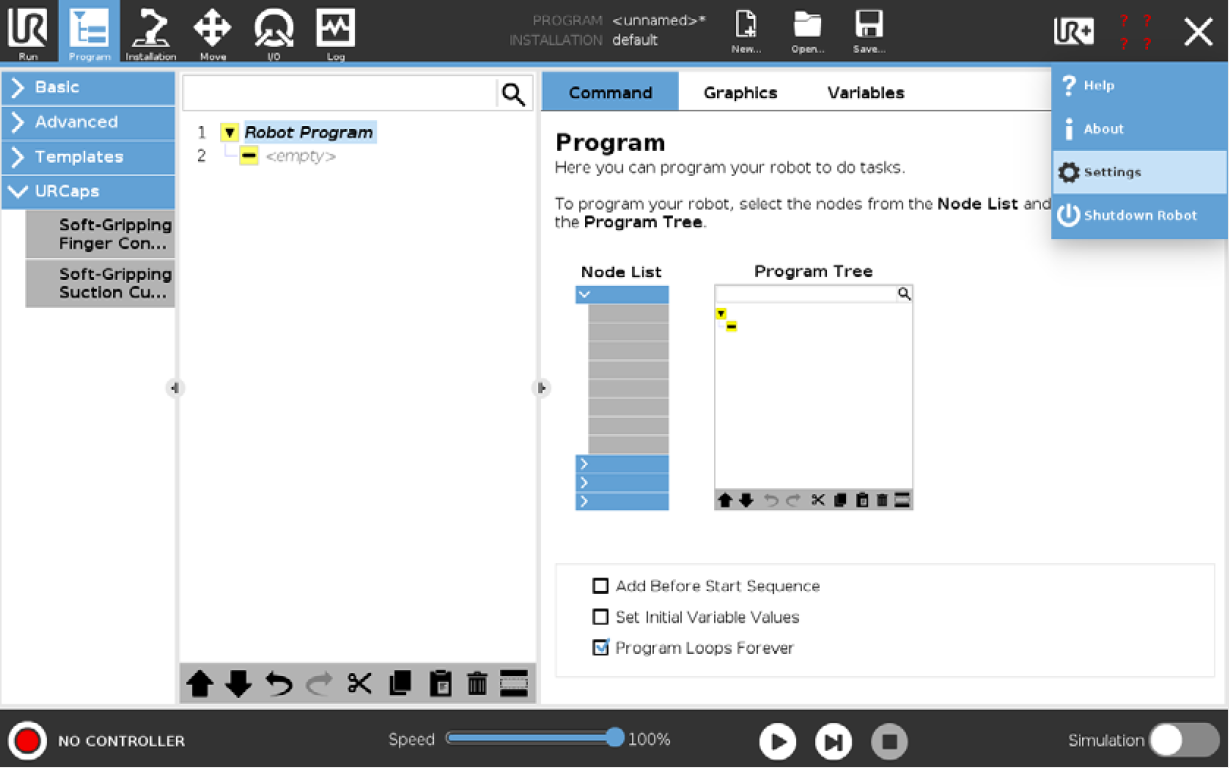
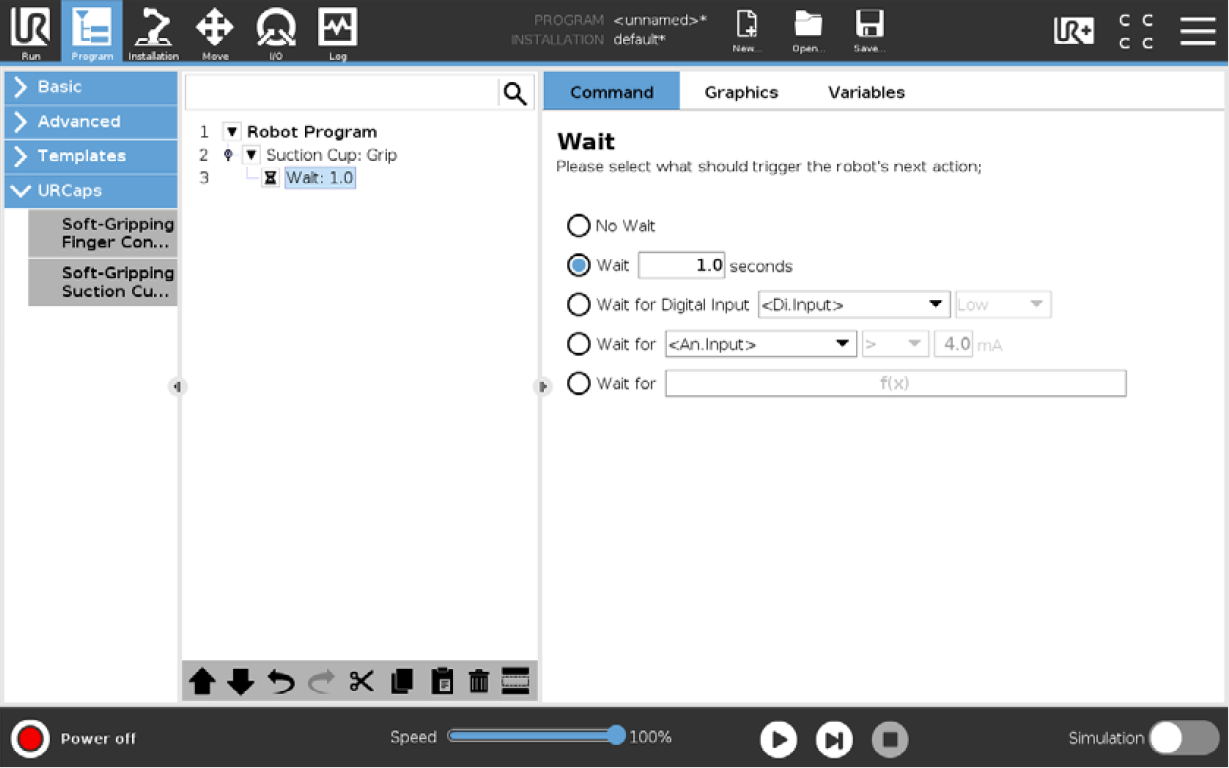
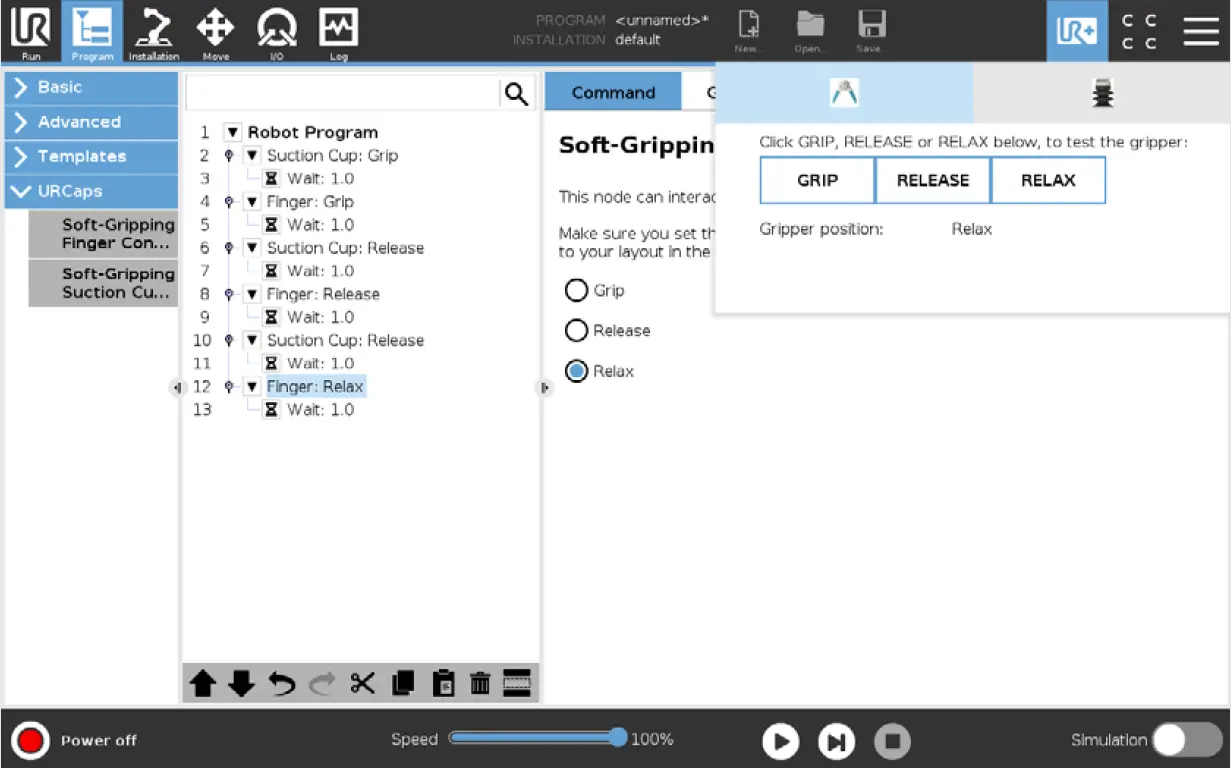
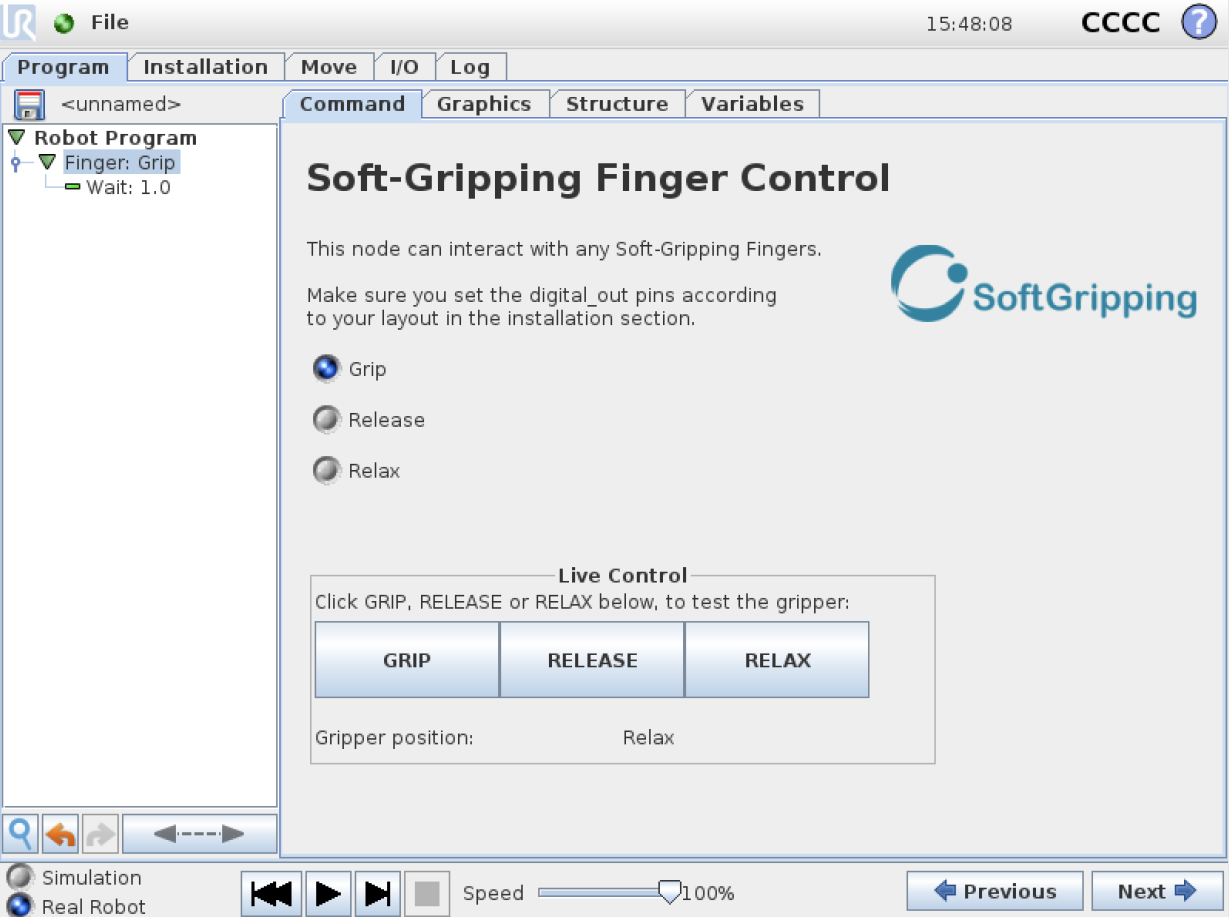
After the initial setup, you are ready to program a workflow. The SoftGripper nodes can now be used like any other familiar node and are found under Program > URCaps. You can choose between 3 states: Grip, Release and Relax.
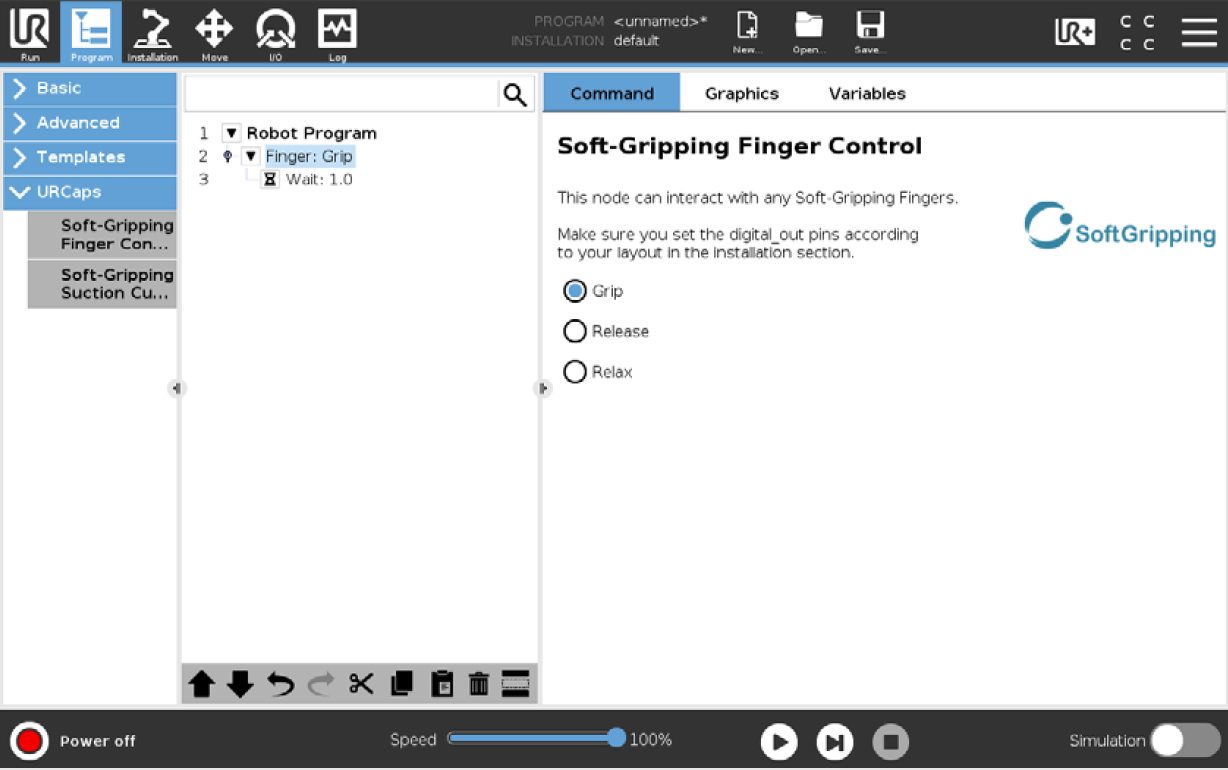
 Grip
Grip
 Release
 Relax
Relax
Additionally, you can set the waiting time in the automatically created subnode. You should recognize the subnode from the Standard Wait node. It can be used as usual, setting a timer, a wait function or to continue upon an external influence. Have fun experimenting with the SoftGripper toolkit and as usual: contact us, if you need further help!
You can also test your setup on the fly using the build in toolbar. No need to set up an extra program!
The URCap is supported by both versions of the Universal Robots software: Version 5 and the older Version 3.
Miscellaneous
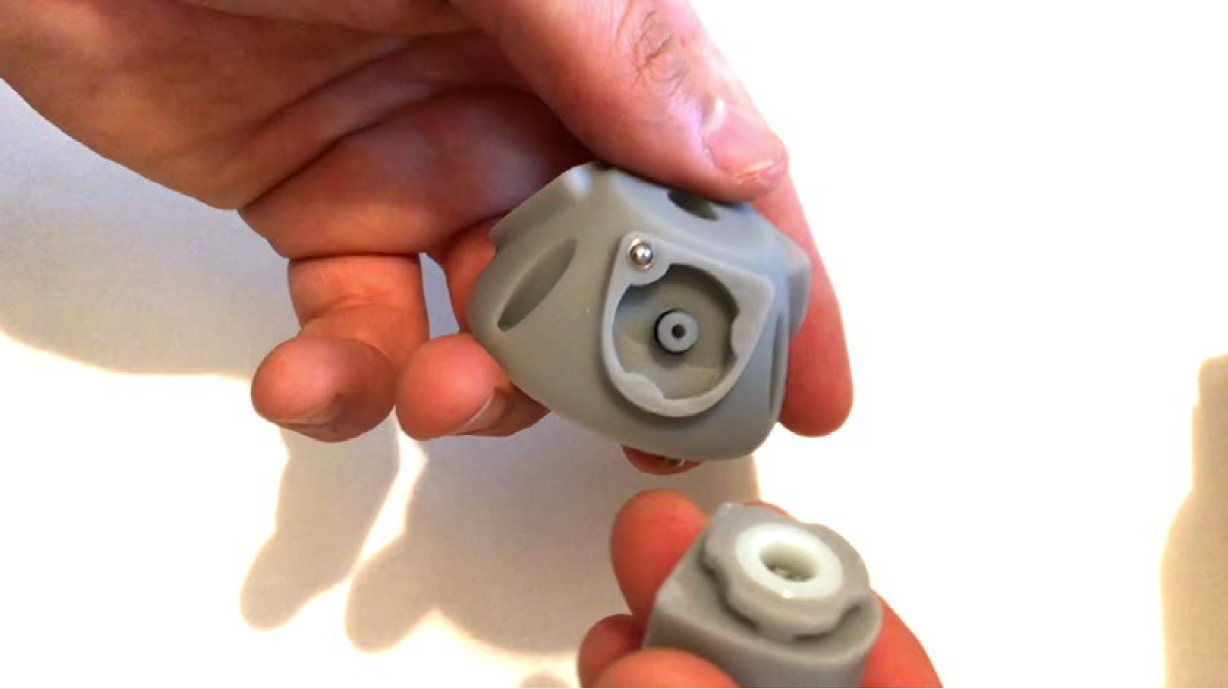
To change the fingers, turn off the pressure control and disconnect the finger turning the integrated bayonet catch counterclockwise. The new finger has to be turned into the grippers base until you hear the click of a latch. It is now safe to operate the robot again.
If you need to remove the URCap, you can do it in the familiar Settings > System > URCaps, by selecting “–“ and restarting your Robot afterwards for the changes to take place.
soft-gripping.comsoft-gripping.shop[email protected]
![]()
References
[xyz-ips snippet=”download-snippet”]