SolAire Vitra Panel Heater Instruction Manual
Safety Instructions
- Read the manual before using the heater. Keep the manual for future reference.
- Before use, check that the heater and its accessories are complete and intact.
- The heater must be installed as per installation instructions. The heater must be plugged into a socket that meets the following requirements: AC 230V, frequency 50/60Hz.
- The heater is only suitable for indoor use.
- Do not use the heater near flammable or explosive materials.
- Inserting items into the protective grill of the heater is strictly prohibited
- Do not touch the metal housing as it will get hot when the heater is in use. Set aside some time to let the heater cool before you turn it off and store it.
- Unplug the heater if it is going to be out of use for a long time.
- Prior to each use, make sure the heater is in good condition and intact. Do not plug in or use if the casing, wire or plug are damaged.
- The heating element may be damaged if the heater is dropped or hit. Do not use the heater if the element is broken.
- Disconnect the plug from the socket when moving or cleaning the heater. When disconnecting, flick the switch to the off position, then unplug. Do not yank the cable.
- The heater must not be located immediately below an electrical socket-outlet.
- If the supply cord is damaged, it must be replaced by the manufacturer, its service agent or a similarly qualified person to avoid a hazard.
- Avoid the use of an extension cord as this may overheat and cause a fire risk.
- Never place the heater where it may fall into water
- CAUTION: some parts of this product can become very hot and cause burns. Particular attention must be given where children and vulnerable people are present.
- CAUTION: never cover the heater. Covering the heater risks overheating and fire.
Technical Data

Installation Instructions
Before installing, check that all parts are complete, and the product is intact.If you want to use the electric heater freestanding, please fit the feet provided with the heater, following the instructions below. Make sure the heater is mounted on a level, stable and clean surface.
Freestanding Installation
- Make sure the heater is Off
- Put the heater upside down on a soft cotton cloth or carpet.
- Fix the feet to the heater’s base using the screws provided. Line up the holes in the base with the holes in feet. Put the screws through the holes and then tighten with a screwdriver

Wall Mounted Installation
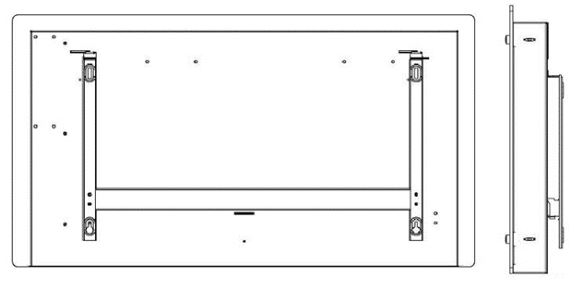
- Take out the wall brackets and expansion screw out from the box and fix the screws onto the wall according to the distances between holes of the wall brackets, as depicted in the picture below.

- Aim the 4 holes in the back of the heater to the 4 hooks on the wall bracket and push it on. Then slide into the slot to click on, as shown below.
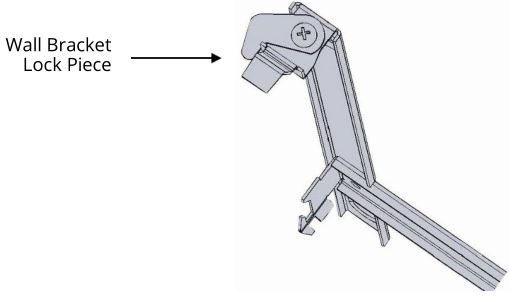
- Fix the wall bracket lock piece onto the bracket with screws, slide the lock piece into the locking slot on the back of the machine, and then tighten the screw, as shown in the picture below.

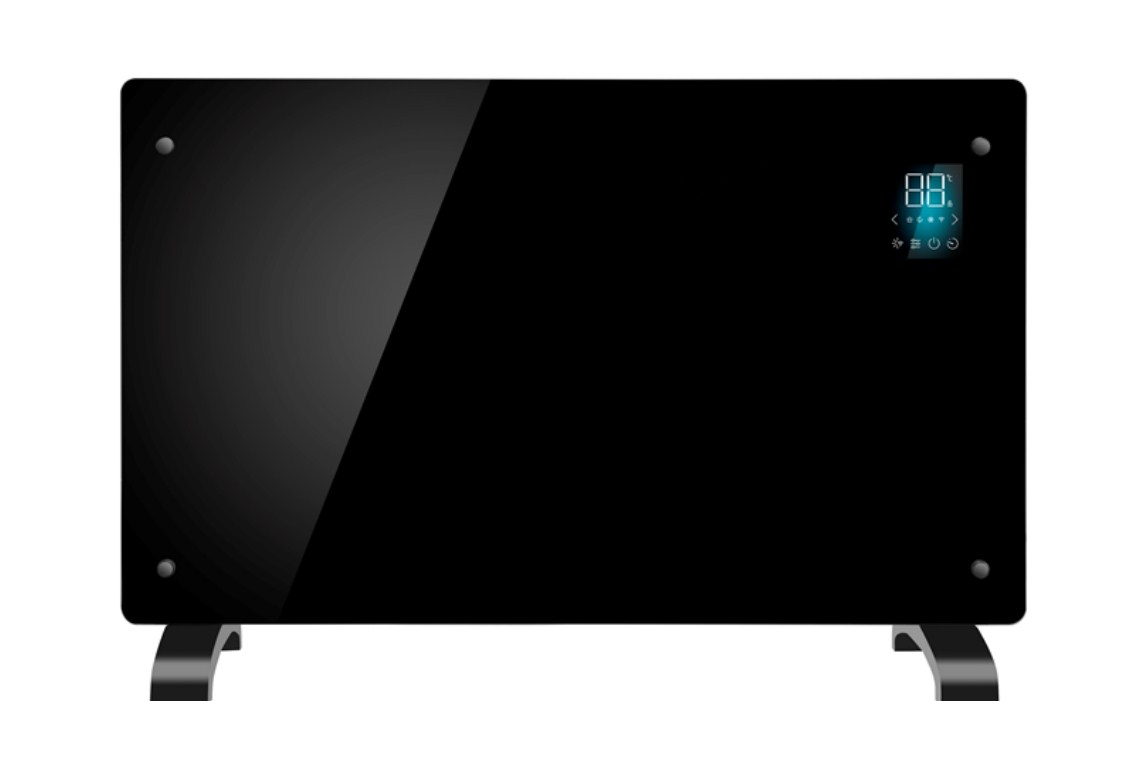
Control Panel

Manual Operation
- After the heater has been plugged in and switched on, it will beep. The heater will come on in standby mode. The WiFi and ON/OFF light will be on.
- To initiate heating, press the power button. You will see the ECO mode icon. This means the device is in the ECO mode.
- To change heating mode, press the “MODE” button to cycle through the modes: ECO mode Comfort mode Anti-frost mode .
- The mode icons will flash as you cycle through them. After a few seconds the mode icon will stop flashing and the heater will heat in that mode.
- To adjust the set temperature, press the UP and DOWN buttons.
- To set the duration timer, press the “TIME” button when the heater is in either the ECO or Comfort mode. The timer’s range is 1-24 hours. The digits will flash while setting and then the screen will return to heating mode. The timer icon on the screen will show that the timer has been set. The heater will heat until the time has elapsed.
- To schedule the heater to switch on later, press the TIME button while on standby mode. The delay range is 1-24hours. The digits will flash while setting and then the screen will return to heating mode. The timer icon will show that the timer has been set. The heater will switch on when the delay has elapsed.
- To set the child lock, press and hold the UP button. The padlock icon will appear on the screen and the control panel will be locked out. To release, press and hold the down button. The padlock icon will disappear, indicating that all the buttons can be used again.
- To adjust the display’s brightness, press the light button. Pressing once turns the light to half brightness. Pressing twice (2 times) will turn the light off. Pressing 3 times the display will return to full brightness
- If the heater has not been touched for 30 minutes the display turn to half brightness
Connecting to WiFi
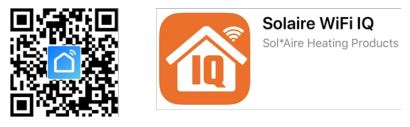
- Download the APP onto your smart phone or tablet. You can find the app by scanning the QR code below or searching “SolAire WiFi IQ” in the Google Play or Apple app store.
- You will need to create an account, unless you already have an account. Create an account by tapping Register. The device will automatically determine your country, although you can change this if necessary. Enter your phone number or email address. If you enter a phone number, a verification number will be sent to your phone: enter this number to verify, then create a password. If you enter your email address, you’ll just need to create a password.
- To add your heater to the app, first put the heater in WiFi connection mode. The heater is in WiFi connection mode when the WiFi icon is flashing. If the WiFi icon is not flashing, go to standby mode and hold down the display button for three seconds.
- Once the WiFi Icon is flashing, go to the app and press Add a Device. Select the device type (heater) and confirm that the indicator is flashing. You will then be prompted to enter your WiFi password. This allows the app to find your heater using your WiFi.
- The app will then display its connecting screen. If the heater fails to connect, press and hold the button for 3 seconds.It will switch to its secondary connection (AP) mode.Then follow the steps on the App for the AP mode.
- The heater will beep and display a solid WiFi icon once the device is connected. The app will confirm the heater has been added.You can now name the device, share it with family members, or proceed to scheduling your heating.
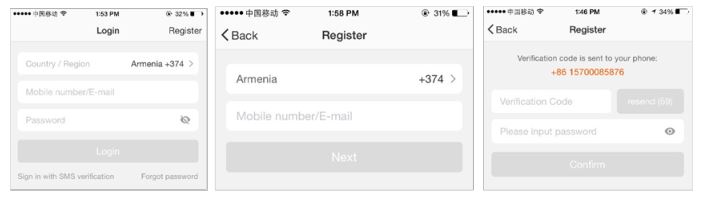 The device will automatically determine your country, although you can change this if necessary. Enter your phone number or email address. If you enter a phone number, a verification number will be sent to your phone: enter this number to verify, then create a password. If you enter your email address, you’ll just need to create a password.
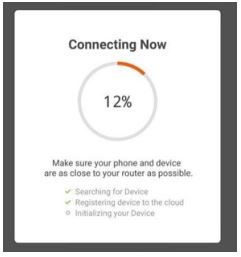 If the heater fails to connect, press and hold the button for 3 seconds.It will switch to its secondary connection (AP) mode.Then follow the steps on the App for the AP mode.
Using the WiFi App
You can use the app to control multiple devices. The status of your devices is shown on the device list:
- Offline (device is turned off at wall)
- Turned Off (device is in standby mode)
- Turned On (device is in heating mode)

When the heater is online, tap the device name to go to the control interface.Note: when the heater is offline, you will not be able to control it with the app.
Controlling the Heater

You can change the heater’s mode by pressing the “mode” buttons. You can adjust the mode’s temperature using the + and – buttons.
Temperature calibration
If the heater reports a temperature that differs from the actual room temperature the thermostat can be re calibrated.Adjust the actual temperature until it matches your room’s temperature, Click the thermometer icon to adjust the temperature detected by the heater.
Scheduling your Heating
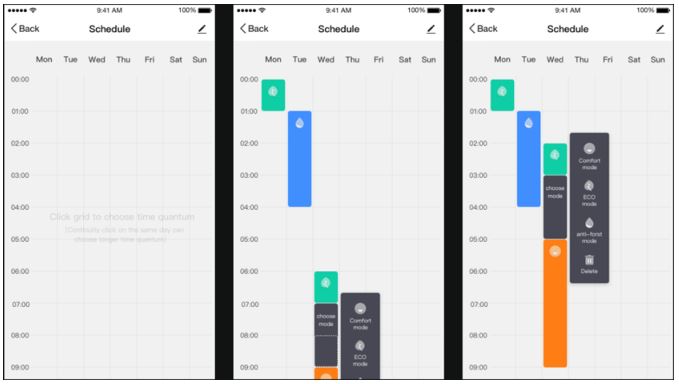
- You can create a heating schedule to program the heater through the day.
- The APP displays the schedule as a graph. Tap and Drag your finger on the screen to programme the heater.
- The App will then let you pick from 3 heating modes: Comfort, Eco and Anti Frost. The temperature of these heating modes can be set to any temperature the you desire
Other Features
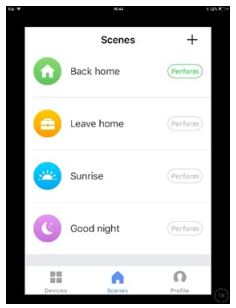
- Scenes“Scenes” bring all your devices together to respond to environmental conditions. Triggers of events include the temperature, humidity levels, air quality, sunrise and sunset, and device behavior. Only devices connected to the app can be used in scenes.
- SharingYou can share control of your devices with family members. Go to “device sharing”, toggle which devices you want to share, and tap Share with New Member. You can then add their email address or phone number. If they have the app, the device will appear on their device list. If they don’t have the app, they will be sent a link to download the app.Note you can only share to numbers and email addresses that are connected to app – compatible devices: smartphones or tablets.
- Voice integrationThe App is compatible with both Amazon Echo and Google Home.
1000W ERP LABEL

2000W ERP LABEL
The product is for household use only
Correct Disposal of this product
![]()
This marking indicates that this product should not be disposed with other household wastes throughout the EU. To prevent possible harm to the environment or human health from uncontrolled waste disposal, recycle it responsibly to promote the sustainable reuse of material resources. To return your used device, please use the return and collection systems or contact the retailer where the product was purchased. They can take this product for environmental safe recycling.
Warranty Information
- The manufacturer provides warranty in accordance with the legislation of the customer’s own country of residence, with a minimum of 1 year, starting from the date on which the appliance is sold to the end user.
- The Heater has a 2 year Guarantee in the UK
- The warranty only covers defects in material or workmanship.
- The repairs under warranty may only be carried out by an authorized source. When making a claim under the warranty, the original bill of purchase (with purchase date) must be submitted.
The warranty will not apply in cases of:
- Normal wear and tear
- Incorrect use, e.g. overloading of the appliance, use of non-approved accessories
- Use of force, damage caused by external influences
- Damage caused by non-observance of the user manual, e.g. connection to an unsuitable mains supply or non-compliance with the installation instructions
- Partially or completely dismantled appliances
Sol*Aire Heating ProductsBig ShedNew RowDL11 7AWEmail: [email protected]Tel: 01325717899
SolAire Vitra Panel Heater Instruction Manual – SolAire Vitra Panel Heater Instruction Manual –
[xyz-ips snippet=”download-snippet”]