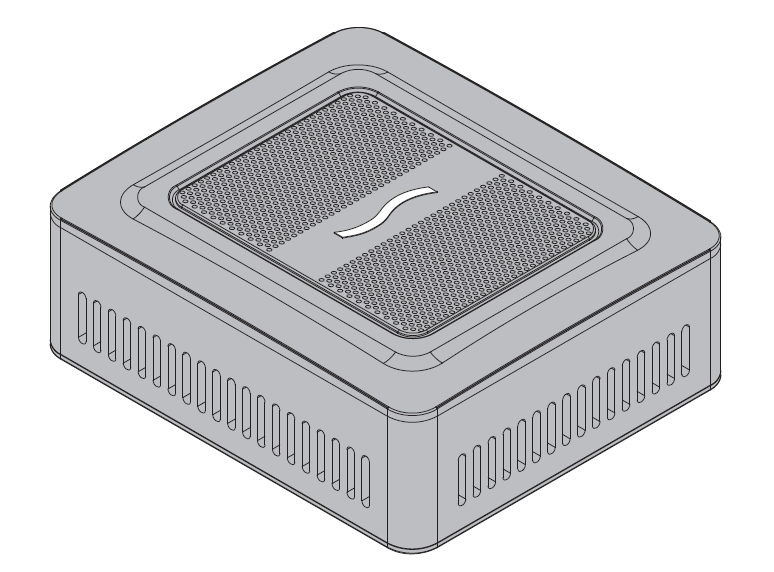
eGFX Breakaway PuckRX 560

©2019 Sonnet Technologies, Inc. All rights reserved. Sonnet, the Sonnet logotype, Simply Fast, the Simply Fast logotype, and Breakaway are trademarks of Sonnet Technologies, Inc. Thunderbolt 3 and the Thunderbolt logo are trademarks of Intel Corporation in the U.S. and/or other countries. Other product names are trademarks of their respective owners. Product specifications subject to change without notice. QS-GPU-RX5X0-TB3-6-B-012519
You Should Have
The following items should be included in your product package:
- One eGFX Breakaway Puck
- One power adapter and one power cable
- One Thunderbolt™ 3 (40Gbps) cable
- QSG
Mac® Compatibility
- Mac with Thunderbolt 3 ports
- macOS® 10.14.2+ (eGFX Breakaway Puck Radeon™ RX 560)
- macOS 10.13.6+ (eGFX Breakaway Puck Radeon RX 570)
Windows® Compatibility
- PC with Thunderbolt 3 ports
- 64-bit editions of Windows 10, Version 1709 (Creator’s Edition), or later
IMPORTANT NOTE FOR WINDOWS USERS: For the latest information on setting up your Windows computer to support the eGFX Breakaway Puck, please visit www.sonnettech.com/product/egfx-breakaway-puck.html
Support Note: This document was up to date at the time of printing. However, hardware or software changes may have occurred since then. Please check the Sonnet website for the latest QSG.
- Go to www.sonnettech.com/support/kb/kb.php
- Click the Thunderbolt link.
- Locate and click the eGFX Breakaway Puck link, and then click the Documentation link.
- Click the eGFX Breakaway Puck Quick Start Guide [English] link, and then check the Document Version information. If the version listed is later than this document (revision B), click the Download Now button for the latest version.
eGFX Breakaway Puck Description
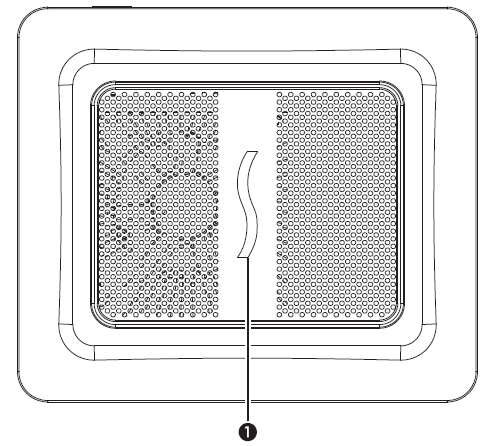
1 – Power Indicator LED
This indicator lights when the eGFX Breakaway Puck is connected to a power source, the included Thunderbolt cable plugged in securely between the device and your computer, and the computer powered on.

2 – DisplayPort 1.4 Ports
3 – HDMI 2.0b Port
4 – Thunderbolt 3 PortConnect the included Thunderbolt cable, or a comparable Thunderbolt 3 (40Gbps) cable, between this port and your computer’s Thunderbolt 3 port.
5 – 20VDC SocketConnect the included DC power adapter between this socket and the included power cord.
Mac Setup Overview
To support an eGFX Breakaway Puck, your Mac must be running the required minimum (or later) version of macOS; Sonnet recommends using macOS Mojave (or later), as it offers more features and greater stability. The drivers that support the Puck are installed as part of macOS. As a result, the Puck is ready to use when connected to your computer.
1. If you are connecting displays to the Puck, do so now. Please note, macOS Mojave 10.14.2 or later is required for the Puck to accelerate graphics on the built-in display of an iMac®, MacBook Air®, or MacBook Pro®.
Support Notes: If you’re using a 2016 or 2017 13-inch MacBook Pro, always connect the Puck to one of the left-hand Thunderbolt 3 ports for maximum data throughput.For optimal performance, the Puck should be connected directly to your Mac and not daisychained through another Thunderbolt device.
2. Connect the included power cord between a wall outlet or power strip and the power adapter, and then connect the power adapter cable to the Puck’s power socket. Note that the Puck’s power indicator will not light until the computer is turned on.
3. Connect the included Thunderbolt cable, or a comparable Thunderbolt 3 (40Gbps) cable, between the Thunderbolt 3 port on the Puck and a Thunderbolt 3 port on your computer. Cables marked with the USB icon ![]() are NOT compatible.
are NOT compatible.
4. If you haven’t already done so, turn on your computer. With the Puck connected to your Mac, the eGPU icon ![]() will appear in the menu bar, indicating the Puck is recognized and ready for use.
will appear in the menu bar, indicating the Puck is recognized and ready for use.
Using the Puck
Under macOS you can configure applications to use the Puck with one of the following methods:
Support Note: eGPU support in macOS High Sierra 10.13.4 and later is designed to accelerate Metal, OpenGL, and OpenCL applications that benefit from a powerful eGPU. Not all apps support eGPU acceleration; check with the application’s developer to learn more.
- Use the Prefer External GPU OptionStarting with macOS Mojave 10.14, you can turn on Prefer External GPU in specific applications’ Get Info panels in the Finder. This option enables the Puck to accelerate apps on your computer’s internal display (if equipped) or any display connected to the Mac. Note that you won’t see this option when the Puck isn’t connected or if the application self-manages its GPU selection. Some applications will ignore the Prefer External GPU checkbox and directly select which graphics processors are used.
- Set a Puck-connected Display as the Primary DisplayIf you have an external display connected to your Puck, you can choose it as the primary display for all apps. Since applications default to the GPU associated with the primary display, this option works with a variety of applications. If you disconnect the Puck, your Mac defaults back to the internal graphics processor that drives the built-in display. When the Puck is reconnected, the external display will automatically be set as the primary display.
Support Note: For more detailed information on eGPU use, visit support.apple.com and search “use an external graphics processor with your Mac”.
Tips/General Information
- Before unplugging the Puck from your computer, click the eGPU icon in the menu bar, and then select Disconnect.
- macOS High Sierra 10.13.4 and later don’t support eGPUs in Windows using Boot Camp or when your Mac is in macOS Recovery or installing system updates.
- If you have a Mac mini (2018) with FileVault turned on, make sure to connect your primary display directly to Mac mini during startup. After you log in and see the macOS Desktop, you can unplug the display from Mac mini and connect it to your eGPU.
- eGFX Puck Radeon RX 560 provides charging power up to 60W to compatible computers, while the RX 570 model provides up to 45W.
Need More Information?
Please visit www.sonnettech.com/support/kb/kb.php, click on the Thunderbolt link, and then click on the eGFX Breakaway Puck link for important information, useful tips, and answers to frequently asked questions.
FCC Compliance
eGFX Breakaway Puck complies with Part 15 of the FCC Rules. Operation is subject to the following two conditions: This device may not cause harmful interference, AND this device must accept any interference received, including interference that may cause undesired operation.
Contacting Customer Service
The Sonnet Web site located at www.sonnettech.com has the most current support information and technical updates. Before contacting Customer Service, please check our Web site for the latest updates and online support files, and check this Quick Start Guide for helpful information.
Email support requests generally receive the fastest responses, and are usually processed within a 24-hour period during normal business hours, excluding holidays. When you contact Customer Service, have the following information available so the customer service staff can better assist you:
- Product name
- Date and place of purchase
- Computer model
- OS version
- A System Report (macOS) or a Microsoft System Information MSINFO32 (Windows) report (Windows), along with a description of the issue(s) you are encountering with your device.
If further assistance is needed, please contact us at:
USA CustomersPlease contact Sonnet Customer Service at:E-mail: Tel: 1-949-472-2772(Monday–Friday, 8 a.m.–4 p.m. Pacific Time)
For Customers Outside the USAFor support on this product, contact your reseller or local distributor.
 report this ad
Visit Our Web SiteFor the most current product information and online support files, visit the Sonnet web site at www.sonnettech.com. Remember to register your product online at https://registration.sonnettech.com to be informed of future upgrades and product releases.
References
[xyz-ips snippet=”download-snippet”]