User’s manual
Congratulations on your new purchase of a DVD Entertainment system.Please take a moment to fully review this owner’s manual thoroughly prior to the initial operation, which will provide you with the best understanding to properly operate your new Entertainment system.

AV Out: Audio and Video OutputExternal Remote: External Remote Sensor OutputBLK(GND)/ RED(ACC+) : Power Connector input
Remote Control
 report this ad
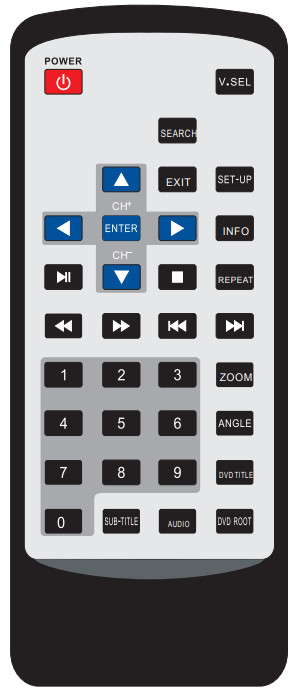
| 1 | POWER | Power On/Off |
| 2 | V.SE L | Change to Discs or USB Mode |
| 3 | SEARCH | Search |
| 4 | EXIT | Exit from the Current mode |
| S | SET-UP | DVD Menu Set-up |
| 6 | Cursor Up | |
| 7 | Cursor Left | |
| 8 | ► | Cursor Right |
| 9 | Cursor Down | |
| 10 | ENTER | Function Select |
| 11 | INFO | Display on Disc |
| 12 | Play & Pause | |
| 13 | ■ | Stop |
| 14 | REPEAT | Repeat Function Change |
| 15 | Rewind | |
| 16 | Fast forward | |
| 17 | Previous | |
| 18 | Next | |
| 19 | 1-0 | Number Key |
| 20 | ZOOM | Zoom In and Out |
| 21 | ANGLE | Support DVD angle function |
| 22 | DVD TITLE | DVD Title Menu |
| 23 | SUB-TITLE | Sub-Title selection |
| 24 | AUDIO | Audio function change |
| 25 | DVD ROOT | DVD-Root Menu |
Important Safety Instructions
CAUTIONPLEASE READ AND OBSERVE ALL WARNINGS AND INSTRUCTIONS IN THIS OWNER’S MANUAL AND THOSE MARKED ON THE UNIT. RETAIN THIS BOOKLET FOR FUTURE REFERENCE This set has been designed and manufactured to assure personal safety. Improper use can result in electric shock or fire hazards. The safeguards incorporated in this unit will protect you if you observe the following procedures for installation, use, and servicing. This unit is fully transistorized and does not contain any parts that can be repaired by the user.WARNING
 |
DO NOT attempt to operate if the picture fails or no sound is heard. Stop using the unit and turn it off immediately if there is any smoke or burning smell. If the unit is damaged. it could cause fire or electrical shock. |
 |
This product is designed for DC I2V. It is recommended to check with a trained “Authorized Dealer’ for using this unit in an RV, truck, or bus application. |
 |
DO NOT install the unit where it may obstruct drivers’ sight or cause possible injury to passengers. DO NOT allow installation to interfere with normal vehicle operations. Wring and Installation should not interfere with the brake pedal, steering wheel, or transmission shift lever. |
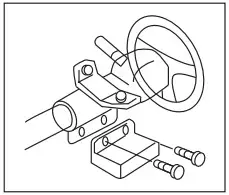 |
DO NOT remove any screws or hardware from the vehicle to install products |
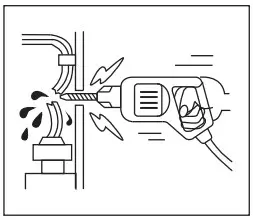 |
Inspect any vehicle areas before drilling any holes for mounting or wring of the unit. Make sure to check behind the installation area to prevent damaging any existing vehicle wiling or other connections. Failure to do so could result in In-vehicle malfunction or impaired vehicle operation. |
 |
All wiring must be routed safely and should not distract the driver’s attention during normal operating conditions. DO NOT allow wring to interfere with the operation of the vehicle’s brake pedal. shift lever or steering wheel. |
 |
DO NOT cut or modify any DIN cables with fuse built-in. This could render such a protective circuit inactive and potentially result in permanent damage to the unit or vehicle. Make sure both DIN cable and other wiling are not run where it may be out or damaged. |
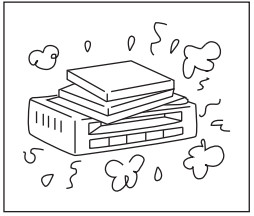 |
The slots and openings in the unit are provided for necessary ventilation. These must not be blocked to ensure reliable operation. |
Basic Operation
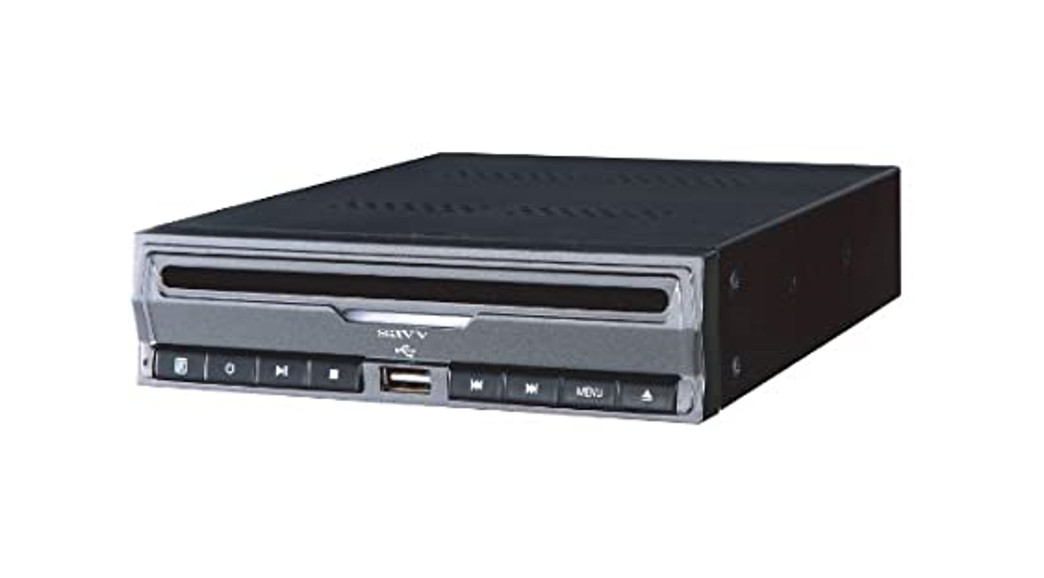
- Play a Disc1) Press the Power button on the unit or remote2) Inset the disc into the disc slot with label side facing-up3) The Player starts playback automatically
- Ejecting a discThe press eject button on the unit
- Stopping play1.) Press the stop button on the unit or remote to stop playback2.) Press the Play button on the unit or remote control to play the disc again
- Rewind & Fast Forward1) Move to Rewind track: Press
 the button on the remote control during playEach time press button, the track will be re winded X2, X4, X8,X16, X32 times and the Play again2) Move to Fast forward track: Press the button on the remote control during playEach time press button, the track will be Fast Forward track X2, X4, X8, X16, X32 times and the Play again
 - Previous and Next1) Press the button on the unit or remote control to move to the previous chapter2) Press the button on the unit or remote control to move to the next chapter
- Remote sensor (Infrared sensor for remote control)1) Point the remote control to the IR window on the unit to control the DVD functions2) Point the remote control to the External IR sensor (Included) to control the DVD functions
- USB Play1) Plug-in USB memory to the USB slot on the unit2) Please press the V.SEL button on the unit or remote to change the DVD Mode to USB Mode3) Internal folder will be showing up Move ▲ or ▼ cursor on the remote control to select the file4) Press the Play button on the unit or remote control to play the file5) Press the Stop button on the unit or remote control to stop playback*Only selected Audio & Video file format will be played with the unit
Specifications
| 1 | Mechanism | Anti-Shock Steel supporting mechanism for Car |
| 2 | Mounting | Vertical/Horizon mounting for various usage |
| 3 | Video System | NTSC/PAL Auto |
| 4 | Support Disc | DVD Video, Compact Disc, CDR, CDRW, VCD |
| 5 | Audio Output level | 1.5V± 0.1V (Under 2500 ) |
| 6 | Video Output level | 1±0.2V (750) Video outs |
| 7 | USB function | Multimedia Playback Video: AVI, MPEG, MP4 Audio: MP3, WMAPhoto: JPG |
| 8 | Characteristics | Frequency Response 20Hz-20KHz ( ± 2dB) S/N Ratio 90dB(11S) (1KHz)Channel Separation > 85dB (1KHz) |
| 9 | Illumination | Blue LED illumination |
| 10 | Remote control | Full function remote control included Remote-eye extension cable included (1.5m) |
| 11 | Supplying Voltage | 12Volt (9 —16V) D.0 input |
| 12 | Current Consumption | Less than 2A |
| 13 | Dimension(W X D X H) | 146mm X 179mm X 38mm |
CAUTION
 |
For the best results, follow the wiring diagram for the products shown in the manual. Do not place the unit on uneven or unstable surfaces, avoid dusty areas and unsealed doors, or openings where water may be splashed. |
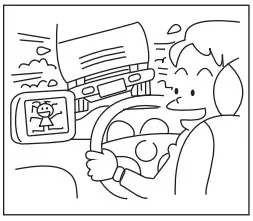 |
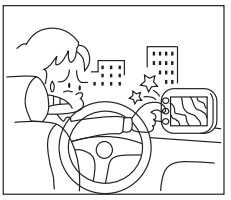
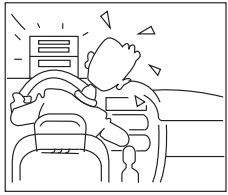
DO NOT watch the unit while driving. Distracting the driver from the proper operation of the vehicle can result in possible accidents or injuries. Proper installation allows the driver to only watch TV when the vehicle is stopped and the parking brake is applied. |
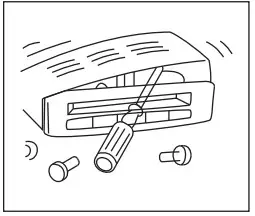 |
DO NOT disassemble or modify the product as it may cause an accident, fire, or electrical shock. |
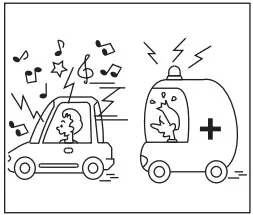 |
Set the volume to a moderate level, which will not prevent your hearing outside noises such as emergency vehicles. |
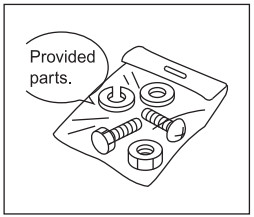 |
Use provided parts. Over-sized hardware may cause an electrical short or result in the product not being mounted securely. |
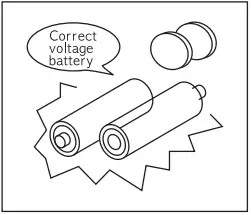 |
Use correct voltage batteries only. Make sure to insert batteries observing correct polarity. Using old and new batteries is not recommended. Keep small objects such as batteries out of the reach of children. Swallowing them may result in serious injury. |
 |
Keep the remote control in a safe place when not in use to ensure that the remote control does not interfere with the vehicle operation if it is dropped or shifts while driving. |
 |
DO NOT Install antennas where they could cause unexpected accidents or injury to pedestrians. |
[xyz-ips snippet=”download-snippet”]