
SoundStream LM-707 User Manual
IMPORTANT SAFETY INSTRUCTION
CAUTIONPLEASE READ AND OBSERVE ALL WARNINGS AND INSTRUCTIONS IN THIS OWNER’S MANUAL AND THOSE MARKED ON THE UNIT. RETAIN THIS BOOKLET FOR FUTURE REFERENCEThis set has been designed and manufactured to assure personal safety. Improper use can result in electric shock or fire hazard. The safeguards incorporated in this unit will protect you if you observe the following procedures for installation, use and servicing. This unit is fully transistorized and does not contain any parts that can be repaired by the user.
WARNING
- DO NOT attempt to operate if picture fails or no sound is heard. Stop using the unit and turn it off immediately if there is any smoke or burning smell. If unit is damaged, it could cause fire or electrical shock.

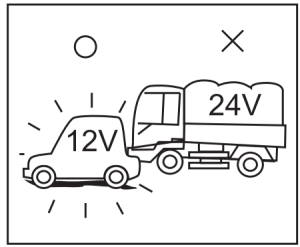
- This product is designed for DC 12V. It is recommended to check with a trained “Authorized Dealer” for using this unit in a RV, truck or bus application.
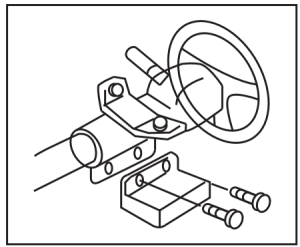
- DO NOT install unit where it may obstruct driver’s sight or cause possible injury to passengers. DO NOT allow installation to interfere with normal vehicle operations. Wiring and installation should not interfere with the brake pedal, steering wheel or transmission shift lever.
- DO NOT remove any screws or hardware from vehicle to install products.
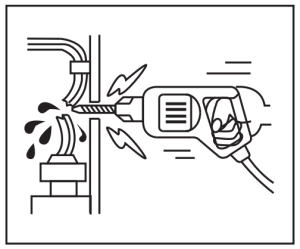
- Inspect any vehicle areas before drilling any holes for mounting or wiring of unit. Make sure to check behind installation area to prevent damaging any existing vehicle wiring or other connections. Failure to do so could result in vehicle malfunction or impaired vehicle operation.
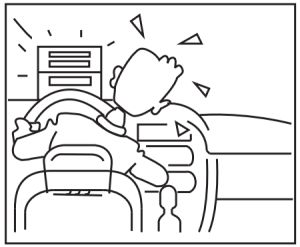
- All wiring must be routed safely and should not distract the driver’s attention during normal operating conditions. DO NOT allow wiring to interfere with operation of the vehicle’s brake pedal, shift lever or steering wheel.
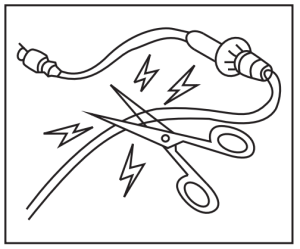
- DO NOT cut or modify any DIN cables with fuse built-in. This could render such protective circuit inactive and potentially result in permanent damage to the unit or vehicle. Make sure both DIN cable and other wiring is not run where it may be cut or damaged.
- The slots and openings in the unit is provided for necessary ventilation. These must not be blocked to ensure reliable operation.
CAUTION
- For the best results, follow wiring diagram for products a shown in the manual. Do not place unit on uneven or unstable surfaces, avoid dusty areas and unsealed doors, or openings where water may be splashed.
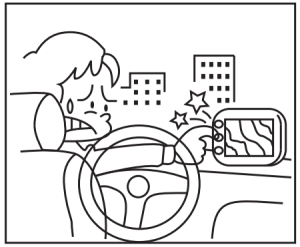
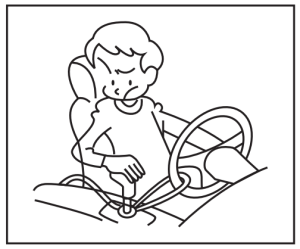
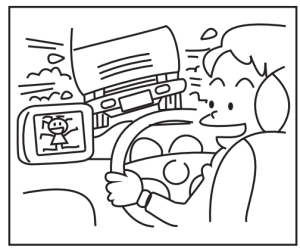
- DO NOT watch the unit wihile driving. Distracting the driver from proper operation of the vehicle can result in possible accident or injury. Proper installation allow the driver to only watch TV when the vehicle is stopped and the parking brake is applied.
- DO NOT disassemble or modify the product as it may cause accident, fire or electrical shock.
- Set the volume to a moderate level, which will not prevent your hearing outside noises such as emergency vehicles.
- Use provided parts. Over-sized hardware may cause an electrical short or result in product not being mounted securely.
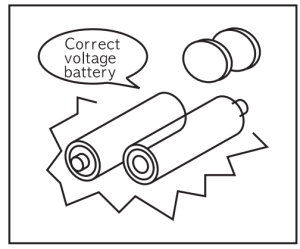
- Use correct voltage batteries only. Make sure to insert batteries observing correct polarity. Using old and new batteries is not recommended. Keep small objects such as batteries out of the reach of children. Swallowing them may result in serious injury.
- Keep the remote control in safe place when not in use to insure that the remote control dose not interfere with the vehicle operation if it is dropped or shifts while driving.
- DO NOT Install antennas where they could cause unexpected accident or injury to pedestrians.
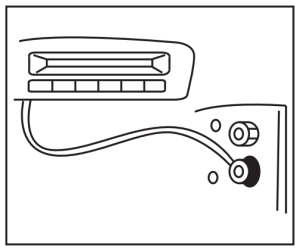


Wiring Diagram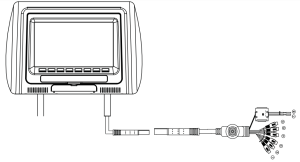
Materials On The Box
- Headrest Monitor
- Beige cover and Gray cover
- DIN to RCA cable
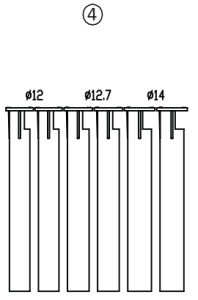
- Pipe Adaptors(12/12.7/14mm)
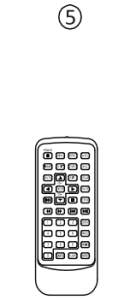
- Rmote Control
- User’s Manual

GENERAL SPECIFICATION
|
No |
Functions | 7″Wide Headrest |
9″Wide Headrest |
| 1 |
Power |
DC 12V (11V -16V) |
DC 12V (11V -16V) |
|
2 |
LCD Screen | 7″ Wide |
9″ Wide |
|
3 |
Resolution | 800 X RGB X 480 |
800 X RGB X 480 |
|
4 |
Aspect Ratio | 16:9 |
16:9 |
|
5 |
AV Inputs | 2AV input |
2AV input |
|
6 |
Video Input Level | 1Vp-p,75 ohm (Composite) |
1Vp-p,75 ohm (Composite) |
|
7 |
IR Frequency (A Ch.) | 2.3MHz / 2.8MHz |
23MHz/ 2.8MHz |
|
8 |
IR Frequency (B Ch.) | 3.2MHz/3.8MHz |
3.2MHz/3.8MHz |
|
9 |
IR Transmitter range |
1 m +-30 degree |
lm -i- 30 degree |
|
10 |
3m +-15 degree |
3m+ 15 degree |
|
|
11 |
Post Diameter |
10mm Post with 12/12.7/14mm Post adoptors |
10mm Post with 12/12.7/14mm Post adoptors |
|
12 |
Posts distance |
Adjustable 110mm -210mm |
Adjustable 110mm -210mm |
|
13 |
Remote Control | Full function remote control included |
Full function remote control included |
|
14 |
Wire Headphone output | On the Front Panel |
On the Front Panel |
|
15 |
Wireless heaphone Suport | Yes |
Yes |
|
16 |
Color Choices | Black Beige, Gray |
Black Beige, Gray |
User’s Manual
Congratulations on your new purchase of a Headrest Entertainment system Please take a moment to fully review this owner’s manual throughly prior to the initial operation, which will provide you with the best understanding to preperly operate your new Headrest Entertainment system
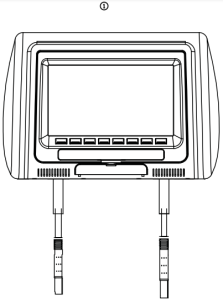
Description of Buttions![]()
![]()
| POWER | Power ON/OFF |
| DIMMER | Dimmer ON/OFF |
| V.SEL | Video Mode Seiection |
| MENU | Menu OSD Display |
| < | VOL – |
| > | VOL + |
| ASPECT | 16:9/4:3 Display Change |
| MUTE | Mute ON/OFF |
*Volume Default is 17 and volume can be adjust from 0 ˜ 20
![]()
Description Of Remote Control
|
POWER |
Power ON/OFF |
|
V.SEL |
Video Mode Selection |
| EXIT |
EXIT from MENU |
|
|
Cursor UP |
|
Cursor Down |
|
|
|
Cursor Left |
|
Cursor Right |
|
|
VOL- |
Volume Down |
|
VOL+ |
Volume Up |
| ENTER |
Function Select |
|
MUTE |
Mute ON/OFF |
| DIMMER |
Dimmer ON/OFF |
|
ASPECT |
16:9/4:3 Display Change |
| MENU |
Menu OSD Display |
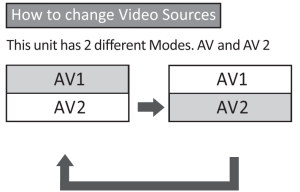
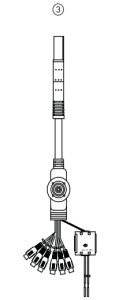
- AV1
- AV1 input locate on the DIN to RCA cable
- This input designed for slave external devices such as TV tuner or Game console.
- AV 2
- AV 2 input locate on the DIN to RCA cable
- This input designed for slave external devices such as TV tuner or Game console.
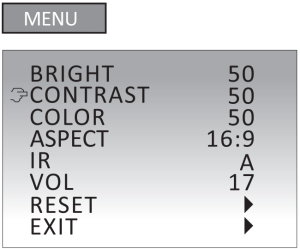 Please refer Monitor MENU adjust as below
|
MENU |
Value Adjust |
Defaul Setting |
|
BRIGHT |
0— 100 | 50 |
| CONTRAST | 0— 100 |
50 |
|
COLOR |
0— 100 | 50 |
| ZOOM | 16:9 and 4:3 |
16:9 |
|
IR |
A, B and OFF | A |
| RESET |
Press > |
|
|
EXIT |
Press > |
BRIGHT: Picture brightness control
CONTRAST: Picture contrast control
COLOR: Picture color adjust ZOOM:16:9,4:3 aspect adjust
IR: Wireless headphone channel selection
RESET: Back to factory setting
EXIT: Exit from the MENU
[xyz-ips snippet=”download-snippet”]