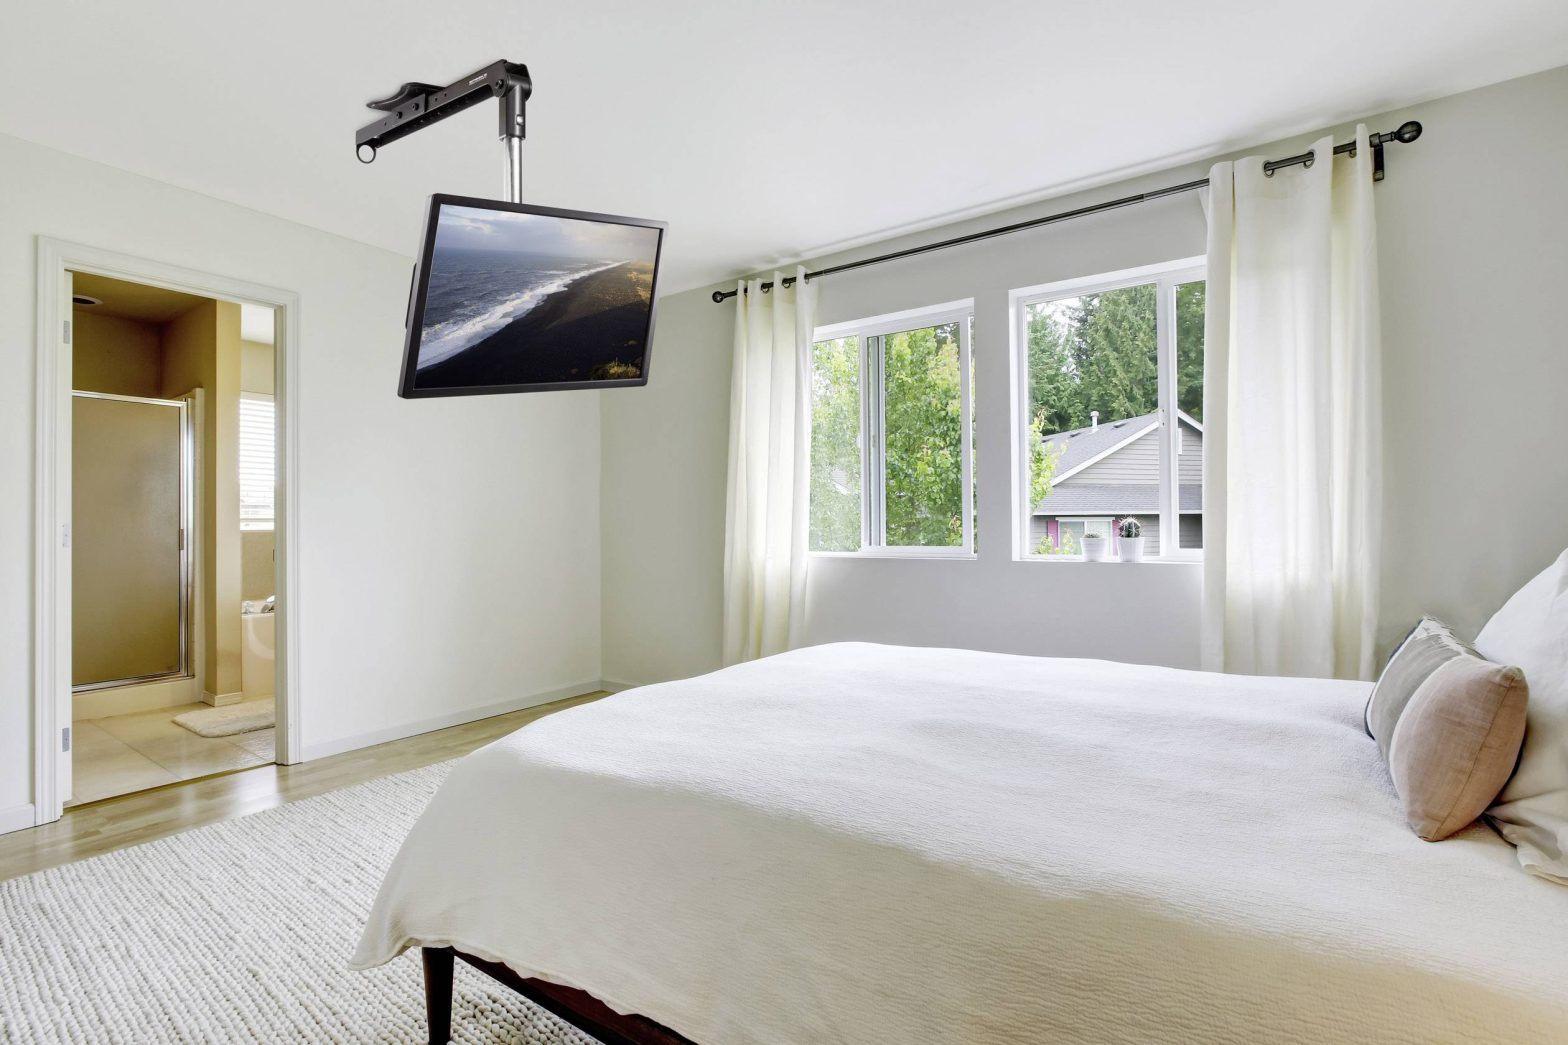
SpeaKa 1439178 Motorised TV Ceiling Mount

Introduction
Dear customer,Thank you for purchasing this product.This product complies with the statutory national and European requirements.To maintain this status and to ensure safe operation, you as the user must observe these operating instructions!
These operating instructions are part of this product. They contain important notes on commissioning and handling. Also consider this if you pass on the product to any third party. Therefore, retain these operating instructions for reference!If there are any technical questions, please contact: www.conrad.com/contact
Intended use
This TV ceiling mount is designed to mount compatible TVs to ceilings. It features a built-in motor, which can be controlled using the remote control provided to adjust the position of the mount. Only use the power adapter that came with the product to power the motor. The power adapter is only suitable for connection to a 100-240 V/60/50 Hz alternating voltage. The TV that you attach to the mount must not exceed the size and weight specifications listed in the “Technical data” section.It is intended for indoor use only. Do not use it outdoors. Contact with moisture, e.g. in bathrooms, must be avoided under all circumstances.For safety and approval purposes, you must not rebuild and/or modify this product. If you use the product for purposes other than those described above, the product may be damaged. In addition, improper use can cause hazards such as short circuiting, fire, electric shock etc. Read the instructions carefully and keep them. Make this product available to third parties only together with its operating instructions.All company names and product names are trademarks of their respective owners. All rights reserved.
Delivery content
- TV ceiling mount
- VESA plate
- Drill template
- 2 x VESA adapter E
- 2 x VESA adapter F
- 2 x decorative cover
- 4 x screw M5x14
- 4 x screw M6x14
- 4 x screw M8x50
- 4 x screw M6x30
- 4 x screw M8x30
- 6 x screw ST6.3×55
- 4 x washer D5
- 4 x washer D6
- 4 x washer D8
- 8 x spacer (small)
- 8 x spacer (large)
- 6 x concrete dowel
- 2 x adhesive cable clip
- 2 x cable conduit (1 m)
- 16 x cable tie
- Remote control
- Power supply (24 V/1.5 A)
- AAA battery x 2pcs
- Installation instructions
Up-to-date Operating InstructionsDownload the latest operating instructions at www.conrad.com/downloads or scan the QR code above. Follow the instructions on the website.
Features and functions
- Motorised ceiling mount for monitors and TVs.
- Suitable for horizontal or sloping ceilings.
- Remote control with 6 m range.
Safety instructions
Read the operating instructions carefully and especially observe the safety information. If you do not follow the safety instructions and information on proper handling in this manual, we assume no liability for any resulting personal injury or damage to property. Such cases will invalidate the warranty/guarantee.
General information
- The device is not a toy. Keep it out of the reach of children and pets.
- Do not leave packaging material lying around carelessly. This may become dangerous playing material for children.
- Protect the product from extreme temperatures, direct sunlight, strong jolts, high humidity, moisture, flammable gases, vapours and solvents.
- Do not place the product under any mechanical stress.
- If it is no longer possible to operate the product safely, take it out of operation and protect it from any accidental use. Safe operation can no longer be guaranteed if the product:– is visibly damaged,– is no longer working properly,– has been stored for extended periods in poor ambient conditions or– has been subjected to any serious transport-related stresses.
- Please handle the product carefully. Jolts, impacts or a fall even from a low height can damage the product.
- Also observe the safety and operating instructions of any other devices which are connected to the product.
- Consult an expert when in doubt about operation, safety or connection of the device.
- Maintenance, modifications and repairs are to be performed exclusively by an expert or at a qualified shop.
- If you have questions which remain unanswered by these operating instructions, contact our technical support service or other technical personnel.
(Rechargeable) batteries
- Correct polarity must be observed while inserting the (rechargeable) batteries.
- (Rechargeable) batteries should be removed from the device if it is not used for a long period of time to avoid damage through leaking. Leaking or damaged (rechargeable) batteries may cause acid burns when in contact with skin. Always use suitable protective gloves to handle damaged (rechargeable) batteries.
- (Rechargeable) batteries must be kept out of reach of children. Do not leave (rechargeable) batteries lying around, as there is a risk that children or pets may swallow them.
- All (rechargeable) batteries should be replaced at the same time. Mixing old and new (rechargeable) batteries in the device can lead to (rechargeable) battery leakage and device damage.
- (Rechargeable) batteries must not be dismantled, short-circuited or thrown into fire. Never recharge non-rechargeable batteries. There is a risk of explosion!
Electrical safety
- The power adapter is built according to protection class II. Only use a mains socket (230 V/AC, 50 Hz) connected to the public grid as a voltage source.
- Never pour any liquids over electrical devices or put objects filled with liquid right next to the device. If liquid or an object does enter the interior of the device, power down the respective socket (e.g. switch off the circuit breaker) and then unplug the mains plug from the mains socket. Discontinue use and take the product to a specialist workshop.
- Never use the product immediately after it has been brought from a cold room into a warm one. The condensation generated could destroy the product, and the power adapter may produce a fatal electric shock! Allow the product to reach room temperature before connecting it to the power supply and putting it to use. This may take several hours.
- If the power adapter is damaged, do not touch it, as it may produce a fatal electric shock! First, switch off the mains voltage to the mains socket to which the power adapter is connected (switch off at the corresponding circuit breaker or remove the safety fuse, then switch off at the corresponding RCD protective switch, so that all poles of the mains socket are disconnected). You can then unplug the power adapter from the mains socket. Dispose of the faulty power adapter in an environmentally friendly manner and discontinue use. Replace it with a wall plug transformer of the same design.
- The mains outlet must be located near to the product and be easily accessible.
- Unplug the mains plug from the mains socket if you do not use the device for an extended period of time.
- Disconnect the mains plug from the mains socket in thunderstorms for reasons of safety.
- Never plug in or unplug the mains plug when your hands are wet.
- As power supply, only use the supplied mains adapter.
- Only connect the power adapter to a normal mains socket connected to the public supply. Before plugging in the power adapter, check whether the voltage stated on the power adapter complies with the voltage of your electricity supplier.
- Never unplug the power adapter from the mains socket by pulling on the cable; always use the grips on the plug.
- When setting up the product, make sure that the cable is not pinched, kinked or damaged by sharp edges.
- Always lay the cables so that nobody can trip over or become entangled in them. This poses a risk of injury.
Persons and Product
- Mounting the product in an unsuitable location can result in injury or damage to property!
- Proceed with care when assembling and mounting the product! The product has some sharp edges which have the potential to cause injury!
- Only carry out the work necessary to mount (or adjust) the ceiling mount. Never attempt to dismantle, convert or repair the product. Some TV ceiling mounts contain pre-stressed metal springs. These may cause serious injury if you attempt to dismantle the mount improperly.
- Do not hold onto the ceiling mount or use it to support yourself.
- Do not secure any objects to the ceiling mount other than a TV or monitor.
- Lay all monitor cables such that they will not be squeezed or bent in the ceiling mount.
- Do not use any force when moving/adjusting the ceiling mount, otherwise you may damage your TV/monitor.
- Do not apply pressure to the TV/monitor screen when moving/adjusting the mount!
- Do not overload the ceiling mount. Pay attention to the maximum monitor size/weight provided by the manufacturer.
- Do not hold onto the ceiling mount or use it to support yourself.
- Do not secure any objects to the ceiling mount other than your TV/monitor.
Miscellaneous
• If you are in any doubt, do not mount the product yourself; ask a qualified person to do it for you.• Only carry out the work necessary to mount (or adjust) the product. Never attempt to dismantle, convert or repair the ceiling mount.• The screws that you will need to mount the product and your TV/monitor are included, but other screws may be required depending on your TV/monitor specifications.• Do not use any force when tightening screws, otherwise you may damage your TV/monitor and void the warranty! If you are in any doubt about the correct length of the screws required, contact a technician.
Operating elements
- Low-voltage socket
- LED
Preparation for mounting
The TV ceiling mount must be secured to a strong ceiling. Ensure that the surface of the ceiling is appropriate for the TV mount. Do not mount the product if the texture of the ceiling is not suitable. Thin partition walls or plasterboard (including plasterboard sloping ceilings) are normally not suitable. However, special dowels are sometimes available for these types of surfaces. If in doubt, contact a specialist before mounting the product. Mounting materials may vary depending on the mounting surface (e.g. for wood, only use screws and no dowels). In order to ensure that the mount is fixed securely, always determine the load-bearing capacity of your ceiling. The ceiling must be able to support 10 times the maximum weight of the ceiling mount and the attached TV/monitor.
- Plan the mounting location carefully so that the ceiling mount and your TV/monitor will be at the desired height/position.
- If necessary, use a spirit level.Ensure that no cables or wires are damaged during drilling/screwing. Accidentally drilling into electrical cables can cause a fatal electric shock!
- When working with electrical tools (such as a drill), pay attention to your safety and wear safety goggles. Long hair must not get into turning parts. Do not wear rings or other jewellery.
- Ensure that nobody is underneath the ceiling mount when you are fixing it to the ceiling.
Assembly
Remove the individual components from the packaging. Place the components onto a table and refer to the parts list to ensure that no components are missing.
If any components are missing, contact your dealer for a replacement. Do not attempt to mount the product, as it may become loose and fall onto your head, causing serious injuries.
Parts list
Securing the motorised ceiling mount
Start by securing the ceiling mount (A) to your concrete, brick, or other ceiling using the screws and dowels provided (see parts list). The mounting instructions are the same for sloping ceilings.
- Use the drill template provided to mark the positions of the drill holes. Drill the holes to the correct diameter and depth (refer to the specifications in the diagram above).
- Insert the two screws that you are going to fix to the key-shaped holes on the ceiling mount, allowing them to protrude about 5 mm from the ceiling.
- If you are securing the TV mount to a non-mineral surface or ceiling (e.g. wood), follow the steps above, but use the screws without dowels and make the holes slightly smaller (4.5 mm wide and 55 mm deep).
- If you are securing the TV mount to a surface in a lightweight construction, refer to the specific instructions for the mounting components that you are using.
- Slide the TV mount into the screws on the ceiling/surface and insert the remainder of the screws as shown above.
- Align the TV mount in a straight position and secure all of the screws with a Phillips screwdriver.
Assembling the VESA adapter
- Remove the two pre-inserted screws from the VESA plate (B) (see diagram above) and keep them in a safe place until you are ready to attach your TV/monitor to the ceiling mount.
- Remove the pre-inserted screws from the VESA adapters (E & F).
- Fix the four VESA adapters to the VESA plate (B) using the screws that you just removed (see diagram above). Ensure that the plates are positioned correctly. Do not tighten the screws fully.
Attaching the VESA adapter to your TV
- Lay your TV/monitor flat on a soft, clean surface with the screen facing down to ensure that there is no pressure on the screen and to prevent the screen from getting scratched. Protect valuable furniture using a suitable pad or cloth.
- If the back of your monitor is flat, screw the VESA adapter directly onto the monitor. If the back is curved, place suitable spacers (M-H or M-I) underneath. Four different possibilities are shown below.
Monitors with a flat back
Monitors with a curved back
- Before attaching the VESA adapter, ensure that there are suitable mounting holes on the back of your monitor.
- The existing monitor stand normally has to be removed before you can attach the monitor to a ceiling mount. For details, refer to your TV/monitor operating instructions. Remove the monitor’s stand; depending on the design, this will either be screwed or clipped in.
- Always ensure that you use the correct screws when securing the VESA adapter to the back of your monitor. The thread on the screws must match the screw holes on the monitor and must not be too long, otherwise the monitor may be damaged.
- The screws must not be too short, however, otherwise the stand will not be securely attached to the monitor. The screws must be screwed into the threaded fixture holes on the monitor with at least 5 full 360° turns.
- The screws for the ceiling mount/monitor are usually included, but you may need to purchase other screws depending on the design of your monitor. Do not use any force when tightening the screws, otherwise you may damage the monitor and void the warranty!
- If you are in any doubt about the length of the screws required, contact the monitor manufacturer or consult a specialist.
Attaching your TV/monitor to the ceiling mount
• Warning! Carefully mount the product according to the instructions, otherwise the TV or the ceiling mount may become loose and result in costly damage or injury!• Ensure that the supporting arm on the ceiling mount (A) is in a vertical position.• Remove the two bottommost screws (located opposite to each other) from the VESA plate (B).• The other screw on the VESA plate must remain in place and protrude approximately 3-4 mm.• Hang the monitor onto one of the key-shaped holes on the ceiling mount using the screw on the VESA plate. You can choose from four different mounting positions.
Depending on the size and design of your monitor, it may be a good idea to ask another person to help you hold the monitor in position while you secure it to the ceiling mount.Insert the other two screws through the oval slots and screw them into the thread on the VESA plate. Once you have attached your TV/monitor in the desired position, tighten all three screws using a Phillips screwdriver.
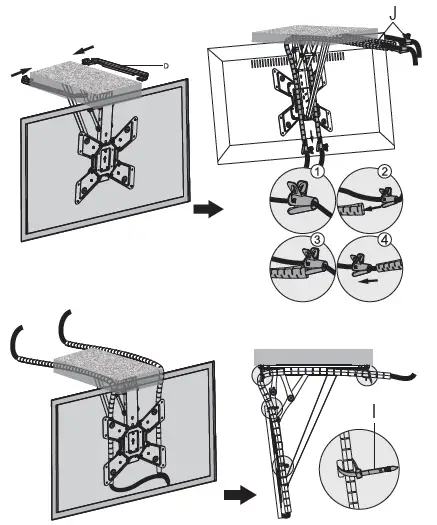
• Connect all necessary cables (e.g. video, antenna, and power cables) to your TV/monitor. To protect the cables, guide them through the cable conduit (J).• Ensure that there is enough slack in the cable so that the ceiling mount and the TV/monitor can move freely without the cable becoming trapped.• Use the cable ties to hold the cables in place. Once you have connected all of the cables, attach the decorative covers (D) to each side of the mount.
Connecting the power adapter
• Find a suitable place to run the power cable (H) (approx. 1.5 m long) and stick the adhesive cable clips (K) to a clean and strong surface.• Connect the cable to the connection socket (1) on the ceiling mount’s motor unit.• Connect the low voltage cable on the power adapter to the low voltage socket (2) on the ceiling mount’s motor unit.• The LED indicator (3) turns on.• Connect the power adapter to a mains socket.
Using the remote control
Do not operate the ceiling mount until you have finished mounting it in accordance with the instructions. Only adjust the mount using the built-in motor, otherwise the moving mechanism may become entangled or incorrectly stowed.
- mem1 button
- 1 button
- OK button
- button (no function)
- button
- LED
- IR LED indicator
- SET button
- button (no function)
- button
- 2 button
- mem2 button
Upward / downward movement
- Clear all obstacles within the range of motion before adjusting!
- Press the button (5) to move the mount up to the lowest profile position against the ceiling.
- Press the button (10) to move the mount down to the max. tilt angle 75° (default).Press the OK button (3) to stop the mount from moving.
Memory setting
1. Adjust the mount to the desired position.2. Press and hold mem1 or mem2 until you hear a beep.3. The position is saved.
Recall memory: Press the 1 or 2 button and the mount will automatically go to the saved position.
Reset the mountIf the mount cannot be adjusted to the highest position (0° against the ceiling) or the lowest position:
1. Disconnect then reconnect the power supply.2. Press and hold the OK button (approx. 5 sec) until the mount retracts to the highest position.3. The mount has now been reset.
Reset the tilt range for pitched ceilingsThe default folding tilt range is 0 to -75º. If you are mounting it to a pitched ceiling, please reset the tilt range.
1. Reset the mount. Refer to previous section “Reset the mount”.2. Press the , , and OK buttons to set the proper position against the ceiling.3. Press and hold the mem1 button until it beeps once.4. Step 2 should be repeated 5 times. The unit will emit a long beep to indicate success.Steps 2 and 3 should be completed within 2 minutes otherwise you will need start again from step 1.
Manual modeIf the mount is manually moved, it will automatically return to the minimum position against the ceiling (0°).
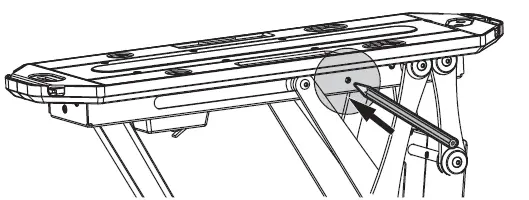
Matching the remote controller and box.
- Connect the mount to the power supply.
- Insert a small tool into the control box and press the matching button once. The box will emit a beep to indicate that is is ready for matching.
- Press the SET button on the remote. The box will beep repeatedly for approximately 10 seconds to indicate the remote control is being matched. When the beeping stops it means that matching is complete.The mount can be matched with up to 20 remote controllers.To reset all matched controllers, press and hold the matching button for approximately 5 sec. The unit will beep twice to confirm all matched controllers have been released.
Care and cleaning
Never use aggressive detergents, rubbing alcohol or other chemical solutions, as these could damage the housing or even impair the functioning of the product.
- Always disconnect the ceiling mount and the connected monitor from the mains before cleaning the product.
- Use a dry, lint-free cloth to clean the product.
- The product is essentially maintenance-free. Check that all of the screws are securely in place from time to time (approximately every 3 months). The screws may become loose over time due to you adjusting and moving the screen/ceiling mount.
- In addition, the ceiling mount should be inspected annually to ensure that it is safe to use. This particularly applies to cables and cable connections, the rolling mechanism, and electrical connections and components (such as the power adapter).
Disposal
ProductElectronic devices are recyclable waste and must not be disposed of in the household waste. At the end of its service life, dispose of the product according to the relevant statutory regulations. Remove any inserted (rechargeable) batteries and dispose of them separately from the product.
(Rechargeable) batteriesYou as the end user are required by law (Battery Ordinance) to return all used batteries/rechargeable batteries. Disposing of them in the household waste is prohibited.Contaminated (rechargeable) batteries are labelled with this symbol to indicate that disposal in the domestic waste is forbidden. The designations for the heavy metals involved are: Cd = Cadmium, Hg = Mercury, Pb = Lead (name on (rechargeable) batteries, e.g. below the trash icon on the left).
Used (rechargeable) batteries can be returned to collection points in your municipality, our stores or wherever (rechargeable) batteries are sold.You thus fulfil your statutory obligations and contribute to the protection of the environment.
Technical data
TV ceiling mountVESA fixing dimensions………………………………. 200 x 200 mm, 400 x 200 mm, 300 x 300 mm, 400 x 400 mm (see “Operating elements”)Diagonal screen size…………………………………..58.42 – 140 cm (23″ – 55″)Tilt adjustment……………………………………………+3° to -3° (to zero line)Load…………………………………………………………Max. 30 kgFolding angle……………………………………………..0 to -75ºCable length ……………………………………………..2 mOperating/storage conditions………………………..0 to +45 °C, 1 – 80 % RH (non-condensing)Dimensions (W x H x D)………………………………557 x 435 x 108 mm (unfolded)Weight………………………………………………………7.5 kg
Remote controlPower supply……………………………………………..2 x 1.5 V AAA batteriesRemote control range………………………………….6 m (in open spaces)
 report this ad
Power adapterInput voltage/current……………………………………100 – 240 V/AC, 50/60 Hz, max. 2 AOutput voltage/current…………………………………24 V/DC, 1.5 ACable length ……………………………………………..1.2 m
References
France.fr : Actualités, destinations et infos du tourisme en France
Conrad Electronic » Your Sourcing Platform
Conrad Electronic » Your Sourcing Platform
Conrad Electronic » Your sourcing platform
Conrad Electronic » Your sourcing platform
Document
Conrad Electronic » Your sourcing platform
Conrad Electronic » Your Sourcing Platform
Contact Us | Conrad.com
[xyz-ips snippet=”download-snippet”]