
![]()
Spectrum Remote Control User Guide
 Spectrum Remote Control
Getting Started: Install Batteries
- Apply pressure with your thumb and slide the battery door for removal. Show image of bottom of remote, indicating pressure point and slide direction
- Insert 2 AA batteries. Match the + and – marks. Show illustration of batteries in place
- Slide the battery door back into place. Show bottom of remote with battery door in place, include arrow for slide direction.
Other top spectrum manuals:
Setup Your Remote for a Charter WorldBox
If you have a Charter WorldBox, the remote must be paired with the box. If you do NOT have a WorldBox, proceed to PROGRAMMING YOUR REMOTE FOR ANY OTHER CABLE BOX.
To Pair the Remote to the WorldBox
- Ensure that your TV and WorldBox are both powered-on and that you can view the video feed from the WorldBox on your TV.Show image of STB and TV connected and on
- To pair the remote, simply point the remote at the WorldBox and press the OK key. The Input key will begin blinking repeatedly.Show image of remote pointed at the TV, transmitting data
- A confirmation message should appear on the TV screen. Follow the on screen instructions to program the remote control for your TV and/or audio equipment as needed.
To Un-Pair the Remote to the WorldBox
If you wish to use the remote with a different cable box, follow these steps to un-pair it with your WorldBox.
1. Press and hold MENU and Nav Down keys simultaneously until the INPUT key blinks twice. Show remote with MENU and Nav Down keys highlighted2. Press 9-8-7 digit keys. The INPUT key will blink four times to confirm pairing has been disabled. Show remote digits with 9-8-7 highlighted in order.
Programming Your Remote for Any Other Cable Box
This section is for any cable box that is NOT a Charter WorldBox. If you have a WorldBox, refer to the section above for remote pairing, following the on-screen instructions for any other remote programming.
Setup Remote to Control Cable Box
Point your remote at your cable box and press MENU to test. If the cable box responds, skip this step and proceed to PROGAMMING YOUR REMOTE FOR TV AND AUDIO CONTROL.
- If your cable box is branded Motorola, Arris, or Pace:
- Press and hold MENU and the 2 digit key simultaneously until the INPUT key blinks twice.Show remote with MENU and 3 keys highlighted
- If your cable box is branded Cisco, Scientific Atlanta, or Samsung:
- Press and hold MENU and the 3 digit key simultaneously until the INPUT key blinks twice.Show remote with MENU and 3 keys highlighted
Programming Your Remote for TV and Audio Control
Setup for Popular TV BrandsThis step covers setup for the most common TV brands. If your brand is not listed, please proceed to SETUP USING DIRECT CODE ENTRY
- Ensure that your TV is powered-on.Show TV with remote pointed at it.
- Simultaneously press and hold MENU and OK keys on remote until the INPUT key blinks twice.Show remote with MENU and OK keys highlighted
- Find your TV brand in the chart below and note the digit that relates to your TV brand. Press and hold down the digit key.
Digit
TV Brand
1
Insignia/Dynex
2
LG/Zenith
3
Panasonic
4
Philips/Magnavox
5
RCA/TCL
6
Samsung
7
Sharp
8
Sony
9 Toshiba
10
Vizio
- Release the digit key when the TV turns off. Setup is complete.Show remote pointed at TV, transmitting data and TV is off
NOTES: While holding the digit key, the remote will test for the working IR code, causing the INPUT key to flash each time it tests a new code.
Setup Using Direct Code Entry
This step covers setup for all TV and Audio brands. For faster setup, be sure to locate your device brand in the code list before beginning setup.
- Ensure that your TV and/or audio device is powered-on.Show TV with remote pointed at it.
- Simultaneously press and hold MENU and OK keys on remote until the INPUT key blinks twice.Show remote with MENU and OK keys highlighted
- Enter the 1st code listed for your brand. The INPUT KEY will blink twice to confirm once complete.Show remote with digit keys highlighted
- Test volume functions. If the device responds as expected, setup is complete. If not, repeat this process using the next code listed for your brand.Show remote controlling TV.
Assigning Volume Controls
The remote is set to default to control TV volume once the remote is programmed for a TV. If the remote is also set up to control an audio device, then volume controls will default to that audio device.If you wish to change volume control settings from these defaults, perform the following steps:
- Simultaneously press and hold MENU and OK keys on remote until the INPUT key blinks twice.Show remote with MENU and OK keys highlighted
- Press the key below for the device that you wish to use for volume controls:
- TV Icon = To lock volume controls to the TV, Press VOL +
- Audio Icon = To lock volume controls to the audio device, Press
- VOLCable Box Icon = To lock volume controls to the cable box, Press MUTE.
Troubleshooting
|
Problem: |
Solution: |
|
INPUT key blinks, but remote does not control my equipment. |
Follow the programing process in this manual to set your remote up to control your home theater equipment. |
|
I want to switch VOLUME CONTROLS from to control my TV or to my Audio Device. |
Follow ASSIGNING VOLUME CONTROLS instructions in this document |
|
The INPUT key does not light up on the remote when I press a key |
Ensure that the batteries are functional and are inserted properly Replace the batteries with two new AA size batteries |
|
My remote won’t pair with my Cable Box. |
Ensure that you have a Charter WorldBox.Ensure that the remote has a clear line of sight to the Cable Box when pairing.Be sure to follow the on-screen instructions that appear when pairing. |
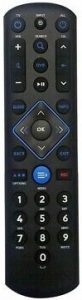
Remote Key Chart
Show image of the whole remote control with lines pointing to each key or key group for the description below.
|
TV POWER |
Used to turn on the TV |
|
INPUT |
Used to switch video inputs on your TV |
|
ALL POWER |
Used to turn on the TV and set-top box |
|
VOLUME +/- |
Used to change volume level on TV or Audio Device |
|
MUTE |
Used to mute volume on TV or STB |
|
SEARCH |
Used to search for TV, Movies, and other content |
|
DVR |
Used to list your recorded programs |
|
PLAY/PAUSE |
Used to play and pause current selected content |
|
CH +/- |
Used to cycle through channels |
|
LAST |
Used to jump to the previous tuned channel |
|
GUIDE |
Used to display the program guide |
|
INFO |
Used to display selected program info |
|
NAVIGATION UP, DOWN, LEFT, RIGHT |
Used to navigate on-screen content menus |
|
OK |
Used to select on-screen content |
|
BACK |
Used to jump to previous menu screen |
|
EXIT |
Used to exit the current displayed menu |
|
OPTIONS |
Used to select special options |
|
MENU |
Used to access main menu |
|
REC |
Used to record current selected content |
|
DIGITS |
Used to enter channel numbers |
Declaration of Conformity
Federal Communication Commission Interference StatementThis equipment has been tested and found to comply with the limits for a Class B digital device, pursuant to Part 15 of the FCC Rules. These limits are designed to provide reasonable protection against harmful interference in a residential installation. This equipment generates, uses, and can radiate radio frequency energy and, if not installed and used in accordance with the instructions, may cause harmful interference to radio communications. However, there is no guarantee that interference will not occur in a particular installation. If this equipment does cause harmful interference to radio or television reception, which can be determined by the turning of equipment off and on, the user is encouraged to try to correct the interference by one of the following measures:
- Reorient or relocate the receiving antenna.
- Increase the separation between the equipment and receiver.
- Consult the dealer or an experienced radio/TV technician for help.
- Connect the equipment into an outlet on a circuit different from that to which the receiver is connected.
This device complies with Part 15 of the FCC Rules. Operation is subject to the following two conditions:
- This device may not cause harmful interference, and
- this device must accept any interference received, including interference that may cause undesired operation.
The user is cautioned t that the changes and modification made to the equipment without the approval of manufacturer could void the user’s authority to operate this equipment.
VIDEO
FAQs
The battery cover is on the back. The lower end of the remote
Not to my knowledge, but there are a few items that you can drape over the arm of a couch or chairs. You just put them in them and its right next time you have them right there
While it is a universal remote I doubt you will be able to control your Panasonic blue ray player. You can definitely program it to control your TV volume and maybe a soundbar volume.
Yes, but the the manual with the remote doesn’t mention the procedure. I found the setting buried deep in Spectrum’s menu using the remote connected with its IR function out of the box: press the Menu button on the remote, then Settings & Support, Support, Remote Control, Pair New Remote, RF Pair Remote.
I can’t find the designation “SR-002-R” anywhere on the remote, but looking at the SR-002-R manual online, the controls are identical. The paper manual for this remote has the designation “URC1160”. FWIW, we’re using this replacement successfully with a Spectrum cable box without DVR, so I can’t vouch for that function.
Yes, that remote is defective and has been since day 1. I got 3 new ones and they were so defective, I ordered one from amazon, and it was defective too. The manufacture should recall them or fix them.
No. Use the old one. There is also a back button on the old one.The other fre
Yes, the keys are illuminated
I’m a new Spectrum customer and I’m pretty sure I have the 201 box. I can confirm it on Monday when I get back home.
Ours is done by using the tv remote for use on the tv closed captioning. For use on spectrum system there is a few ways. Lower corner look for the c/c and click. Or menu until you find c/c and click. You tube has lots of videos to help.
You need the programming guide with the device codes ie. TV DVD AUDIO VIDEO RECEIVER.
It has worked with everything and so reasonably priced!
Not directly. We have our Polk Sound Bar connected to the LG television, and after programming this remote to control the TV, it can also control volume and mute for the sound bar. It’s a little wonky, in that we’ve got to turn the TV power on first, let it finish booting, then turn on the cable box, otherwise the TV gets confused and doesn’t forward sound to the sound bar, and instead tries to use the built-in speakers.
Spectrum Remote Control User Guide – Spectrum Remote Control User Guide –
![]()
[xyz-ips snippet=”download-snippet”]