
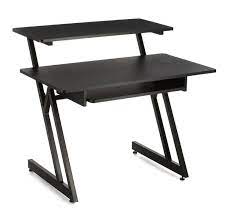
Stage Right P/N 600039 Studio Workstation
SAFETY WARNINGS AND GUIDELINESPlease read this entire manual before using this device, paying extra attention to these safety warnings and guidelines. Please keep this manual in a safe place for future reference.
- This device is intended for indoor use only.
- Do not install this device on an unstable surface where it could fall and cause either personal injury or damage to the device and/or other equipment.
- Do not subject this device to extreme force, shock, or fluctuations in temperature or humidity.
- This device includes small parts that could pose a choking hazard to small children. Keep these parts out of reach of small children.
CUSTOMER SERVICEThe Monoprice Customer Service department is dedicated to ensuring that your ordering, purchasing, and delivery experience is second to none. If you have any problem with your order, please give us an opportunity to make it right. You can contact a Monoprice Customer Service representative through the Live Chat link on our website www.monoprice.com or via email at [email protected]. Check the website for support times and links.
PACKAGE CONTENTS
Please take an inventory of the package contents to ensure you have all the items listed below. If anything is missing or damaged, please contact Monoprice Customer Service for a replacement.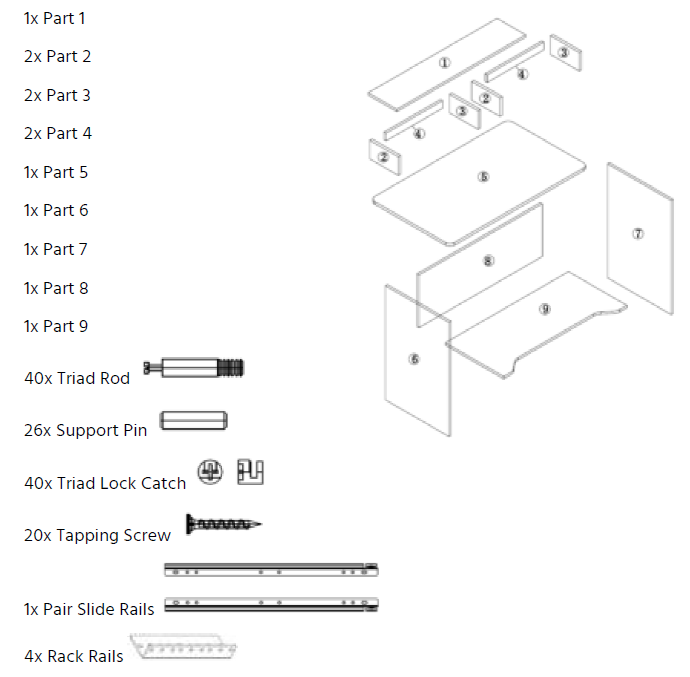
ASSEMBLY
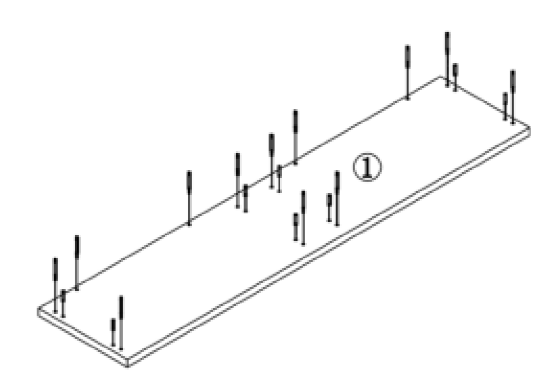
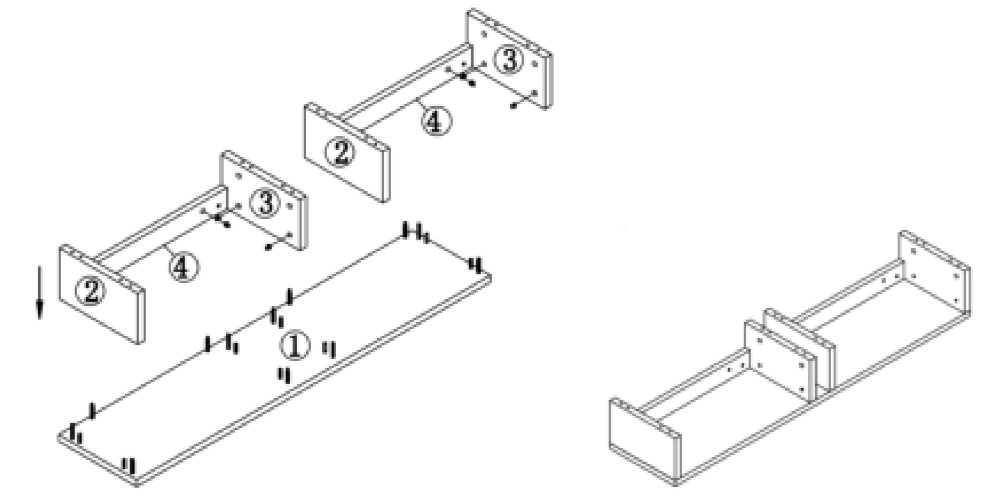
- Screw 12x Triad Rod and 8x Support Pin into the holes in Part 1, as shown in the diagram below.

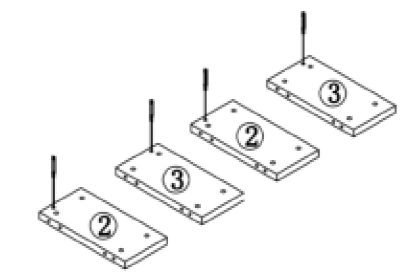
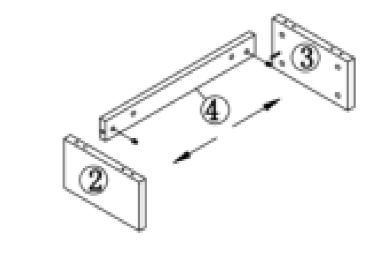
- Screw 1x Triad Rod into the holes in each of two Part 2 and two Part 3 pieces, as shown below.
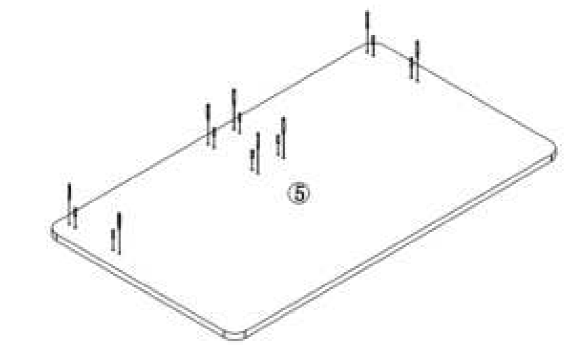
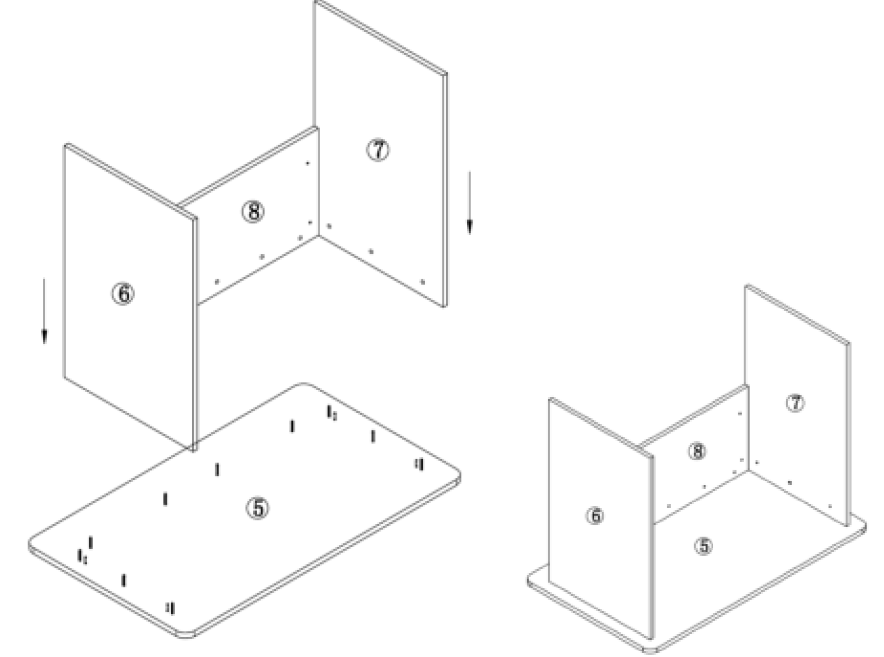
- Screw 8x Triad Rod and 8x Support Pin into the holes in the top of Part 5, as shown below.
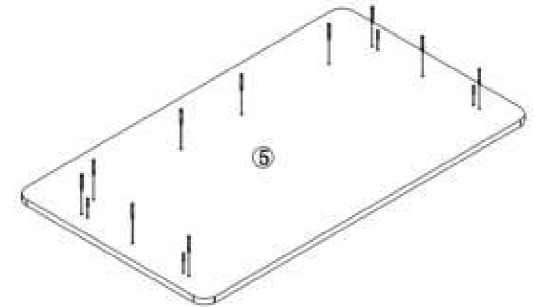
- Flip Part 5 over, then screw 10x Triad Rod and 4x Support Pin into the holes in the bottom of Part 5, as shown below.
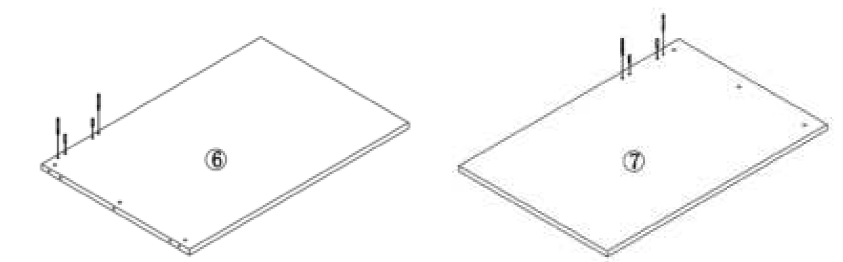
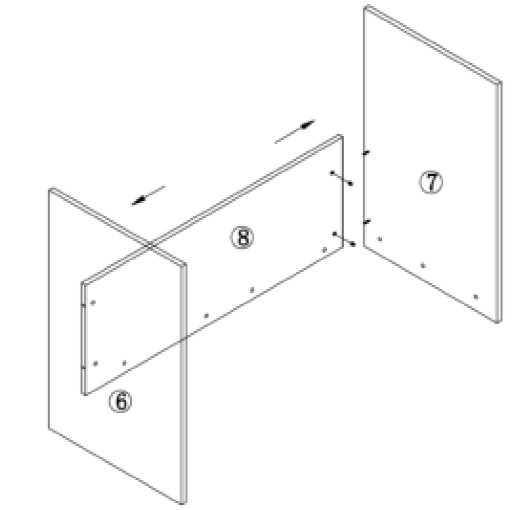
- Screw 2x Triad Rod and 2x Support Pin into the holes in each of Part 6 and Part 7, as shown below.
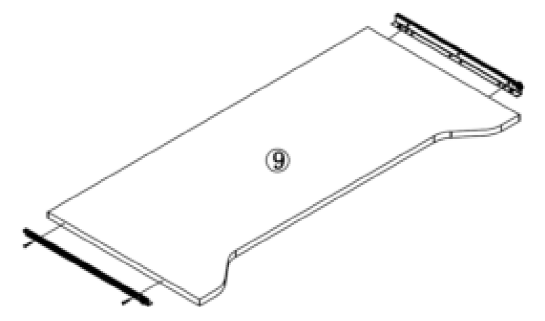
- Use 4x Tapping Screw to attach the inner parts of the two Slide Rails to each side of Part 9, as shown below.
- Insert the Triad Rod on one of the Part 2 pieces and the Triad Rod on one of the Part 3 pieces into the holes on the sides of one of the Part 4 pieces, then use 2x Triad Lock Catch to lock the Triad Rods in place. Repeat for the other Part 2, Part 3, and Part 4 pieces.
- Place the two Part 2/3/4 assemblies onto the Triad Rods on Part 5, then use 12x Triad Lock Catch to lock each Triad Rod in place. The resulting assembly is shown below in the image to the right.
- Insert the Triad Rods on Part 6 and the Triad Rods on Part 7 into the holes on each side of Part 8, then use 4x Triad Lock Catch to lock each Triad Rod in place.
- Place the Part 6/7/8 assembly onto the Triad Rods on the bottom of Part 5, then use 10x Triad Lock Catch to lock each Triad Rod in place. The resulting assembly is shown below in the image to the right.
- Use 4x Tapping Screw to attach the outer parts of the two Slide Rails to Part 6 and Part 7, as shown below.
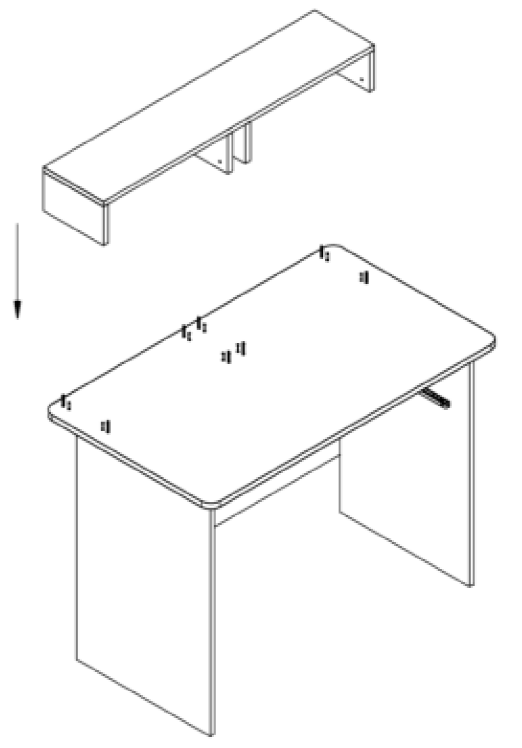
- Flip the Part 5/6/7/8 assembly over so that it rests on its legs (Part 6 and Part 7). Place the Part 1/2/3/4 assembly onto the Triad Rods on the top of Part 5, then use 8x Triad Lock Catch to lock each Triad Rod in place.
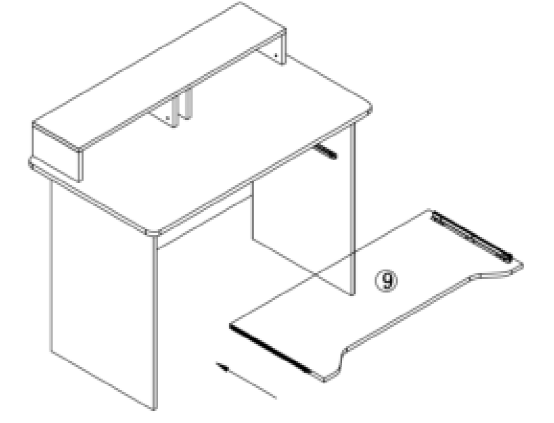
- Insert the inner part of the two Sliding Rails on Part 9 into the outer parts of the Sliding Rails on Part 6 and Part 7. Latches on the Sliding Rails should engage, which prevents the shelf (Part 9) from detaching from the rest of the Studio Workstation assembly.

Congratulations! Your Studio Workstation is now fully assembled and ready for use!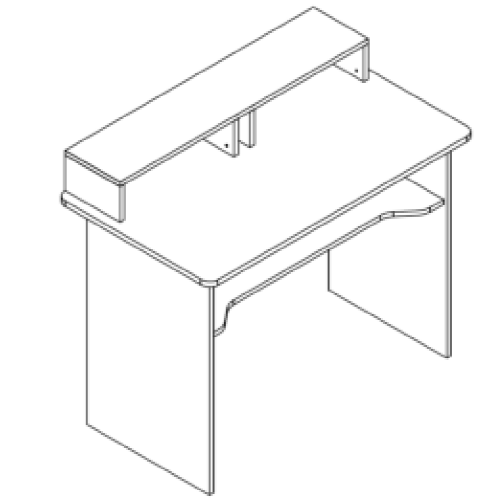
TECHNICAL SUPPORTMonoprice is pleased to provide free, live, online technical support to assist you with any questions you may have about installation, setup, troubleshooting, or product recommendations. If you ever need assistance with your new product, please come online to talk to one of our friendly and knowledgeable Tech Support Associates. Technical support is available through the online chat button on our website www.monoprice.com or through email by sending a message to [email protected]. Check the website for support times and links.![]()
References
[xyz-ips snippet=”download-snippet”]