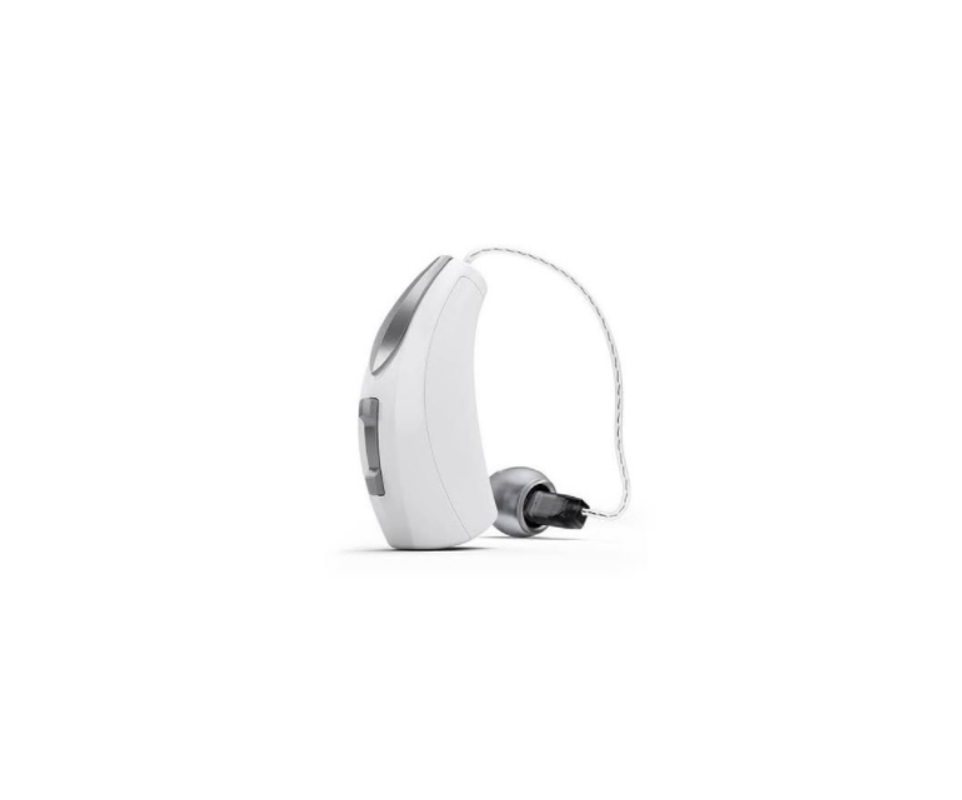
Starkey Behind-the-Ear Rechargeable With Earmold User Guide
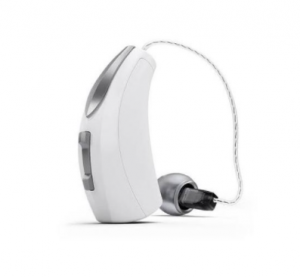
Behind-the-Ear Rechargeable (BTE R) With Earmold
Your new hearing aids offer Starkey’s most advanced technology with supreme sound quality and features.They are customizable to fit your unique hearing needs, helping you to stay connected to the people and things you love most.
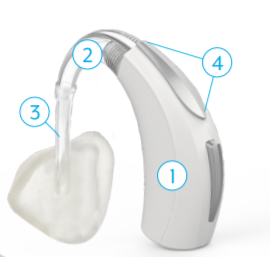
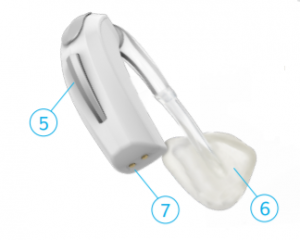
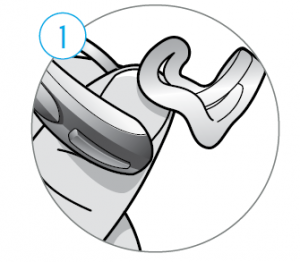
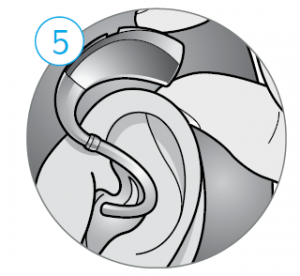
Hearing Aid Parts
- Hearing Aid
- Earhook
- Tubing
- Microphone
- Push Button User Control
- Earmold
- Charging Contacts
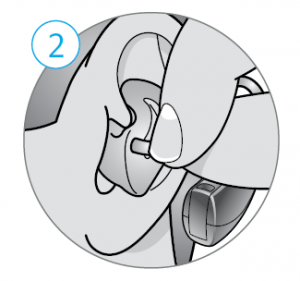
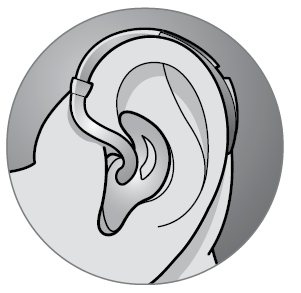
To insert the hearing aid:
- Grasp the tubing at the point where it enters the earmold with your thumb and forefinger.
- Tilt your hand slightly forward and gently insert the tip of the earmold into your ear canal.
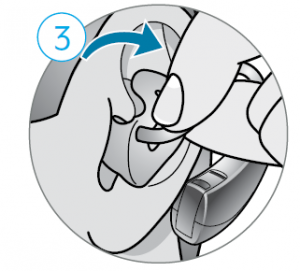
- Rotate the earmold slightly backward into position.
- Softly press the earmold into place with your fingertip.
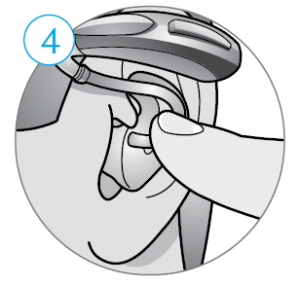
- Carefully place the hearing aid behind your ear wrapping the earhook over the top of your ear.
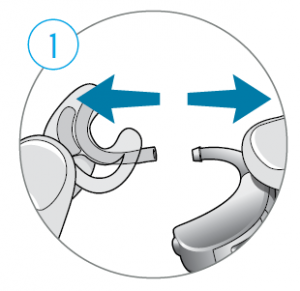
To remove the hearing aid:
- Pull the hearing aid forward to remove it from behind your ear.
- Grasp the tubing at the point where it enters the earmold with your thumb and forefinger and gently pull the earmold out of your ear canal.
- Lightly pulling down on the earlobe may help loosen the custom earmold as it is removed.
Behind-the-Ear Rechargeable (BTE R)
Charging Your Hearing Aids
Your hearing aid uses a rechargeable battery as its power source. To charge the battery:
- Plug your charger into an outlet.
- Place your hearing aids in the charging ports with the earmolds resting inside the case.
- Your hearing aids will turn off automatically and begin to charge.
- The front of the charger is equipped with two LED indicators to provide information about hearing aid charging. The front LED indicators will glow green to indicate successful charging.
- When the hearing aids are fully charged (approx 3.5 hrs charge time), the front LED indicators will be solid green.
- Your hearing aids will automatically power on when removed from the charger.
Battery Indicator
You will hear an indicator through your hearing aid when battery voltage is low and the battery needs charging.
Hearing Aid Charger Parts
- Desiccant Puck Holder
- Cleaning Brush
- Charging Ports
- Hearing Aid Charging LEDs
- On-board Battery LEDs
- Power Cord Port
Desiccant Puck
The desiccant puck will be effective for 3–6 months depending on moisture in the hearing aids and humidity. The color will fade from blue to white, indicating a need for replacement.
On-board Battery
- The back of the charger is equipped with four LED indicators to provide information about the status of the on-board battery. The on-board battery allows charging of the hearing aids up to three times while the charger is away from a power source.
- When away from a power source, the back LED indicators will be solid green indicating the amount of charge available for the on-board battery. The LED indicators will turn off after 10 seconds to preserve power.
On-board Battery (Continued)
- One blinking LED on the back of the charger indicates that the on-board battery is low and the charger should be connected to a power source.
- When plugged into a power source, the back LED indicators will glow green to indicate successful on-board battery charging.
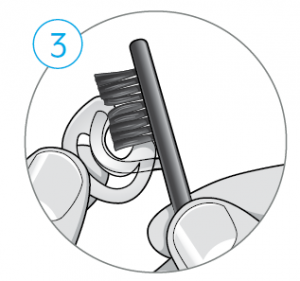
Hearing Aid Care
Cleaning Your Hearing Aids
- Use the cleaning brush or soft cloth to clean debris from around the user control, microphone, charging contacts, tubing and earmold.
- Never use water, solvents, cleaning fluids or oil to clean your hearing aid.
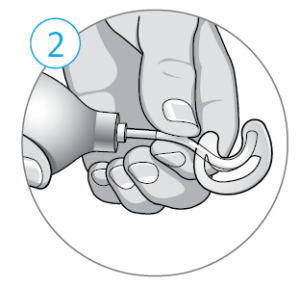
Cleaning the Tubing and Earmold
- Separate the earmold from the hearing aid by gently pulling the tubing away from the earhook.
- Connect an earmold air blower to the tubing and gently squeeze the bulb to push air through the tubing. Any moisture or debris should come out the end of the earmold.
- Use a soft, damp cloth or a cleaning brush to clean debris from the earmold.
- Ensure the earmold is dry, then slide the earmold tubing onto the earhook.

 For more help, visit Starkey.com/Support
Read More About This Manual & Download PDF:
References
[xyz-ips snippet=”download-snippet”]