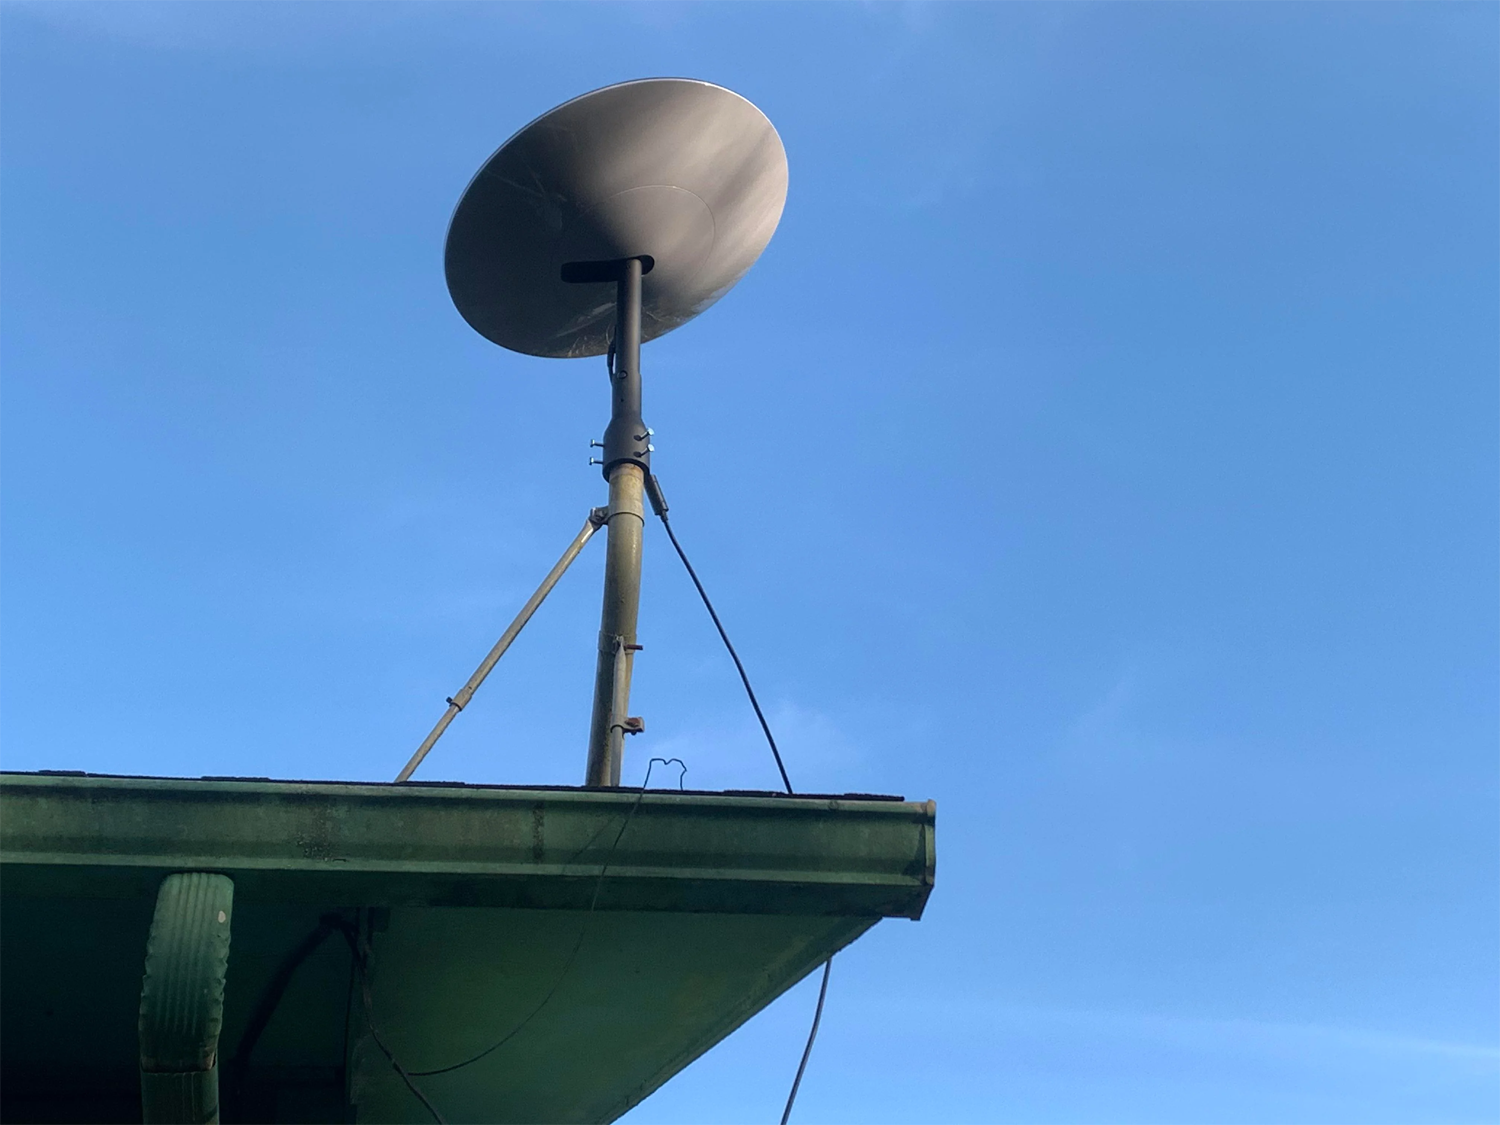
Starlink Ground Pole Mount
If you are uncomfortable with any part of the installation process, do not attempt – contact a professional to install your Starlink. Starlink is not responsible for damage to property caused by the installation process.
Please be aware that inclement weather (e.g., heavy rain, snow, or wind) can affect your satellite internet connection, potentially leading to slower speeds or a rare outage.
The Starlink will detect and melt snow that falls directly on it; however, accumulating snow around the Starlink may block the field of view. We recommend installing Starlink in a location that avoids snow build-up and other obstructions from blocking the field of view.
If your Starlink App displays a “Motors Stuck” alert, your Starlink may be mounted in a way that it cannot reach its optimal angle to connect with the satellites. We advise mounting your Starlink within 40 degrees of vertical. Mounting your Starlink in a horizontal position (e.g., on the side of your chimney), will not allow it to operate.
Installation Conditions
WARNING! The power supply and router are restricted to indoor use only.
WARNING! Mounts are not designed for high winds or hurricane / tornado wind loads.Tethering should be used in all cases to prevent failure in an unexpected wind event.
Safety Notices
WARNING! To reduce the risk of injury, electric shock, or fire, follow basic safety precautions, including:
- Make sure the product’s power is disconnected before accessing, moving, or installing the Starlink (aka “Dishy McFlatface”). Starlink contains moving parts when powered on.
- Plug the power cord into an AC outlet that is easily accessible at all times. If the power cord has a 3-pin attachment, plug the cord into a grounded (earthed) 3-pin outlet.
- Only use the AC adapter and power cord provided with the system or purchased from SpaceX.
- Do not operate this product with a damaged power cord set. If the power cord is damaged, replace before using this product.
- During operation, do not allow the AC adapter to contact skin or a soft surface, such as carpet/rug or clothing. The product and the AC adapter comply with the user-accessible surface temperature limits defined by applicable safety standards.
Note: Do not operate this product if you notice crackling, hissing, popping sounds, a strong odor, or smoke coming from any parts of the system. Turn off the system, disconnect from power source, and contact Starlink technical support for assistance.
WARNING! To avoid injury to persons and damage to property when drilling, take caution and follow basic safety procedures, including:
- Wear appropriate eye, hand, and face protection.
- Avoid studs, electrical wiring, and water lines when drilling. Drilling into any of these can lead to fire, shock, injury, or death.
- Drill at a slight downward angle from the home interior to the home exterior and thoroughly apply sealant. Improper drilling and sealing may lead to water and/or bug intrusion and/or damage.
For more safety, regulatory, labeling, and disposal information, refer to the Regulatory Notices in the main internet kit.
The information contained herein is subject to change without notice. SpaceX shall not be liable for technical or editorial errors or omissions contained herein.
Setup

- Download the Starlink app on your phone.
- Before installation, use the “Check for Obstructions” tool in the app to identify the best location for uninterrupted service.
- Setup your Starlink.
- After connecting, confirm your setup location is obstruction free by reviewing the data coming from your Starlink.
- Additional app features: customize settings, receive updates, troubleshoot issues, and contact Support.
Box Contents

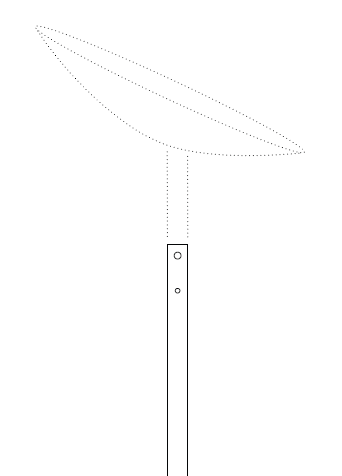
1. Ground Pole Mount
NOTE: The Ground Pole is approximately 7.5′ / 2.2 m
Additional Items Needed

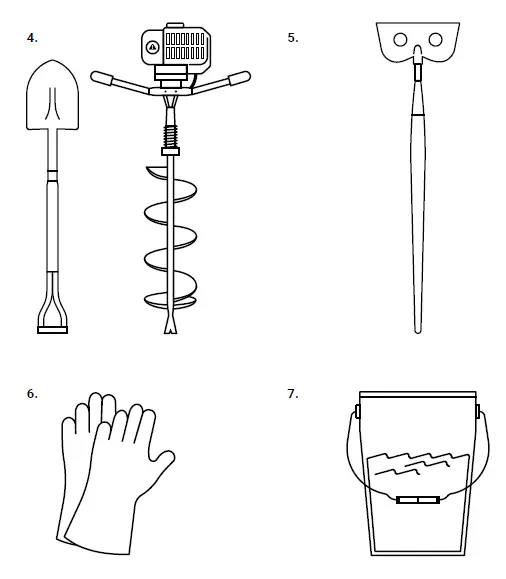
2. Concrete Mix3. Mixing Trough4. Shovel / Augur5. Mortar Hoe6. Gloves7. Water
Install Instructions
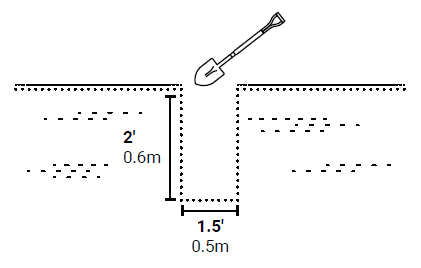
1. Select a location with solid ground—avoid loose soil, gravel, or marsh-like conditions.

2. Dig a hole 2’ (0.6 m) deep and approximately 1.5’ (0.5 m) wide.
3. Position the pole in the center of the hole.
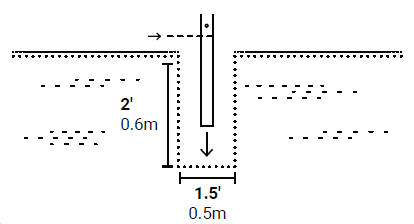 NOTE: Drain hole should be just above the ground-line.
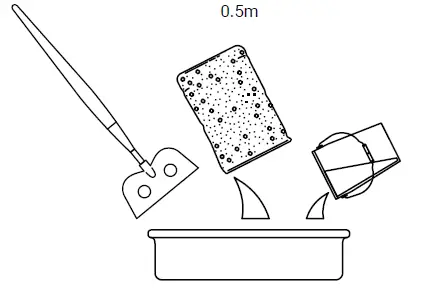
4. Mix the concrete per the instructions and pour into the hole. The mount’s drain hole needs to remain above the concrete’s surface.
5. Maintain the pole’s upright position until the concrete sets enough for the pole to stand on its own. Set overnight.

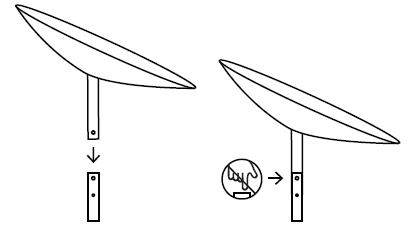
6. Carry the Starlink to install location.To prevent damage to the Starlink, do not set face-down on the ground.Place the Starlink into the mount.Snap buttons do not need to be depressed when inserting the Starlink.
7. Unravel your connected cable coil. Route the loose end to your home and connect to the power supply

NOTE: Cable is not burial rated.

Starlink Ground Pole Mountstarlink.com©2021. Space Exploration Technologies Corp.01990000-009
Downloads
Starlink Ground Pole Mount Installation Instructions –
Starlink Ground Pole Mount Installation Instructions –
[xyz-ips snippet=”download-snippet”]