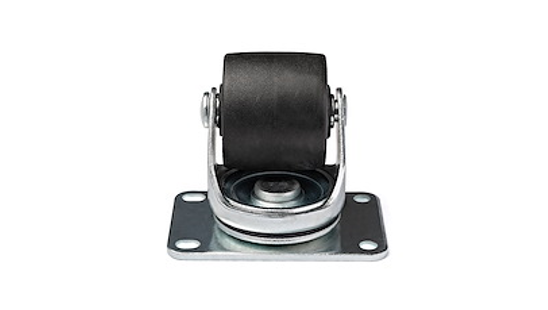
![]() Set of Four 45×75 mm M6 Casters
Set of Four 45×75 mm M6 Casters
Product Diagram (RKCASTER2)
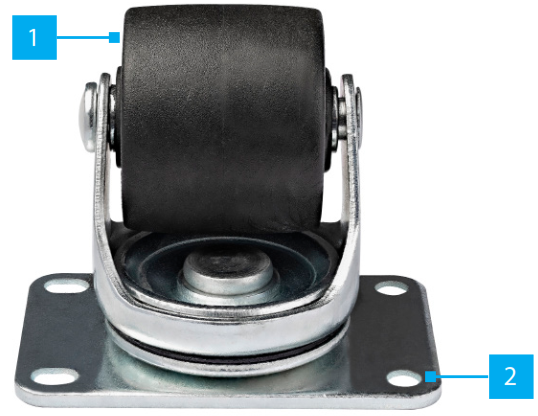
| Component | Function | |
| 01 | Casters x 4 | • Roll a Rack or Enclosure from location tolocation.• Maximum Weight Capacity stationary = 250 kgrolling = 75 kg. |
| 02 | Mounting Holes x 4 | • Securely mount the Casters to a Rack orEnclosure. |
Package Contents
• Casters x 4• M6 Screws x 16 + (*2)• Washers x 16 + (*2)• M6 Nuts x 16 + (*2) (* Spare Parts)
Requirements
For the latest requirements, please visit www.startech.com/RKCASTER2• 10 mm Wrench x 2• Rack or Enclosure w/ Caster Holes
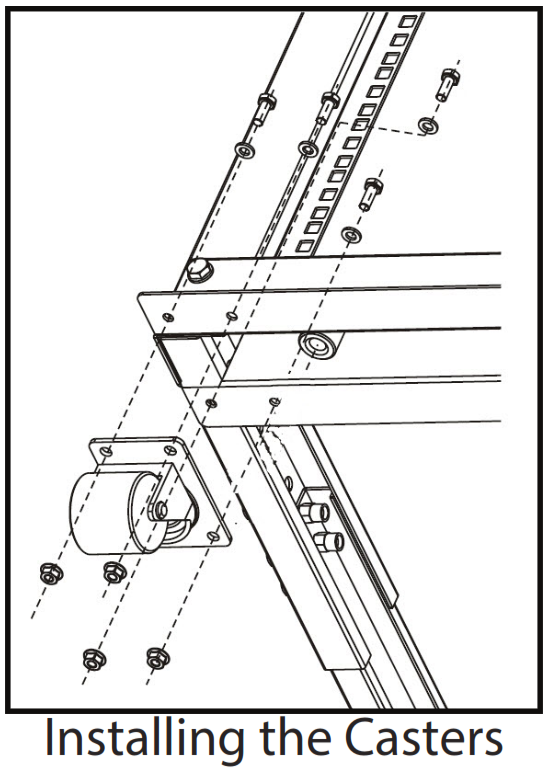
Installing the Casters
Racks or Enclosures with Caster Mounting HolesNote: The Rack or Enclosure must feature four sets of four Caster Mounting Holes.
- Ensure the Rack or Enclosure is positioned on it side.Note: Two people are required for repositioning the Rack or Enclosure.
- Align the Mounting Holes on the Casters with the Caster Mounting Holes on the bottom of the Rack or Enclosure.
- Insert the M6 Screws (x 4) through the Flat Washers (x 4).
- Insert the four M6 Screw and Flat Washer Combinations through the Caster Mounting Holes, the Rack or Enclosure, and into the M6 Nut.
- While securing the M6 Nut in place with a 10 mm Wrench, use a second 10 mm Wrench to tighten the M6 Screw.
- Repeat step 5 to secure the other three M6 Screws.Note: If the Rack or Enclosure has Leveling Feet, adjust the Leveling Feet after the Casters have been installed. Ensure the Rack or Enclosure is level. Please refer to the Rack or Enclosure’s user manual for instructions on how to adjust the Leveling Feet.
- Repeat steps 2-6 to install the three remaining Casters.
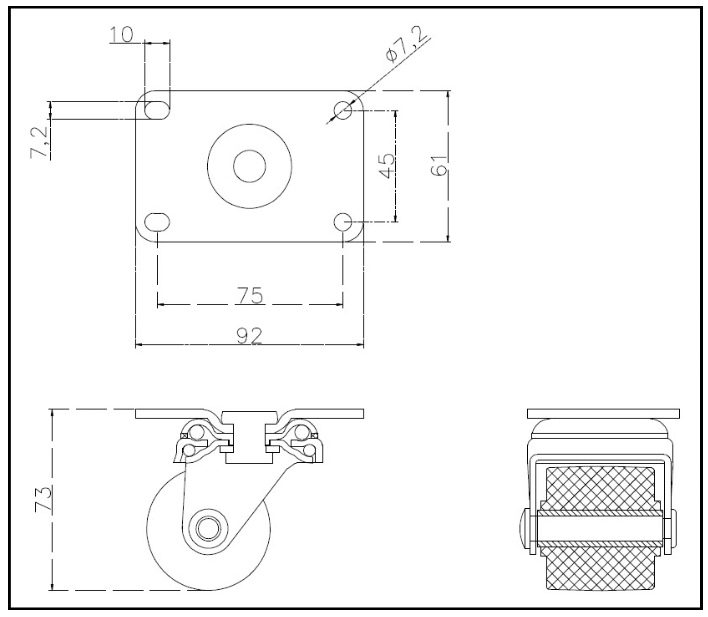
Product Dimensions
Warning Statements• Do not exceed the weight capacity of this product. Overloading this product might result in injury or property damage. This product can support the following weight: Stationary = 551 lb. (250 kg) Rolling = 165 lb. (75 kg).
Use of Trademarks, Registered Trademarks, and other Protected Names and SymbolsThis manual may make reference to trademarks, registered trademarks, and other protected names and/or symbols of third-party companies not related in any way to StarTech.com. Where they occur these references are for illustrative purposes only and do not represent an endorsement of a product or service by StarTech.com, or an endorsement of the product(s) to which this manual applies by the third-party company in question. StarTech.com hereby acknowledges that all trademarks, registered trademarks, service marks, and other protected names and/or symbols contained in this manual and related documents are the property of their respective holders.Warranty InformationThis product is backed by a three-year warranty.For further information on product warranty terms and conditions, please refer to www.startech.com/warranty.Limitation of LiabilityIn no event shall the liability of StarTech.com Ltd. and StarTech.com USA LLP (or their officers, directors, employees or agents) for any damages (whether direct or indirect, special, punitive, incidental, consequential, or otherwise), loss of profits, loss of business, or any pecuniary loss, arising out of or related to the use of the product exceed the actual price paid for the product.Some states do not allow the exclusion or limitation of incidental or consequential damages. If such laws apply, the limitations or exclusions contained in this statement may not apply to you.
| StarTech.com Ltd. | StarTech.com LLP | StarTech.com Ltd. | FR: startech.com/fr |
| 45 Artisans Cres | 4490 South Hamilton | Unit B, Pinnacle 15 | DE: startech.com/de |
| London, Ontario | Road | Gowerton Rd, | ES: startech.com/es |
| N5V 5E9 | Groveport, Ohio | Brackmills | NL: startech.com/nl |
| Canada | 43125 | Northampton | IT: startech.com/it |
| U.S.A. | NN4 7BW | JP: startech.com/jp | |
| United Kingdom |
References
[xyz-ips snippet=”download-snippet”]