
step2tub Instructions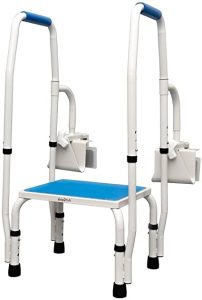

Assembly Instruction
- Place all parts on a flat working surface. Remove all plastic wrap, corner step protectors and foam wrapping before assembly.

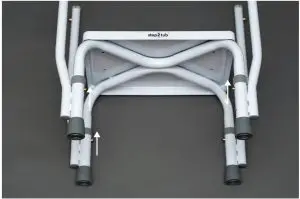
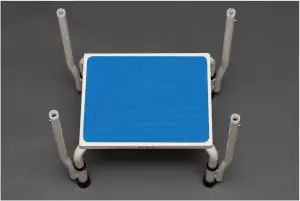
- Slide the legs into the base of the step stool making sure the brass tension tabs lock into place.
- Repeat the process with all the four legs and set the step stool upright.
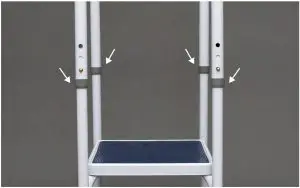
- Insert the two handles into the legs making sure the handles are the same height by pushing in the brass tab adjustments. Make sure the round-shaped bars are facing the back of the unit.Note: Make sure these are locked in place before using.
- To adjust height, press in each brass tab on each leg to adjust the height of the leg making sure all four legs are the same height.The legs are adjustable to three positions by 1″ increments.WARNING: Never use the step2tub unless the brass tabs are securely locked in place to avoid serious injury. Always check the brass tabs prior to using the step stool.
- Customize height of the step2tub in increments of 1″ and the handle by 1/2″
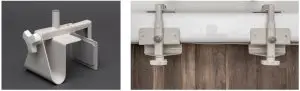
- Apply both bathtub grab bars to the bathtub using the step2tub to properly measure and determine the correct alignment. Once they are aligned, tighten both bars as firmly as possible to ensure maximum stability. Twist handle to tighten by hand.
- Lower the rounded bars on top of the bathtub grab bars and push the poles firmly into place. Please be sure to double check that the unit is firmly attached to the bathtub. Your safety is our priority!

 Note: Make sure these are locked in place before using.
 WARNING: Never use the step2tub unless the brass tabs are securely locked in place to avoid serious injury. Always check the brass tabs prior to using the step stool.
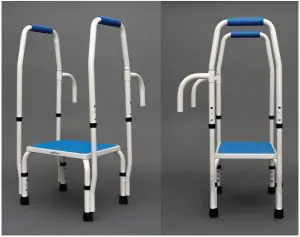

[xyz-ips snippet=”download-snippet”]