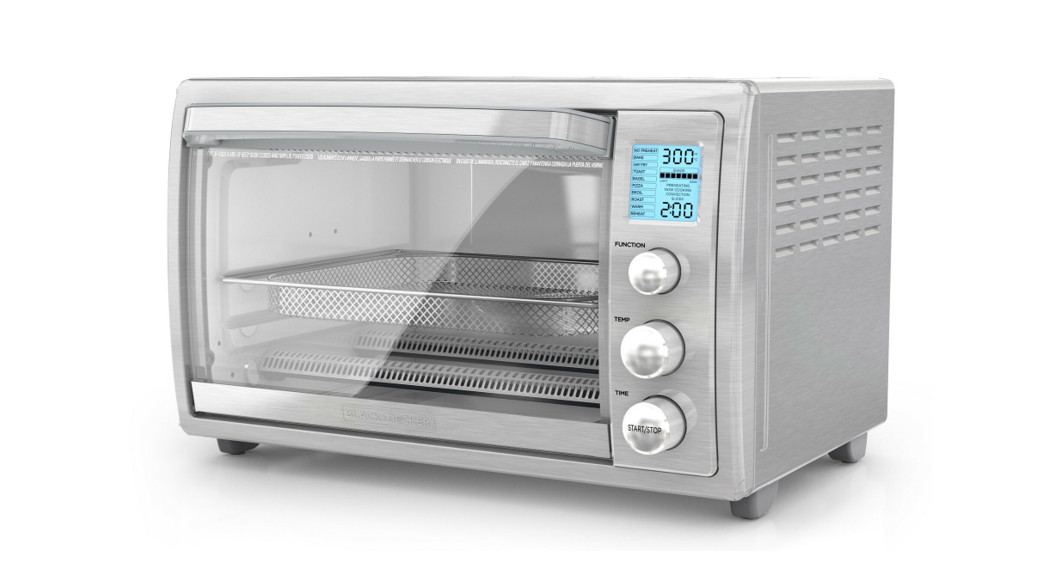
Stirling Appliances AFD23L-G Digital Air Fryer Oven
This quick start guide contains basic instructions to get you started. For the full picture, please refer to the supplied manual which has comprehensive usage instructions, important safety advice and recipes.
Setting up the air fryer oven
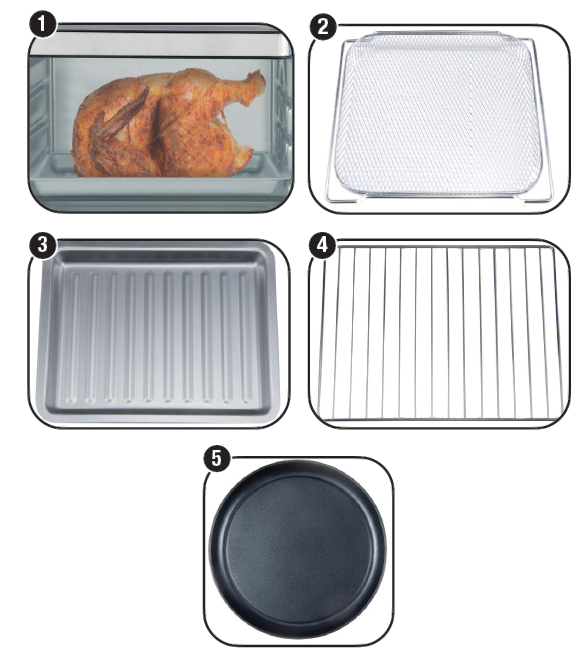
- Your new air fryer oven has a gross cavity capacity of 23L – enough space to fit a whole chicken!
- Air-frying basket: When air-frying, use this basket (with the food tray underneath to catch drips) to optimise your cooking results.NOTE: Maximum food weight for air-frying is 350g. For larger quantities, take the basket out of the oven and shake the food halfway through air-frying.
- Food tray: The food tray can be used alone when baking or roasting, with the air-frying basket when air-frying, or when grilling or toasting to catch drips or crumbs.

- Oven wire rack: The oven wire rack is designed to hold the pizza pan or a baking dish.NOTE: Maximum food weight for grilling on the wire rack is 400g. For larger quantities, turn over the food halfway through grilling.
- Pizza pan: Use the round pizza pan for baking pizza.
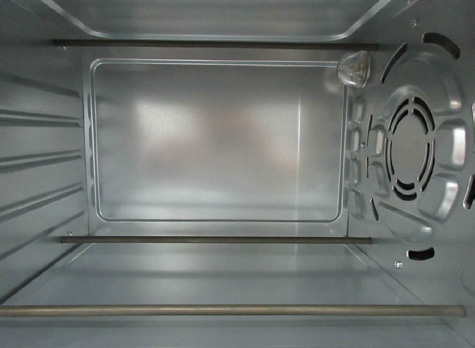
- The air fryer oven has three support guides at the sides of the cavity for the accessories.Place the basket in the middle support guide for air-frying and the food tray underneath to catch drips.Place the pizza pan or a baking dish on top of the wire rack and choose an appropriate support guide when baking or grilling.Do not place food directly on the bottom of the oven cavity.Control panel
- The LED screen displays the set cooking program, time remaining, etc.
- The setting knob can be turned to the right or left to set the desired cooking function, cooking time, cooking temperature or browning level (darkness), depending on the mode.
- You can also press the AIR FRY button to select the air-fry function.
- To set the cooking time, press TIME/Darkness button and then turn the setting knob to the desired cooking time, or browning level when toasting.
- To select a function, press the FUNCTION button and then turn the setting knob to the desired function: Toast, Air-Fry, Bake, Biscuit, Grill, Pizza, Dehydrate, Warm. The respective function icon will blink on the LED display when it is selected.
- To set the cooking temperature, press the TEMP/Darkness button and then turn the setting knob to set the desired cooking temperature, or browning level when toasting.
- Press the START/CANCEL button to start a function once it is selected. During preheating, press to cancel the preheating and start cooking. During cooking, press to cancel the operation and return to standby. Press and hold this button for about 3 seconds to cancel all settings.
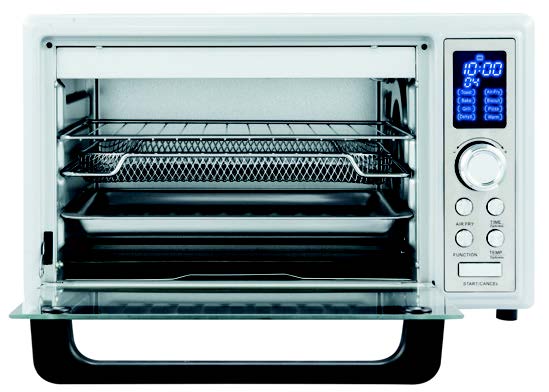
 Control panel
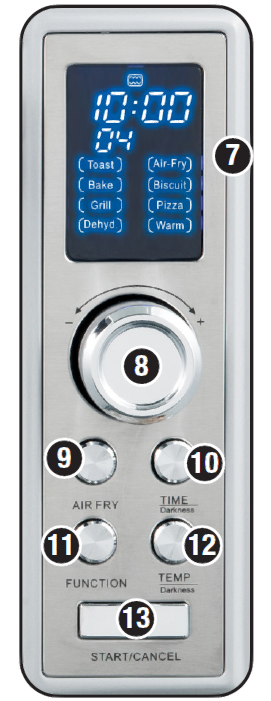
Function settings
| Function | Heating element | Default temp. (temp. range) (°C) | Default time (time range) (min) |
| Toast | Top + bottom | 230 (non-adjustable) | Level 4 (Levels 1–6) |
| Air-Fry | Top + bottom + side
+ convection |
205 (65–205) | 25 (1–90) |
| Bake | Top + bottom | 150 (65–210) | 50 (1–90) |
| Biscuit | Top + bottom | 160 (65–210) | 20 (1–90) |
| Grill | Top + bottom | 210 (non-adjustable) | 30 (1–90) |
| Pizza | Top + bottom | 205 (65–210) | 15 (1–90) |
| Dehydrate | Top | 65 (non-adjustable) | 12h (1min–12h) |
| Warm | Bottom | 80 (55–80) | 30 (1–90) |
Give us a call:
What? You mean this Quick Start Guide didn’t have ALL the answers? The manual has more comprehensive instructions, or speak to us. Call our After Sales Support on 1300 886 649.
 report this ad
Well done, you made it! Now sit back and relax … your new digital air fryer oven is automatically covered by a 3 year warranty.
[xyz-ips snippet=”download-snippet”]