
![]()
STORM CHASEREMERGENCY WIRELESS SPEAKER50W PEAK POWEREMERGENCY WIRELESS SPEAKER WITH NOAA/SAME/FM/AM/SW/CLOCK![]() Quick Start Guide
Quick Start Guide
ITEM NO.: IMT7012
WHAT’S INCLUDED
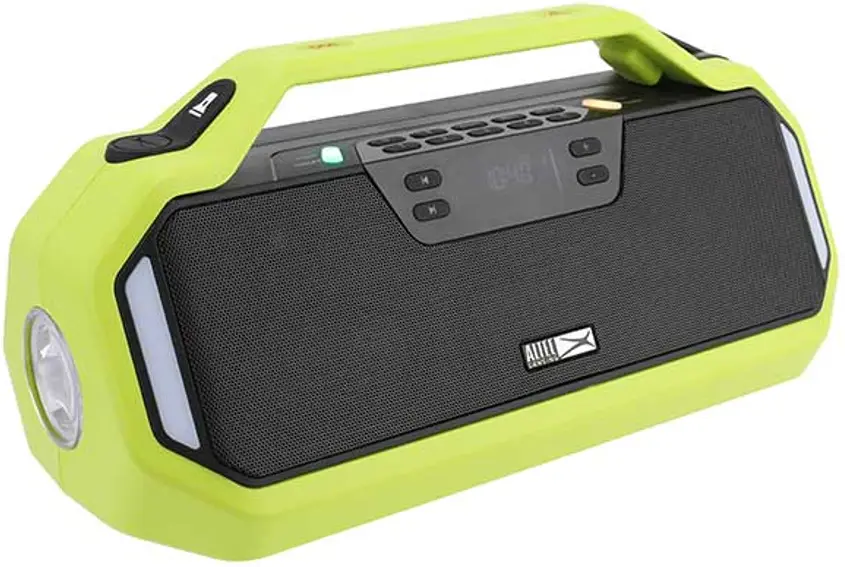
 IMT7012EMERGENCY WIRELESS SPEAKER
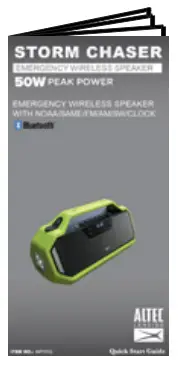 Quick Start Guide Quick Start Guide |
|
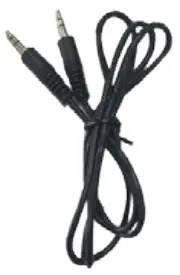 AUX. Audio cable AUX. Audio cable |
 USB-A to USB-C charging cable USB-A to USB-C charging cable |
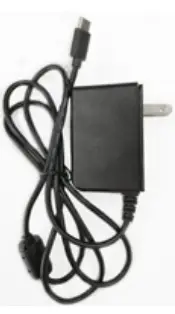 Adapter
GENERAL FUNCTIONS
|
|
USER INTERFACE

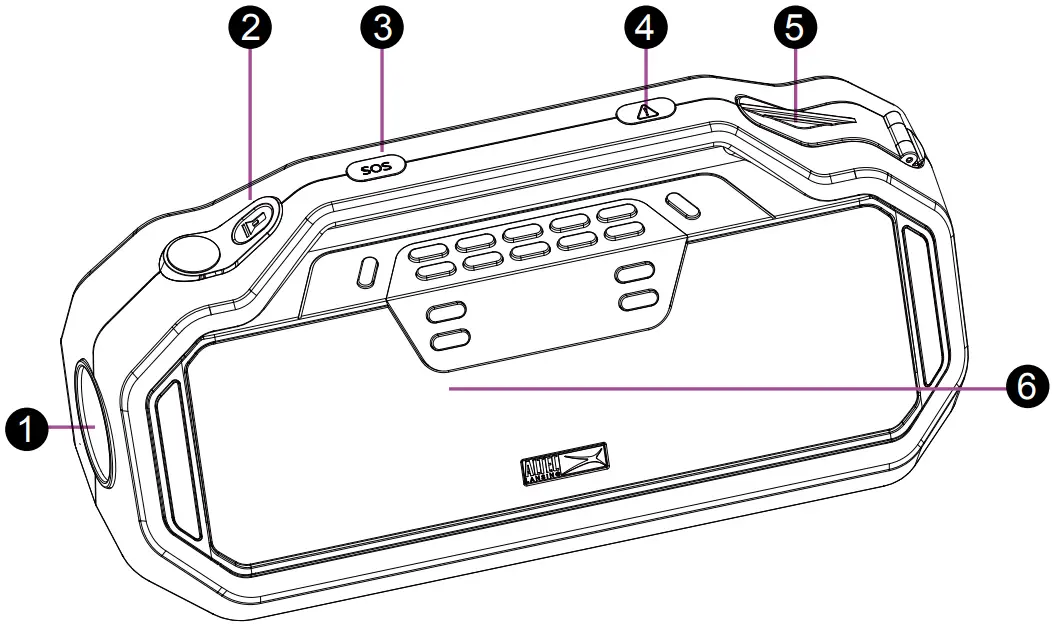
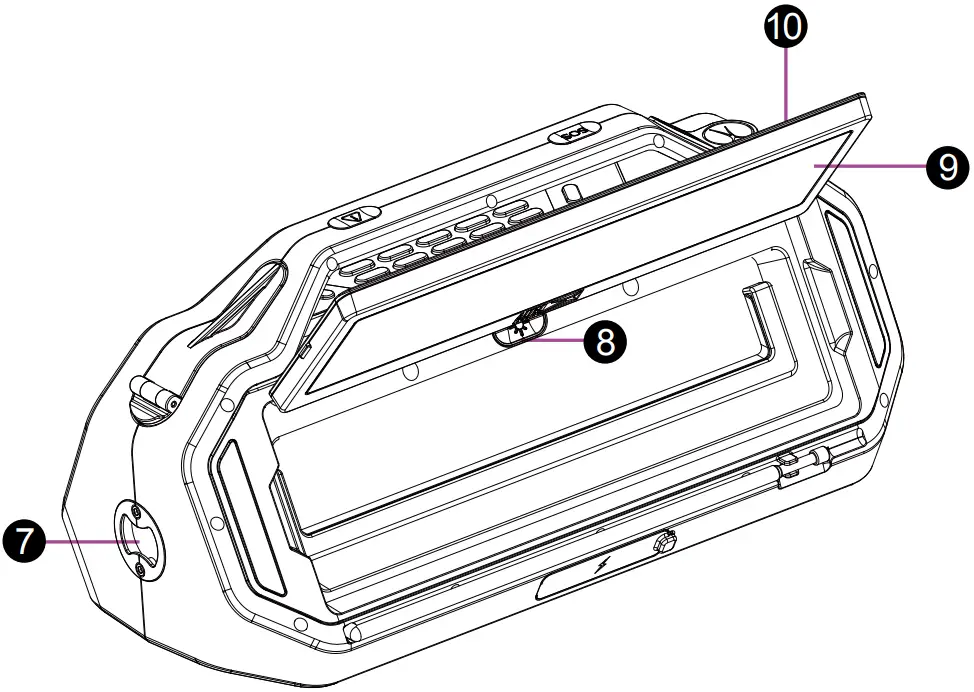
FEATURES/CONTROLS
 |
 |
|
7. Bottle Opener8. LED Flood Light Power button9. LED Flood Light10. Solar Panel: Charges interior battery from strong sunlight |
CONTROL PANEL

- Local Weather and Area Alert button/LEDPress: Review alertsPress and holds: Alert Function On/OffGreen: Alerts Enabled Yellow: `Advisory’ Level Alert ReceivedOrange: `Watch’ Level Alert ReceivedRed: `Warning’ Level Alert Received
- Power buttonPress: Standby/OnPress and hold: Full Off
- Bluetooth / AUX buttonPress Briefly: Bluetooth on (also acts as play/pause in BT mode) Press and hold: Drop connection and pair a new deviceWhen in BT mode and paired with a phone press briefly to answer/hang up a call, press and hold to reject an incoming call Press to select Aux when an Auxiliary lead is plugged into the rear
- Radio buttonPress to toggle through the radio bands (FM/ AM/ SW/ WX)
- Menu buttonPress to toggle through menu options
- Select buttonUsed to select items for adjustment in Menus
- Power button/LEDPress: Enable/Disable USB charging outputGreen: 80 – 100% chargeOrange: 10-80% chargeFlashing Red: <10% charge (charge needed)
- Radio Presets (1-5):In FM/AM or SW, modes press and hold one of the numbered buttons to save a radio station.
- Previous Track/Scan button:Press to go to the Previous track. Press and hold to scan to the Previous radio station.
- Next Track/Scan button:Press to go to the next track. Press and hold to scan to the next radio station.
- Volume up/Menu upPress to increase the volume. In Menu mode, press to toggle through Menu options.
- Volume down/Menu downPress to decrease the volume. In Menu mode, press to toggle through Menu options.
Press MENU to access top-level menus.Repeatedly press the MENU button or use the + and – buttons at the toplevel to change to the next available menu.Press SELECT to enter that menu. Press |< and >| buttons to move forward/back selecting items to be changed.Press + and – buttons to change the parameters of the selected item.
Menu Pages and OptionsSET TIME(Hours) (Minutes)SET ALARM 188:88 (Hours)88:88 (Minutes) ON/OFF, RADIO/BUZZER, VOLUMESET ALARM 288:88 (Hours)88:88 (Minutes) ON/OFF, RADIO/BUZZER, VOLUME
SET WEATHER CHANNEL
| Ch.# | Frequency |
| 1 | 162.400 MHz |
| 2 | 162.425 MHz |
| 3 | 162.450 MHz |
| 4 | 162.475 MHz |
| 5 | 162.500 MHz |
| 6 | 162.525 MHz |
| 7 | 162.550 MHz |
SET LOCATIONALL / MULTI / SINGLEALERT DISPLAYFULL BROADCAST / SIREN NO CAST / CAST NO SIREN / STROBE / DISPLAY ONLYSELECT EVENTSDEFAULT/ MAJOR ONLY/ ALL/ USERSET LANGUAGEENGLISH / ESPANOL / FRANCAISEBACKLIGHTON BRIGHT / ON DIM / OFF / ALERT ONLYALERT TEST/ VOLTREBLE/BASSTREBLE / BASS (±5dB)RESETSURE Y/N
Setting the Time
- Press the Menu button until SET TIME appears on the display. Pressing Menu will move to the next menu, pressing + or will also move back and forward to the next menu.
- Press the Select button to edit the clock’s time. Press the + and – buttons to change the hour. AM and PM are set by changing the time. (the hour number will be flashing when being set)
- Press the Select or >| button to select and edit the minutes. Use the + and – buttons to change the time. (the minute’s number will be flashing when being set)
- Press Select or >| to save the hour and move to minutes.
- Press Select or >| to save time and exit the menu.
Setting the Alarms (Alarm 1 and 2)
- Press the Menu button until SET ALARM 1 (or 2 ) appears on the display.
- Press the Select or >| button to edit the alarm time. Use the + and – buttons to change the hour. AM and PM are set by changing the time. (the hour number will be flashing when being set)
- Press the Select or >| button to select and edit the minutes. Use the + and buttons to change the time. (the minute’s number will be flashing when being set)
- Press the Select or >| button to select the ON/OFF setting. Press the + or button to turn the alarm ON/OFF (a clock will appear with 1 (or 2) next to it when ON).
- Press the >| button to change to the next menu. Press the + or – button to choose between Buzzer (Alarm sound) or Radio. The `Rnsymbol lights up if the radio is selected for wakeup.
- Press the >| button to change the alarm volume. Press the + or – button to increase or decrease the volume of the alarm.
- Press Select or >| to save the alarm and exit the menu.
Setting up weather alerts
Setting the Weather Channel (the frequency used by the local transmitter for your area)
For the US there are two ways to find the frequency used by the local transmitter for your area.Option 1Find your local station via the listing at https://www.weather.gov/nwr/station_listing Click on your state, find your area and note the station’s call-sign and its frequency.Option 2Search at https://www.weather.gov/nwr/coverage/station_search.php Enter the name of your area or state and click on the icon displayed on the map for information and details about the transmitter.For Canada find your local station via the interactive map at: https://www.canada.ca/en/environment-climate-change/services/weatheradio/findyour-network.html
- Press the Menu button until the SET WEATHER CHANNEL appears on the display.
- Press SELECT or >| to enter the menu, then press the + and – buttons to find the desired weather channel (frequency).
- Press SELECT or >| to save the channel and exit the menus.
NOTE: When you exit this menu option, the Radio Alert function will automatically turn On. Press the Alert ON/OFF button to turn the Radio Alert function on/off.The frequency set above will also be the frequency the radio tunes to if you choose to listen to WX (Weather) RADIO via the RADIO button.
Setting your Location (the area/s you are interested in for SAME alerts)
The Storm Chaser can receive and decode Specific Area Message Encoding (SAME) Alerts which are displayed as text on the display.To do this you need to tell the unit the Location/s you want alerts for. If you select All from the USA or Canada you will receive all alerts generated in that country. If you want to set either a list of specific areas (Multi) or just your single local area (Single) then you need to enter the special SAME code for your areas.For the USA find the SAME codes for your area via the listing at https://www.weather.gov/nwr/counties note down the SAME numbers you are interested in.For Canada find the SAME codes via the interactive map at https://www.canada.ca/en/environment-climate-change/services/weatheradio/specific-area-message-encoding/forecast-regions.html
- Press the Menu button until Set Location appears on the display.
- Press SELECT or >| to enter the menu, then press the + or buttons to choose between ALL (all alerts from either USA or CANADA), MULTI (multiple i.e. set your own list of multiple states/counties in USA or CANADA), and SINGLE (set to one state/ county in USA or CANADA)
• If MULTI is selected then you will be asked to input a list of your preferred locations (up to 10 locations).Press the + and – buttons to choose between the USA and Canada, then press SELECT or >| buttons to move to the next step.Press the + and – buttons to choose the position in the list (will initially be `01′) and press SELECT or >|.Press the + or buttons to set the first digit.Press >| to move to the next digit press |< to move back one digit.Pressing >| after the last digit moves to the next list item. Press the + or buttons to choose the next position in the list you want to edit.Once you have entered all locations press Menu to save and exit the menu.• If SINGLE is selected then you will be asked to input one specific location in the same way as above.
Choosing Alert Display (How an Alert is displayed or presented)
- Press the Menu button until ALERT DISPLAY appears on the display.
- Press the Select or >| button to enter the menu.
- Press the + and buttons to toggle through the following 4 options, then press SELECT.
- Press Select or >| to save the desired option and exit the menu.
FULL BROADCAST The speaker will make an alert sound and flash the Hazard and Alert Button LEDs for eight seconds. This is followed by the weather/alert broadcast audio (if transmitted) and the display will show the alert text.
SIREN NO CAST Siren but no broadcast audio – The speaker will make an alert sound and flash the Hazard and Alert Button LEDs for eight seconds. The display screen will show the alert text. There will be no weather/alert broadcast audio.
CAST NO SIREN Broadcast audio but no siren – The speaker will not make an alert sound but will flash the Hazard and Alert Button LEDs for eight seconds. This is followed by the weather/alert broadcast audio (if transmitted) and the display will show the alert text.
STROBE Lights only, no broadcast audio or siren – The speaker will not make an alert sound but will flash the Hazard and Alert Button LEDs for eight seconds. There will be no weather/alert broadcast audio but the display will show the alert text.
DISPLAY ONLY No Hazard lights or audio – The speaker will show the alert text only, the Alert button will still flash to indicate the level of alert and that an alert has been received.
Note:The Alert function must be enabled for Alerts to be received. (Press and hold the Alert button to enable/disable alerts)When there is an alert, the Alert button will illuminate according to the level or Alert:Green - Alert reception is on, nothing has been received, or all alerts timed out FlashingRed – WarningFlashing Orange – WatchFlashing Yellow – AdvisoryNote: The Alert button always indicates the last active alert received. To review alerts after they have been received press the Alert button briefly. The last active alert will be shown on the display, its level is shown by the color of the button. Use the + and – or |< and >| buttons to step through up to 10 active alerts if more than one is currently active. NOAA alerts are transmitted with a timeout from 15 minutes to 6 hours. When all active Alerts have timed out the button will return to green.Setting Events (The type of event you want to be alerted about)Alerts are categorized as Advisory, Watch, and Warning and then by type of events such as Flood Watch or Tornado Warning, etc.
For the full list of events, the Storm Chaser can receive in the modes set below to see page 11.
- Press the Menu button until ALERT EVENTS appear on the display.
- Press the Select or >| button to enter the menu.
- Press the + and buttons to toggle through the following 4 options, then press SELECT.
- Press Select or >| to save the desired option and exit the menu.
ALL – Enables all alerts including test alertsDEFAULT – Enables all alerts except some advisory level test alertsMAJOR – Enables a fixed list of all important alerts (see page 11).USER – Allows the user to set their preference. Various major alerts cannot be disabled as these are crucial to the operation of the NOAA/SAME service. (see page 11).
Setting the Language
- Press the Menu button until SET LANGUAGE appears on the display.
- Press the Select or >| button to enter the menu.
- Press the + and buttons to toggle through the following 3 options; English, Espanol, or Francaise then press SELECT.
- Press Select or >| to save the desired option and exit the menu.
Setting Backlight Brightness
- Press the Menu button until BACKLIGHT appears on the display.
- Press the Select or >| button to enter the menu
- Press the + and buttons to select between On Bright, On Dim, Alert Only (only comes on when displaying alert text), and Off.
- Press Select or >| to save the desired option and exit the menu
Testing/Setting the Alert Siren Volume
- Press the Menu button repeatedly until ALERT TEST/VOL appears on the display.
- Press the Select or >| button to enter the menu, the Alert will sound.
- Press the + and – buttons to increase or decrease the volume of the alert sound.
- Press Select or >| to save the volume level (which will be used for the next alert) and exit the menu.
Setting TREBLE/ BASS
- Press the Menu button until TREBLE/BASS appears on the display.
- Press the Select or >| button to enter the menu.
- Press the + and buttons to adjust the treble.
- Press the >| button to move to the next setting.
- Press the + and buttons to adjust the bass.
- Press SELECT or >| to save the adjustment and exit the menus.
Reset SettingsNote this resets all settings including radio presets, NOAA/SAME frequency, location, etc.
- Press the Menu button until RESET appears on the display.
- Press SELECT or >| to enter the menu.
- Press Select again when the display is showing SURE Y/N to reset all settings units will go back to all factory defaults
EVENT LISTINGS
DEFAULT/MAJOR ONLY: – means the event is disabled, * means event is enabled.USER: can select ON/OFF (ON: Enabled, OFF: Disabled), events that cannot be disabled (according to NOAA rules) are shown ON only.Not shown is ALL mode – all events are enabled NOTE: The Required Weekly/Monthly/Periodic/Silent Tests and Admin/Network/Demo Messages will not cause a siren to sound but can be displayed in ALL mode or in USER mode is enabled
| ENGLISH EVENT DESCRIPTION | LEVEL | DEFAULT | MAJOR ONLY | USER |
| ADMINISTRATIVE MESSAGE | Advisory | ON/OFF | ||
| AVALANCHE WATCH | Watch | ON/OFF | ||
| AVALANCHE WARNING | Warning | ON/OFF | ||
| BIOLOGICAL HAZARD WARNING | Warning | ON | ||
| BOIL WATER WARNING | Warning | ON/OFF | ||
| BLIZZARD WARNING | Warning | ON/OFF | ||
| CHILD ABDUCTION EMERGENCY | Advisory | ON/OFF | ||
| CIVIL DANGER WARNING | Warning | ON | ||
| CIVIL EMERGENCY MESSAGE | Warning | ON | ||
| COASTAL FLOOD WATCH | Watch | ON/OFF | ||
| COASTAL FLOOD WARNING | Warning | ON/OFF | ||
| CHEMICAL HAZARD WARNING | Warning | ‘ | ON | |
| CONTAMINATED WATER WARNING | Warning | ‘ | ON | |
| DAM WATCH | Watch | ‘ | – | ON/OFF |
| DAM BREAK WARNING | Warning | ON | ||
| CONTAGIOUS DISEASE WARNING | Warning | ON | ||
| PRACTICE/DEMO | Advisory | ON/OFF | ||
| DUST STORM WARNING | Warning | ON/OFF | ||
| EMERGENCY ACTION NOTIFICATION | Warning | ON | ||
| EMERGENCY ACTION TERMINATION | Advisory | ‘ | ‘ | ON |
| EARTHQUAKE WARNING | Warning | ‘ | ON | |
| IMMEDIATE EVACUATION | Warning | ON | ||
| EVACUATION WATCH | Watch | – | ON/OFF | |
| FOOD CONTAMINATION WARNING | Warning | ON | ||
| FLASH FLOOD WATCH | Watch | ON/OFF | ||
| FLASH FLOOD STATEMENT | Advisory | ON/OFF | ||
| FLASH FLOOD WARNING | Warning | ON/OFF | ||
| FLOOD WATCH | Watch | ON/OFF | ||
| FLOOD STATEMENT | Advisory | – | ON/OFF | |
| FLOOD WARNING | Warning | – | ON/OFF | |
| FIRE WARNING | Warning | ON/OFF | ||
| FLASH FREEZE WARNING | Warning | ON/OFF | ||
| FREEZE WARNING | Warning | ‘ | ON/OFF | |
| HURRICANE STATEMENT | Advisory | ‘ | ON/OFF | |
| HAZARDOUS MATERIAL WARNING | Warning | ‘ | ‘ | ON |
| HURRICANE WATCH | Watch | – | ON/OFF | |
| HURRICANE WARNING | Warning | ON | ||
| HIGH WIND WATCH | Watch | ON/OFF | ||
| HIGH WIND WARNING | Warning | ON/OFF | ||
| ICEBERG WARNING | Warning | ‘ | ON/OFF | |
| INDUSTRIAL FIRE WARNING | Warning | ‘ | ‘ | ON |
| LOCAL AREA EMERGENCY | Advisory | ‘ | ‘ | ON |
| LAW ENFORCEMENT WARNING | Warning | ON | ||
| LANDSLIDE WARNING | Warning | ON | ||
| NATIONAL AUDIBLE TEST | Advisory | ON/OFF | ||
| NATIONAL INFORMATION CENTER | Advisory | ON/OFF | ||
| NETWORK NOTIFICATION MESSAGE | Advisory | ON/OFF | ||
| NATIONAL PERIODIC TEST | Advisory | ON/OFF | ||
| NATIONAL SILENT TEST | Advisory | ON/OFF | ||
| NUCLEAR POWER PLANT WARNING | Warning | ON | ||
| POWER OUTAGE ADVISORY | Advisory | – | ON/OFF | |
| RADIOLOGICAL HAZARD WARNING | Warning | ON | ||
| REQUIRED MONTHLY TEST | Advisory | ON/OFF | ||
| REQUIRED WEEKLY TEST | Advisory | – | ON/OFF |
EVENT LISTINGS
DEFAULT/MAJOR ONLY: – means the event is disabled, * means event is enabled.USER: can select ON/OFF (ON: Enabled, OFF: Disabled), events that cannot be disabled (according to NOAA rules) are shown ON only.Not shown is ALL mode – all events are enabled NOTE: The Required Weekly/Monthly/Periodic/Silent Tests and Admin/Network/Demo Messages will not cause a siren to sound but can be displayed in ALL mode or in USER mode is enabled
| ENGLISH EVENT DESCRIPTION | LEVEL | DEFAULT | MAJOR ONLY | USER |
| SPECIAL MARINE WARNING | Warning | ON/OFF | ||
| SPECIAL WEATHER STATEMENT | Advisory | ON/OFF | ||
| SHELTER-IN-PLACE WARNING | Warning | ON | ||
| SEVERE THUNDERSTORM WATCH | Watch | ON/OFF | ||
| SEVERE THUNDERSTORM WARNING | Warning | ON/OFF | ||
| SEVERE WEATHER STATEMENT | Advisory | ON/OFF | ||
| TORNADO WATCH | Watch | ON/OFF | ||
| 911 TELEPHONE OUTAGE EMERGENCY | Advisory | ON/OFF | ||
| TORNADO WARNING | Warning | ON | ||
| TROPICAL STORM WATCH | Watch | ON/OFF | ||
| TROPICAL STORM WARNING | Warning | ON | ||
| TSUNAMI WATCH | Watch | ON | ||
| TSUNAMI WARNING | Warning | ON | ||
| TRANSMITTER BACKUP ON | Advisory | ON/OFF | ||
| TRANSMITTER CARRIER OFF | Advisory | ON/OFF | ||
| TRANSMITTER CARRIER ON | Advisory | ON/OFF | ||
| TRANSMITTER PRIMARY ON | Advisory | ON/OFF | ||
| VOLCANO WARNING | Warning | ON | ||
| WILDFIRE WATCH | Watch | ON/OFF | ||
| WILDFIRE WARNING | Warning | ON | ||
| WINTER STORM WATCH | Watch | ON/OFF | ||
| WINTER STORM WARNING | Warning | ON | ||
| UNRECOGNIZED WATCH | Watch | ON/OFF | ||
| UNRECOGNIZED EMERGENCY | Advisory | ON/OFF | ||
| UNRECOGNIZED STATEMENT | Advisory | ON/OFF | ||
| UNRECOGNIZED WARNING | Warning | ON | ||
| UNRECOGNIZED MESSAGE | Warning | ON |
INPUT/OUTPUT PORTS
- Adapter portCharge via USB C lead (supplied) from USB adaptor (supplied) or other USB port
- 3.5mm AUX portFor line-level or headphone output from audio sources, phones, etc.
- USB portFor charging mobile devices Note CHARGE/POWER button on top panel turns on/off USB output
Bluetooth Connection
Go to the Bluetooth settings menu on your phone. Make sure Bluetooth is on before connecting to the available device “AL Storm Chaser”.AL Storm Chaser
 |
 |
| *Press to select BT mode, speaker will go to pairing mode and auto-reconnect if already paired.*Press and hold to drop an already paired BT connection if you want to change the device |
SPECIFICATIONS
POWER Audio: 15W (RMS), 50W (Peak)Playtime: 10Hrs @ 50% volume levelCharge Time: 4HrsDriver Units: 3″ x1 +ABR x2 + 1″ x1Separation: ≥40dBS/N: ≤5% (1K,1W)DC input: 5V 2ADimensions: W331xD162xH158(mm)Length of Audio cable(stereo-to-stereo):90cmLength of USB-A to Type-C charging cable: 90 cmLength of adaptor:110cm
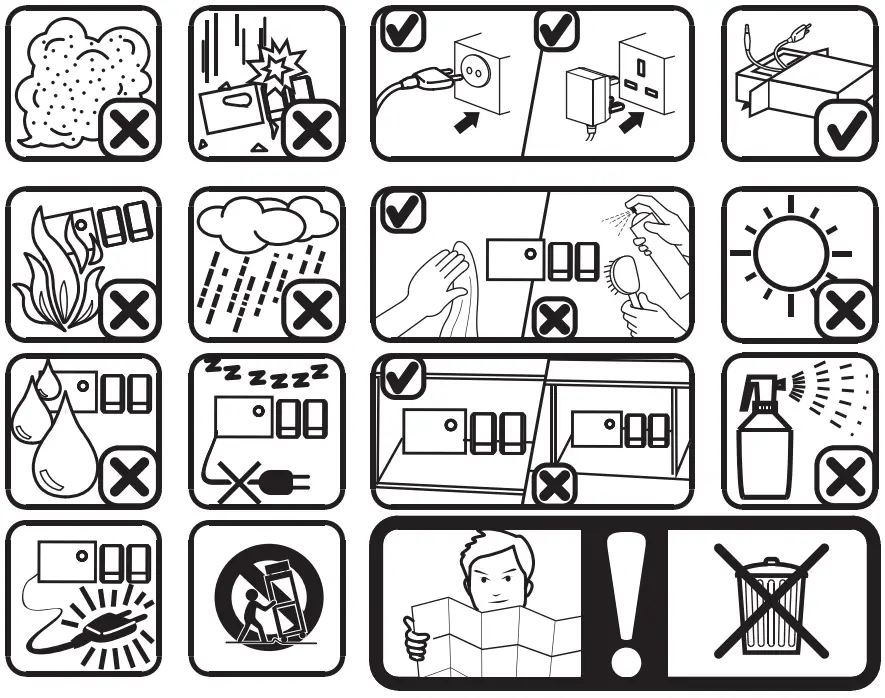
SAFETY PRECAUTIONS
![]()
Having Troublr?We’re here to help!Call us 24/7 at 1-855-292-4087E-mail us at [email protected]or visit us at alteclansing.com
FCC STATEMENT
Changes or modifications not expressly approved by the party responsible for compliance could void the user’s authority to operate the equipment.This device complies with Part 15 of the FCC Rules. Operation is subject to the following two conditions: (1) this device may not cause harmful interference, and (2) this device must accept any interference received, including interference that may cause undesired operation.This equipment has been tested and found to comply with the limits for a Class B digital device, pursuant to Part 15 of the FCC Rules. These limits are designed to provide reasonable protection against harmful interference in a residential installation. This equipment generates, uses, and can radiate radio frequency energy and, if not installed and used in accordance with the instructions, may cause harmful interference to radio communications. However, there is no guarantee that interference will not occur in a particular installation. If this equipment does cause harmful interference to radio or television reception, which can be determined by turning the equipment off and on, the user is encouraged to try to correct the interference by one or more of the following measures:— Reorient or relocate the receiving antenna.— Increase the separation between the equipment and receiver.— Connect the equipment into an outlet on a circuit different from that to which the receiver is connected.— Consult the dealer or an experienced radio/TV technician for help.
Supplier’s Declaration of Conformity47 CFR § 2.1077 Compliance InformationUnique Identifier Trade Name: Altec LansingModel No.: IMT7012 Responsible Party U.S. Contact InformationUS Company Name: SAKAR INTERNATIONAL INC.Address: Edison, NJ 08817Telephone number or internet contact information: 855-292-4087
 report this ad
RF Exposure Compliance
This equipment complies with FCC radiation exposure limits set forth for an uncontrolled environment. This equipment should be installed and operated with a minimum distance of 20cm between the radiator and your body.
WARRANTY CARD
This warranty covers the original consumer purchaser only and is not transferable.This warranty covers products that fail to function properly UNDER NORMAL USAGE, due to defects in material or workmanship. Your product will be repaired or replaced at no charge for parts or labor for a period of one year.What Is Not Covered by Warranty: Damages or malfunctions not resulting from defects in material or workmanship and damages or malfunctions from other than normal use, including but limited to, repair by unauthorized parties, tampering, modification, or accident.To Obtain Warranty Service and Troubleshooting Information: Call 1-855-292-4087 or Visit our website at www.alteclansing.com.To receive a Warranty service along with the name and address of an authorized product service center, the original consumer purchaser must contact us for problem determination and service procedures. Proof of purchase in the form of a bill of sale or receipted invoice, evidencing that the Product is within the applicable warranty period(s), MUST be presented in order to obtain the requested service. It is your responsibility to properly package and send any defective products along with a dated copy of proof of purchase, a written explanation of the problem, and a valid return address to the authorized service center at your expense. Do not include any other items or accessories with the defective product. Any products received by the authorized service center that is not covered by warranty will be returned unrepaired.NO WARRANTIES, WHETHER EXPRESS OR IMPLIED, INCLUDING, BUT NOT LIMITED TO, ANY IMPLIED WARRANTIES OF MERCHANTABILITY OR FITNESS FOR A PARTICULAR PURPOSE, OTHER THAN THOSE EXPRESSLY DESCRIBED ABOVE SHALL APPLY. THE DISTRIBUTOR FURTHER DISCLAIMS ALL WARRANTIES AFTER THE EXPRESS WARRANTY PERIOD STATED ABOVE. NO OTHER EXPRESS WARRANTY OR GUARANTY GIVEN BY ANY PERSON, FIRM, OR ENTITY WITH RESPECT TO THE PRODUCT SHALL BE BINDING ON THE DISTRIBUTOR. REPAIR, REPLACEMENT, OR REFUND OF THE ORIGINAL PURCHASE PRICE – AT THE DISTRIBUTOR’S SOLE DISCRETION -ARE THE EXCLUSIVE REMEDIES OF THE CONSUMER. IN NO EVENT WILL THE DISTRIBUTOR, ITS MANUFACTURERS, OR SAKAR INT. BE LIABLE FOR ANY INCIDENTAL, DIRECT, INDIRECT, SPECIAL, PUNITIVE, OR CONSEQUENTIAL DAMAGES (SUCH AS BUT NOT LIMITED TO, DAMAGES FOR LOSS OF PROFITS, BUSINESS, SAVINGS, DATA, OR RECORDS) CAUSED BY THE USE, MISUSE, OR INABILITY TO USE THE PRODUCT. EXCEPT AS STATED HEREIN, NO OTHER WARRANTIES SHALL APPLY. NOTWITHSTANDING THE FOREGOING, THE CONSUMER’S RECOVERY AGAINST THE DISTRIBUTOR SHALL NOT EXCEED THE PURCHASE PRICE OF THE PRODUCT SOLD BY THE DISTRIBUTOR. THIS WARRANTY SHALL NOT EXTEND TO ANYONE OTHER THAN THE ORIGINAL CONSUMER WHO PURCHASED THE PRODUCT AND IS NOT TRANSFERABLE.Some countries, states or provinces do not allow the exclusion or limitation of incidental or consequential damages or allow limitations on warranties, so limitations or exclusions may not apply to you. This warranty gives you specific legal rights, and you may have other rights that vary from state to state or province to province. Contact your authorized retailer to determine if another warranty applies. This product is manufactured, distributed, and sold by SAKAR International, Inc. All other trademarks are the property of the respective owner, who has not sponsored, endorsed, or approved this product.
IMPORTANT SAFETY INSTRUCTIONS
- Read these instructions All the safety and operating instructions should be read before this product is operated.
- Keep these instructions The safety and operating instructions should be retained for future reference.
- Heed all warnings All warnings on the appliance and in the operating instructions should be adhered to.
- Follow all instructions All operating and use instructions should be followed.
- Do not use this apparatus near water The appliance should not be used near water or moisture for example, in a wet basement or near a swimming pool, and the like.
- Clean only with a dry cloth.
- Do not block any ventilation openings. Install in accordance with the manufacture’s instructions.
- Do not install near any heat sources such as radiators, heat registers, stoves, or other apparatus (including amplifiers) that produce heat.
- Do not defeat the safety purpose of the polarized or grounding plug. A polarized plug has two blades with one wider than the other. A grounding plug has two blades and a third grounding prong. The wide blade or the third prong is provided for your safety. If the provided plug does not fit into your outlet, consult an electrician for the replacement of the obsolete outlet.
- Protect the power cord from being walked on or pinched particularly at the plugs, convenience receptacles, and at the point where they exit from the apparatus.
- Only use attachments/accessories specified by the manufacturer.
- Use only with the cart, stand, tripod, bracket, or table specified by the manufacturer, or sold with the apparatus. When a cart or rack is used, use caution when moving the cart/apparatus combination to avoid injury from tip-over.

- Unplug the apparatus during lightning storms or when unused for long periods of time.
- Refer all servicing to qualified personnel. Servicing is required when the apparatus has been damaged in any way, such as power supply cord or plug is damaged, liquid has been spilled or objects have fallen into the apparatus has been exposed to rain or moisture, does not operate normally, or has been dropped.
- CAUTION: These servicing instructions are for use by qualified service personnel only. To reduce the risk of electric shock, do not perform any servicing other than that contained in the operating instructions unless you are qualified to do so.
- warning to reduce the risk of fire or electric shock, do not expose this apparatus to rain or moisture. The apparatus shall not be exposed to dripping or splashing and that objects filled with liquids, such as vases, shall not be placed on the apparatus.
- warning the terminals marked with the symbol of “ ” may be of sufficient magnitude to constitute a risk of electric shock. The external wiring connected to the terminals requires installation by an instructed person or the use of ready-made leads or cords.
- This equipment is a Class II or double insulated electrical appliance. It has been designed in such a way that it does not require a safe connection to electrical earth.
- – This lightning flash with an arrowhead symbol within an equilateral triangle is intended to alert the user to the presence of non-insulated “dangerous voltage” within the product’s enclosure that may be of sufficient magnitude to constitute a risk of electric shock.– Warning: To reduce the risk of electric shock, do not remove cover (or back) as there are no user-serviceable parts inside. Refer servicing to qualified personnel.– The exclamation point within an equilateral triangle is intended to alert the user to the presence of important operating and maintenance instructions in the literature accompanying the appliance.
Keep manual and all relevant information for future reference.JUST LISTEN.The Bluetooth® word mark and logos are registered trademarks owned by the Bluetooth SIG, Inc. and any use of such marks by Sakar International is under license. Other trademarks and trade names are those of their respective owners.
References
[xyz-ips snippet=”download-snippet”]