Congratulations on your Sunforce Products purchase. This product is designed to the highest technical specifications and standards. It will supply years of maintenance-free use. Please read these instructions thoroughly prior to installation, then store in a safe place for future reference. If at any time you are unclear about this product or require further assistance please do not hesitate to contact our trained professionals operating the customer support line at 1-888-478-6435. Monday to Friday, 8:30 am to 5:00 pm (Eastern Standard Time), Montreal Canada or email us [email protected].
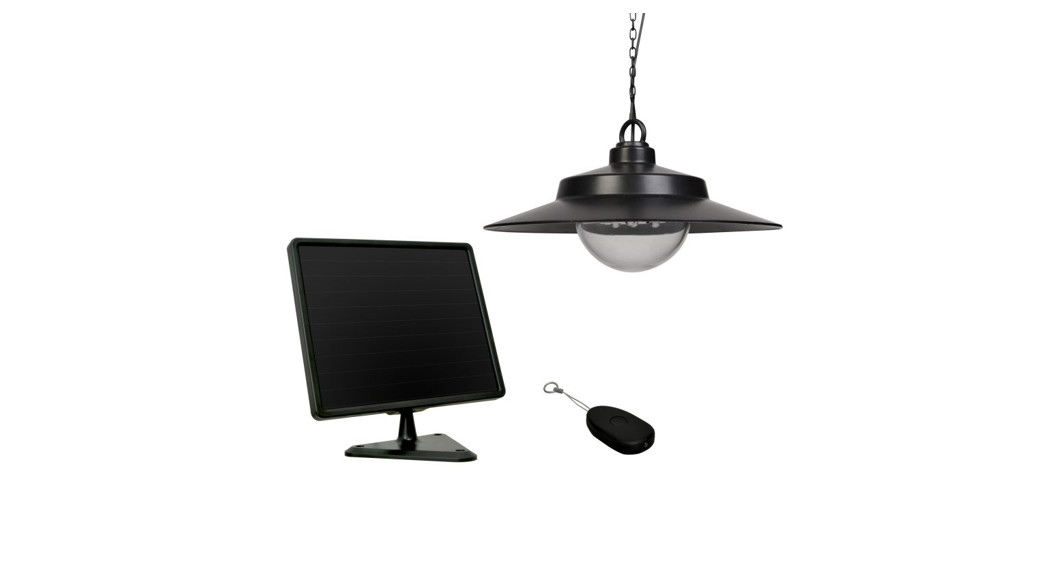
Your Solar Hanging Light with Remote is the ideal solution for patios, gazebos, and porches. Multi-functional design allows for ‘dusk till dawn’ operation, two-stage lighting intensity and full remote control. Charge the included internal battery by day with the solar panel and use the light to illuminate any space without complicated wiring.
Parts List:
- LED Solar Hanging Light with integrated chain link cable
- Remote Control
- Solar Panel with plug
- 3 AA 1500 mAh 1.2V batteries (pre-installed)
The Solar Panel
A solar panel charges a battery pack using the power of the sun. This means you do not require any connections to your household power supply. Sunforce utilizes state-of-the-art solar technology to bring you a panel that can even charge under indirect light conditions. You should still make every attempt to locate the panel to receive maximum sun exposure.

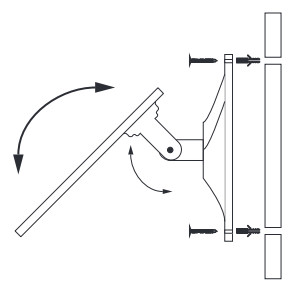
Installing and Adjusting the Solar PanelUsing the supplied mounting hardware, attach the solar panel to your chosen surface.The angle of the solar panel can be adjusted utilizing the pivot point where the panel attaches to the bracket. This allows you to maximize sun exposure
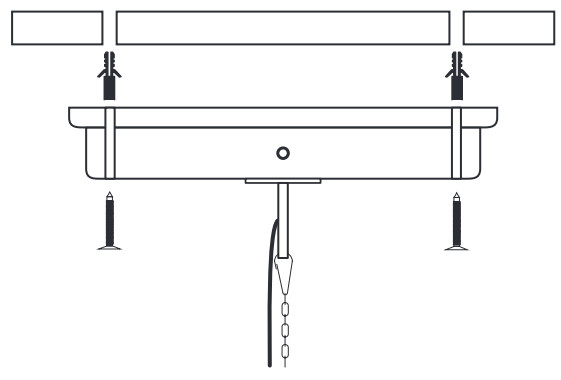
Installing the Ceiling Mount DiagramScrew the ceiling mount with an integrated chain to your chosen surface using the mounting screws provided. Ensure this part is unobstructed as it could limit the remote control’s ability to operate. Make sure the chain and cable fall freely downwards
Connecting the Solar Panel Diagram
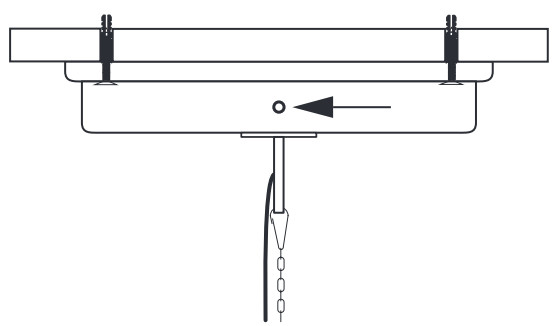 Your solar panel connects to the small ‘jack plug’ located on the side of the ceiling mount. Ensure this connection is tight and secure.
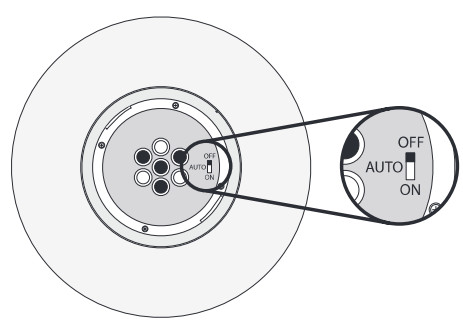
Operating your Solar Hanging LightUnscrew the glass dome covering the LED lights. You should notice a switch. This switch in conjunction with your remote control will give you control of your hanging light. The switch has 3 positions:ON, This function turns on the light, you can now control the intensity and operation of the light with your remote control.OFF, This overrides the remote control. This function should be used to complete an initial 2 day charge period.AUTO, This function will allow the integrated sensor to turn on the light at night. In this setting, you can control the intensity of the light but you cannot switch the light off with the remote control.
 report this ad
Battery Replacement
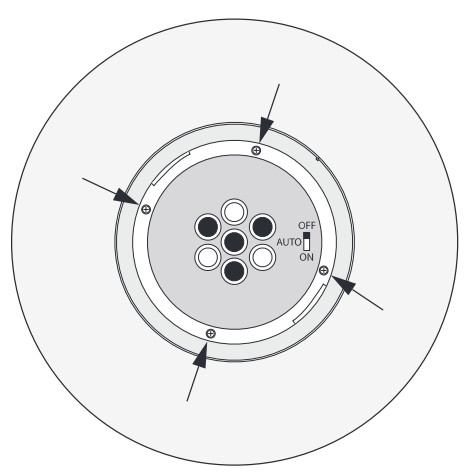 Should you need to replace your battery, simply unscrew the glass dome. You will then have access to 4 screws around the edge of the light. Once you have unscrewed and lifted the LED light fitting, you will see the batteries.REMEMBER ALWAYS SELECT REPLACEMENT BATTERIES WITH MATCHING SPECIFICATIONS.
Maintenance
Periodically check your connections, between the ceiling mount and solar panel. Make sure the plug is correctly inserted.Some seasonal adjustments of the solar panel may be required to offset shorter charge days in the winter. Clean your solar panel with a damp cloth. Never use any abrasive chemicals or surfaces for this maintenance. Ensure the solar panel is free of obstruction, such as trees or buildings.FAQQuestion: Why does my light not come on at night? Answer: make sure you have selected AUTO on the small switch inside the glass dome.Question: The light on my remote does not light up when I press the button. What is wrong? Answer: There is no light on the remote. The small bulb simply emits a signal.Question: Why is there a small paper tab sticking out of my remote control? Answer: This tab needs to be completely pulled free of the remote to allow the remote to function.This product is covered under a one-year limited warranty. Sunforce Products Inc. warrants to the original purchaser that this product is free from defects in materials and workmanship for the period of one year warranty from the date of purchase. The included battery is not covered under this warranty.To obtain warranty service please contact Sunforce Products for further instructions email us at info(@sunforceoroducts.com. Proof of purchase including date and explanation of complaint is required for warranty service.
[xyz-ips snippet=”download-snippet”]