Sungale True Cloud Frame Editable Cloud

Packed
- Cloud Frame
- Quick Start Guide
- Power Adaptor
- USB cable
- OTG cable
- Warranty Card
- Stand
Connect Power
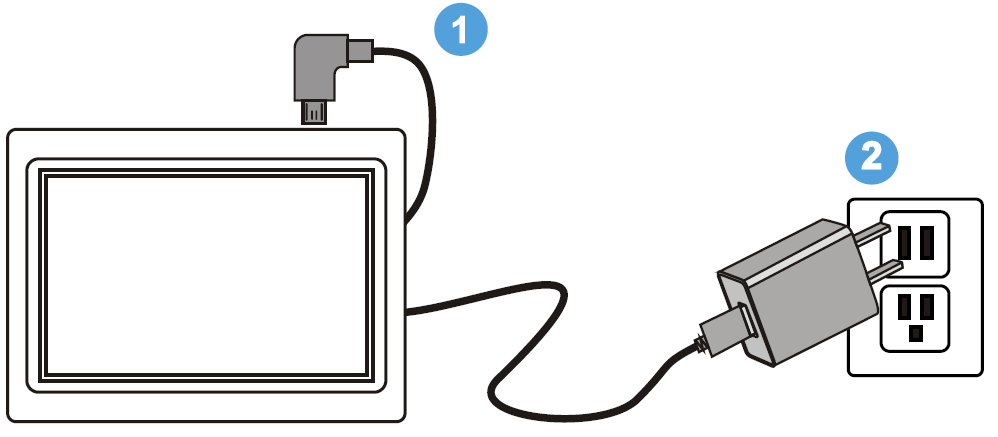
Plug the Power Adapter into the frame and also into a power outlet.
Press and hold on the Power ( ) button for more than 3 seconds to turn on or turn off the frame.
Link Wi-Fi

After power-on, the frame’s screen will appear a prompt to remind you to link to Wi-Fi, tap on the “Settings” to link your frame to the internet.
Register Your Cloud Frame
After Wi-Fi is connected, tap “My Cloud Album” on home screen, below message will appear to remind you to register your cloud frame.
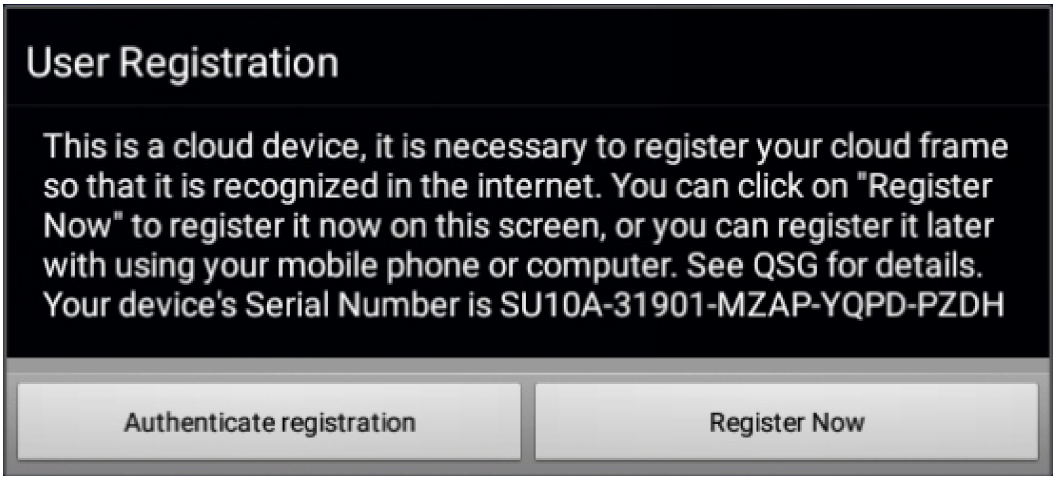
Now you can register your cloud frame on this device, or you can go to your mobile phone or computer to register your cloud frame.
Register on your Cloud Frame
Tap on “Register Now” button on the prompt, enter your personal information, then tap “Submit”, you will be prompted to enter the activation code that has been sent to your registered email, get your activation code, and tap “Confirm”.Note: The Serial Number has been extracted from the system, you do not need to input it.

Register with your Mobile phone
Go to Apple’s App Store or the Google’s Play Store, download and install “Sungale Cloud” onto your mobile phone, then, follow screen prompts, you can register your cloud frame, and operate and manage it easily.
Register on your computer
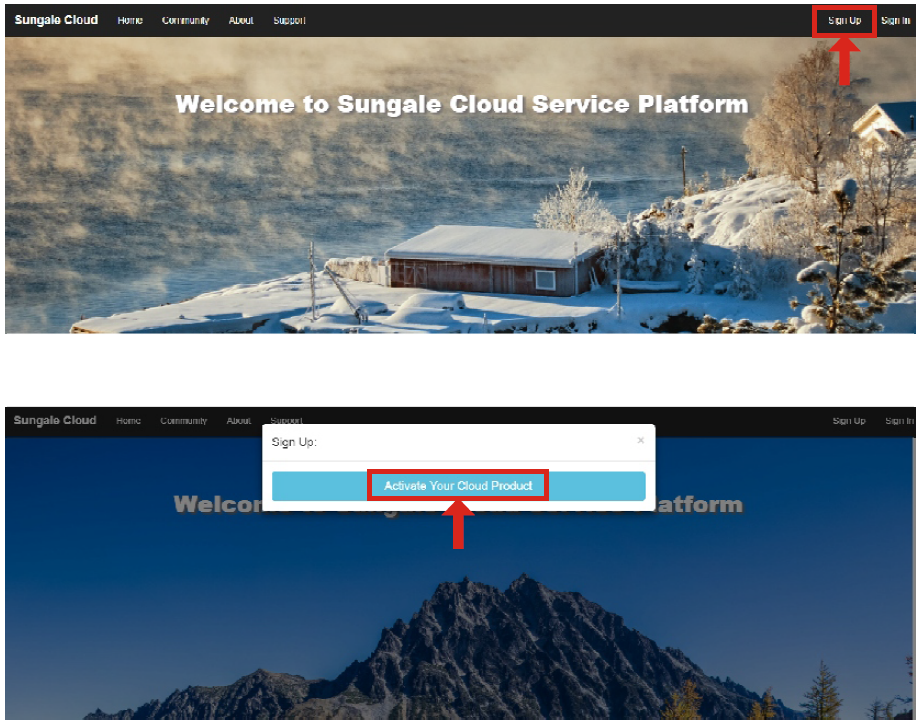
Open browser, type in “cloud.sungale.com“, you will find below interface. Click on “Sign Up”, then click on “Activate Your Cloud Product”, then, follow screen instructions, you can finish your registration.
Check if you need to upgrade
After Wi-Fi is connected, tap “Settings” on home screen, then tap Setting/Device Info/Upgrade/Check for updates, System will auto inspect new Version.
If it has new version, your frame should look like the below:
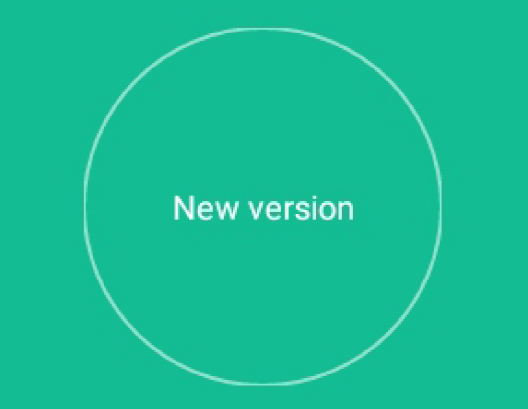
Tap on “Download”, then follow screen prompts, you can upgrade your cloud frame.
If your device’s software is currently up to date, it should look like the below:

How to add photos to the Cloud?
Go to Google Play Store or Apple App Store to download and install “Sungale Cloud” App, open it, input your account and password to log in.
Step 1: Login into your accountStep 2: Tap “Cloud Album” icon.Step 3: Tap “Album+” from the upper right hand corner.
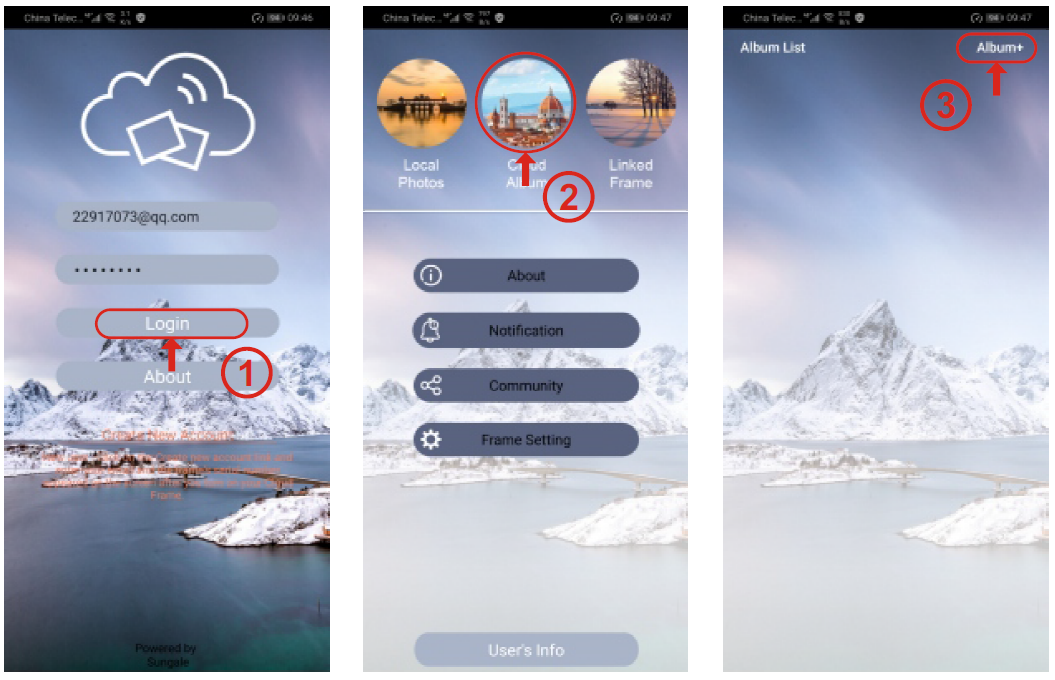
Step 4: Input the album name and tap “OK” button.Step 5: Select the Album you want to add photos to.Step 6: Tap “+” icon to choose photos from your mobile phone.Step 7: After selecting the photos, tap “Send Photos” to send photos.Step 8: Tap “Upload Photos” button to upload photos.
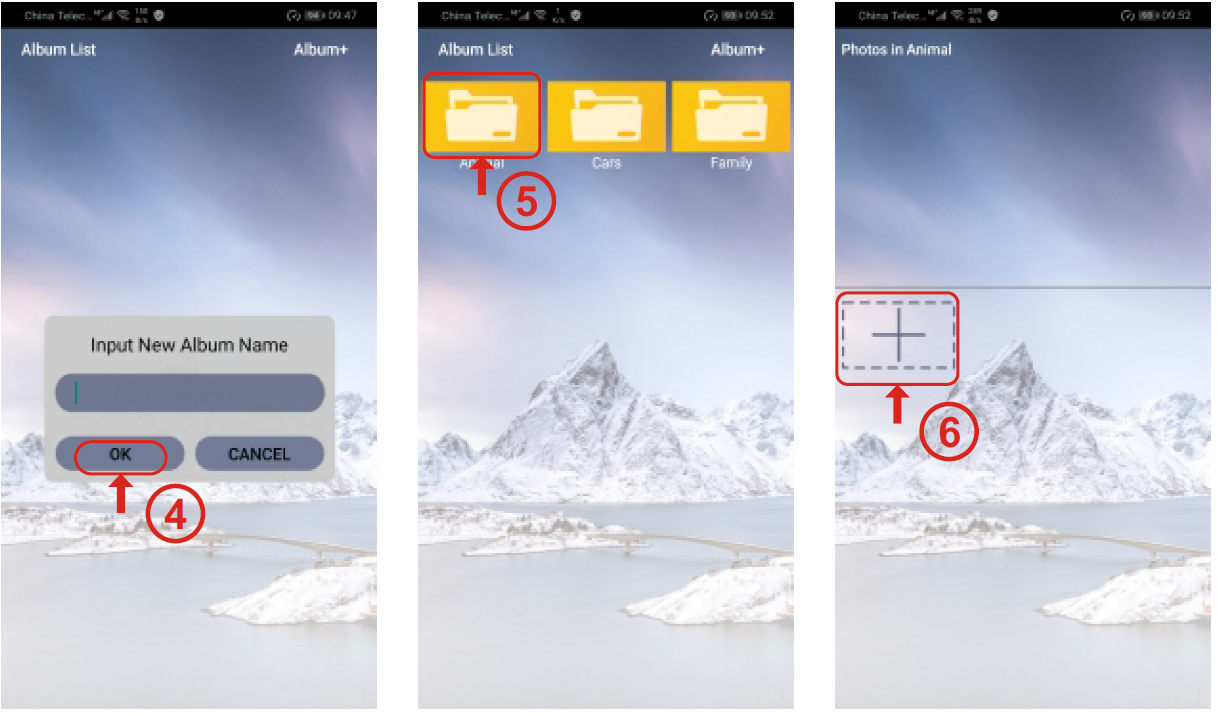
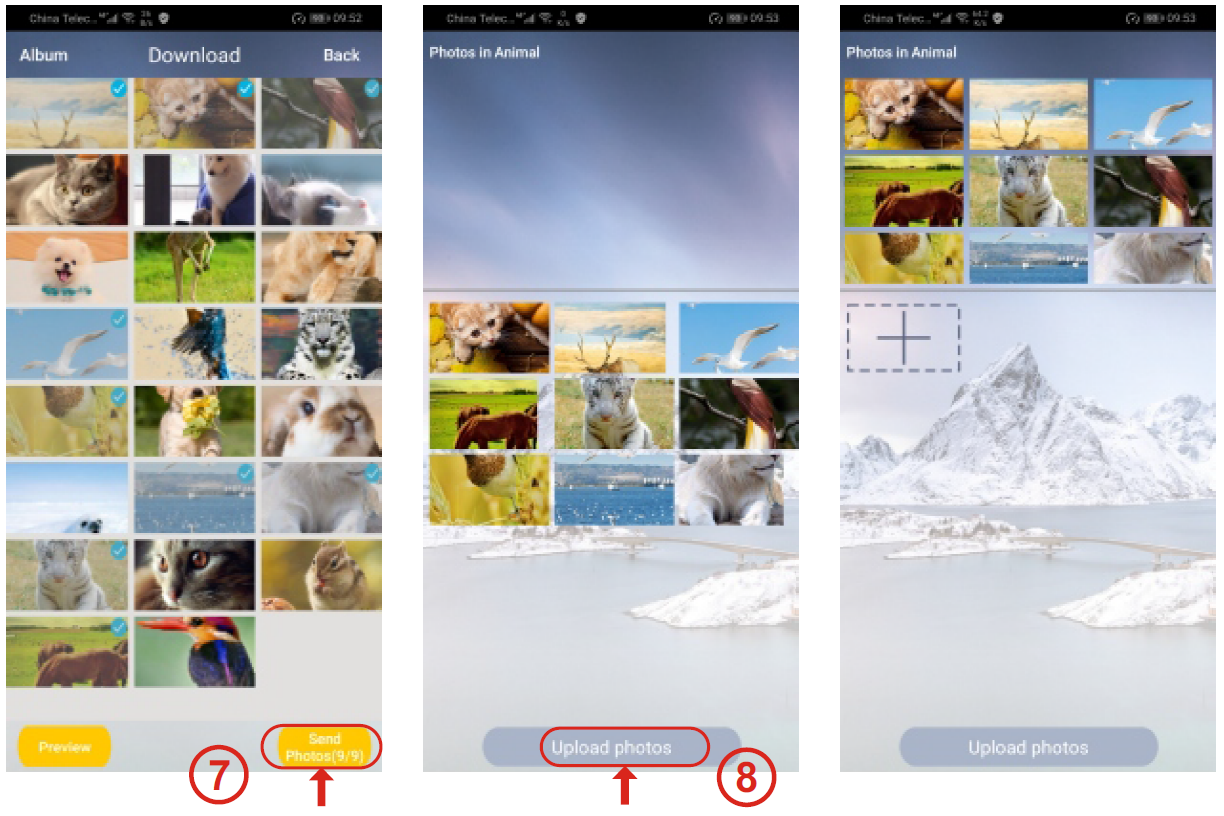
Now, the photos you added to the Cloud will appear on your Cloud Frame even it is in another country.
Multi Function Brief
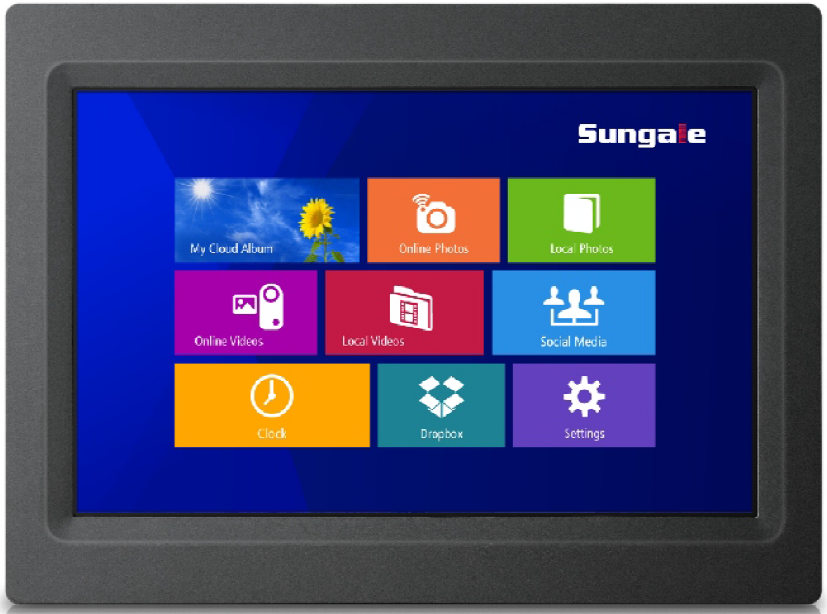
CPF1051+ is with friendly user interface, touch on screen, you can directly get Online Photos, Local Photos, Online Videos, Local Videos, Social Media, Dropbox, you can do settings of your frame.
Support
- For manual download, FAQs and more supports: www.sungale.com
- If you need help, please contact us:
- Tips:For additional product video support, go to YouTube.com, and search “Sungale Products”, where you will find additional demo videos to help with ex plaining the operation of your product.

References
[xyz-ips snippet=”download-snippet”]

