sunsky Digital LevelInstruction Manual
DL1909 Digital Level
DESCRIPTION
This digital level is a highly versatile leveling tool designed for fast, easy operation
- Measuring range of digital display: 4×90°
- Resolution of Digital Display : 0.05°
- Precision of Digital Display : ±0.1° at 0° and 90° ±0.2° at other angles
- Unit of measurement (°degrees / % / mm/m / IN/FT)
- VA screen, black color backlight, white characters LCD display
- Hold function
- 0°calibration
- High accuracy horizontal & vertical bubble vials built in, for leveling work without battery
- V-groove on the measurement base, for easy attach to round pipes
- Groove on the 2 sides & top housing, for easy doing the mark work
- Powerful built-in magnets on the base secures the attachment to iron surface
- Battery type: 2×1.5V “AAA” batteries
- Working temperature: 0℃ ~ 40℃
- Storage temperature: -10℃ ~ 50℃
- Dimensions: 140*30*56mm(L*W*H)
- Weight: About 120g (Not containing batteries)
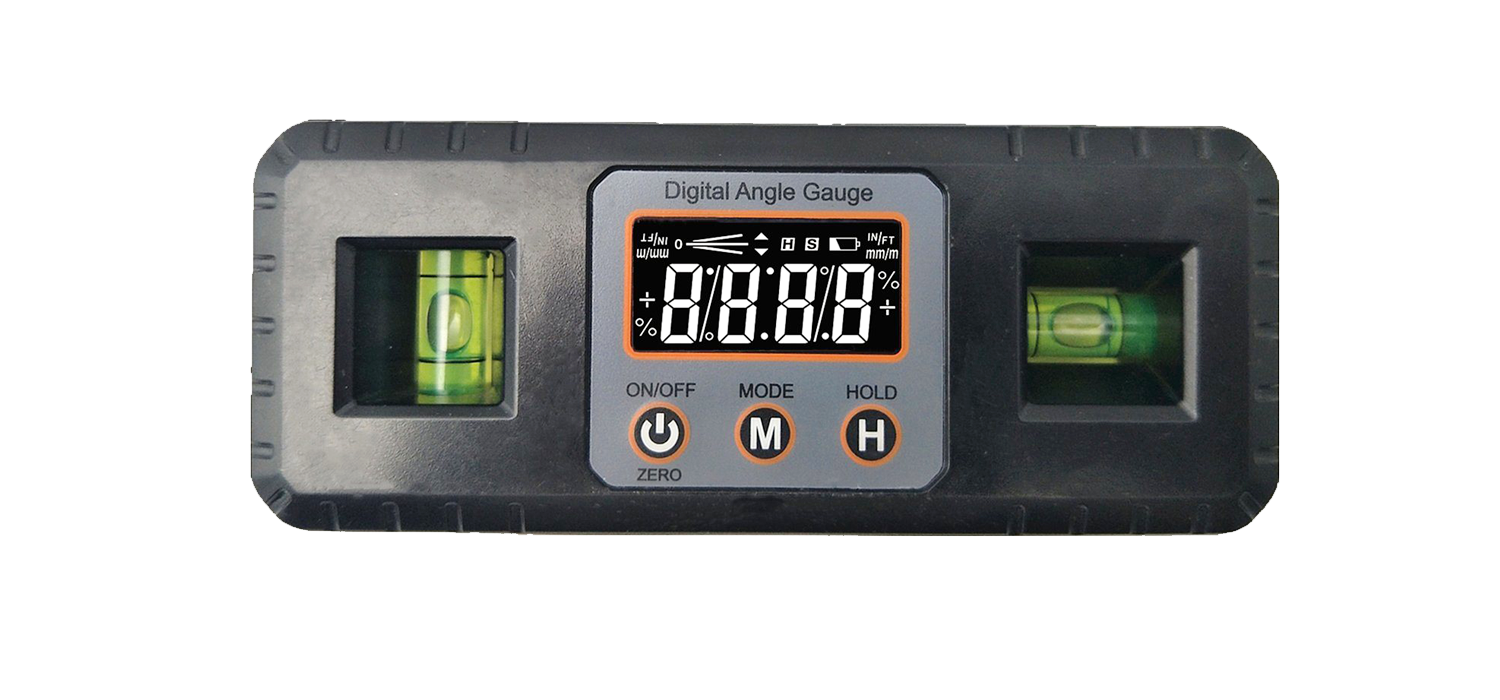
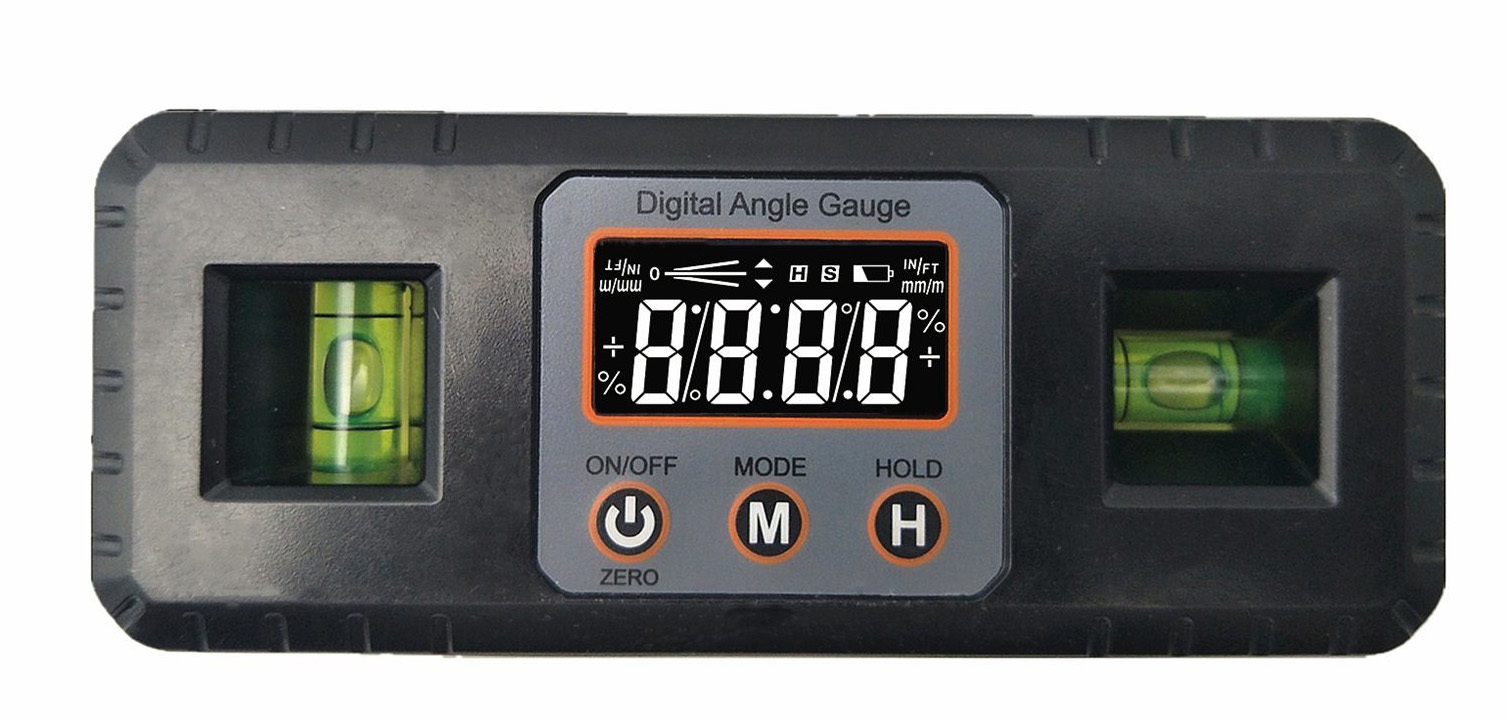
Product outlook

Operation instructions
1. Battery replacement
Remove the rear battery cover of the equipment by unscrewing the battery cover retaining screw.Open the battery case. Put two “AAA” batteries and close the case.Your electronic level is now ready to use.
2. ON/OFF
Press ![]() button to turn the equipment on. Press and hold
button to turn the equipment on. Press and hold ![]() button for about 3 seconds to turn off.After about 3 minutes of non-using the equipment, it will switch off automatically.
button for about 3 seconds to turn off.After about 3 minutes of non-using the equipment, it will switch off automatically.
3. Level measurement
Turn on the equipment and put it to the level position for measuring.

4. Unit of measurement selection (°degrees / % / mm/m IN/FT)
After switching on, the screen always shows the actual slope in degree. By pressing the ![]() button you can change the angles unit display units from degrees (°) to percent (%), to (mm/m) to pitch (in/ft). Pitch readings are in 1/8-inch/feet increments.The “
button you can change the angles unit display units from degrees (°) to percent (%), to (mm/m) to pitch (in/ft). Pitch readings are in 1/8-inch/feet increments.The “ ![]() ” icon indicates the measured surface is horizontal or vertical;The “
” icon indicates the measured surface is horizontal or vertical;The “ ![]() ” & “ ” icons indicate the measured surface deviated from the horizontal or vertical position;The “
” & “ ” icons indicate the measured surface deviated from the horizontal or vertical position;The “ ![]() ” icons indicate the direction of adjusting the measured surface to the horizontal or vertical.
” icons indicate the direction of adjusting the measured surface to the horizontal or vertical.
The “ ![]() ” icons indicate the direction of adjusting the measured surface to the horizontal or vertical.
” icons indicate the direction of adjusting the measured surface to the horizontal or vertical.
5. Angle measurement
If the equipment isn’t in level, it will display a value on the screen.Short press ZERO button to set current angle to zero, keep the equipment still after pressing the button for 3 seconds around, the ![]() icon would flash during this period, then it automatically enters into the relative angle measurement mode. The
icon would flash during this period, then it automatically enters into the relative angle measurement mode. The ![]() icon would sustaining show on the screen. Short press ZERO button again to exit the function.
icon would sustaining show on the screen. Short press ZERO button again to exit the function.
6. Hold
If you need to move the device to read the display, press the ![]() button to freeze the measurement. The
button to freeze the measurement. The ![]() icon will display. Press
icon will display. Press ![]() again to return to measuring mode.
again to return to measuring mode.
7. Low battery indicator
Recommend to replace two new “AAA” batteries, when the low Battery indicator “ ” shows on the screen.
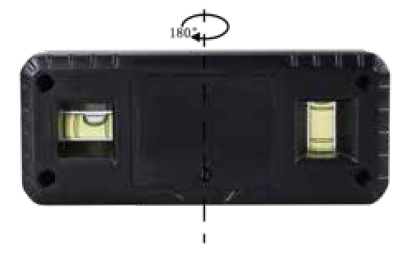
8. User’s calibration
a. Turn off the equipment. Put the equipment on a flat and smooth solid surface. (see the following figure).
 b. In the shutdown status, press and hold
 ![]() button first, then press
button first, then press ![]() button, until the LCD display reads “CAL”. Then the screen displays angle degrees.c. Keep the equipment still for a period of time and then press the
button, until the LCD display reads “CAL”. Then the screen displays angle degrees.c. Keep the equipment still for a period of time and then press the ![]() button, display reads “CAL1” & flashes, then the screen displays angle degrees.d. In the same location, rotate the equipment 180°(see the following figure), then press the
button, display reads “CAL1” & flashes, then the screen displays angle degrees.d. In the same location, rotate the equipment 180°(see the following figure), then press the ![]() button, display reads “CAL2” & flashes.After the “CAL2” disappears, the calibration is completed and then the LCD will show the current angle in high-accuracy-display.
button, display reads “CAL2” & flashes.After the “CAL2” disappears, the calibration is completed and then the LCD will show the current angle in high-accuracy-display.
NOTE:
- The calibration must be performed on a flat and smooth surface with the tilt no more than 5°. If it exceeds 5°, display reads “Err”, that indicates the user can’t proceed to do the calibration.
- During calibrating, the level also can not be beveled or moved.
- After completed calibration, the equipment automatically replaces from original factory data to consumer’s data, so it must be careful to use this function.
[xyz-ips snippet=”download-snippet”]