SUPERBCHEAP Glove Box User Manual
![]()
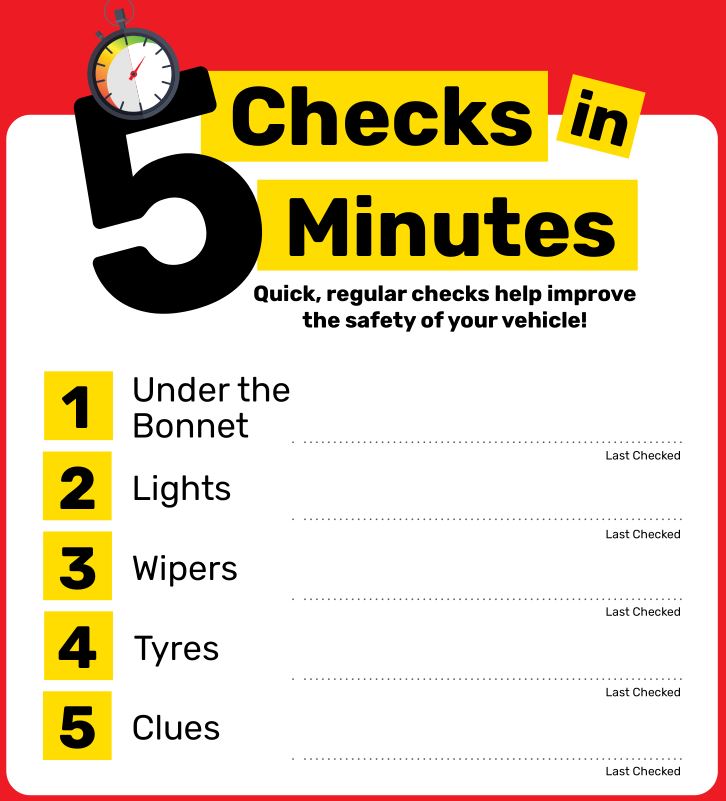
Glove BoxCheck It Guide
Quick, regular checks help improve the safety of your vehicle!

When it comes to road safety, one thing you can control is proper maintenance of your vehicle. Keep this simple guide in your glove box & use it to complete quick, regular checks to help you improve the safety of your vehicle.

Learn how to check it online now with our short videoswww.supercheapauto.com.au/check-it
![]() We’re here to helpTalk to our team for more information
We’re here to helpTalk to our team for more information
Check Under the Bonnet
Setup
Before you start checking your vehicle, make sure the car is on level ground with the handbrake on, and the engine is off and cooled down for at least 30 minutes. Grab yourself some gloves, goggles, clean rags, and then open the bonnet. The first thing to check is your bonnet support struts. Make sure your bonnet is secure and safe to work under before progressing with any under bonnet checks.
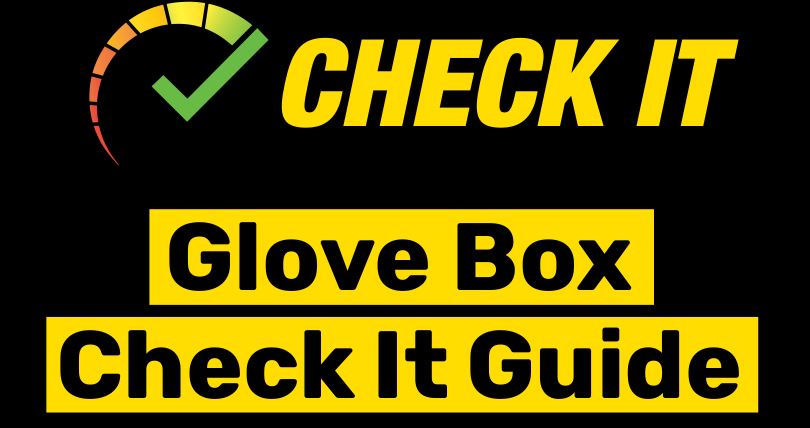
Checking Engine Oil
To start with, locate the dipstick on the side of the engine block. This stick allows you to check the level of the engine oil at the base of the block. Pull out the dipstick and wipe off any oil with a clean cloth. Replace the dipstick into its original position and then remove it again. Check the oil level on the markings on the end of the dipstick.
There should be a high and low point at the end of the dipstick If the oil is below the high mark, you need to top up the engine with the recommended oil via the oil filler point.
Topping Up Engine Oil
If you need to top up your oil look for the oil filler cap which is generally located on the top of the engine. First, remove the cap and inspect the oil around the thread. This should be the same oil colour as your dipstick. If you’ve found that the oil inside your engine is a milky colour, it might be contaminated and will require mechanic inspection.Add the correct engine oil slowly to top up. Just be sure to do this gradually and keep checking the dipstick, not to overfill. Once full, simply replace the cap and wipe up any small drips or spills. There are many different types of oil, so make sure you get the right oil for your car. For help, simply ask one of the team at your local Supercheap Auto.

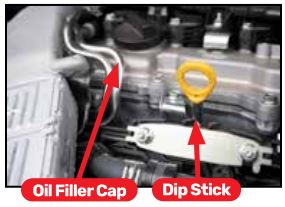
Power Steering
A power steering fluid check is as simple as opening the cap and checking the level. Some power steering reservoirs may have a dipstick built into the reservoir cap to make it easier. Power steering levels fluctuate depending on the temperature of the car, so often the indicator typically shows a HOT or COLD level to show you where the fluid level should be in both instances. If this is low, it’s time to top up with the recommended fluid.
NOTE: Images shown are a general guide as to what to look for, all vehicles will vary.Quick, regular checks help improve the safety of your vehicle!
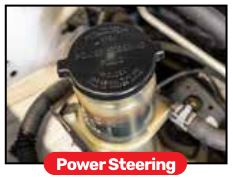
WARNING:Wait for engine to cool down completely
Coolant is HOT
It’s imperative to never open the cap on the radiator or overflow if the engine is hot as there is a chance that any boiling liquid in the pressured cooling system will spray out. Make sure to wear gloves and goggles as a precaution.
Radiator
Check the radiator by removing the cap slowly. If you can’t see coolant in the radiator, it’s time to top it up with the recommended coolant. Using a funnel, top up the radiator slowly as coolant travels to the bottom of the engine before it fills.
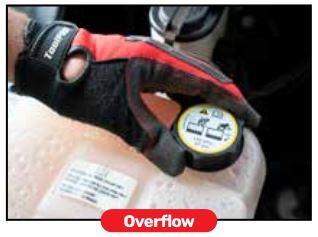
Overflow
The overflow bottle is a clear plastic container connected to the radiator. It shows maximum and minimum levels that are clearly marked on its side. If your coolant is low or empty, top it up with the recommended coolant as per your Owner’s Manual or with a universal coolant.
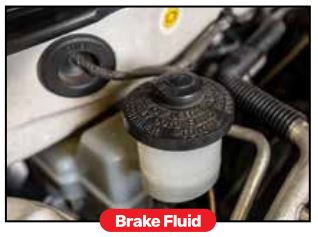
Brake Fluid
Brake fluid reservoirs are typically located at the back of the engine bay on the driver’s side, are transparent and have ahigh and low indicator viewable. Once located, it is just a case of visually checking that the fluid is at the optimal level. Top up with the recommended fluid if the level has dropped or is below the low-level marker.
Also, check for leaks around the reservoir and master cylinder with a clean cloth. If you have found a leak, it’s best to have it inspected by a mechanic.

NOTE: Images shown are a general guide as to what to look for, all vehicles will vary.
NEED A HAND? We’re here to help !
Check Lights
Park, Head & Fog Lights
The best set up to test your headlights is to park your vehicle facing a wall with the engine switched off, handbrake on and the ignition in the accessories (ACC) position. Turn your headlights onto the park light function and walk around to check that your park/tail lights are working correctly. You should have 1 light on each corner of your vehicle and a light at the rear illuminating your number plate.
Once this check is complete, switch the headlights on to the low beam position. Check the beam pattern on the wall in front of you and make sure they are functioning correctly. Now the high beam; with this turned on, you should see the beam pattern change to higher up the wall and should be slightly brighter. If your vehicle is fitted with fog lights, best to turn them on and check they’re working as well.
Indicator Lights
Chances are you’ll be on the road when you first notice an indicator light isn’t working and often the first clue is a change in indicator sound. The affected side will click faster than normal. To check which light is out, turn your hazard lights onand check each light, front, sides and rear.

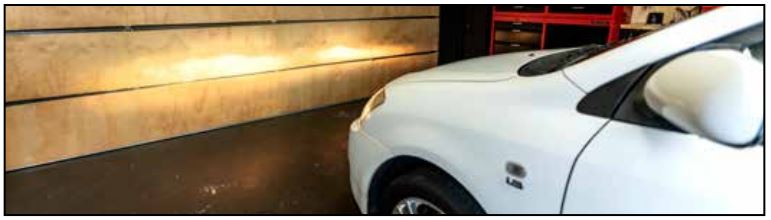
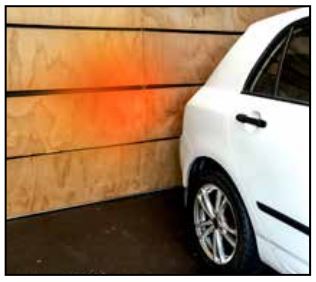
Brake & Reverse Lights
Unlike indicator lights, tail and reverse lights often don’t have a sound clue to alert you a light could be out. If you don’t have someone to check your lights for you, a quick tip is to test your lights against a wall or in a dark garage. You’ll be able to see the reflections on the walls or garage door.
You’ll soon be able to tell if there are any lights not working by the absence or dimming of the light reflecting. If one side has blown, the other side may not be far behind it. It’s best practice to replace the corresponding light on the other side at the same time.
NOTE: Images shown are a general guide as to what to look for, all vehicles will vary.Quick, regular checks help improve the safety of your vehicle!
Check Wipers
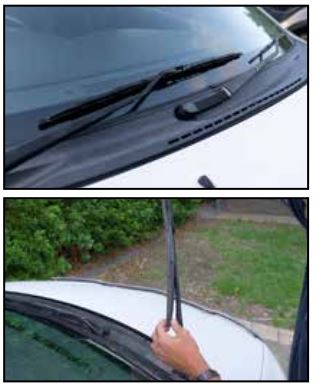
Wipers
Typically you only realise your wipers need to be replaced when it’s raining, and you need them working. To ensure that you don’t get into this unsafe situation, get into a habit of testing them when it isn’t raining. That way you have an opportunity to get them replaced before the next downfall.
Before you test your wipers, make sure that your windscreen washer fluid is topped up. Then start by using your windscreen fluid spray function on the car. Take note of the water coming out and the pattern of the jet, make sure this is spread across the windscreen to ensure good coverage of the glass. If this is uneven, consider getting it repaired or replaced.
As the wipers move across the glass with the fluid, your wipers should glide across moving all the water and dirt along with it. Uneven streaking, splitting, scratching or skipping across the windscreen may all indicate that your wipers are due for replacement.
As a guide, it is a good idea to follow the below timeline for your wiper and washer fluid checks and replacement. If you are unsure how to replace your wipers or need further advice, ask your local Supercheap Auto Team Member to fit them for you. A new set of wipers is one of those little things that can make a big difference. Use the blank area to keep track of your last check date.
Check Wipers: Once a MonthReplace Wipers: Every 6 MonthsCheck Fluid: Once a Month
Washer Fluid
Washer fluid and working washer jets are important to help you keep your windscreen clean when you’re on the road.
To keep your washer fluid topped up, locate the windscreen washer fluid bottle, pop off the cap and pour in water or ready-to-use washer fluid when necessary. You can also add some automotive glass cleaning concentrate to give more grime fighting power and help to keep your screen clean.

NOTE: Images shown are a general guide as to what to look for, all vehicles will vary.NEED A HAND? We’re here to help !
Check Tyres
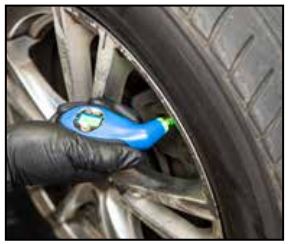
Tyre Pressure
Incorrect tyre pressure can result in poor car handling, increased braking distance, and uneven wear. When checking your tyre pressure, the first step is to find out what the right pressure for your car tyres is. This can be found on the tyre plaque, usually located on the inside of the driver’s side door. It suggests the recommended inflation levels for both normal and maximum loads. Check the vehicle manual if you can’t find it.
The next step is to remove the tyre valve cap and place the tyre gauge onto the valve for a second to get a reliable reading. Compare this reading to the manufacture recommendation and arrange to top up at your local service station if required.
When you have finished checking your tyre pressure, always make sure you replace the valve caps as they act as a secondary seal if the valve is leaking. You might notice a pressure rating on the tyre itself, this isn’t your recommended pressure but the maximum tyre pressure for that specific make of tyre.
Tyre Tread
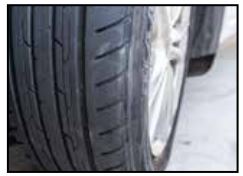
Using the Check It tyre tread depth gauge or similar style, insert the gauge into the tread groove at the outer, inner and middle points of the tyre:

In addition to the tread, also check each tyre for damage. If the tyre has been under-inflated, there is going to be more flex in the sidewall resulting in wear along the shoulders of the tyre. If it’s been over-inflated, you will find increased wear through the centre of the tyre.
Also check the overall condition of the tyre, hairline cracks, rubber degradation and the DOT manufacture date. The date is formatted as the week number followed by the year number. For example, 2414 is the 24th week of 2014. How old is too old? It depends on many factors, but we know that the older the rubber, the less grip it has. As a general rule of thumb, tyres over 5 years old are suspect and should be inspected.
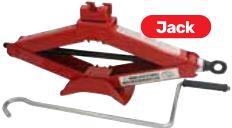
Spare Tyre & Jack
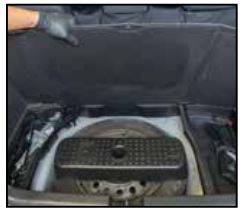
It’s always good practice to check the spare tyre pressure and tread at the same time. A working jack is a must for every spare tyre, so ensure you check it is in the car and is fully operational. The last thing you want is to be stuck on the side of the road without a jack, or with a spare that isn’t up to the job.
NOTE: Images shown are a general guide as to what to look for, all vehicles will vary.Quick, regular checks help improve the safety of your vehicle!
Check for Clues
Clues
You know your car better than anyone, and often a good indication of early issues is the clues your car makes. Clues of sounds, feels, smells and leaks may appear and are not to be ignored. If picked up early, the repair might be a simple one preventing costly damage to the rest of the system.
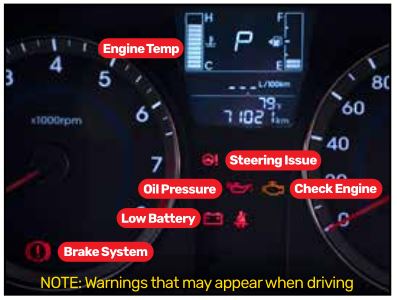
For example, a great indicator that your battery needs replacing is when your car is slow to start after you turn the key. Or if your steering starts making noises as you turn a corner maybe you have a power steering issue.
If you start to smell something sweet when your car starts to run, it’s most likely coolant escaping the system and requires further inspection. Or if your vehicle starts to smoke under acceleration, your engine is burning a vital fluid from the system. Listen for knocks and bumps too, this isn’t normal for cars to have these sounds. It could mean that something is worn in the suspension.
Keep an eye out for warning lights on your car dash and on your car’s temperature gauge for any signs thatthings could be heating up. It’s really just about taking a bit of notice and watching out for anything out of the ordinary. If you think something isn’t right consult a professional.
Leaks
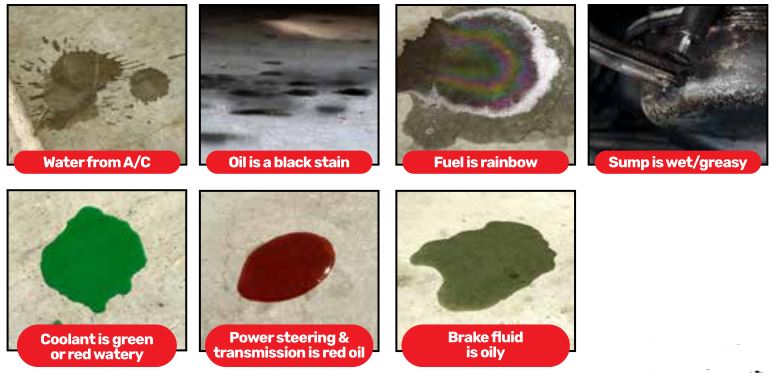
Your car shouldn’t leak. The only puddle it should be leaving is a bit of water from the air conditioner. So, a puddle of oil or coloured liquid is a sure sign that something isn’t right. Getting a leak checked as early as possible is always the best practice.
NOTE: Images shown are a general guide as to what to look for, all vehicles will vary.NEED A HAND? We’re here to help !
Front Tyre Pressure …………………………..
Rear Tyre Pressure …………………………….
![]()
![]()
References
[xyz-ips snippet=”download-snippet”]