
WE THANK YOU FOR CHOOSING THIS PRODUCT FROM SWAROVSKI OPTIK. IF YOU HAVE ANY QUESTIONS, PLEASE CONSULT YOUR SPECIALIST DEALER OR CONTACT US DIRECTLY AT SWAROVSKIOPTIK.COM.
SPEND ONE MINUTE.EARN ONE YEAR
Register at SWAROVSKIOPTIK.COM to enjoy all the benefits of MY ACCOUNT.
– We will extend the warranty by one year, free of charge.*– Keep track of all your SWAROVSKI OPTIK devices and purchase dates.– If your product requires servicing, we can quickly call up the key information and ensure that we provide fast efficient assistance.– You can conveniently initiate repair orders for your registered products.
*When you register a product, we will extend its warranty in line with our warranty conditions by one year (warranty card also available for download). Electronics are excluded from the extended warranty.
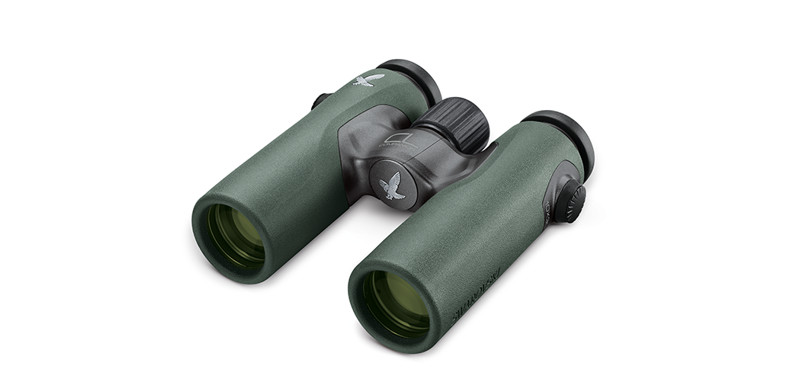
OVERVIEW

- Eyepiece cover
- Twist-in eyecup
- Strap connector cover
- Dioptric compensation
- Focusing wheel
- Objective lens cover
Supplied with the CL Companion:Field bag, carrying strap or side strap (depending on the model), lens-cleaning cloth, soap, brush.
The strap is not attached to the CL Companion during delivery. You can easily attach the strap or special accessories.
ATTACHING THE STRAP
Press the button inwards and turn it counterclockwise (90°).

Pull out the button.
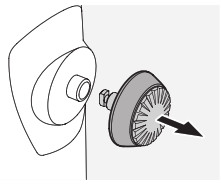
Detach the pin from the ring.

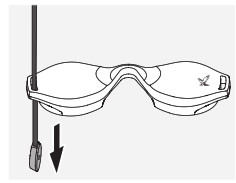
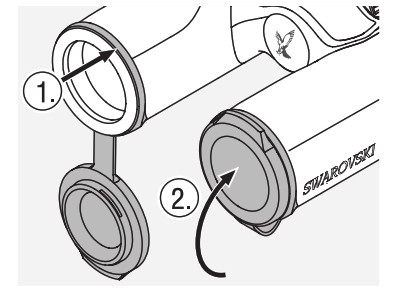
To attach the eyepiece cover, first pull the strap through the loop of the cover.
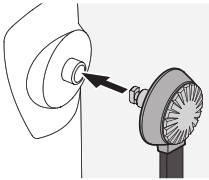
Align the button pin with the strap connector ring and press until it clicks.
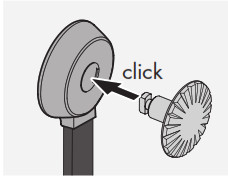
Insert the button strap into the buttonhole on the binoculars.
Press the pin in firmly and turn slightly clockwise until it clicks.

Note:If the pin can no longer be turned without pressing it, it is securely in place.
OPERATION
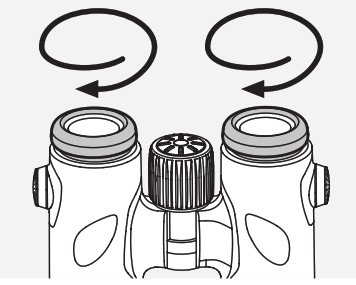
3.1 ADJUSTMENT OF THE TWIST-IN EYE CUPS
Use without eyeglasses:Turn both eyecups (counterclockwise) until they stop.

Use with eyeglasses:Turn both eyecups clockwise until they stop.
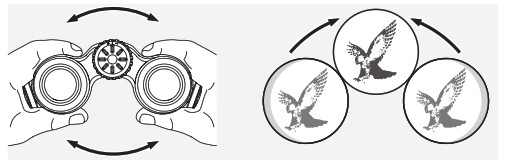
3.2 ADJUSTMENT OF INTERPUPILLARY DISTANCE
To see a single round image, turn the two halves of the binoculars until no irritating shadows can be seen.
3.3 ADJUSTMENT OF FOCUSING
It is possible to bring every subject into focus from the shortest adjustment distance (see technical data sheet) to infinity by turning the focusing wheel.
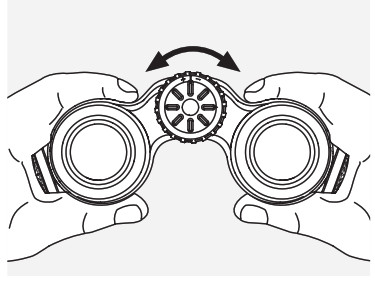
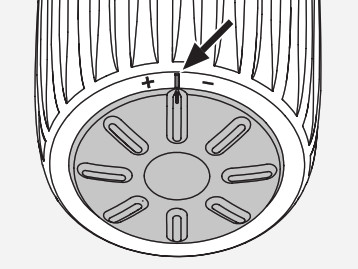
3.4 DIOPTRIC COMPENSATION
To achieve optimal image quality, the possibly varying visual acuity between the left and right eye must be corrected.
Use with equal acuity of both eyes:The dioptric compensation is set to “zero”.
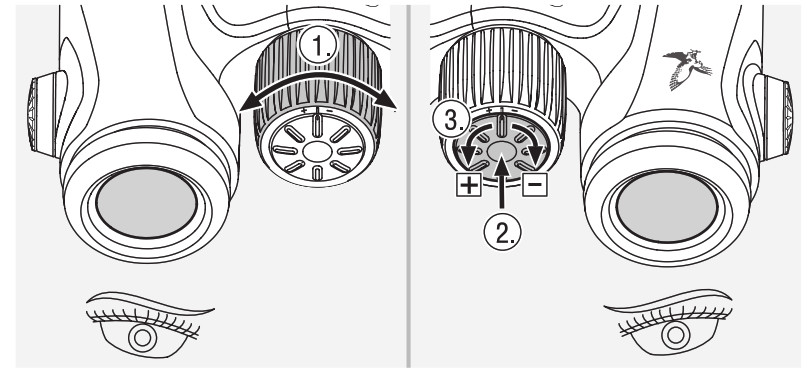
Use with varying acuity of both eyes:1. Look through the left ocular with your left eye and turn the focusing wheel to focus sharply on a selected object.
2. Now, using your right eye, look at the same object through the right eyepiece and use the dioptric compensation to set the optimal image sharpness. For that purpose, press on the dioptric compensation on the focusing wheel and turn the dioptric compensation left or right until the image is sharp.
ASSEMBLY INSTRUCTIONS FOR OBJECTIVE LENS COVER
CARE AND MAINTENANCE
5.1 LENS-CLEANING CLOTHWith the included microfiber lens-cleaning cloth you can clean even the most sensitive glass surfaces. It is ideal for objective lenses, eyepieces, and eyeglasses. Please keep the cloth clean, as dirt can damage the lens surface. Simply wash it in lukewarm soapy water and leave to air dry. Please only use it for cleaning glass surfaces.
5.2 CLEANINGWe attach great importance to ensuring all elements and surfaces are very easy to clean.
Cleaning the optics. To ensure the long-lasting optical brilliance of your binoculars, you should keep the glass surfaces free from dirt, oil, and grease. First, brush off any larger particles of dirt with an optical lens brush. Then breathe gently on the lens and polish it with the cleaning cloth to remove any remaining dirt. If it is very dirty (e.g. with sand), the twist-in eyecups can be completely unscrewed, making it very easy to clean.

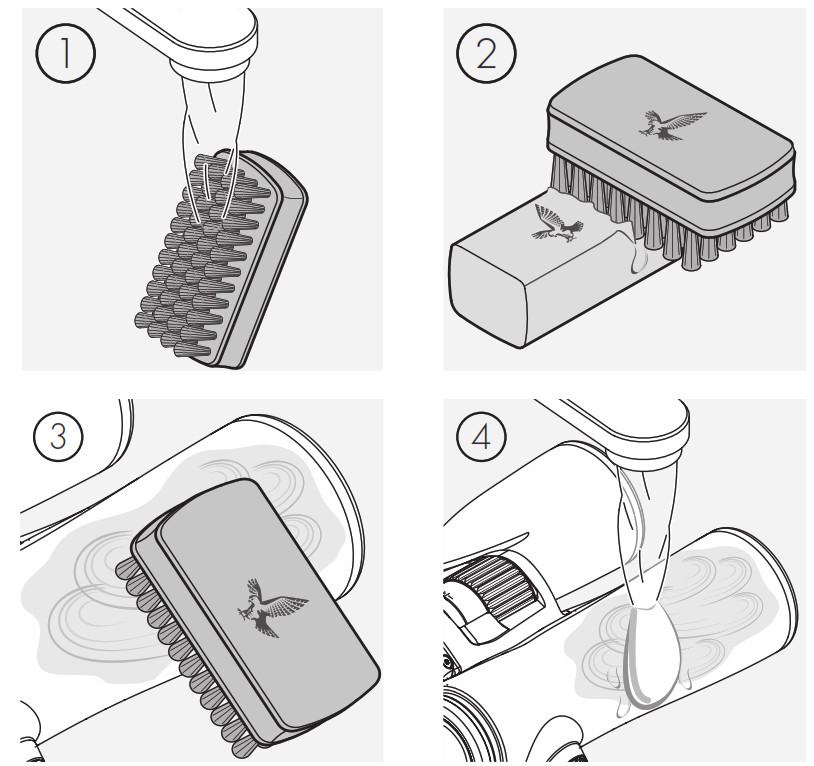
Cleaning the protective housing. Use the soap & brush kit (supplied). Close the covers on the eyepiece and objective lenses. Moisten the brush and apply the soap using circular movements to gently clean the housing. Rinse the binoculars with clean water and dry with care. If the optics become wet, dab them dry with a clean cloth to prevent scratching. Rinse the brush thoroughly and leave the soap & brush kit to dry.
Note:If you clean your binoculars outdoors, please ensure the soapy water does not contaminate the natural water cycle.
5.3 STORAGE
Keep your binoculars in their bag in a well-ventilated place.

If the binoculars are wet, they must be dried first. In tropical areas or areas with high humidity, it is best to store them in an airtight container with a moisture-absorbing agent (e.g. silica gel).
FOR YOUR SAFETY!
Never look at the sun with the binoculars! This leads to injury of your eyes!

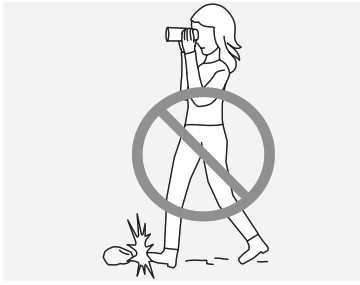
Never look through the binoculars when walking! You could encounter obstacles!
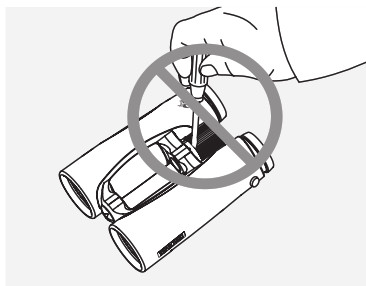
Please protect your binoculars from jolts and jars.

Repair and service work shall only be carried out by either SWAROVSKI OPTIK Absam (Austria) or SWAROVSKI OPTIK North America and any work by non-authorized parties shall render the warranty void.
MERCI D’AVOIR CHOISI CE PRODUIT DE LA MAISON SWAROVSKI OPTIK. POUR TOUTE QUESTION ADRESSEZ-VOUS A VOTRE DETAILLANT OU CONTACTEZ-NOUS DIRECTEMENT SUR SWAROVSKIOPTIK.COM.
All the specifications given are typical values.We reserve the right to make changes regarding design and delivery. We accept no liability for printing errors.
References
[xyz-ips snippet=”download-snippet”]