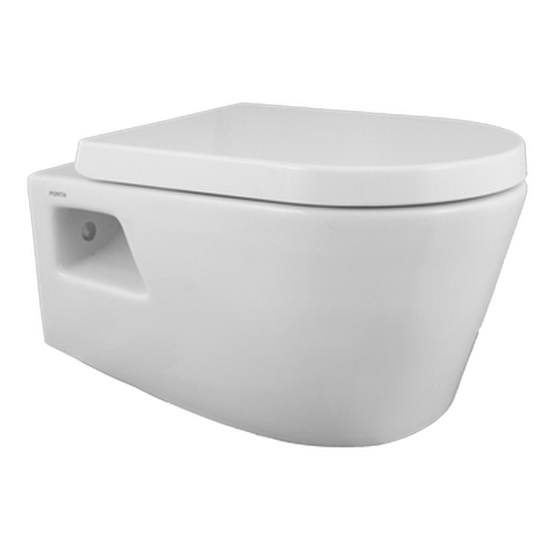
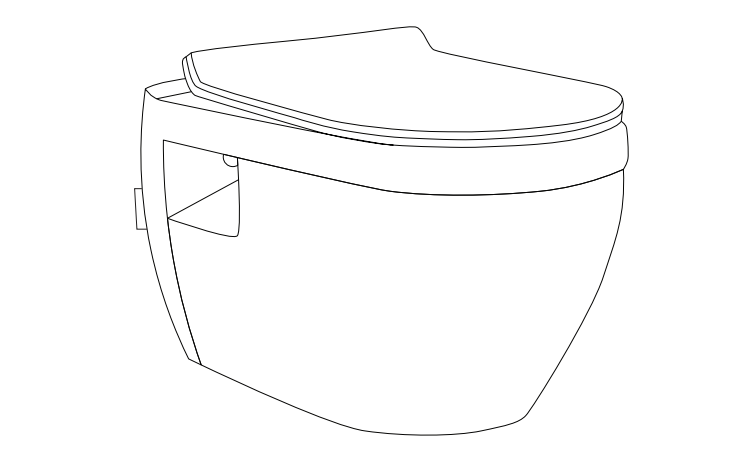
Swiss Madison® HD427WH Wall Hung Toilet Installation Instructions

@SwissMadison#WellMadeForever
www.swissmadison.com | 1-434-623-4766 | [email protected]
![]()
PRIOR TO INSTALLATION
- Inspect toilet to ensure no damages have occurred while in shipping.
- Observe all plumbing and building codes in accordance with your state and local requirements.
- All dimensions are nominal! Be sure to measure your toilet prior to installation.
- The step-by-step guidelines in the installation instructions are a general reference. Should there be any discrepancies, Swiss Madison cannot be held liable. It is recommended to install all Swiss Madison products by hiring a licensed professional.
- Read installation and maintenance instructions thoroughly before installing. Be sure to use proper tools and always wear proper personal safety accessories for your protection.
- Two people are recommended to handle and install this product as it is fragile.
If you have any questions or concerns please contact us:1-434-623-4766[email protected]
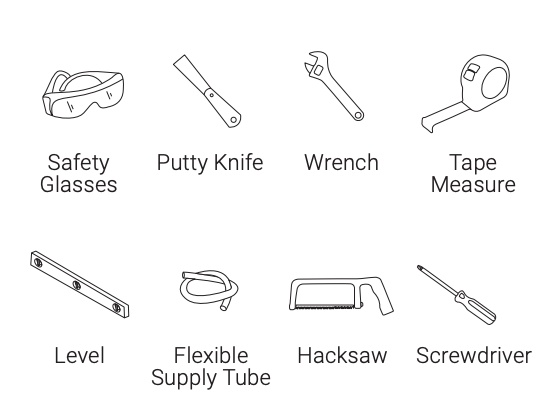
SUGGESTED TOOLS & MATERIALS
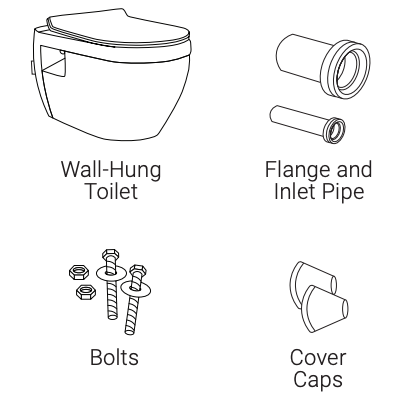
INCLUDED PARTS
- Install Tank
- Before toilet bowl installation, a wood frame and commercial or residential tank system is required.
- Install according to manufactuer’s instructions.
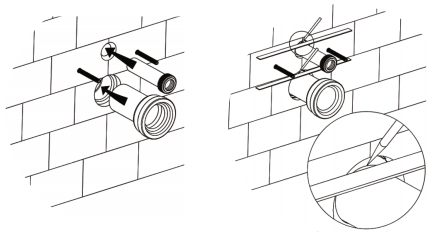
- Dry Fit Flange and Inlet Pipe
- Fully insert straight tube into cistern flushing outlet then connect pipe into discharge outlet.
- Draw lines to mark the finished wall location on each pipe as pictured below.

- Determine Pipe Size
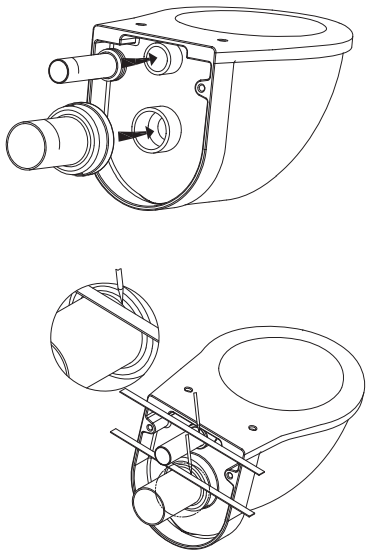
- Apply lubricant on rubber washers of straight tube and connecting pipe, then insert into holes.
- Draw lines on pipes as pictured below.
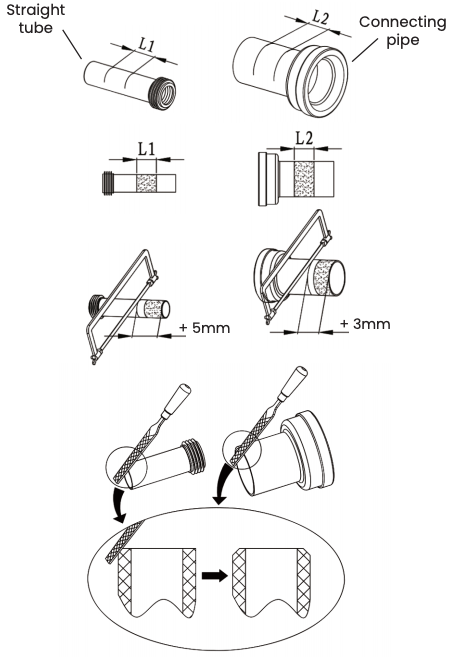
- Cut Pipes
- Using the marked lines, cut the straight tube and connecting pipe as instructed below.
- After cutting, be sure to chamfer cut edges.
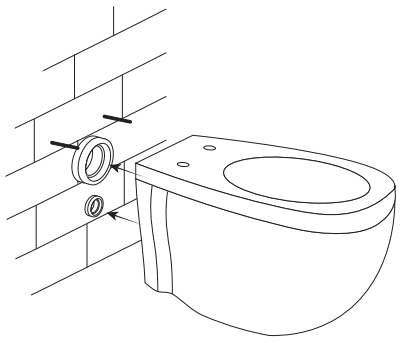
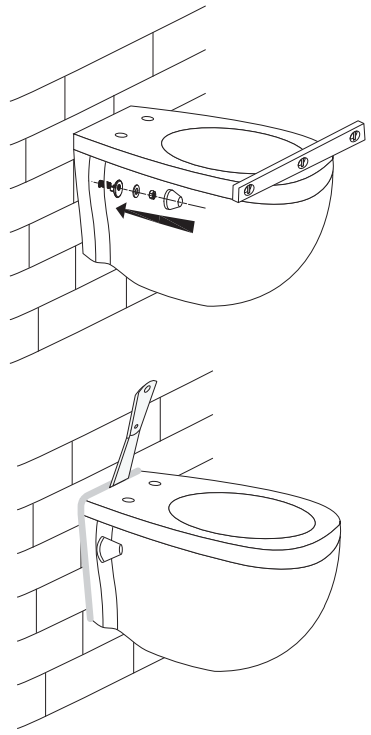
- Mount Toilet Bowl
- Apply lubricant to the joint surface on straight tube and connecting pipe.
- Mount the toilet bowl to the wall.
- Level and Attach Bowl
- Attach bowl using the washers and bolts, make sure the bowl is level, then cover with included cap.
- Fill any gaps with cement or sealant.
TOILET SEAT INSTALLATION
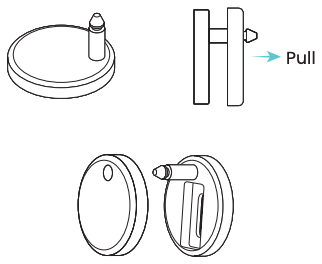
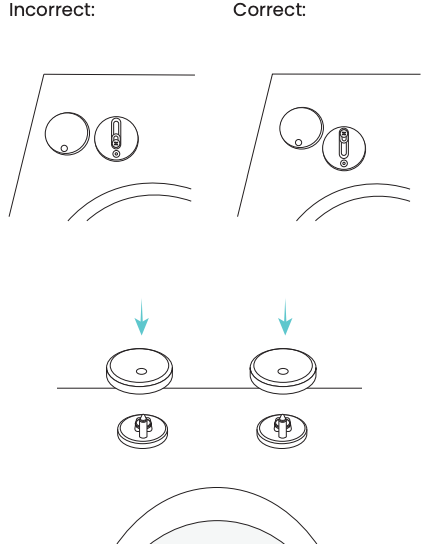
- Disassemble
- Disassemble the cover cap and the hinge.
- Disassemble the cover cap and the hinge.
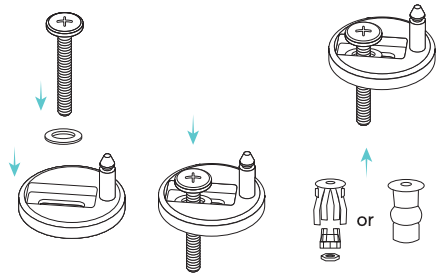
- Construct Hinges
- Insert screw and nut into the hole on the hinge.
- Attach blind hole screw fixing to the bottom of screw.
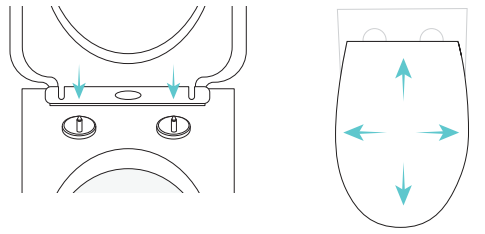
- Attach Hinges
- Insert hinges with blind hole screw fixings attached into holes on toilet bowl.
- Lightly tighten hinges with a screwdriver too allow for later adjustment.
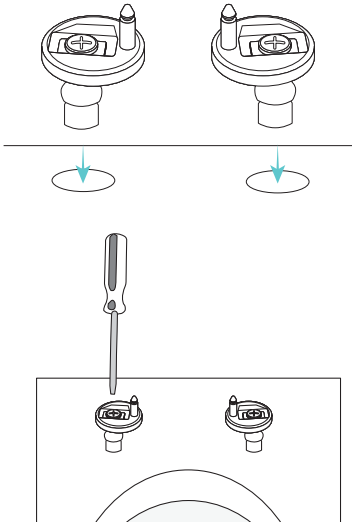
- Adjust and Cover Hinges
- Be sure the hinge is all the way forward for proper seat fitting.
- Place the covers onto the hinges.
- Adjust and Attach Seat
- Align seat to the hinges then firmly tighten the hinges.
- Attach seat to the secure hinges.
- Adjust seat to align to the bowl.
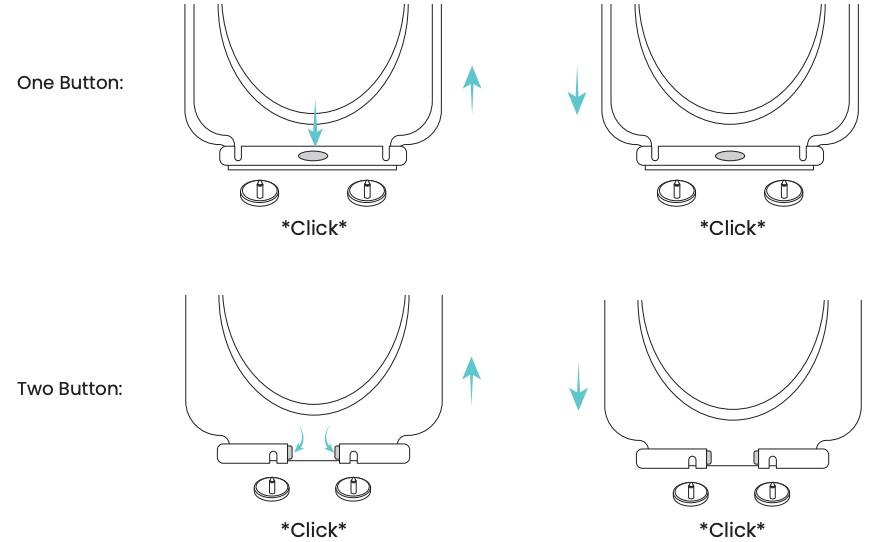
TOILET SEAT USAGE
- To remove, push middle button until you hear a “click”, then pull straight up.
- To re-install, align hinge posts with reference marks on seat, then push down until your hear a “click”.
If you have any questions or concerns, please contact us directly at1-434-MADISON (623-4766)
![]() WARNING: Contents of your order may contain sharp and possibly other harmful pieces and may cause hazard to children and adults. Swiss Madison® is not responsible in any way for personal damages.
WARNING: Contents of your order may contain sharp and possibly other harmful pieces and may cause hazard to children and adults. Swiss Madison® is not responsible in any way for personal damages.
References
[xyz-ips snippet=”download-snippet”]